/Repair/Apron/
A mosaic apron is a non-trivial and at the same time time-tested alternative to aprons made of large-format ceramic tiles, porcelain stoneware, stone or glass. And although mosaic tiles are made from the same materials (and not only), the properties and appearance of such an apron have their own characteristics. Let's find out how to plan the design of a future panel, prepare for a trip to the store, calculate the consumption of materials, choose glue and grout, and also how to lay a mosaic with your own hands.
Where to use mosaic?
Apron. By apron we mean a part of the wall located above the working surfaces of the set in the part where splashes of grease and droplets are most likely to penetrate: above the sink, table and panel. You can completely lay out this area with a mosaic in the form of some ordinary pattern or a whole picture of small parts. Or you can only part of the wall, connecting it with simple tiles.
Tabletop – Surprisingly, this is great for decorating tabletops. A surface made from this material is not afraid of temperature changes, humidity, or chemicals included in detergents.
The mosaic floor also looks very unusual. You can lay out the pattern in the very center, you can cover it entirely with multi-colored squares, or you can make a simple pattern.
Walls and furniture. A kitchen room completely covered with mosaics will look quite colorful, but using it to mark some area or part of the wall will be acceptable. They also make window sills, bar counters and furniture facades from mosaics with their own hands.
Glue
Many people are interested in what to glue the mosaic onto so that it holds firmly. The adhesive composition must be carefully selected to match the properties of the wall surface, material, and operating conditions.
Special tile adhesive
The easiest way is to purchase a special adhesive for tiles at a building materials store, made on the basis of Portland cement with the addition of plasticizers. This is a ready-made composition that only requires dilution with water to the required thickness. The glue ensures reliable adhesion to any surface. This glue is not suitable for glass mosaics due to its light gray tint.
Tile adhesive Source purplemint.ru
Polymer glue
The acrylic-based mixture ensures reliable fixation of mosaics made of any materials on various surfaces. This is the best ready-made adhesive for rooms with humid air. Dyes are added to the composition, which makes it possible to use it to create interesting design solutions. Before use, stir and apply to the surface. The glue dries quickly, forming a glass-like mass.
What material is used?
Glass is a material that is heat-resistant and resistant to aggressive environments, strong and reliable. An apron made from glass mosaic will please the eyes for several decades. Thanks to the striking refraction of rays in the sun's rays and the richness of the color palette, this material looks very effective.
Ceramic granite is a fairly strong, environmentally friendly, water-resistant, easily affordable material that is resistant to temperature fluctuations. Basically, ceramic granite mosaics come in soft colors and are very often used for flooring.
Real stone. Various format mosaics are made from real stone: in the form of squares, rectangles, circles. Sometimes they even leave small relief pebbles completely. The advantage of the material is that it is virtually permanent; the disadvantages are a limited palette of colors and a high price. Real stone mosaics are often black, brown or gray. For the most part, small parts are glued onto a mesh base so that you can very easily put it on with your own hands.
Smalt is made from small particles of glass, pressed at high temperatures with the addition of metal oxides. It has a wide range of colors, brighter and richer than glass. Smalt frescoes were made in Rome, but they have come to the 21st century without losing either integrity or beauty.
The creative process of this material is quite complex, and therefore it is expensive and is rarely found in hypermarkets selling building materials. Much more often, smalt is an excellent opportunity to find in aesthetic stores - it is used to make panels with a decorative effect and paintings on the surface of walls. The laying out process is quite complex, and therefore smalt mosaics made with your own hands take a lot of time and effort.
Ceramics is a fairly popular material with excellent price-quality ratio. Ceramic mosaics have countless options: from large and small pieces, smooth and corrugated, made up of squares or circles of complex shapes. Suitable for different types of surfaces.
Combined materials: real stone + glass, glass + stone + metal, etc. This kind of mosaic looks quite bright and catchy. Smooth sparkling details of various shapes are combined with rough ones, bright with dark, in the same tone with multi-colored ones.
Metal. Metal mosaics are now becoming popular. Very often it consists of small aluminum or steel parts placed in turn. This kind of mosaic is suitable for today's high-tech style kitchen; it will coexist perfectly with stainless steel household appliances, chrome-plated design details, etc.
Briefly about the main thing
Mosaic tiles allow you to quickly and inexpensively tile the surface of any room. The variety of types makes it possible to choose the best option for different wall surfaces.
The basic requirements for creating a beautiful and durable mosaic are knowledge of what material the tiles are suitable for the room, and what glue to use to glue the mosaic.
Mosaic allows you to implement any design idea at low cost. The cladding looks impressive, and its properties are not inferior to ceramic tiles.
After studying the instructions on how to lay mosaic tiles, you can decorate a bathroom, toilet or other room yourself. It is important to adhere to the rules and recommendations for laying mosaic tiles.
Color and texture
The variety of mosaic colors is simply enormous: white, black, red, turquoise, etc. In addition, any color can have a dozen colors. It can be matte, shiny, smooth or rough, and can be made up of large and small parts. In addition, images with additional effects are extremely popular among consumers. For example, with a pearlescent sheen, interspersed with precious metals, or made up of mirror parts. Such “effects” will add individuality and elegance to the interior.
Tool preparation
To work you will need the following tool
1.Mosaic sheets; 2. Construction level; 3.Container for diluting tile adhesive; 4.Drill-screwdriver; 5. Mixer attachment; 6.Smooth with teeth; 7. Rubber grater; 8. Narrow spatula; 9.Special crosses for seams; 10. Masking tape; 11.Sponge; 12. Measuring meter-roulette; 13. Tile adhesive; 14. Grout for mosaic seams.
Related article: Laying natural stone on the kitchen floor: advice from professionals
Grout
Mosaic tiles for the kitchen apron are laid on a flat wall. We assume that the wall under the kitchen apron is smooth and free of unnecessary objects. But you still have to prepare the place for work a little.
How to lay a mosaic?
The time has passed when craftsmen spent years creating frescoes from small details with their own hands. Now no one will want to do such hard work anymore. To make it easier to glue the mosaic onto the surface with your own hands, manufacturers place a specialized elastic mesh base under the pieces. Similarly, consumers purchase ready-made matrices ranging in size from 10 to 25 cm.
The mosaic in the kitchen area is laid in stages. Before gluing the finished parts, you need to prepare the wall - level it and prime it. To get a specific idea of how the finished pattern will look, you can make a computer model of the kitchen with mosaics, or simply draw out the prepared wall with a pencil, connecting the matrices with fragments into one block, a couple of pieces, for simplicity.
The next step is applying glue. They apply it to the wall, to a small area with a similar calculation, so that 2-3 matrices can be glued in one go. Residues are immediately removed with a spatula, as it dries instantly. To glue a mosaic on a mesh base, you need to press each section, pressing the mesh into the glue with a rubber spatula or a soft rag. It is important to ensure that the sheets do not move and that the same distance is maintained between them. It is best to use white glue so that it does not show through the parts of the mosaic.
A day after gluing, we begin grouting the joints. Before doing this, you need to remove the remaining glue with your own hands, using a wet sponge or rag. The grout is applied with a rubber spatula, filling the joints. Since it dries quite quickly, a small area is treated at one time in order to have time to remove the remaining material before it hardens. The grout can also be washed with a wet soft cloth or sponge, and if it has already dried, you can use a cleaning agent, which must then be rinsed off with water. So, the entire wall is processed section by section.
Mosaic for the kitchen room is a fairly unpretentious material; it does not require specialized care. It can be washed with products that do not contain abrasive particles, certainly in the same way as ordinary ceramic tiles.
Flaws
The first thing everyone talks about when they talk about the disadvantages of mosaics is the seams. Yes, this is really a big problem, since there are a lot of seams, germs , dust and other dirt love them, which can interfere with presentability.
But for this, as mentioned above, there is an expensive medicine - epoxy grout. By itself, it doesn’t cost much more than usual, but don’t forget about paying the technician who will work with this grout. A beginner cannot handle it with his own hands, since such grout dries very quickly. There is one more minus.
Need for careful care. Even though epoxy does not absorb water and grease, dust settles on it, which means it will have to be wiped frequently. After all, when there are a lot of seams, they become more noticeable, and with them, dirt.
In addition, it is worth periodically treating the seams and tiles with antifungal agents. The difficulty of care also depends on the material from which the mosaic is made - glass is much easier to care for than natural stone.
If the price, complexity of installation and maintenance do not scare you, then you can safely choose mosaic for the kitchen, because it looks very original, stylish and expensive. And advice on choosing and design options for an apron will help you decide on the final design.
Description of work
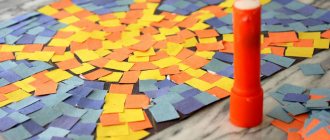
- Prepare the wooden surface for decoration. Wipe the table and sand any uneven areas with medium-grit sandpaper. Wipe well again.
- Cut the discs into small pieces, approximately 3x3 cm.
- Glue the disk pieces to the table using glue. Place the elements on the table so that the distance between them is about 2 mm. Do not forget to alternate the back and front sides of the mosaic particles.
- Using construction putty, carefully fill all the empty spaces and indentations created during the design. Wipe off excess substance from the surface with a slightly damp sponge.
- After 12-24 hours, cover the mosaic table with two layers of acrylic varnish (with a break for drying).
Italian sink
Anyone familiar with the architecture of Italy has probably paid attention to the beautiful mosaic ensembles in the interiors, where everything is made of mosaic: tables, sofas, flower vases, bath bowls and sinks. Today, anyone can install an Italian sink in their home. The technology is the same: decorate an old faience sink with mosaic or install a bowl cast from concrete
You can cast it yourself by using two dishes of different diameters instead of a silicone mold.
The technology is the same: decorate an old faience sink with mosaic or install a bowl cast from concrete. You can cast it yourself by using two dishes of different diameters instead of a silicone mold.
You will have to lay out the mosaic on the inside of the sink manually, one tile at a time, making sure that the edges of the tiles are in the same plane and do not protrude and do not create roughness. It's a painstaking job, but you'll be rewarded with a luxurious interior.