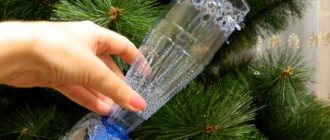
Creating various crafts and decorative elements with your own hands is becoming more and more popular every day. One of the types of handmade is weaving baskets from plastic bottles. The process is very interesting and exciting. It is enough to once spend more time studying popular techniques and subtleties of the process, and then create masterpieces in a few hours.
Advantages of plastic and preparation for weaving
Plastic baskets can perform not only a decorative function in landscape design, but also bring practical benefits during gardening work. The strength of the material, resistance to temperature changes and precipitation, accessibility - all these qualities were appreciated by craftsmen.
If the basket is intended to decorate a site, it is designed without a bottom. This is especially convenient for further placement inside the flower bed. Using it as a container for harvest requires you to take care of a durable product with reliable handles. To work you will need:
- Plastic bottles. It is better for novice craftsmen to collect containers of the same color. When the weaving technique is at a high level, you can experiment with combining shades.
- Scissors, electrical tape.
- Nylon thread or fishing line.
- Glue for plastic.
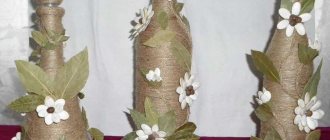
You can decorate a finished wicker basket with flowers made from plastic bottles of a different color. It is convenient to attach the decor using a glue gun. As an option, the finished product is coated with moisture-resistant acrylic paints.
Flower arrangements
You can use straws to make asters and create a flower arrangement. To work, you need to cut the tubes into 4 cm long pieces, cutting the ends at an angle of 45 degrees. Cut a circle 3-5 cm in diameter from cardboard. Using a hot gun, glue along the edge of the first row of straws. Then secure the second row, which will be located at a slight angle to the first. Pour glue into the center and insert pieces of straws into it to fill the entire space.
A craft made from cocktail tubes “Flowers” can become the basis of an original panel. Glue several ready-made asters onto a sheet of cardboard and add leaves of fabric or paper and other elements as desired. Insert into frame.
In the same way, not only asters are made, but also chrysanthemums, for which you need to cut longer pieces.
Zigzag basket
A brief algorithm of actions consists of the following steps:
- The bottom and neck of all bottles are removed.
- Plastic cylinders are cut into strips of the required size.
- Prepare preparations.
- The elements are intertwined, forming zigzags.
- The rows of the future basket are connected to each other.
- Add a handle.
- If necessary, attach the bottom.
Now about each stage of basket weaving in more detail.
Plastic cylinders from bottles are cut lengthwise, after which strips are formed. The approximate width of the part is 1-1.5 cm. It is recommended to adhere to the proportions of 1:8 relative to the length of the strip. From a 2 liter plastic bottle, a strip of 15 cm is obtained, that is, its width can reach 1.8 cm. Thus, by increasing the size of the workpiece, the time of weaving the basket will be noticeably reduced. If you do not follow the proposed proportion, the connection of the elements will turn out to be of poor quality.
Each blank for the future basket is folded in half until a fold is formed, the resulting halves are alternately bent inward. As a result, the edges of the plastic bottle part should touch the central fold from the inside. The length of the element is reduced by 4 times compared to the original strip.
Then the plastic blanks from the bottles are connected to each other by two extreme folds. The central fold remains free at first. This is how the first corner for the basket turned out. A third part is attached to it, a fourth, and so on. As a result, a zigzag is formed, the final length of which should correspond to the perimeter or circumference of the basket.
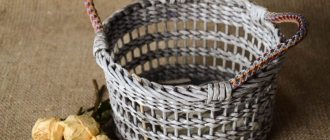
The extreme elements are fixed with fishing line. If you do not plan to use the basket on the farm, you can make handles from plastic bottles in the same way. For practical purposes, it is better to design more convenient details.
When the required number of zigzags from plastic bottles is ready, they are connected to each other with nylon thread or fishing line. The design of the bottom depends on the purpose of the product. The part can be woven or just thick plastic, secured with a glue gun.
Using a similar technology, you can weave an original vase from plastic bottles.
What you need
To work you need to have on hand:
- a lot of cocktail tubes (their number depends on how large the future basket should be);
- a rolling pin or any other object of a similar shape (it must be heavy enough);
- a cube, box, box or any other product necessary to shape the future structure;
- stationery erasers;
- paper clips;
- glue;
- decorative braid.
Checkerboard weaving
A basket of plastic bottles can be made using the checkerboard weaving technique. To ensure an even shape of the product, select a suitable frame. Any rigid box will fulfill its role.
The method of cutting strips from a plastic bottle is somewhat different here. Parts for work need maximum length. Therefore, after the standard cutting of the neck and bottom, the cylinder is covered in a spiral with electrical tape so that the layers do not overlap each other. The bottle is cut along the resulting gaps, the electrical tape is removed.
Place a cardboard box of the desired shape on a table or chair upside down. Plastic strips are secured with tape as close as possible to each other between two parallel side edges. After this, they begin to weave the bottom of the basket, threading the loose strips in a checkerboard pattern. When the bottom is ready, the side edges are decorated in the same way.
Sequencing
In order to make a basket of plastic bottles beautiful and original, it offers a certain algorithm of actions.
- First you need to decide on the color that the original basket of plastic bottles will have. The color of the source material depends on this.
- Next, you can move on to cutting the bottle.
- From it we make strips of the same length and width.
- We bend them into “corners” blanks.
- We intertwine them with each other.
- We connect individual rows with each other.
- We attach a handle to the product.
- The final step will be attaching the bottom to the finished product.
This handmade basket of plastic bottles will be an excellent decorative element for any suburban area.
Each piece is folded in half so that there is a fold towards the center. Then the halves are bent again, obtaining a strip whose length is four times less than the original sample.
A beautiful basket of plastic bottles with your own hands can be made from bottles of different colors. For example, the bottom of the product will be brown, and the sides will be green.
Designers offer a variety of options for creating such decor; it is quite possible to choose the method that seems most understandable and accessible.
To prevent the product from spreading, you can arm yourself with a fishing line.
Cardboard will quickly lose its performance characteristics when exposed to moisture, and the appearance of the product will be lost.
Lamp
If a lampshade on a sconce is damaged, it can be restored or a new one can be made using just such a material.
Elementary manufacturing principle:
- First, choose a frame base. You can use a plastic container or make a skeleton from the tubes themselves - glue a lattice of tubes.
- Cut the base material into pieces 1-2 cm long. You can make the pieces longer.
- Glue the cut along or perpendicular to the base of the body. You can arrange elements along clear lines or in random order.
Lamp in the style of perfectionism
If you still have a metal frame from an old sconce, you can make a completely original lamp:
Cut the straws into pieces of equal length. Use a felt-tip pen to mark the middle of each cut.
- Using a needle, thread a straw onto a thread through the marked point. The longer the bundle, the more impressive the product will look.
- You need to make about 10 of these “garlands”.
- Tie all the “garlands” to the top circle and distribute them around the perimeter.
The product will resemble a multi-level waterfall. You can change the appearance of the lamp if you move the straw cuts in different directions.
Second option
A basket from a plastic bottle can be made with your own hands using the “chess” method. This weaving is much more complex and requires the master to have certain skills.
For work you will need the same tools as in the first case. A cardboard box is used as additional material.
First, long strips are cut from a plastic bottle. The middle part of a plastic bottle is optimal for this.
The cardboard box will serve as a model for the basket being created, and it can also be used as a basis for creativity.
You need to turn the box upside down and fasten two plastic strips side by side in a horizontal or vertical direction. For this you will need tape. Then new plastic strips are attached in a checkerboard pattern, they are threaded between those that are already attached. Similar actions can be carried out without a box, for example, on a table.
After the bottom is woven, the side parts of the product are made in the same way. After completing the work, you need to carefully bend the edges of the plastic and glue them inside the basket.
If desired, add a handle to the created accessory. Such a basket will not be empty; for example, you can put flowers in it. Among the many advantages of such products, we note:
- ease of care for them;
- minimum cost of the product;
- aesthetic appearance;
- basket mobility
DIY origami sun made of colored paper and plastic tubes: master class
Let's build an origami sun with our little ones and give everyone some warmth.
- Cut out squares from colored paper.
- Fold the square in half and unfold it.
- Bend the top and bottom corners to the middle of the fold.
- We get a rhombus by bending the lower corners again.
- Place the diamond like a tie and bend the end of the tie.
- Fold it like a book so that the small triangle is on top.
- We make the remaining “rays of sunshine” in the same way and insert one into another until a circle is formed.
You can stick this sun on the wall, and you will always have sunny weather in your house! Give a smile to your kids! Be sure to make this “sunshine” with them!
By the way, a note to mothers. The tubes can be used as curlers and get great curls!
Useful tips
Decorative items offered in stores are not always interesting and unique. That is why many summer residents try to create decorative elements on their own. Any craft you make yourself will be much cheaper, and no one else will have such a product. For example, wicker baskets made from old plastic bottles can be turned into original containers for country small items.
Modern designers consider plastic to be a universal and inexpensive material, so they are increasingly turning to plastic bottles in their work.
Lately, you can increasingly see homemade polyethylene flower pots at your summer cottage, which are not inferior in appearance to ready-made flower pots.
Nowadays, many craftsmen create unusual products in the handmade style, which involves the use of a variety of improvised means. Plastic bottles have become the most popular.
They are not only available, but will also be completely free, which is a significant plus. Three types of plastic are suitable for creating crafts. We have already talked about the plastic from which bottles are made. The second type of raw material for creativity is packaging polymer. Its main advantage is its length. It is much easier to divide a wide ribbon into narrow fragments than plastic bottles.
You can also make unusual decorative baskets from polycarbonate, milk packaging boxes, paper folders, and plastic cups.
Such materials are much denser than packaging polyethylene, so the finished basket will have a more impressive and presentable appearance.
Shutdown
In order for the product to look neat, it is necessary, firstly, to remove the working tubes, and secondly, to somehow form the edge and do something with the stands.
Some weaving elements are more complex. It’s best to master them after you’ve made a couple of simple baskets
We fix the working tubes
First you need to secure the working tubes. Usually they are hidden in the weave - in the nearest binding. For this operation you will need a knitting needle or a long wooden skewer.
- Having retreated down three or four rows, we insert the skewer so that it comes out not far from the working tube.
- Bend the tube and place it on a skewer. We carefully place the entire structure in the place where the skewer was inserted.
- We cut the tube as close to the weave as possible.
- We repeat from the second.
- We straighten the weaving from newspaper tubes so that the scraps are not visible.
This is a simple and reliable way to secure the working tubes. Their ends are hidden in the weaving, but are securely fixed and clamped. For those who are just starting to master paper weaving, this is perhaps the best option.
Weaving the edge - the main technique
Next, you can begin to close the edge. There are many different ways - more or less complicated. The simplest one is to do the same as with the workers, but bend them inside the product. But then the edge is not very beautiful. If you want to make it more aesthetically pleasing, you can try the “rod” edge. It is not too difficult for beginners to master, and it looks interesting.
To close the edge with a “rod”, you need an auxiliary tube or you can take a skewer or knitting needle. With its help, we bend the first post to the right, bring it behind the next post and bring it forward. We bend it to the right in the same way, hook it behind the next one and bring two more posts forward. In total, we have three bent.
From now on we will always work with the leftmost tube. We take it, move it to the right, go around the two posts in front (one bent, one standing), take it behind the third, bring it forward and bend it.
We cut it with pliers so that 8-9 mm of tube remains behind the stand. To fix this trim, we bend the first of the standing posts to the right, pressing the trimmed edge. Again we have three tubes (bent) at work. Again we take the left one and repeat everything again.
A side is gradually formed that covers the top of the weave. We repeat all these steps until three stands remain: two bent and one standing. It’s easy to track this moment, it’s important not to miss it. This is where you need to be careful. If everything is done correctly, it will be impossible to find the place where the work begins/ends.
Final chords
When three racks remain uncovered, you need to make sure that the newspaper tubes are laid in the same sequence and in the same direction, so that they lie the same way as before. We take out the auxiliary tube or skewer with which we began to close the edge.
Again we take the leftmost tube, in front we go around the last standing post and then, according to the previous weaving algorithm, we need to lead it behind the next post. This stand is already bent and secured. This is the one with which they began to close the edge. We insert the tube from the back, slip it under the first curved post (it’s more convenient with a skewer) and pull it forward, laying the tube like the rest. We cut it off.
Further according to the algorithm, it must be covered with the previous stand. In this case, it's the last one standing. We bend it, bring it behind the weaving and push it behind the cut-off post.
Now there are no standing racks, only three working ones remain. They must be laid in the same way as those that are already secured. We take the far left one, it must be pulled under the third post. Look carefully. This is the first stand that does not have a cut tube near it. Stretch, lay, cut.
We lay the left tube along the top, covering the tubes we just laid. We start it from the back, pull it under the counter, in front of the laid tube.
We repeat the same operations with the next leftmost one. It must be placed behind an “empty” stand, near which there is no cut tube. This stand is located to the right of the one we just worked with. Here you can’t do without a skewer - you need to slip a newspaper tube under the two already laid (look at the photo).
We lay the tube on top, hiding the cut one above. We start it from the back, put it on a skewer and pull it out. Holding it with your fingers, we rock it from side to side so that there is a place for it and it “lies down.” We cut it off.
All that was left was a newspaper tube sticking out. We start it behind the third rack. It’s not difficult to find your way: under the first two there are already scraps of the ones that were just laid. We insert the skewer under the laid turns and bring it out near the bent post.
Using a skewer, we bring the last rack out and lay it out so that it lies the same way as the others. Now it can be trimmed. The edge of the basket is ready and it is impossible to find where the row begins and ends.
History of weaving
Weaving originated in ancient times. This technique was used to create kitchen utensils, baskets for harvesting and storing crops, traps for hunting, house walls, furniture and toys. Wicker items were made from various natural materials - reeds, grass, vines. The toys had a sacred meaning, because they were made with their own hands. They were slandered about health and good luck. Wickerwork was believed to ward off evil spirits. Everyone knows an item called a “dream catcher” and its properties of preventing nightmares from entering the owner’s mind. And wicker furniture is always in trend, light, comfortable and durable. The first wicker chairs were found during excavations in Ancient Rome.
Super practical basket made from old plastic bottles: for the bathroom, kitchen or garden
Recently, crafts made from plastic bottles have become fashionable. And today the editors of “So Simple!” invites you to familiarize yourself with an unusual way of using plastic bottles.
This is weaving from plastic bottles , this way you can make baskets, vases, bags, rugs and much more.
Well, I liked the idea of creating a spacious laundry basket for the bathroom with my own hands. It turns out to be light, durable and hygienic, since this material is not afraid of moisture and detergents. In addition, when I found out how such a basket is made, I was surprised that everything was so simple! Even I did it in one evening, and I have no experience in weaving.
Corner technique
This type of making baskets from plastic bottles is quite simple. First, corners are made from cut plastic bottles, and then the product is assembled from them into a single whole. To complete the product you will need:
- Plastic bottles;
- Scissors;
- Fishing line;
- Glue gun.
To work, you need to cut the bottles with scissors into strips 1 cm wide and 8 cm long.
If you are planning to take strips of a different size, then when calculating, remember that the length of the strip is eight times the width. It is important to choose bottles that do not have unnecessary bends.
Cut off the bottom and neck, and use the rest for cutting blanks.
The strips are ready, now you need to bend them in half, unfold them and fold the edges towards the center as shown in the photo.
You will need a lot of such blanks. Connect them together by inserting them into each other.
Weave the bottom of the basket from several parts, alternately fastening the corners. For strength, you can glue the bottom with transparent tape. The parts are attached to each other using a fishing line.
After making the bottom, a long horizontal zigzag strip is made. Its size is equal to the girth of the bottom. The strips are also held together with fishing line. You can fasten them in tight rows or make diamond-shaped passes. Don't forget to attach the correct size handle. The basket is ready!
It can be used as a vase for sweets or a garden planter. The advantage of such a product is that plastic is not afraid of changes in temperature and humidity. If you plan to use the basket as a flowerpot, then you don’t have to make a bottom. Simply fasten the zigzag strips together. Dig up the decoration a little in the flowerbed and plant some beautiful flowers. At the end of the summer season, you can simply rinse the basket with water and put it away for storage.
Photo frame
To make a frame from tubes, you can use several options. The simplest thing is to decorate the finished base.
Using multi-colored tubes of different lengths, cover a cardboard or wooden frame.
Elements can be placed from the center to the edges or along the frame. step-by-step production
You can make a thin frame for each photo, which will be hanging.
You need to cut each element lengthwise and thread the photo through the cut on 4 sides. At the same time, immediately thread a thread through the top tube, which will become a loop for hanging the photo.
If you arrange several photographs using this principle, you can create an entire composition from them. All you need to do is string the framed photo onto the rail. You can weave a fabric-frame from straws
on the same principle that baskets are made. To prevent the weaving from falling apart, it is worth fixing the elements together with glue.
"Chess"
This weaving method is a little more complicated than the previous one, but using detailed step-by-step instructions, you can easily cope with making the basket.
The difficulty with this method lies in making the strips: they must be long. But even here, experienced needlewomen have brought the process almost to perfection. They came up with a great method that allows you to cut strips of the same width, efficiently using the entire bottle. In order to dissolve the container into strips, you need to remove the bottom and neck and apply electrical tape or narrow masking tape to its surface in neat turns. And then cut the entire surface into a long strip one by one.
Don't try to straighten it; it will still lie correctly when working.
To work on making a basket you will need:
- Strips made from plastic bottles;
- Scissors;
- Rubber;
- Clamps;
- A small container that you will use as a base for weaving.
Weaving starts from the bottom. To do this, place vertical stripes on the table and weave horizontal ones in a checkerboard pattern using this pattern.
It should look like this. Apply clear tape along the sides to reinforce the bottom.
Now this blank can be transferred to a braided box. For convenience, secure the stripes on it with an elastic band.
Continue adding stripes, weaving them in a checkerboard pattern. If the “vine” is over, you should attach the next overlapping strip using tape. Having completed the weaving, remove the product from the base and, carefully bending the strips along the edge, secure them with tape on the inside. Make a handle if necessary. The basket is ready. It’s a great way to go into the forest to pick mushrooms.
Or you can make a large laundry basket.
Step-by-step instruction
To make your own basket of cocktail straws, you must sequentially go through the following stages of work:
- Preparation of tubes. They are given a flat shape using a rolling pin.
- Creating the bottom of the structure. To do this, first take 2 straws and place them perpendicular to each other so that the first straw is under the second. Then the third tube is placed parallel to the first and perpendicular to the second so that it is above it. The fourth tube is located parallel to the second and above the third. Using a similar algorithm of actions, they create a small square, which will serve as the bottom of the basket.
- Formation of walls. To do this, take an object of the chosen shape, place it on the manufactured bottom, and bend the edges of the straws upward and secure them with a rubber band. The first tube is woven in such a way that it is under the first and above the second (the alternation is constantly repeated). The second row begins differently: the straw is woven over the first and under the second tubes, repeating these actions.
- When the walls of the product become high enough, the straws are bent, secured with paper clips, after which the edges of the structure are smeared with glue and treated with decorative braid.
If it is necessary to create a fairly large basket, several tubes are glued together, after which weaving begins as described above. It would be good to glue strong cardboard to the bottom of the product for greater stability. The finished structure can be additionally decorated with ribbons, pebbles, beads or other decor at your own discretion.