The idea of replacing conventional building materials with plastic bottles first came to the German engineer Andreas Froes. This founder of the environmental standards ECO-TEC developed and brought to life the idea of building a house from plastic bottles with his own hands. I propose to understand the advantages of bottle houses and the features of construction from different materials, as well as other possibilities of plastic.
Source blogspot.com
Theoretical basis for the use of glass containers in construction
The physical properties of glass do not change over time.
A tightly sealed bottle is a good thermal insulation material , so the use of glass containers for the construction of building elements is completely justified.
It has been proven that a panel constructed from 1 row of bottles retains heat no worse than a brick wall about half a meter thick.
Structures made from glass containers have good light transmittance. Wall panels can be designed in any color scheme, imitating elements of various architectural styles.
To build houses from glass containers, 2 methods are used:
- frame;
- wall
The resulting design will compare favorably in cost - you will get the bottles for free or at a purely symbolic price , and the main cost item will be the components for preparing the solution.
Further in the article we will talk about how to build from bottles with your own hands, from the practical side of this issue.
Assembling the box at home
Connect the floor and ceiling frames into a single structure - the box of the house - using tees. Place the 2 window crossbars (30 cm pipes) in place. Install the door lintel - a 45 cm pipe.
Assemble two gables of the house using tees and 90 cm pipes.
Connect the gables with a ridge - a 140 cm pipe. Glue the roof to the house box using a large amount of glue through the 45 degree corners. Wait a little while for the universal glue to dry completely.
We build the building with our own hands
Any building consists of several elements that are completed one after another. First comes the foundation, followed by the walls and floor. Let's start in order.
Foundation
Garages and summer kitchens, showers and baths can be “placed” on a foundation made of glass bottles without compromising the strength of the resulting foundation.
Despite the fragility of glass, the foundation will have excellent strength characteristics comparable to the properties of a stone foundation .
Advantages of a foundation made of glass containers:
- moisture resistance;
- excellent thermal insulation;
- no shrinkage of components;
- corrosion resistance;
- long service life.
Glass also has a drawback that will have to be mitigated during the construction process. Binding materials do not adhere well to bottles , so the requirements for the brand of concrete used here are high.
Main stages of construction:
- Preparation, including clearing the area and marking it for excavation work.
- Construction of a trench to a depth below the freezing point of the soil.
- Formwork installation.
- Laying a cushion under a foundation made of sand and crushed stone mixture.
- Pouring the bottom layer of cement.
- Laying the first row of glass bottles close to each other.
- Filling with cement mixture followed by laying a layer of bottles.
- Reinforcement with iron rods.
Rows of bottles, cement and reinforcement alternate with each other until the desired height of the structure is achieved. The last layer is made of a dense concrete mixture.
Self-construction of a glass base requires taking into account some subtleties:
- Difficult hydrogeological conditions are the reason for abandoning the intention to build a “glass” foundation. High groundwater levels and movement of heaving soil will lead to cracking of the foundation.
- Severe freezing of the soil in winter is a factor influencing the appearance of cracks in the thickness of the foundation. For construction in northern latitudes, foundations of a different type are suitable.
- Bottles may float in cement solution . Place them after the mixture becomes viscous enough to hold the glass container securely.
Walls
Bottles, an exotic, at first glance, material for building walls, are increasingly being used for the construction of gazebos and summer verandas.
There are cases where entire houses were built from bottles. The walls of such structures look very original, reminiscent of lace stained glass windows.
The construction of walls from bottles requires careful selection of material. Bottles must be the same volume and diameter , and the color scheme can be very diverse.
To prepare the binder composition, it is recommended to use cement and sand in a ratio of 5 to 1 . Clay is not added to the solution.
To build 1 m2 of wall you will need about 420 bottles.
Searching for material, as a rule, does not cause difficulties:
- self-collection on the streets;
- gathering from neighbors, acquaintances, relatives;
- organizing a bottle collection point.
The technology for laying walls involves installing support pillars , the thickness of which is equal to the height of the bottles used. The distance between supports should be no more than 2 meters.
You can choose any material for the pillars:
- brick,
- tree,
- metal.
Too much distance between the pillars and each other will affect the stability of the structure.
The bottles are laid on the foundation in a horizontal position with each layer of glass coated with a binding solution. The bottom layer is laid bottoms out , subsequent layers can change direction or remain unidirectional. Each subsequent layer is laid after the previous one has completely dried.
When stacking bottles, you must leave a small gap between them. This measure will allow the solution to more fully adhere to the glass.
Floor
In addition to its durability, the concrete floor in a garage or livestock barn is distinguished by its low temperature.
To insulate a concrete surface, you can use polystyrene foam and other expensive insulating materials, or you can use a supply of glass bottles.
It has been experimentally determined that 1 m2 of floor will require about 145 half-liter bottles, into which vodka is usually poured.
Glass containers can be placed either horizontally or vertically , depending on the overall thickness of the future floor. It is enough to fill the bottle layer with concrete mortar to a level of 1 cm and a light heated floor will be ready.
What to make from
First of all, let's decide on the material to create this toy. Such a house is relatively easy to make from many different materials, each of them has its own positive and negative qualities:
- Cardboard is an undoubted advantage of this material; it is easy to process cardboard (cut with ordinary scissors). The disadvantages undoubtedly include the low strength of cardboard; the consequence of low strength is the fragility of the structure.
- Plywood - an undoubted advantage of plywood is that a house made of plywood is pleasant to the touch. The disadvantages include the fact that the material gluing the layers together may contain harmful substances; plywood often contains formaldehyde. And cutting out such material is not easy; it is better to entrust this part of creating a house to specialists. Fortunately, the market is now full of cutting offers.
- Drywall - The advantage of such a “building material” for a dollhouse is that the drywall can remain from repairs. And cutting drywall won’t be too difficult. A significant disadvantage is that the usual method of fastening is not suitable for creating a dollhouse (after all, the screws that are usually used to fasten drywall stick out from the back side, and this is dangerous, because they are sharp) and the drywall will have to be glued, and this method of fastening imposes requirements the cleanliness of the cuts is much higher.
- OSB board - the advantage of this material is its strength. The disadvantages are the content of harmful substances in the adhesive composition, the complexity of cutting, and also the fact that the slab, although warm to the touch, is not very pleasant.
- Chipboard - the advantages of the chipboard material are the same as when creating a house from OSB boards, the disadvantages are similar. The disadvantages include the large weight of the house made of chipboard.
- Glued furniture board - the advantages of furniture board are those that are inherent in most wooden materials. The main disadvantage of furniture panels is the high price.
It is worth noting that materials can be combined.
Installation of a glass floor in a bathhouse
In order for the bath to bring pleasure and benefit, it is necessary to take care of the consistency of the temperature in the steam room.
The main “cold bridge” in a room is the floor. You can try to insulate it using empty glass containers.
There are general rules for preparing material for work :
- The bottle must be tightly closed. Air exchange with the external environment will make your efforts to insulate the floor useless.
- It is better to close bottles in dry, sunny weather. As the air cools inside the vessel, a rarefied space is created, and the heat-insulating properties of the bottle increase.
We build from scratch
To make a glass floor, in addition to bottles, you will need :
- sand, crushed stone or gravel chips;
- metal mesh for reinforcement;
- concrete solution, for the preparation of which you can use a ready-made dry mixture;
- finishing coating - wood, tile.
Work order:
- Removal of soil around the perimeter of the future building to a depth of more than 20 cm, followed by compaction of the bottom of the resulting pit.
- Construction of a cushion of sand, crushed stone or gravel with its obligatory compaction.
- Construction of a reinforcing layer.
- Laying out the first row of bottles. The containers are located “back to back” to each other. To achieve maximum heat-saving effect, it is recommended to place the bottles vertically.
- Laying the second layer of reinforcement.
- Installation of concrete screed with a thickness of 50-70 mm.
- Applying the finishing coating after the concrete has completely dried.
Insulation of the finished base
When planning work on insulating the floor in a bathhouse, estimate the height of the ceiling .
A layer of insulation from bottles will significantly raise the floor level , so if the ceiling is low, then it is better to abandon this method of insulation.
Stages of work:
- Covering the subfloor with roofing felt to create reliable waterproofing.
- Arrangement of a dense layer of horizontally arranged bottles.
- Filling bottles with sand to level the surface.
- Installation of the second waterproofing layer.
- Floor reinforcement.
- Pouring concrete solution with a thickness of at least 3 cm.
- Finishing the floor covering.
Take care of the drainage system before starting work.
Master class on creating a swan
Bird sculptures for decorating suburban areas are often made of plastic. We present to your attention a small master class on making a swan from an old canister.
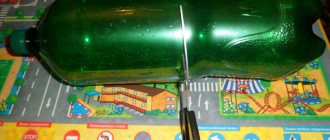
For this purpose you will need 5 liter containers . It is necessary to cut the product so that the body, tail and long neck are immediately cut out.
Then you need to prepare the wings from thick cardboard.
The neck should be covered with newspapers and tape , then do the same for the entire workpiece.
Afterwards you need to apply a layer of simple napkins and coat the future sculpture with plaster mortar.
As the surfaces dry, they are sanded, painted and decorated with additional elements (for example, the eyes of a bird can be made from colored stones or glass).
Building a fence
A bottle fence is an original, easy-to-make fence option.
Advantages of bottle fencing:
- simple installation;
- strength and durability of the structure;
- excellent light conductivity;
- the ability to implement any architectural forms;
- exclusivity;
- savings on materials.
To make a screen fence you will need:
- empty bottles of any color and size;
- material for making racks - brick, blocks, metal, wood, plastic;
- components for preparing concrete mortar;
- frame corners and metal rods with a diameter smaller than the neck of bottles;
- decorative elements.
You will need to drill holes in the bottles. To drill glass, use diamond-tipped drill bits . Work at minimum speed.
The work is performed in the following order:
- preparation of bottles - washing, drying, drilling holes in the bottom of containers;
- digging holes to a depth of 120 cm for installing support pillars;
- installation of supports with concreting of their base;
- forming the frame of a bottle fence using steel corners and rods;
- assembling the canvas by stringing glass onto rods with the addition of decorative elements.
The resulting structure is not particularly durable and is not suitable for use as a street fence . A screen is an option for decorating a site, and not protecting it from the penetration of uninvited guests.
A permanent glass fence is created using a different technology.
You will need:
- bottles, preferably identical;
- components for preparing concrete mortar;
- spatula for spreading the mixture;
- level.
Draw a sketch of the desired hedge , carefully consider the placement of the bottles to create a specific ornament.
Stages of work:
- Preparing glass - washing, drying, closing.
- Construction of a foundation made of vertically placed bottles filled with cement mixture. The depth of the base is 35 cm.
- Formation of the fence fabric.
To ensure the fence is stable, continue work only after the concrete has completely hardened.
The bottles are stacked in 2 rows, with the narrow end inside the future structure . Each layer is coated with a binding solution and dried - failure to comply with this requirement will lead to cracking of the bottom row of bottles.
Transparent bottles can be painted in any color using a special tinting paste, which will allow you to put into practice any design idea, having only colorless glass available.
Garden ideas
The low cost of the technology makes it a convenient tool for creating a variety of garden buildings, and not just houses made of plastic bottles; crafts are limited only by the imagination of the site owners. You can build a greenhouse for seedlings, a shed for storing garden tools, a fence, an outdoor shower, and a playhouse for children.
For non-residential structures, the technology is simplified, since a lightweight structure does not require a foundation or laying columns. All you need to stock up on besides bottles is reinforcement bars and frame material (for example, an aluminum profile or wooden blocks). Walls are made in two ways:
- The bottom of each bottle is cut off, then the prepared containers are strung on a rod; in this case, one bottle is inserted into another, forming a column. The finished posts are fixed to the frame.
- The walls are assembled from whole products. This option is suitable for making a quick greenhouse.
Source stjohnssevenoaks.com
About houses made of plastic containers in the following video:
Bottom line
Construction from glass bottles is a real way to create exclusive elements from seemingly useless raw materials. The use of glass containers in construction work reduces financial and labor costs.
Laying rows of bottles does not require much skill or effort, and the raw materials themselves will not cost you anything .
Collecting bottles is not only a chance to get free building materials, but also a way to take care of the environment.
Give unwanted glass a second life!
Advantages and disadvantages
Initially, the technology was intended for third world countries, because the first dozens of similar buildings appeared in Honduras, Colombia, and Bolivia. Later, interest in the topic of environmentally friendly consumption and recycled resources became worldwide, and houses made from plastic (as well as glass) containers began to appear in developed countries. The technology has gained popularity due to its following advantages:
- Low construction costs. The main trump card that influenced the spread of plastic bottle houses. Used containers are worth nothing, and their recycling is not organized everywhere. So there will definitely not be a shortage of raw materials.
- Durability of the material. Both plastic and glass containers retain their original properties for at least a couple of hundred years.
- Performance characteristics. If the construction technology is followed, bottle walls become strong and reliable. Such a building turns out to be more resistant to loads than a brick house.
Source fantasticviewpoint.com
- Comfort. Bottle walls maintain a comfortable microclimate, keeping you warm in winter and cool in summer.
- Variety of applications. Not only housing is built from bottles, but also a variety of garden buildings, including a greenhouse, gazebo, fence, and children's playhouse.
Critics of bottle houses make the following claims:
- Problems with material accumulation. Somewhere in Bangladesh there won’t be such a problem, but here the process may take longer. Alternatively, you can negotiate with a couple of restaurants and cafes to pick up used bottles (they still go into recycling).
- Delaying construction. Construction will take a long time if you do it alone.
Source avaz.ba
Sprayer
A large capacity (10-30 liters) can be used for spraying plants with chemicals that protect plantings from pests.
The canister is equipped with a manual or electric pump for easy spraying. For carrying, you can attach a handle or straps to carry it on your back.
The hose, spray nozzles and boom can be purchased at any hardware or plumbing store.
A rubber nipple can be used to install the valve.
This sprayer is suitable for processing small vegetable gardens and front gardens; for larger areas an extension cord may be required.
Most often, a device made from a plastic canister is used to spray chemicals against pests, cabbage beetles, as well as mold and mildew. You can also use products prepared according to folk recipes, from soap solution to urea.
Alternative solutions to bottles
If the height of the foundation allows, then glass jars can be used instead of bottles. Unfortunately, it turns out to be much more difficult to accumulate them in such quantities, and you will need a lot of caps. True, you can use dishes that close with screw lids.
The cans are installed with their necks down so that there is a relatively flat base for the screed. You can use dishes of different volumes, or place containers that differ in the homogeneity of the raw materials.
Shower for the cottage
The procedure for creating such a design includes the following steps:
- Creating a pen . To do this, you can use a simple rope, passing it through the handle of the container and tying it around a tree or other structure where the shower will be attached.
- Installation of the nozzle . You should make many small holes in the lid, blow them out, then insert it into the container tap. The joint should be sealed to prevent moisture from leaking.
- Creating a shut-off valve that regulates water pressure. This product can be found in the plumbing department. Rubber seals will be required for installation.
- Arranging a lid where water will be poured. It is better to make it closed so that dirt, leaves and insects do not get into the canister.
- The side parts are covered with black electrical tape so that the water inside warms up faster: black walls absorb ultraviolet radiation better.
Plastic scoop
If the canister is small in size (1.5-2 liters), it can be used to make a scoop for cleaning or garden work .
You will need to mark the future product on the surface and cut it out; the handle matches the handle of the container. The bow can be made either triangular or square.
In the first case, the scoop is convenient to use for digging up plants with a small root system from soft soil, and in the second, for collecting debris.
Watering can
For such a product, it is optimal to take a canister of detergent or other products that has a slightly flattened shape and a comfortable handle .
It is necessary to thoroughly wash the internal parts from any remaining liquid, then drill thin holes in the lid. The optimal size is 1-1.5 mm. Just above the handle you need to make a larger hole for air supply: if this is not done, watering the beds will be more difficult due to the pressure difference.
If necessary, you can equip the watering can with a plastic tube, which can be purchased at hardware or plumbing stores: it will increase the spray range.
Filling the water is done through a plug; for this it is convenient to use a funnel or hose so that the liquid does not spill.
You can also cut a wider lid, then using a funnel when filling with a regular bucket is not necessary. However, in this case, you should ensure that when watering the plants, water from the watering can does not flow onto the ground through the lid.