Making products from twine is a newfangled trend in needlework. The material is used for both small and large crafts. Jute is used to weave stylish rugs and beautiful boxes - spectacular and inexpensive products that decorate the house, maintaining a rustic style and Provence. You can buy jute rugs or knit them yourself.
A cute little thing that is not difficult to make from jute with your own hands is a box.
You can store jewelry, memorabilia and trinkets that are simply dear to a woman’s heart in it.
Creative people are always interested in new directions, for example, various decorative elements, boxes, figurines, baskets and much more can be made from twine. Jewelry boxes made of jute and other small items are very popular.
A beautiful round box made of jute filigree technique will be a wonderful gift for family and friends.
To learn how to crochet a box, you need to read the detailed instructions for making it. With minimal cost and effort, the technology allows you to produce an original product.
The box can also serve as a decorative element for your own boudoir.
Jute is a magical material, you can make almost anything from it.
Crochet jute thread box
Materials:
- cardboard base in the shape of a cylinder;
- jute thread;
- wood beads;
- hook;
- sheets of cardboard;
- silicone glue.
The amount of material depends on what size you want to make the product.
A wicker jute box will help you and delight you for a long time.
What materials and tools are needed for work?
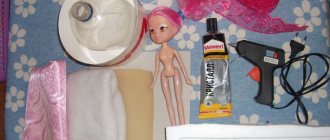
In order for a cardboard box to turn into a stylish organizer for various items, you need to prepare:
- a strong cardboard box of the required size;
- glue gun or spray glue;
- ruler;
- beautiful fabric;
- scissors
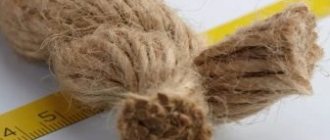
- rope made of natural material (cotton or jute);
- threads to match the fabric;
- sewing machine (although you can sew the liner by hand).
Execution technique
First of all we make the bottom. You need to draw a pencil along the inside of the cylinder and cut out the resulting circle. You need to leave approximately 5 mm in reserve. We make cuts along the contour and glue the bottom for the workpiece. We put another circle on top of it and secure it with glue.
This box will decorate any home or become a pleasant gift for friends or colleagues.
The jute rope needs to be twisted into a spiral. Fixing it with glue, screw it on, completely filling the bottom area.
Wraps the side of the workpiece in the same way.
The work is done carefully so that there are no gaps in the cardboard.
Jute filigree is becoming very popular among needlewomen.
Using a hook, you need to knit chains of air loops. Its length is equal to the circumference of the cylinder. The lid is made in the same way as the bottom of the product. You can crochet it.
Interior items made using filigree technique from jute cord fit harmoniously into the interior and can become a beautiful and expensive gift.
We cast on 2 air loops, and in the 3rd - 12 columns, then the number of loops needs to be doubled. Third row - knit 36 loops. We continue to perform the next two rows with 36 loops each. This way you will get a knitted lid for the box. We stretch ropes from the front side and attach wooden beads to them. We tie the ends into bows.
Considering the availability of jute, the main material for such creativity, absolutely everyone can master the technique of jute filigree.
You can draw a drawing on paper and work from the drawing, or you can immediately lay out the drawing in a frame.
How to attach 2 strands of jute if the skein is over
The rope is too thick, so the 2 ends cannot be tied together and the knot hidden. To fasten the ends of a thick thread you need hot glue or “Moment”.
How to fasten threads:
- From both ends that need to be connected, cut off the protruding threads.
- Heat the glue in the gun.
- Apply glue to the tip of one of the ends. You will need a lot of glue, but it should not get on the sides of the rope.
- Attach the other end of the rope. Hold the tips with your fingers until the glue hardens.
Moment glue is used by analogy.
When the ends are glued together, the seam will be barely noticeable. To hide it completely, during the tying process you need to close the joint with jute thread, tying the joint with a single crochet.
DIY box made of jute thread
Like any other craft, jute products require a set of certain materials and tools.
The “Jute Filigree” technique involves creating light and elegant crafts from twine or thick thread.
The techniques of filigree jewelry technology came to this art from weaving twisted wire.
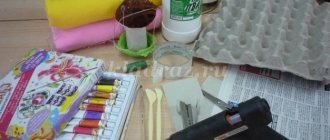
Necessary materials:
- leg-split;
- wooden skewers;
- a round cardboard blank, you can take a roll of adhesive tape with a wide canvas;
- glue;
- stationery knife, scissors and tweezers.
Decorative elements: small beads - 0.5 cm, several large beads, no more than 1 cm in diameter.
Working with natural thread is so pleasant that it immediately attracts young and beginning needlewomen.
Technique for making a jute filigree box with your own hands:
Making a box begins with making its base. Take a cardboard circle from under wide tape or another suitable piece measuring 9 cm in diameter and 5 cm in width.
Simple techniques and a simple algorithm of actions allow you to quickly master this magnificent ancient technique.
Stencils serve as the basis for filigree work. You can draw them using your own imagination or print them from the Internet.
Apply glue to the inner surface. We glue the turns of twine tightly inside the future box, and we also glue the sides. The outside of the box can be painted using acrylic paint in dark tones. Alternatively, you can use craft paper to cover the surface of the product.
The next stage is making an openwork pattern. Measure the circumference of the box from the outside and divide the length by 4.
It is convenient to work with narrow tweezers or fingers.
We transfer the resulting size to a blank sheet of paper - there are 4 sectors. Now we make separate drawings in them, then glue is applied along their lines. A large continuous pattern is formed from the resulting elements. We glue loops in the central and side parts.
Each element requires tight fixation, then glue is distributed and fixed to the surface, leveling it. The work must be left to dry.
To keep your hands always clean, it is advisable to use wet wipes!
If desired, the needlewoman can paint the napkin with acrylic paints.
After drying, the film and remaining glue are removed from the workpiece using a stationery knife. After cleaning the sectors, we attach them to the cardboard ring with glue.
There are a great variety of patterns for making openwork boxes.
Note! The work must be done carefully, since glue that has not dried will slip and parts will move, become deformed and bent.
After this, the spaces between the glued elements are decorated using small beads. Before this, you need to make jute cuttings for the beads. You can decorate the box with other decorative elements - polymer jewelry, satin ribbons, lace and other products.
The art of jute filigree attracts not only young needlewomen, but also young guys with a creative streak.
We decorate the bottom of the box using the same openwork technique. Using a compass we draw a circle equal to the diameter of the cylinder. Lubricate with glue and make curls, tightly gluing them together. Let it dry. The lid is made in the same way - its surface is smeared with glue, and turns are depicted using thread.
Jute twine is an excellent material for creativity.
Working with jute is not difficult, and as a result you can get a stylish piece for your interior or just a useful item for storing small items. DIY jute rugs can be a good gift.
Handicrafts using this material are performed using different techniques, which makes it possible to realize the most original ideas.
Preparing the box
In order to make a stylish storage basket out of a box, you must first prepare this box for transformation. Choose a cardboard package of the right size, but preferably it is strong and reliable. If necessary, seal its bottom and all joints with packing tape. Since the top flaps are not needed, because the basket will be open, they need to be cut with scissors or a stationery knife strictly in a horizontal straight line.
Only the best memories: Stotskaya admitted that she separated from her husband 2 years ago
Wet a Paper Towel: How to Chop Onions Without Tears
With a leather shirt: stylish looks with jeans for ladies over 50 from Instagram bloggers
Large baskets
They are now, without exaggeration, in fashion. Large baskets are used everywhere: not only for decorating an apartment or house, but also for their intended purpose (going to the forest). They are useful in the bath (for example, for dirty laundry), in the nursery (for toys), as a basket for needlework (to store yarn), in the country - for harvesting crops, apples, etc.
The only negative is the weight of the basket. With a wooden bottom it will weigh less.
Jute basket as a decorative flower pot or flowerpot
A small basket is knitted around the circumference of the pot itself. And a container with a living flower is placed in it. Entire compositions consisting of such flowerpots look beautiful. They can be placed on the floor or even in the garden area. The jute basket is not afraid of rain, snow and other natural factors. Can be outdoors all year round.
If you have time and desire, you can knit a large jute basket for a thuja or other evergreen coniferous plant. This idea also applies to the balcony.
Using the master class on knitting a small jute basket given above, you can knit such a flowerpot. More precisely, this same basket can become a flowerpot for a flower.
Raising the walls of the basket
Now you will need to lift all the knitting up so that the bottom remains flat and the walls are voluminous.
If we knitted without a rope, we would simply stop adding loops and the fabric itself would begin to knit upward, not wide. But with a rope everything is a little more complicated.
It is necessary to attach the rope in the first row of the lift as far above the bottom as possible. At the same time, knit in the first row, capturing only the top loop of the column of the previous row. As shown in the video:
This series will force you to make an effort and be more attentive, but overall it is not difficult.
And now we knit up to the desired height.
If you want the basket to tuck, then knit more rows by 5 - 10 cm.
Tapered jute and rope basket
This option is also suitable for a Christmas tree; this basket model can be used as a vase for artificial flowers, etc.
The diameter is knitted exactly as described above. But in this basket I have it 35 centimeters . I measured the legs of the artificial Christmas tree, their length is about 30 cm.
This basket is just for the Christmas tree, so there is no point in making the bottom anymore.
In the same way, we lift the basket up, moving the rope accordingly and knitting only one part of the column of the previous row.
10 rows - according to the drawing without increases or decreases.
Then 10 st.b/n + decrease.
If there is an uneven number of loops, that is, by the end of the row there will be, for example, 5 tbsp + decrease, it’s okay. Continue knitting in a spiral pattern. Thus, the decreases will be asymmetrical and will not be visible in the overall drawing.
In the next row = 9 tbsp + decrease. And so on until there are 4 tbsp + decrease in knitting.
The neck of the basket is formed.
We knit upwards 10 - 12 rows.
If you like, leave a loop of rope for decoration.
A finished crocheted jute basket can be decorated and “named” with a tag. Looks nice in brown leather.
