Rate this post
Good morning!
Topiary or, as it is also called, the “tree of happiness” is a composition that imitates a neatly trimmed small tree. You can make such a craft with your own hands from literally anything that may be nearby.
Such a thing can become a wonderful interior decoration or serve as an excellent gift for almost any occasion. Moreover, it is suitable for giving to both a loved one and a complete stranger.
A universal thing, isn't it? In this article, I have collected 9 instructions for you showing how to make topiary at home. Both the simplest and more complex options are presented here. So not only beginners, but also those who already have experience will be able to learn something new for themselves.
And if you have been making decorative trees for a long time and I’m unlikely to be able to teach you anything, just enjoy viewing the illustrative material. There is more than enough of it here. And at the same time, maybe you’ll come up with your next idea. Or check out my other articles).
Topiary for March 8th from napkins for beginners
Many people mistakenly believe that in order to make a beautiful topiary, you must buy expensive materials. In fact, you can get by with completely improvised means - for example, such as ordinary napkins. Let's see what beauty can be made from a seemingly ordinary thing.
We will need:
- Stapler;
- The basis for the topiary is a foam ball;
- Wooden stick;
- Napkins (any color);
- Pot;
- Beads for decoration;
- Wire;
- Glue gun;
- Scissors.
Subsequence:
Take a napkin and fold it to make a square. Pierce it in the middle with a stapler.
After this, use scissors to cut a circle out of the napkin. We will make it multi-layered.
Each circle needs to be slightly crumpled so that you get a voluminous flower. If you look at the photo, you will understand how this is done. You will need several such blanks to cover the entire surface of the base.
Instead of a foam ball, you can make a ball from papier-mâché or using another technology.
The main thing is that it is strong enough and has a round shape.
Using a glue gun, we plant our flowers on the base. We can fill the gaps between them with leaves made from green napkins using the same principle.
Finally, we add beads for decoration - they imitate drops of dew on delicate flower petals.
Thus, just by choosing the color of the napkins, you can make many variations of the same tree. We plant the resulting craft in a pot. If you wish, you can attach it to a wooden stick. Or you can leave it like that.
Let's see what else can be made from ordinary napkins. How do you like this option?
Very gentle, don't you agree?
Topiary, by the way, does not necessarily have to have a stem. The main thing is the foundation. You can simply plant it in a pot, as, for example, the author of this work did:
This is also a very nice tree.
As you can see, everyone makes flowers differently. You can come up with your own completely new way.
Wishing tree with colored leaves
A wonderful panel that will fill the newlyweds’ home with warmth and wisdom, because loved ones will not wish anything bad to the young family. Making such an accessory is very simple. You will need:
- frame
- thick colored cardboard to fit the frame for the background
- colored paper
- thick double-sided colored paper
How to do:
- Cut out a tree trunk with branches from colored paper. Glue it in the center of the background cardboard
- Cut out leaves (hearts, butterflies) from thick double-sided colored paper.
- Fold each leaf in half along the longitudinal axis
- Glue the leaves to form a round tree crown. Glue is applied to one half of the leaf!
- Frame
- Guests write wishes on each piece of paper
Another interesting option for decorating a wish tree in the form of a panel
Beautiful topiary made from coffee beans
Another common topiary option is a candy bean tree. In addition to the fact that such a craft looks very impressive, it also has an indescribable aroma. This will definitely appeal to a coffee lover, to whom such interior decoration can be safely gifted.
Necessary materials:
- Coffee beans - they should be fairly even, large and smell good;
- Satin ribbon;
- Double sided tape;
- Glue gun;
- Scissors;
- Plastic tube 25 cm long and 1.2 in diameter (or approximately);
- Plastic plant pot;
- Ball for the base with a diameter of about 8 cm;
- Alabaster and a container where it can be diluted;
- Nylon tape.
Subsequence:
We take our base and glue coffee beans over its entire surface.
We glue them with the convex side up. It will turn out more beautiful.
The result will look something like this:
Now we apply the second layer, on the contrary, gluing the grains with a strip up.
Then we wrap our tube (the future trunk) with double-sided tape, leaving 3 cm at both ends.
And we put a satin ribbon on the tape.
Next, pour water into the pots in such an amount that it does not reach the edge of about 3 cm.
We again pour this water into the container for diluting the alabaster (in the step above we measured the amount we needed in this way) and, in fact, dilute it.
Pour the resulting mass into the pot and, before it hardens, insert the tube.
We are waiting for it to dry completely. It is important!
We paste the frozen solution with grains in two layers in the same way as we did with the ball.
Now we lubricate the free end of the barrel with glue.
And we attach our ball to it. Make sure everything is level. We decorate our tree with a bow made of translucent ribbon.
You can decorate such a tree in completely different ways.
Look, for example, what an interesting topiary is made from coffee beans with coins!
Even the combination of colors is beautiful in itself.
The crown of the tree does not have to be spherical. It could be anything. For example, the heart. By the way, coffee’s constant companion is cinnamon. And this is also used here.
Artificial flowers also look nice.
And here’s a video, by the way, catch it. But it is not simple, coffee-colored and with fabric flowers.
A coffee tree
In this case, coffee beans are attached to the spherical crown using glue. You can also decorate the base with coffee beans. All wood elements are made in the same color scheme. This tree of happiness has a very laconic design and can become a decoration in the kitchen or living room, exuding a pleasant coffee aroma.
New Year's topiary made of corrugated paper
This topiary looks a little unusual - it does not have a trunk, as we are used to. But this is explained by the fact that we will be making a Christmas tree, and not an “ordinary” tree of happiness. If you wish, you can find a wooden stick and a flower pot and bring the craft to the “standard”. In previous lessons we have already looked at how this is done.
We will need the following materials:
- Scissors;
- Beads;
- Compass;
- Scotch;
- Green corrugated paper;
- PVA glue and Moment;
- Green gouache;
- Cardboard – 1 sheet;
- Gold ribbon.
Subsequence:
Take a sheet of paper and roll it into a cone. To prevent it from moving apart, we secure everything with tape.
We cover the cone with green gouache so that the white areas of the base do not show through the decor later.
Let's start creating “needles”. To do this, we fold the existing sheet of corrugated paper into several layers and, using a compass or stencil, draw circles on it.
We cut out each circle and fasten its layers in the center with a stapler. And then we begin to carefully crumple each layer so that we get a voluminous piece.
We paste the resulting “roses” over the entire cone.
We completely get rid of open areas and let the tree dry.
We decorate the craft with beads and gold ribbon.
This is what will happen if you put such a Christmas tree on a leg.
New Year's topiaries can be very different. Let's look at a few options.
Beautiful, don't you agree?
Materials and tools
Below are the main materials and tools that will be needed for the job. But for each method, different additional items can be used.
- Pot. The main thing is that its size is medium or large.
It should also be quite heavy.
The weight and parameters of the pot are determined by the size of the craft itself.
Chocolates and lollipops can differ in their density, and therefore, first you need to choose what to make the craft from, and then choose a container.
A clay pot is ideal.
- Crown material.
Designers advise choosing the shape of the tree’s crown in advance. And then create it from available material. For example, newspaper is suitable for this; you will need to compress it and secure the shape with adhesive tape.
Balls made of plastic or rubber are also suitable for the job.
Some people cut out a foam ball or other geometric shape.
- Trunk. To make it you will need a long trunk made of durable, smooth wood.
A branch that can support the top is suitable.
Miniature compositions are made from simple pencils.
You can buy a special blank in a store that sells everything for needlework.
In addition, for production you need an adhesive composition, polyurethane foam (fill the pot with it), glass pebbles, various parts that imitate earth (fabric, etc.), a satin ribbon for decorating the barrel, and candies packaged in beautiful candy wrappers.
Tree in the form of a topiary made of satin ribbons
In the next tutorial, as you may have guessed from the title, we will make topiary from satin ribbons. We experiment with materials. The result, as always, will be very delicate and beautiful.
Necessary materials:
- Water;
- Gypsum;
- Glue gun;
- Tube or branch for the trunk;
- Penoplex;
- Raspberry, white and pink satin ribbons. Optimal width – 2.5 cm;
- Satin ribbon 1 cm wide;
- Newspaper sheets;
- Decor (beads, sisal, etc. to your liking);
- Flower pot.
Subsequence:
The first stage is the longest and most boring. We will need to make about 50 roses from satin ribbons, which will then form the basis of our topiary.
To make one rose you need a ribbon 50 cm long.
We twist the ribbon around the small curl at its end, bending it away from us every 2 cm.
It is necessary that all the roses are almost identical.
We make all the preparations in this way.
Now you can do the base. We roll up a ball from newspaper sheets and wrap it with threads for strength. The shape of the base should be close to spherical.
Remove the bark from the branch (if you are using a branch) and prepare the rest of the items.
We attach our ball to the future trunk, having previously made a small hole in it.
Wrap the barrel with tape.
Cut a piece of polystyrene foam and place it inside the pot.
Stick the barrel into it.
Now fill it with gypsum solution and wait until it hardens completely.
Let's start decorating our tree with roses. To do this, apply a drop of glue to each workpiece.
Cover the entire surface of the ball with flowers.
In order to cover all areas, roses may have to be glued in several layers.
It’s still not possible to get rid of all the gaps. Therefore, we resort to a trick: we cover them with beads, which we place on glue.
It turns out a little unevenly, but that's not a big deal.
We decorate the base of the tree: we make grass from sisal. We plant a couple of flowers on the pot. The author of the master class even found a small ladybug - it’s wonderful if you have one too.
You can also decorate the trunk.
Topiary made from satin ribbons is ready!
You can also make a lot of interesting things out of satin ribbons. Don't underestimate this material!
Look how tender it is!
A very original option. Is not it? Does the crown match the color of the mug or vice versa?
Here is a very cute baby tree. Would you do this?
Let's just enjoy the beauty.
As you can see, there are just a lot of options!
How to make topiary from artificial flowers
If you don’t want to spend a lot of time making decor to decorate the crown, you can use ready-made artificial flowers. This guide tells you exactly how to do it. We skipped the process of making the base for the tree because you already know how to make it and focused directly on the decoration itself.
For work we will need:
- Artificial flowers;
- Artificial greenery;
- Glue gun;
- Base for topiary (you can make it using the method described in any of the master classes we reviewed earlier);
- Satin ribbons for decoration;
- Sisal.
Subsequence:
We glue sisal at the base of the tree. Let's use a hot gun for this.
We begin to decorate the crown of the tree with artificial flowers.
You can alternate flowers of different shades - it will be even more interesting.
We continue working until the entire surface of the base is covered with flowers.
Now for the finishing touches. We make a bow from a satin ribbon.
We do not tie, but glue the ribbons to each other.
And we decorate the trunk of our topiary.
At this point, the tree of happiness can be considered ready.
What you get depends on what materials you use.
As you can see, the options can be very different.
Tree of Good lesson plan (senior group) on the topic
Topic: “Tree of Goodness”
Goal: creating conditions for the development of creative abilities in the process of making the “Tree of Good”.
Tasks:
1. create conditions for the development of creative thinking and imagination in the process of making the “Tree of Goodness” (artistic and aesthetic development);
2. promote the development of fine motor skills of the fingers in the process of making sisal balls (cognitive development);
3. promote the formation of spiritual and moral qualities in children during a conversation about goodness (social and communicative development);
4. create conditions to encourage children to engage in speech activity (speech development);
5. promote the development of communication and interaction of the child with peers and adults (socio-communicative development);
6. support children's initiative and independence (socio-communicative development);
7. provide conditions for children’s physical activity (physical development).
Types of children's activities:
1. productive activity;
2. cognitive activity;
3. communication activities;
4. motor activity.
Heart made from scrap materials at home for Valentine's Day (February 14)
Topiary can be an excellent gift not only for the New Year or birthday, but also for Valentine's Day, if it is designed correctly. In the following step-by-step tutorial, we'll look at how to make a heart-shaped topiary. Intrigued? Then go ahead!
Materials:
- Foam heart;
- Red napkins;
- Scissors;
- Glue gun;
- Satin ribbons;
- Flower pots;
- Alabaster;
- 2 kebab skewers;
- Decor.
Stages:
We break each skewer into 2 parts and glue the 3 halves together. We put the fourth one aside - we will need it later.
We insert the resulting trunk into the pot and fill it with gypsum solution. We wait for it to dry completely and decorate everything with ribbons to your liking.
We attach our foam base to the trunk.
And let's start decorating it. To decorate such a small heart you will need about 15 napkins. Cut each of them into small squares with a side of 3 cm.
We will work using the cutting technique. Take the remaining half of the skewer and wind one square onto its blunt end.
After this, dip the skewer into PVA glue and place the workpiece on our base.
In this way we cover the entire surface of the heart.
Ready. Add decor at your discretion and the craft is complete.
How to decorate your tree is up to you to decide.
But of course, if a tree is presented as a gift on February 14, you should take into account the taste of your other half.
Some even use candy for decoration. A very original move!
Beautiful, don't you agree?
Would you be happy if someone gave you something like this? I think it's a very beautiful tree.
Christmas tree
For the New Year, you can make a festive New Year's tree of happiness. It is decorated with tinsel, rain, beads, and small snowflakes.
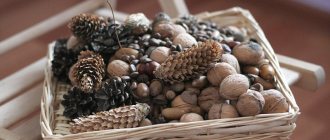
For inspiration, look at the tree of happiness photos of finished works. If desired and imaginative, the tree of happiness can be decorated with anything - candy wrappers, fir cones, acorns, buttons, coins. Everyone will get their own original work, not similar to others.
Craft in the shape of a topiary made from shells
A great way to preserve your memories of a hot summer holiday at sea is to make topiary from shells brought from the resort! Do you have a few of these lying around? Great! Then let's get to work.
We will need the following materials:
- Scissors;
- White and beige sisal;
- Clay pot;
- Foam base (ball);
- Foam cylinder;
- Shells;
- Glue gun;
- Paper;
- Cardboard;
- Wire;
- Thread or twine of the same color as the sisal;
- Fishing line;
- Satin ribbon;
- Beads.
Subsequence:
Let's start with making the crown. To do this, cover the surface of the foam ball with glue and attach sisal to it.
Now we decorate the base with shells, leaving small gaps between them.
While the crown dries, let's work on the trunk. We wrap the thick wire with threads and twist it around the cylinder to give it a curved shape.
Glue a foam cylinder inside the pot. Let's make a hole in it first. Where will the barrel be attached?
We attach the free end of the trunk to the crown, having previously made a recess of the required diameter in the ball.
We will have several trunks intertwined with each other to make the craft more interesting. But you can leave one.
We stick the trunks into the foam and coat them thoroughly with hot glue to make the structure durable. Place a cardboard circle on top of the pot.
And we put sisal on it.
Decorate with shells. The author makes these complex shells with pearls. You can design your topiary differently.
Finally, let's complete the overall picture with satin ribbons.
Let's decorate the crown of our tree with pearls.
To do this, string the beads onto a fishing line, as shown in the photo instructions.
These are the light, delicate beads you get.
We wrap our tree with them.
Don't forget about the potty.
We make bows from thin ribbons and also attach them to the base.
This is such a wonderful interior decoration we have created.
By the way, we always produce very interesting works on a marine theme.
Look how great it is!
What can you say about this?
This is also a very original, in my opinion, option. The pot is decorated with denim fabric in a very interesting way.
You can even do this!
Very beautiful and gentle. Personally, I would definitely be delighted with such a gift.
Topiary ideas
When making topiary, you can combine several decoration options, for example, use purchased artificial flowers and organza.
Coffee topiary can be glued to a candlestick.
Candy topiaries can be given as a holiday gift to women of all ages!
The main thing is to use expensive and tasty treats.
You can make a tree that is not round and has a non-standard shape. Just using half of the ball.
Organza topiary looks very easy.
Topiary made from polymer clay looks luxurious and very realistic.
Topiary made of beads looks very delicate, an excellent wedding gift.
Master class on how to make topiary from banknotes
Topiaries are often made not only to attract happiness or luck into the house, but also money. The materials used to make such trees are appropriate - coins and artificial banknotes. Let's see what this looks like in practice.
To make flowers we will need souvenir 100 dollar bills.
We again skip the process of creating a base for wood, since here you can use the options proposed in the ones we discussed earlier in the article.
Such wood is usually painted gold and green, like banknotes.
In order to make a flower, take a square of paper (consider an example on a regular piece of paper) and fold it in half diagonally.
Raise one end of it to the upper (obtuse) corner.
And so does the second one.
We unfold our workpiece and bend each of the corners again along the resulting line.
We straighten out what we got and make these diamonds:
They fold easily along the resulting fold lines.
And we bend the corners extending beyond the edge of the workpiece.
And now we fold the resulting triangles on the sides towards the inside.
We fold the resulting blank in half and secure it with glue. The first petal is ready.
Each flower requires five of these petals. Now we do the same thing, only from banknotes.
We combine every 5 petals into a flower and then plant it on our base using a glue gun.
We do this until we fill the entire ball. Glue a coin into the center of each flower.
The tree is ready. The dollar at the trunk can be made from wire wrapped with masking tape and twine on top. Everything is covered in gold paint.
Well, as always, we can’t do without examples of what else can be done.
A bit similar to our version.
Well, I already showed you something like this.
And such a tree, by the way, can be made if you want to give someone real money.
Suitable instead of bills and coins.
Wishing tree with fingerprints
The undoubted advantage of such a wish tree: after the ceremony, it can be decorated as a picture that will remind you of a happy day. Decorating a tree can be a wonderful experience for guests of all ages. Each invitee should leave their own colorful imprint by participating in the creation of the bright crown of your tree. On the imprint sheet (or next to it) you should write the name of the guest and a wish for the newlyweds.
To create a tree you will need:
- printed tree template
- frame of the appropriate size
- sets of special stamp inks in pads for creating prints (sold in stationery and art supplies departments)
An A3 sheet can hold up to 60 adult fingerprints. If there are more guests, you should increase the size of the template
How to make a topiary Tree of Happiness (step-by-step instructions for beginners)
Topiary is always very beautiful. Properly made, it can be both a wonderful addition to a gift and the main present. And considering that the second name of topiary is “tree of happiness,” the hero of the occasion will definitely be pleased to receive it.
Necessary materials:
- Threads;
- Scissors;
- Super glue;
- A wooden stick, branch or something else for the trunk (pencils are used here);
- Sheets of newspaper or paper;
- Crepe paper;
- Flower pots;
- Sand or small stones;
- Styrofoam;
- A piece of fabric;
- Decor according to your taste.
Subsequence:
We start by creating the base for the topiary. We make a small ball from a sheet of paper or newspaper and wrap it with thread so that it holds its shape firmly.
We take two simple pencils and connect them to each other with glue. This is the future trunk.
We cover it with a piece of paper, as shown below.
We attach our ball to the trunk, having first made a hole in the first one with scissors.
We pour a weighting agent into the pots: in this case, sand is used.
And put a piece of foam on top.
We insert our barrel into the foam. Check that the structure is strong.
We decorate the tree leg with translucent mesh fabric.
Now let's start forming the flowers. We twist small neat roses from corrugated paper according to the pattern presented below:
We will need a lot of such blanks to cover the entire surface of the crown of our tree.
When everything is ready, we begin to decorate the ball. We tear the tails obtained from the flowers when twisting them in half:
We grease each half with glue and, slightly spreading the ends of the base of the rose, plant it on our topiary. We repeat this until the entire surface of the ball is covered with flowers.
We make leaves from green corrugated paper. To do this, cut out 2x2 cm squares and wrap them around the blunt end of a stick. And then, dipping a stick with a piece of paper in glue, we plant our resulting leaf on the tree in the gaps between the flowers. This technique is called trimming.
We repeat the same at the base of the trunk. The tree of happiness is almost ready. We decorate the craft with decor to your liking. It turns out very beautiful. How do you like it?
Look what beauty can be made using the same principle.
You need to have a great sense of taste to make something like this.
Topiary care
Topiary is just the kind of tree that requires absolutely no maintenance. It does not need to be watered, fertilized or replanted. It will delight you with its appearance regardless of the season. Caring for it involves placing it away from direct sunlight, as the material may fade. It won't be necessary to blow off or shake off dust very often.
Caring for topiary involves removing dust
A decorative “tree of happiness” made by yourself will become a talisman for your home. It is also suitable as a holiday gift for family or friends. For some time now, topirary has become widespread in wedding floristry. Bridal bouquets are made not from fresh flowers, but from decorative materials. Their advantage is that the flowers on them will not wither during the day or freeze in winter. In general, creating topiary is a fascinating process that captivates many, regardless of age and gender. Simplicity of action, inexpensive and beautiful materials and excellent results are the main motivators to learn a new hobby.
DIY corrugated paper topiary: video
DIY topiary: photo
New topiary ideas 2022 made from money and artificial grass
Let's look a little more at what types of topiary there are. Maybe you will now get excited about the idea and run to create. I propose to pay attention once again to the so-called “money trees”. Just look at how many options for crafts you can come up with on this topic!
You don't have to use banknotes - coins are fine too. Or you can combine both in one topiary.
As soon as you add up the money differently, the tree takes on a completely different look.
We looked at how to make such flowers. It turns out very tender, doesn’t it?
If you have time and desire, create a composition from several topiaries. They will attract twice as much money.
Sisal is perfect for decoration, as well as figurines of birds, insects, beads, etc. In general, everything you like.
This is where the bird took refuge.
You don’t have to cover the entire base with money flowers, but use them only as an additional element, as in the work below.
In general, as you can see, you can do anything. Creativity is wonderful because no one limits the flow of your imagination. What you succeed depends only on yourself. Be sure to write in the comments under this article whether you liked my selection, and which of the ones discussed above you would like to implement. Good luck to everyone and have a nice day!