The need to use ultraviolet light may arise not only in various specific areas of industry, but also in everyday life. Thus, you cannot do without a UV flashlight if you need to check banknotes for authenticity, detect various contaminants of biological origin (for example, animal urine), identify the location of a refrigerant leak in a car air conditioner, and so on.
However, not everyone has an ultraviolet flashlight, and purchasing one for use several times a year certainly cannot be considered advisable. But don’t be upset, because if necessary, making a UV flashlight at home is not difficult.
UV connection diagrams
First, let's look at circuits that require connecting wires into an electrical circuit. To build them you will also need a base or stand:
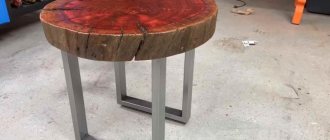
Making a stationary lamp with a UV lamp is not difficult. To install the simplest device, you will need a fluorescent lamp of the DRL-250 type. It will make an excellent source of ultraviolet light. In addition you will need:
- igniting choke;
- standard socket socket;
- power wires.
You can use waterproof plywood or heat-resistant plastic as a base or stand. The throttle is fixed to the panel, after which the cartridge is installed on it. In this case, the cathode output is connected to connector “3”, and the anode output to connector “1” of the inductor. The power wire must also be connected to the inductor.
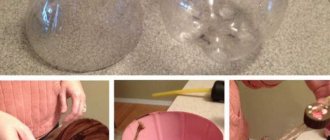
The design of the DRL lamp involves two shells. For the UV lamp project, the outer shell must be removed. In this case, you need to work very carefully so as not to damage the inner shell.
ATTENTION!
An ordinary bench vise and a wet rag will help you carefully remove the top layer of the lamp. DRL-250 is wrapped in a dampened cloth and clamped in a vice. This allows you to get rid of the outer layer of the lamp without being injured by fragments.
The cleaned workpiece is thoroughly treated with alcohol or solvent. After the lamp has dried, a protective aluminum mesh is put on it. It can be extracted from the designs of old lighting fixtures. The finished product can be attached to a tripod. In this case, the lamp will become portable.
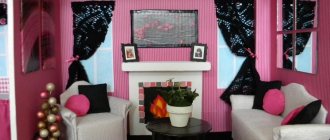
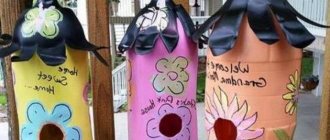
The second UV lamp assembly diagram will be useful for women. It solves the problem of constant visits to a manicurist to apply gel polish on your nails. Essentially, this is a special drying chamber in which the varnish quickly hardens under the influence of ultraviolet radiation. To assemble the device you will need:
- external electrical distribution box for 10 terminals (190x150x77 mm);
- substrate for LEDs 3 pcs. (12x3W Led PCB module);
- thermal paste;
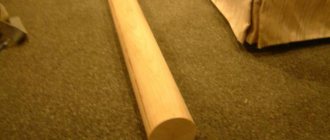
- aluminum profiles about 60 cm (25x8 mm);
- driver 9x3W – 1 pc.;
- UV diodes with constant forward current (IF) 700 mA – 9 pcs.
- power cord – approximately 1 m;
- power button – 1 pc.;
- timer - 1 pc.
Let's consider the algorithm for assembling a drying chamber using UV diodes:
- Unscrew the junction box into two parts. We remove the lid to the side.
- In the part of the box with terminals for the wires, we cut one large hole through 3 channels. Clean the resulting hole with sandpaper.
- Take the lid of the box. We screw three strips of aluminum profile to its inner side (the length of the profile corresponds to the width of the lid), so that two profiles are at the edges and one in the middle. The profile must be installed according to the width of the box.
- Let's move on to electrical installation. We connect the power button, driver and timer to the power cord in sequential order. We solder the wires to the last element, which will be used to provide power to the UV lamps.
- We solder three diodes per substrate. The substrates are connected in series to each other.
- We connect 3 diode substrates with leads from the timer.
- We screw the substrates in the center of the aluminum profiles, so that the lamps look inside the box.
- We twist the box.
- We connect the finished drying chamber to the network.
This scheme is more complicated than all the others. It will require minimal knowledge of electrical engineering, as well as soldering skills.
LED Flashlight Upgrade
Based on the type of light source installed, all hand-held flashlights are divided into two types: with several low-current LEDs or with one powerful LED.
You can change any of them. The main thing is to find UV emitting diodes of a similar size. The cost of an ultraviolet diode of Chinese origin with a wavelength of 370-395 nm, designed for a current of 500–700 mA, is 120–300 rubles. The price of a branded sample can be several times higher. For example, LTPL-C034UVH365 from LITEON with a datasheet available for download costs an average of 750 rubles. Let's briefly look at the design of a hand-held flashlight. As a rule, it consists of the following parts:
- housings based on aluminum alloy;
- LED module;
- reflector with protective glass;
- battery compartment;
- end cover with button.
Of greatest interest is the module with the LED, which must be separated from the remaining elements of the flashlight.
Knowing the geometric dimensions of the installed LED, you need to buy a UV emitting diode that is as similar in size as possible. In addition to dimensions, the selection criterion is the spectral characteristic, that is, the LED must emit in the UV-A range (300–400 nm), and not just emit violet light.
The voltage drop on an ultraviolet LED is slightly higher than on a white LED, which means that recalculation of the number of batteries is not required. But you will have to pay more attention to the load current. As is the case with conventional light-emitting diodes, it should be limited to a level not exceeding the rated value. To do this, the electrical circuit is supplemented with a constant resistor. Installing a driver in this case is not economically justified, since the power dissipation on the resistor will not exceed 0.1 W, even if a very powerful UV-emitting diode is installed in the circuit. Theoretically, to calculate the resistance you need to use the formula: R=(UPIT-ULED)/ILED, Ohm.
However, in practice, the electrical circuit is supplemented with another resistance that cannot be neglected. The current flow path in the flashlight passes through the housing with threaded connections. Depending on the quality of the contact on the thread, additional resistance can reach 0.5–1.0 Ohms and significantly affect the load current.
For example, the calculated resistance for a UV LED with ULED=3.5V, ILED=0.7A will be: R=(4.5–3.5)/0.7=1.4 Ohm. And taking into account the resistance of the case, a resistor with a nominal value of 0.47–0.82 Ohms should be used.
Therefore, when you turn on the ultraviolet flashlight for the first time, it is advisable to measure the current in the circuit using a multimeter and, if necessary, recalculate the resistor value.
An ultraviolet flashlight does not have to operate at rated current. To accomplish the assigned tasks, a gentle regime will be quite enough. Therefore, it is better to choose a limiting resistor provided that the operating current is set to approximately 90% of the rated value.
After completing the preparatory work, it's time to move on to assembly. To do this, you need to unsolder the old LED and attach a new ultraviolet emitting diode in its place. If several low-power LEDs are to be replaced, then the whole procedure comes down to the standard sequence of actions with a soldering iron. Then all that remains is to assemble the lantern in reverse order.
If you intend to install an ultraviolet LED with a power of more than 1 W, then you must provide a radiator or use an existing heat sink. In order to improve heat dissipation, a UV emitting diode is installed through thermal paste on a board coated with aluminum foil. In addition, the place where the board comes into contact with the case is also lubricated with thermal paste. The effectiveness of this method has been proven in 220 V LED lamps.
After checking all electrical connections for reliability, the entire structure of the ultraviolet flashlight is assembled and turned on for the first time.
How to make it yourself from your phone?
This option is suitable for phones with a built-in LED flash. So, to assemble a simple UV lamp from a phone you will need:
- phone with LED flash;
- transparent tape;
- purple and blue marker or felt-tip pen;
- stationery knife.
Now let's look at a step-by-step diagram of assembling such a lamp:
- A small strip of tape is placed on the flash to cover the LED flash. It is important that no air bubbles or folds form under the adhesive tape.
- The first layer of tape is painted with a blue marker. It is better to make a stroke once so that the color completely covers the tape.
- Another layer of tape is applied to the painted strip and painted purple.
- Apply a third layer of tape, which is painted blue.
- A final layer of tape is applied and painted purple.
- Turn on the flash and watch the effect of the resulting UV lamp.
This simple life hack has created a lot of buzz online. And it gave rise to a whole discussion. Some commentators noted that this method is not capable of replacing a real ultraviolet flashlight. Others were not too lazy to follow the instructions and stated with full confidence that the flashlight successfully coped with basic tasks, such as finding the source of an unpleasant odor in a house with animals or hidden messages during a quest. Check it out too, it will take a minimum of time.
For the “UV flashlight simulator” you will need: • Flashlight; • A pair of elastic bands; • Dark blue marker; • Purple marker; • A piece of oilcloth or cling film; • Scissors.
Step 1. Cut a small rectangle from the film (size relative to the flashlight - like the piece of paper in the photo). Secure it in front of the lantern glass with a rubber band and color it in with a blue marker. You need to paint it completely, without bald spots.
Step 2: Repeat Step 1 exactly. You should now have two blue layers of film in front of the glass.
Step 3. Do the same operation with another layer of film and elastic. But now color it over not with blue, but with a purple marker.
Ready! Time to check out the spy features. For example, on banknotes or inscriptions with a bright yellow marker.
You can also do a similar trick with your phone flash. This way the spy gadget will always be at hand.
You will need: • Scotch tape; • Scissors; • Blue marker; • Purple marker.
Step 1: Cut a small piece of clear tape and place it over the flash diode. Color the tape with a blue marker.
Step 2: Place a second piece of tape on top and also color it in with a blue marker.
Step 3: Place the third piece of tape and color it in with a purple marker.
Detailed video instructions on how to turn a smartphone into a UV detector can be found here. Now you can feel like a detective, solve all the domestic “crimes” and rest on your laurels.
Did you like the article? Then support us, click
:
Source: novate.ru
Other tips
- If you want to do something even more practical, you can make a dual-mode device. You will need to insert UV diodes between the standard LEDs. The circuit is reconfigured to dual-mode operation. It is worth considering that the UV diode is chosen not only according to the preset sizes. So, if you need to achieve UV radiation, and not just a stream of violet light, you will need to purchase those elements that work in the UV-A range.
- Instead of adhesive tape, which is difficult to remove without leaving sticky marks, cling film is suitable. It is applied in the same way in layers, and the surface is painted over with felt-tip pens. You can secure the film with an elastic band.
In these simple ways you can make a lamp at home. And for this you don’t need to buy professional equipment: improvised means and UV elements are enough. When everything is ready, it is worth remembering the safety rules and remember that the UV flashlight should not be pointed at the eyes.
Ultraviolet lamp for home use: device and manufacture
If there is a sick person in the house, it is very uncomfortable. It’s even more unpleasant when the disease is viral, and you have to take some precautions when communicating, trying not to get infected. But, as it turned out, it is possible to find a way out of this situation that will suit everyone.
When visiting clinics or hospitals, many were faced with the fact that entry into the premises was prohibited due to quartzing. Many have seen the lamp itself for this process. But few people know what this so-called “quartz” is and why a person should not be under its rays. So why not understand this term.
The real name of such a lamp is ultraviolet, and the name “quartz” comes from the fact that the bulbs of such devices are made of quartz glass. But first things first. First you need to understand what types of UV devices there are.
Checking the performance of the lamp
To do this, you need a device such as a multimeter. To perform the check, perform the following manipulations:
- They disassemble the device.
- Remove the lamp.
- Using a multimeter, check whether there is voltage at the lamp contacts.
If there is no voltage, then first of all you should suspect that one of the contacts has broken, and if everything is fine there, then run a multimeter along the entire circuit, identify the faulty link and replace it with a spare one.
If there is voltage on the contacts, the cause of the breakdown lies in the ultraviolet-emitting lamp itself, which cannot be repaired, it can only be replaced. Since sterilizer-irradiators are so widespread, all operating personnel of the plant should become familiar with their design in order to timely and accurately identify possible breakdowns in this equipment.
Types of ultraviolet lamps
Ultraviolet lamps are divided according to several parameters. They can be ozone - such a device, using ultraviolet light, promotes the release of ozone from oxygen. When operating such a device, it is important to ventilate the room as often as possible, since this gas in large quantities is harmful to the body. The ultraviolet lamp can also be ozone-free. The bulb of such a device has a special coating that prevents the production of ozone.
The next classification is mobility. The devices can be portable or stationary.
According to their operating parameters, they can be open or closed. For quartzing in medical institutions, open devices are used - nothing protects from ultraviolet radiation and it is scattered throughout the room. Their use if there are people or animals in the room is prohibited. Closed (or recirculators) process certain objects. When operating this type of lamp, you do not need to leave the room.
But there is another type of similar devices, which is most common in terms of home use - an ultraviolet lamp for special use. This type is used for physiotherapeutic treatment of the disease and fights acute respiratory diseases.
Usually the kit includes attachments and glasses. They are also applicable in solariums.
Amalgam lamp
But there are ultraviolet lamps that appeared relatively recently. Their difference from conventional bactericidal lamps is that inside the tube there is a hard coating made of an alloy of elements such as indium, mercury and bismuth. When exposed to electricity, this alloy heats up and releases mercury vapor, which emits ultraviolet radiation. Ozone production does not occur during the operation of such lamps, although the destruction of bacteria does not lose its intensity.
It is very important that in the cold state of the lamp, mercury is bound by other metals, and therefore in case of accidental mechanical damage there will be no consequences for the body. Of course, if operating devices are damaged, vapors of this heavy metal can be released, but even here the amalgam lamp has a great advantage.
Advantages
- Affordable price. Such lamps can be purchased for home use, without much damage to family finances.
- A large assortment. It’s not difficult to choose the right model; you can even choose something exclusive, including unusual colors and configurations.
- Versatility. Thus, almost all types of coating can be used, including solid acrylic gels.
Among the disadvantages is the low service life of spare light bulbs, which are recommended to be changed approximately every six months. If this is not done, the quality of the coating will not be up to par. The second significant drawback is the uncomfortable burning sensation during drying. Some models are equipped with a fan for cooling, but this is an additional cost.
There are cases of individual intolerance when it is simply impossible to use such lamps. Also among the disadvantages is the sensitivity of the device to mechanical damage.
You can find out what impress hard nail polish is by reading the contents of this article.
The video explains how to use a nail drying lamp at home:
Ultraviolet lamp device
The essence of the operation of an ultraviolet quartz lamp is similar to a fluorescent lamp. If you look at it, this is the same lighting device. The luminaires of these lighting devices are absolutely no different. The differences are in the flasks themselves. The inside of the LL tube is coated with a special substance – phosphor.
Since a fluorescent lamp, when mercury vapor breaks down and ignites, emits mainly ultraviolet light, which is not visible to the human eye, the phosphor converts it into a visible glow. The principle of operation of “quartz” is identical, only inside the flask there is no substance that converts UV rays, which kill bacteria.
The only problem is that ultraviolet radiation destroys all bacteria, and therefore there is no radiation needed by the body. Therefore, you cannot be in a room where such an open type device is turned on, much less look at it. A person who looks at an ultraviolet lamp even for a short time will experience severe eye pain.
Scope of application
The use of UV lamps, which produce different wavelengths, is enormous. From cosmetology to treatment.
Medicine
In medicine, the use of UV lamps has been practiced for a long time. The main task before the device is to quickly disinfect the entire room, wall surfaces, floors, and objects that are in it. Devices used in medical institutions are capable of:
- Kill fungi and bacteria.
- Make dormant mold spores and bacteria nonviable.
- Neutralize eggs of dust mites, ectoparasites, and any insects.
The exception is that the rays are unable to “reach” parasites and fungi that live in furniture upholstery under the plaster, that is, those that are not on the surface. But the surface insecticidal effect is very powerful.
UV treatment
For plants
In winter, it is possible to provide plants in greenhouses and conservatories with UV rays only using special lamps. UV lamps with different wavelengths are used for plants, this depends on its physiological characteristics and the subsequent cycle.
Thus, long-wave radiation stimulates growth and development, while medium-wave radiation provides resistance to low temperatures. Short waves are destructive for plants and are not used.
Cosmetology
UV lamps are increasingly used in cosmetology; the simplest example is ultraviolet sources in solariums. To create an even tan, long waves are used.
Today, compact devices with UV radiation are popular for nail extensions and creating a neat manicure. Their main task is to dry the gel and shellac that is applied to the nails. Another possibility is to protect the nail plates from fungus.
Lamp for polymerization of gel and shellac
Other areas
In addition, they apply:
- Checking banknotes. A special mark is applied to the banknotes, which is visible only in UV rays. Similar devices are available in banks and many stores.
- Disinfection of drinking water. Together with chlorination, ozonation or disinfection with UV rays is used.
- In chemical analysis.
- For catching insects. This effect is achieved due to the shifted visible range in most insects.
- For restoration. Such a device helps to see old layers of varnish and new ones; they look different in a similar glow. For other light sources, such changes are invisible, just like for the human eye.
- For biotechnology to obtain a genetic mutation.
- They are used in terrariums where reptiles and turtles are kept, and in aquariums.
- To create lighting effects at various events.
How to make an ultraviolet detector from a smartphone or flashlight
Any smartphone can be turned into an ultraviolet detector, with the help of which dirt and watermarks on banknotes that are invisible to the naked eye are visible. To do this, you will need a smartphone (necessarily with a flash), tape and two felt-tip pens or markers - blue and purple. Our task is to make a filter that will filter out all colors except the range that includes ultraviolet.
Place a small piece of tape on your smartphone's flash and color it over with a blue marker. Glue another one and paint it purple. Repeat again - one layer with blue paint and one with purple. You can put transparent tape on top for protection. Use regular tape, since masking tape will not work; it does not transmit ultraviolet radiation.
Turn on the flash (such as with a flashlight or camera) and see if the scanner works. When the flash is turned on, certain colors will glow in the dark (white and florescent, which absorb ultraviolet light well). Keep in mind that fluorescent traces are much more difficult to see in bright daylight than in the dark.
Materials
For assembly you will need to prepare all the components. To make an ultraviolet type device, the master uses different tools and materials, it all depends on the method he chose. Let's list some of them:
- Flashlight base. Often such devices are converted from standard manual LED models. They consist of different parts. Among them it is worth mentioning a housing made of aluminum or other durable material, a glass reflector, an LED module, a battery compartment, etc.
- Ultraviolet LEDs. For an ultraviolet flashlight, you can purchase UV diodes made in China (each of which costs from 150 to 300 rubles).
- Smartphone. A UV flashlight can be made from a regular mobile phone or smartphone.
To make such a thing from a regular LED model, you will need additional materials and tools: purple and blue markers, scissors, transparent tape.
How to easily make a UV flashlight from your phone flash using tape, blue and purple markers
The principle of operation of such a flashlight: The light emitted by the Sun, incandescent lamps, energy-saving lamps and the flashes of our favorite smartphones consists of electromagnetic waves of different frequencies and lengths: waves visible to the eye (visible light) and invisible waves - mainly soft ultraviolet and high-intensity infrared radiation. There are not many of the latter, but they exist. Our task is to try to isolate ultraviolet light. Using a simple homemade selective light filter, I will show how to do this.
A light filter is a device that changes the spectral composition and energy of optical radiation incident on it. A selective light filter is designed to cut off (absorb) or highlight any parts of the spectrum. It works by absorbing electromagnetic waves that we don’t need (here in the picture, all except green ) and reflection or transmission (if transparent) of electromagnetic waves responsible for the color we need.
To make a filter for highlighting ultraviolet light, stick a small strip of ordinary stationery tape on the phone flash (painting tape is not suitable, as it strongly absorbs ultraviolet light)
Color in the flash with a blue marker
Next, stick a second one on top of the first layer of tape.
We also paint it over with a blue marker.
Place a third strip of tape on top of the second one.
We've already painted it over with a purple marker.
That's it, the work ends there. Yes, it's that simple. We created a light filter on the flash that absorbs all electromagnetic waves (it lets the rest through freely), except for those responsible for blue, violet and ultraviolet colors, which are best suited for observing fluorescent substances and charging phosphors. In a few days, by the way, a detailed post will be published on how to prepare long-luminous and bright phosphors of various colors (luminous powders) with your own hands. The method has already been found and tested.
Turn on the flashlight on your phone
To check, write something on paper with a fluorescent marker
We bring our homemade UV flashlight. And, voila, it works!
It's much more noticeable in the dark
Our homemade UV filter can be easily removed and stuck back on the phone. There are no traces left (rarely, however, they remain, it depends on the quality of the adhesive tape)
I propose to compare how the flash built into a smartphone works without a filter. Everything lights up.
As for the effectiveness and benefits: you can observe fluorescent substances, phosphors are infected with them quite well, you can also check banknotes for counterfeitness (this works better in a dark room). Among the disadvantages compared to a regular UV flashlight for 70 rubles from China: the efficiency is a couple of times less and blue is added, a fairly noticeable, sometimes disturbing color.
The best manufacturers
- Ultraviolet LED flashlight 5W Topson. Compact hand-held device with aluminum housing. Radiation wavelength 365 and 395 nm. The device has a backlight scale control, and the belt holder can withstand high humidity. Can be used for checking banknotes, searching for useful minerals, identifying biological traces, polymerizing gel varnishes and adhesives.
- Flashlight UV S08 is a powerful LED tool that includes a rechargeable battery and charger. It completely illuminates markers on banknotes and shows leaks of freon and antifreeze. With its help you can search for amber and traces of biological substances.
- Flashlight - keychain with carbine Era ER - B27. Small LED device for pocket carrying. It has low power, but the lightweight plastic case allows it to be conveniently attached to keys. Lamp operating time up to 100,000 hours. Used to check money. Weight 18 gr.
- Waterproof ultraviolet flashlight for diving, spearfishing, fishing. A powerful tool for underwater lighting. The beam range, depending on the transparency of the water, is up to 100 m. There is a mount for wearing on the belt. Device size 20 cm.
Exploitation
The location for the camera should be chosen such that there are no obstacles in the near observation zone in the form of bushes, trees and other objects from which IR rays are reflected.
Devices that operate on the day/night principle and do not have a mechanical filter can only be used under fluorescent lighting, otherwise serious color distortion will occur.
When installing the camera, you need to pay attention to the temperature conditions. It must correspond to the permissible operating temperatures of the device, the range of which is usually indicated in the instructions
For good signal transmission from the camera to the computer screen, it is better to connect the devices to each other with a high-frequency coaxial cable with copper braiding and a characteristic impedance of 75 Ohms.
Features of work
There is nothing complicated in the operation of an infrared lamp, which is used for outdoor video surveillance. Often cameras at night without additional lighting cannot form a clear picture. A budget option is to install an infrared spotlight. Thanks to the photosensitive camera sensor, this device is capable of clearly recording both the area visible to the camera and has the ability to intercept the infrared range. Thus, the camera is able to show a very clear picture of the entire area in which the video is being filmed.
IR illumination has a number of features that a potential buyer needs to know about:
- The power of the floodlight LEDs is not enough to increase the video surveillance range.
- Do not rush to install more powerful lighting, as this option is considered uneconomical and may result in unplanned waste. For example, after installing more powerful equipment, the owner will have to purchase power supplies and strengthen the power transmission line.
These features enable a conventional camera, the structure of which includes IR LEDs, to capture images of objects with a range of only 10-20 meters. An outdoor camera under such circumstances does not include the formation of images of additional ranges, but can only provide a view of a limited area. As for external sources of illumination, things are much better with this solution. An IR illuminator is a huge number of LEDs that can efficiently use the power of the power source. With such a device, you don’t have to spend a lot of energy to illuminate a large area.
When to use IR illumination
IR illumination is most often used in the following cases of video recording:
- Creation of favorable conditions for lighting. Standard lamps do not cope with the task of uniform distribution of the light flux over the entire observed area. The IR device, coupled with it, allows you to highlight shadows, equalize exposure and detail frames.
- Creating a hidden lighting system. Many security systems are effective when they operate unnoticed by an attacker. An object in complete darkness can actually be well illuminated in the infrared radiation range and all events on it can be recorded in detail on the camera.
- Improved video analytics functionality. IR illumination makes it possible for tracking systems to read and process information as accurately as possible, even in complete darkness.
- Increased data transmission capacity. Infrared lighting improves image quality at night and helps reduce the amount of data recorded and increase the speed of data processing and transmission.
- Improved images of megapixel cameras.
When choosing a video camera for combined work with IR illumination, preference should be given to models that are sensitive to radiation in this range. A good example is the SONYExView HAD CCD camera.
Simple waterproof flashlight
A simple waterproof flashlight can be made using a film can. We will need: a new can of photographic film, a 3 V LED, 2-3 reed switches, a 3 V lithium battery of size 2032 , cotton wool (case filler), a battery socket from an old flashlight. To ensure water resistance, it is necessary that there are no holes in the flashlight body. So, as a switch, you can use sealed contacts. For reliable operation, it is better to take 2-3 reed switches, since when turning along the longitudinal axis, the sensitivity of the reed switch changes. So, let's assemble the flashlight according to the diagram.
What kind of night vision device will we assemble?
- Removing the infrared filter from any of the available smartphones, that is, from its main video camera (not the front one);
- Connecting an external camera to the smartphone, from which the infrared filter is removed;
- Buying a smartphone that has the ability to record night video. Smartphones of this type already have a video camera with a remote infrared filter. However, we will not consider this method, since the purpose of our article is precisely to create our own device. However, if someone is interested in this method, we will provide a link to a number of similar devices.
- the use of special screws with shaped heads that require a special tool (which, as a rule, the DIYer does not have).
- many smartphones are assembled using heat bonding of components, which makes disassembling the case even more difficult
Test time!
After I had everything built, it would have been a shame not to make a video recording of the results. I wrote everything using OBS. Although the program is designed for video broadcasts, it is quite suitable for this type of task. The first filming was done at home, so to speak, I ran around the apartment, tried out how it would be, convenient or not.
But at home it’s all bullshit, anyone can take pictures at night using a toilet pipe, just try going outside and don’t get taken to the crazy place. And I did it!
What surprised me most about this walk was the reaction of the people. Imagine, some eccentric, in camouflage, walks around with a drain pipe, from which a bunch of wires stick out and goes into his backpack, on the other hand he looks into it.
I think I was more like a crazy ghost hunter than an explorer. But no one cared at all, they didn’t pay any attention to me, as if there were a bunch of such individuals walking the streets.
Walking with a camera in the park
What surprised me most was the unusually white, snowy color of the leaves. This was the most unusual thing.
What I saw on the screen
In short, it is better to see once than to read a thousand times! I tried my best not to photograph people, so that there would be no problems in the future, unless they accidentally ended up in the frame. If anyone got caught, I apologize.