- October 30, 2018
- Needlework
- Holly Golightly
Girls' interest in the iconic Barbie dolls has not slowed down for many decades. However, despite the huge assortment of children's stores regarding clothing and furniture for these dolls, not everyone can afford them. After all, branded clothes and household items for Barbie cost a lot of money. But don't despair. Today we will tell you how and what you can do for Barbie with your own hands.
Housing from a rack
Surely in every home there is a not-so-needed shelving unit with open shelves. Or you can buy a new one. In any case, we recommend that you use this type of furniture to create a complete home for your daughter’s dolls.
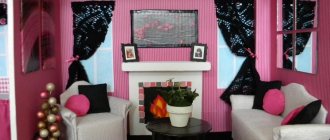
So the idea is very simple. Clear the bottom 3 or 4 shelves of the shelving unit. If possible, you can paint them. After all, it will be much more interesting for a child to play in the light or bright walls of the “house”. Typically, pink, blue, lilac, light green and white tones are chosen as the design for Barbie's home. Therefore, if your shelving is made of wood, then go to the store for paints.
Remove the top layer using sandpaper and apply paint. You can decorate all rooms (floors) in one color or in several. If you have artistic skills, paint flowers or cute designs on the walls. You can also paint windows on some of the walls. This will add even more naturalness to the rooms.
This way you will have a real box for Barbie's future house.
Why is this necessary?
Masters of puppet transformations do not have a single answer to this question. Some people don’t like too bright makeup on toys - girls, in their opinion, should see an example of natural beauty with a minimum of makeup. For others, it's just a hobby, like painting or cross-stitching. As a rule, in the homes of such people you can see a whole collection of different modified dolls.
Still others make dolls to order based on a real prototype. These can be both celebrities and ordinary people for whom this product is intended.
The fourth decided, as they say, to combine business with pleasure and began to make money from their hobby by selling their skillful crafts. After all, it’s one thing to buy one of a million identical dolls in a store, and quite another to buy a handmade toy, being sure that no one will have a second one.
House made of boxes
Another option on how you can make the necessary base for a home for dolls. In other words, walls. You will need four tall, large shoe boxes, pieces of wallpaper, a glue gun and white paint.
Let's get started:
1. Insert one box into another so that you get the letter G. Now glue the boxes together in this way. Do the same with the other two and glue them to the first piece.
2. Cut out the wallpaper to the desired size and glue it inside the box. Make the floor from oilcloth or dense fleecy fabric.
3. Apply white paint on top of the makeshift house. And if you wish, add decor in the form of windows, doors, grass, etc. This is an easy way to make a house for Barbie out of boxes.
Doll life MK cosmetics for dolls part 1
today I will show MK on the topic of how to make a mirror and powder for dolls in one container
we need: PVA glue cotton wool scissors paper (silver or white) pill box
first of all, take a pill cell and cut 2 capsules from it
this is how it should turn out
now let's fold it in half
After we have folded the capsules, we need to cut off the sharp corners so that they do not stick out. Be careful you do not cut off the fold line
Now take and cut a small square from the paper
We trace our blank and cut it out
After we have cut out the circle, we must glue it to our workpiece
Now we take cotton wool and glue it in the same way. but you need to smear glue not on cotton wool but on the tablet cell
Please note that you need to glue the empty side and there is no paper on it
if you took a lot of cotton wool, then you will have to take a stick or pencil and poke it into the cotton wool until it doesn’t fit
many of you probably took and glued plain paper, but if you glued gray or silver paper, then the job is over for you
so if you glued white paper, then you have to turn on your IMAGINATION and draw what you want to see in the mirror
there's a lot of candy and sweets and that's all until we meet again bye
Cool!
thank you
Source
Making a bed for a Barbie doll
Buying ready-made furniture for an entire house of dolls is an expensive undertaking. However, here you can do it on your own. You will need: multi-colored fabric, foam rubber and a sewing machine.
In general, in order to make a bed for Barbie in the simplest version, you need a little material and the ability to sew on a machine.
So, take an A4 sheet and place the doll on it. Did it fit? Great. Place the piece of paper on the brightly printed fabric folded in half and trace it. This will be the base of the bed. If the doll is larger than the sheet, then add the required number of cm.
Cut a rectangle of fabric and sew it along the edges on three sides. Then insert the foam inside and sew up the fourth side.
Now make the pillows for Barbie’s bed in the same way. For the inner filling of the blanket, use not foam rubber, but suitable pieces of fabric. For greater originality, you can make a double-sided duvet cover by first sewing a bag of multi-colored rectangles, and then a full-fledged blanket.
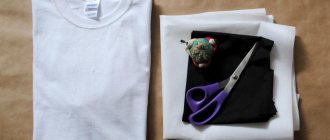
DIY clothes for Barbie
In addition to pink, Barbie loves turquoise and purple shades. To create a dress you will need knitted fabric, satin ribbon for straps, threads, beads, Velcro, a needle, a thimble, pins, old soap and a measuring tape.
- First you need to take measurements from the doll: chest and waist circumference and measure the length of the skirt.
- Make a pattern of two rectangles. One from the chest to the waist, the second from the waist to the knees.
- On the wrong side, use soap or chalk to mark the seam allowances, approximately 0.5 cm.
- Cut out rectangles.
- Place the bodice on the doll from the wrong side, mark the darts with pins and stitch.
- From the wrong side, assemble the dome of the skirt with pins.
- Sew the top and bottom together.
- Sew Velcro on the back.
- Measure the satin ribbon straps and sew them on.
You can add a satin belt to the dress or decorate it with beads.
For walks and cool weather, you can sew a jacket. To do this you will need dark knitted fabric for the jacket, pink fabric for finishing, threads, chalk or soap, and a pattern.
- The pattern can be easily found on the Internet.
- Place the fabric right side inward. It is better to place the back on the fold so as not to make unnecessary seams.
- Trace the pattern twice: once along the contour, the second time with a seam allowance of 0.5 cm.
- Cut out the sleeves, hood, back and shelves.
- Baste two shelves and the back along the shoulder seam, sew, and zigzag the edges.
- Fold the cuff in half and place it under the bottom of the sleeve with the folded edge, sweep and stitch.
- Sew off the hood and finish it with a zigzag.
- Baste the hood from the center to the edge and stitch it.
- Turn the jacket inside out and stitch the seam from the cuffs to the bottom of the front and back.
- Sew ribbons to the hood.
Below on our website https://dnevnikmastera.ru we offer you to see examples of patterns and photos of finished clothes.
How to make a dining table?
Thanks to the ideas of needlewomen who are figuring out how to make a room for Barbie without resorting to crazy spending, we can replicate some elements of the house ourselves.
For example, wooden popsicle sticks can be used to make a huge amount of furniture for your dolls. In addition, the wood lends itself well to painting. This means that nothing will stop you from painting your furniture white or pink.
Let's look at how to make a table for Barbie out of sticks. So, first, prepare: dry and clean sticks, a glue gun, wire cutters and sandpaper.
1. Place six sticks close to each other. This will be the tabletop of the future table. Now alternately apply a strip of glue to the side of the stick and glue it to the adjacent one. In this way, glue all the sticks to each other.
2. Take four sticks and use wire cutters to cut off the rounded ends. Do the same with the rest. And lightly file the ends with sandpaper to avoid splinters.
3. Now take four more and cut off the roundness from them. Or just use sandpaper.
4. Take two sticks with cut ends and stack them on top of each other. Then insert sticks between them like legs. Glue them together this way and glue them to the tabletop. Make exactly the same table legs on the other side.
5. Paint the resulting table with paint or varnish if desired.
Using your imagination, you can come up with other furniture for dolls made in this simple way.
Paper dolls
Paper doll crafts are also a good idea if you want to create additional elements for a more exciting game, for example, these could be textbooks for school or paintings for an art academy. You are capable of doing anything that your imagination can do.
No one usually thinks about it, but you can make dolls themselves out of paper. On the Internet there are many photos of crafts and doll templates with different bodies, hair colors, and faces.
You will only need to cut them along the dotted lines and glue them in some places. This is an excellent alternative because it requires almost no material investment. Yes, and you can print clothes for the characters. And then change during the game.
We recommend reading:
- Can compulsory motor liability insurance be issued by someone other than the owner?
Stencils for crafts - beautiful stencils and a master class on making beautiful crafts (125 photos + video)
Crafts with a jigsaw - 85 photos and videos on how to cut beautiful jewelry and crafts with a jigsaw
Floor lamps made of beads
Here's another idea of what you can make for Barbie with your own hands from materials that are in any home. When making a house for a doll, you want every detail to look realistic and bright. We invite you to try to build a lamp, or rather a floor lamp, for Barbie’s home from scrap materials.
Let's get started:
1. A lid from used medicine will work well as a stand. The main thing is that it is stable and has a flat surface at the top.
2. Using a glue gun, glue a round bead into the center of the lid. Place a smaller bead on it. Make a floor lamp leg this way.
3. Now take some cardboard and cut out a trapezoid. Glue its edges overlapping each other. You've got a lampshade. Then all that remains is to decorate it.
4. You can use sequins, fringe or beads for decoration. Glue any of these elements onto the resulting lamp.
Try making several lamps for Barbie's house, experimenting with the height of the leg and stand, the width of the lampshade and its decorative decoration.
Perfume
Perfume holds a special place in a woman’s life, and a doll cannot do without it. In order for the treasured bottles to appear in your pet’s cosmetic bag, you need to use all your imagination. You can take bottles of real perfumes as a sample, and to make miniature copies, use improvised means - beads, glass beads, seed beads, threads, etc.
The process of making cosmetics may fascinate you so much that you will not stop there and want to improve your skills further. On the Internet you can find specialized master classes and training videos on the topic that will help you in your business.
15.04.2014
Household items
You can also come up with different options for toy products and household items. For example, mold fruits and vegetables from hardening soft plasticine. Make boxes of washing powder or oatmeal from thin cardboard and advertising clippings from magazines.
What would a house be without cleaning equipment? We invite you to try making a broom for Barbie's house.
The manufacturing technique is extremely simple:
- Take an old toothbrush and use pliers to separate the bristled head from the handle.
- Now sand the cut area to avoid damaging children's hands.
- Next, using a glue gun, attach a thin stick to the back of the cleaning head.
Voila, the broom for Barbie's house is ready!
Making a tea set
In the same way, you can get a saucepan and deep vases intended for filling with honey, jam, condensed milk or sour cream:
- They are made from clay or plasticine balls, in which a depression is made with a finger or a stick. The bottom is formed with a thinly rolled clay sausage, connected into a ring.
- The cups are made in the same way, only the diameter of the recess is made larger, and a small handle is required here. To get a mug, you need to wrap a clay or plasticine layer around a felt-tip pen around the edge of its cap. It should be smooth, not ribbed. Then equip the future mug with a bottom and handle. After the material has dried, the product should be carefully removed from the cap, turning it clockwise.
- To sculpt a teapot, you should stock up on several balls: one large one for the base, a second smaller one for the stand, and the third, the smallest one, for the lid holder. You also need to roll the sausage, which will later become the spout and handle.
- Following the same technology, you can replenish kitchen utensils with a coffee pot, sugar bowl, milk jug and other items necessary for drinking tea with guests. To sculpt spoons, you can use clay or thin wire (to do this, use pliers to shape one end into a small half-loop, and then use a hammer to shape the base of the spoon and provide it with a tail).
Taking the work of other masters as a basis, you can create masterpieces of miniature dishes from plasticine or polymer clay. The choice of materials is not limited only to them, because you can also use the quilling technique, using which you can learn how to make a paper plate with your own hands. You can create objects from natural and improvised materials. Well, what products to make to serve on the doll table is up to the doll owner herself to decide!
Originally posted 2018-03-19 05:44:29.
Source
Dollhouse toys
If your daughter's doll has children, then in addition to the children's room, they may need toys. And you can make them yourself. For example, to make a teddy bear, you just need to glue two ears of smaller beads to a large bead. Make the paws in the same way. Draw the bear's face with acrylic paint.
Or here’s another toy option for Barbie:
- Take a padding polyester, a wooden stick and a light cloth.
- Draw a horse's face on the folded fabric.
- Cut and sew, adding padding polyester inside.
- Leave a small hole for the stick.
- Next, sew on the eye bead.
- Now insert the wooden stick inside and tie it with a ribbon for better fixation.
You've got a toy rolling horse.
Fabric doll products
Most often the fabric is used for sewing small clothes. Of course, this is not the easiest task, because you have to pay attention to the smallest decor on the products. All seams, letters, beads must be taken into account.
Otherwise, it will turn out that the fabric product will no longer look so realistic and believable.
If this is your first experience in tailoring suits, you should turn to the Internet. In its vastness you can find a sea of various lessons with detailed explanations, so as not to make mistakes in calculations and patterns.
Otherwise, your item will be too big and will not fit your figure, or, on the contrary, too narrow for a plastic character.
Clothes for dolls
Another important dowry item is clothes for Barbie. Little girls love to dress up their pets in beautiful outfits and different shoes. By playing dress-up and choosing clothes for the dolls, the young creature gets involved in the world of fashion and develops her own taste.
So, what can you make for Barbie with your own hands from wardrobe items? Almost everything, actually. With cutting and sewing skills, a needlewoman can sew almost any outfit. But not everyone has them, you say. Yes, that’s why we suggest making the simplest clothes for Barbie.
Take bright fabric and thin braid for decoration, as well as Velcro and scissors. And get started:
1. First of all, measure the circumference of the doll's chest. And also the length from the chest to the middle of the waist. Based on these data, you need to cut a rectangle from the fabric, adding 1.5 cm to the length and width.
2. Turn the edges under and stitch. Now fold the rectangle in half and sew to the middle. Sew Velcro onto each side.
3. Now it’s time for the skirt from the Barbie outfit. Measure the size you need and cut a semicircle from the fabric with a semicircular notch along the edge. Sew the edges and make light grabs along the waistband using thread. This will give the skirt a fuller look. Now bring it together and sew the two sides.
4. Attach to the top of the dress and sew these two elements together. Also sew a thin lace braid along the edge of the top and hem. And a bow on the belt. A simple dress is ready! All that remains is to try it on the doll.
Workflow Stages
First you need to understand the process of making simple objects. For example, plates for dolls:
- It’s better to take both plasticine and polymer clay (the modeling technology will be the same). Having kneaded the plastic well, you should roll it out into an even layer. It should have a thickness of up to two millimeters;
- the surface of the formation should not have convexities or sudden changes in thickness. You should try to make it uniform;
- using a cutter, a stack or small caps of the required size and diameter without internal threads, you need to cut out the base circles of future saucers and plates;
- After getting rid of the scraps, the middle of each circle should be given a round shape. To make an impression, you can use a lipstick cap or a pencil;
- for beauty, using the head of a pin, the edges of the plate can be made wavy or given a different shape. Then you can go over these decorative dents with a brush with bright acrylic;
- Place the baked polymer clay in the oven. The time for which to bake is usually indicated on the package. Self-hardening clay should be dried under natural conditions. After this, you can sand the dishes with sandpaper, completing the process with varnish.
A flat plate is made in this simple way.
Barbie mobile
The second most popular dream of many girls after a house for their pets is Barbie’s personal car. However, the prices for cars are quite high, which means that few can afford them. But fortunately, there is nothing that cannot be done with your own hands at a minimum cost. This also applies to the car for Barbie dolls.
There are quite a few ways to create a personal car for a doll. But, as usual, we will consider the easiest one. Even a beginner can cope with a similar task.
Crafts for plasticine dolls
Many interesting things can be made for a plasticine doll. These are mainly gaming items.
Most often, dishes and accessories for home furnishings are made from plasticine.
There is no need to try to make decorations for the doll itself. Plasticine can stain the toy, and it can be difficult to clean some parts.
How to make a car?
For the Barbie mobile, prepare the following: a box with a lid (medium size), a set of large rhinestones, foam rubber, black fabric, glossy paper in black and pink, cardboard, foil, corduroy, scissors, glue gun.
Sequencing:
1. First you need to decide how the seats will be arranged in the car. In any case, the driver's seat should be no closer than halfway from the edge of the box. Remember that the main task is to fit the doll's legs. And Barbie's are quite long. You can also do the rear seats, but they will have a decorative function. Or serve as a place for small dolls and things for a Barbie doll.
2. Remove the lid of the box and, turning it over, draw an oval. Leaving 5-7 cm from each edge. Cut it out.
3. Take pink paper and cover the lid of the box. Set it aside for now.
4. Start making the insides of the car. First, cover the box with paper with a zebra stripe. Cut out a rectangle and glue it approximately in the middle of the box. This will be the door. Cut out four black circles and glue them to the box as well. This is what the wheels of the car will look like.
5. Take black fabric, foam rubber and cardboard. Cut out the backs of the front seats from cardboard. You can make them merged, then you will get a cast back of the sofa. Since the cardboard is quite soft, glue several identical backs together. Don't forget to calculate the length so that the back of the chairs can be placed and glued to the bottom of the box. Glue foam rubber onto the backs, following the shape. And then cover it with black fabric, sewing the ends together by hand. Glue the seats to the bottom of the car. If desired, do the same at the back.
6. You can use a transparent table stand as the windshield of a convertible. Cut out a trapezoid with rounded edges and glue it to the inside of the car. Decorate with small rhinestones along the contour.
7. Now proceed to the headlights. We suggest making them not flat stickers on the front, but fabulous and voluminous. Cut out two small circles from cardboard. Make flower silhouettes with petals from both. Now cut two squares from the foil, twice the length of the flowers. Wrap the cardboard in foil, carefully bending the ends. Next, cut a strip of thick black corduroy. Make frequent cuts on it with scissors and fold it in a circle so that you can glue a circle of white cardboard with a drawn eye in the center.
All gluing actions are performed with a glue gun.
How to redraw a doll's face
You are reading the issue of the Cdolls.ru newsletter “All about dolls.”
The most difficult thing in customizing a doll is redrawing the makeup (face painting). But this is also the most creative and most interesting! We will try to simplify this task: for this we have collected tips and examples of redrawn dolls from customization artists.
First, some tips for beginners:
First, practice on the finished make-up: change the shape of your eyebrows, eye color, and plumpness of your lips. This way you will become familiar with the materials, feel how paints apply and how the brush behaves, and get used to painting on a three-dimensional surface.
Monster High doll is ready for redrawing
The next step is to practice on inexpensive dolls to improve your hand and learn how to fix it. It’s good to study on dolls with enlarged facial features: Monster High, Pullip, Blythe, Liladoll, Neo Lucia, etc.
When moving on to painting a face from scratch, always remember the golden rule of any artist: paint in layers. Start applying the paint very lightly and build up the desired intensity of color layer by layer. This way you will avoid rough lines, and the doll's facial features will look more natural.
Applying blush to the face
Secure each layer with clear. This will allow you to erase the unsuccessfully drawn next layer without losing all your previous work.
Remember that with such small work, every barely noticeable line is important - it is thanks to these almost imperceptible strokes that the character of the doll is created.
And don't forget about the glare on your eyes. For a more realistic effect, you can use a glossy varnish.
Think over the make-up so that it expresses the character and style of the doll, complements its costume and image.
Option to redraw makeup for a Monster High doll
Preparation
1. Find makeup for the doll in a magazine or draw it yourself. At first it is better to do this; with experience you will learn to do without this step.
2. Remove the head from the body (preferred) or wrap the body in a white cotton or linen cloth to prevent it from getting dirty. We described how to remove the head from the doll's body here.
3. Remove the doll's hair: remove the wig or wrap the permanent hair with a cloth and cling film to prevent the fixative from damaging it.
Monster High doll with curled hair, ready for makeup
4. Erase the doll's makeup with 100% acetone - it works best on vinyl, but do not touch the body and neck, because Acetone can damage plastic. Work with cotton pads and cotton swabs. Then wash your face with water and laundry soap, pat dry and let dry.
5. Find a well-lit work area. Ideally, it is better to draw in daylight. It is convenient to use a fluorescent lamp on a tripod.
6. Use a magnifying loupe (2-3 times). It can be attached to a table or on your head. Believe me, this will be a very good solution: this way you will be able to see the smallest details and avoid minor errors, which will then be very clearly visible in photographs of the doll. In addition, a magnifying glass will help prevent damage to your eyesight.
BJD doll make-up option
Materials and tools
For a good result, it is important to choose good materials and tools. You can use cheap ones, but they will be more difficult to work with.
Brushes
You will need different brushes for different areas of the face (see picture).
From left to right:
- Large fluffy brush for creating and blending blush
- A very thin brush for drawing small details (lips, eyelashes). You can take a synthetic brush, for example, for nail art.
- Another thin flat brush for drawing fine lines of eye and eyebrow makeup.
- A flat brush with short, stiff bristles for drawing shadows on the eyelids and creating shadows on the wings of the nose.
Brushes for painting a doll's face
Below we provide a list of materials that artist Adele Poe uses in her work.
Pastel
Pastel crayons are good to use for blush on the cheeks, as well as body brushing. We touched on this topic a little in our article How to brush the body of a BJD doll.
Watercolor paints
Use watercolors when you need to emphasize something: lips, eyes, some parts of the body. Apply paint in transparent layers. Watercolors are good for creating natural lips because you can thin the paint down to a transparent, pure color.
How to draw lips
Matte fixative spray, gloss and matte varnish
For example, spray Mr. Super Clear UV Flat is specially formulated to adhere to vinyl and polyurethane. Just use it in a well-ventilated area or outside; and it's better to wear a mask.
After each coat of paint you like, be sure to seal it. There are quite a lot of fixers (or, as they are also called, “clears”). This will help you save the previous work done. If all the previous layers have been fixed, and you paint the last layer unsightly, you can simply erase it with a damp cotton pad. And you won’t have to start all over again: you will paint only from the last layer. Try to achieve 5-6 layers of sealer.
Fashion Royalty doll make-up option
Apply glitter or matte varnish to the sclera (the white part of the eye) until the iris and pupil are drawn. This will make the eyes more realistic. You can also make your lips shinier. Both products can also be used as a finishing treatment to enhance color saturation.
Watercolor pencils
Use sharpened watercolor pencils to draw small details: eyelashes, eyebrows, etc. The fact is that watercolor pencils do not contain oil, so the line they draw remains smooth and bright. Especially over topcoat. But remember, what works on paper won't necessarily work on hard surfaces.
How to draw eyes
Acrylic paints
Sometimes, to achieve the desired result, you cannot do without rich paints, such as acrylics. For example, acrylic paints are suitable if you want to paint very bright lips or searing black eyes. Acrylic paints can be diluted with water without losing their brightness. And one more hint: it’s good to use white acrylic paint as the first layer to prepare the face for further painting.
Option to redraw the Monster High doll
Drawing a face
Next, we offer an approximate sequence of steps when drawing the makeup of a doll from Ladi-in-Window.
Remove the head from the doll's body or wrap everything except the face in natural fabric or cling film, and cover the doll's hair. This is necessary so that the fixative is applied exclusively to the doll’s face, so that the border is not visible. Cover the face with a layer of sealer to prevent damage to the doll's material and to create a base for applying paint.
1. Draw the shape of the eyebrows, sketch out the shape of the eyes and lips to get a general idea of the facial expression.
2. Fill the eye sockets with white, including the inner triangle of the eye.
3. To add volume, draw shadows. Add shadows and strokes to the eyebrows.
4. Barbie has a rather flat eye shape, so you need to add shadow to the eyes. A little light blue or gray in the outer corner of the eyes and along the inner contour of the eyes (see photo).
5. Add shadows on the eyelids, draw the iris and pupil.
6. Draw eyelashes and eyeliner around the eyes. And the finishing touch: the sparkle in the eyes.
7. Lip detailing. Fill the lips with color, draw the lines of the lips (from the closed part to the outer part). Add shadows and matte polish.
8. Last step: apply blush to your cheeks.
We hope our article will inspire you to get creative. Good luck!
And if you want to go further and change not only the painting, but also the shape of the doll’s face, read this material.
Based on materials from adelepo, Lady-in-a-Window, iamloveddolls.
Photo by adelepo, Lady-in-a-Window, iamloveddolls, debi-chiru (deviant-art), gattina*(flickr).
Dear users, if you don't want we to use your photo just write a comment and we will delete it. But before doing it consider the following: leaving your photos here will help other collectors to choose a doll. We all like to share our joy and passion for dolls. Thank you.
Dear users! If you do not want us to use your photos in this article, write us a comment indicating the photo and we will remove it. But before you do, we ask that you consider that by being here, your photos may help other collectors make their decision about the doll they want to purchase. After all, we all love to share our love for dolls. Thank you.
To order any doll
Call us
Write to us:
In the “All about dolls” newsletter:
discounts and promotions, doll news
and interesting stories about dolls and authors.
The “All About Dolls” newsletter: discounts and promotions, new doll products and interesting stories about dolls!
Car decor
When the main and most difficult part of the work is completed, you can start decorating the car. As mentioned above, you will need rhinestones for decoration. But you can also use braid, sequins, beautiful flat buttons, original stickers, etc.
Apply a thin line of the future pattern with a glue gun. It can be either smooth with curls or geometric.
Glue pink circles of smaller diameter in the center of the wheels and also decorate them with rhinestones.
This is just a little that you can do for Barbie with your own hands with minimal time and money.
Shine, surprise, inspire: three rules of makeup
As children, we enjoyed experimenting and knew how to make it even better by adding oriental arrows or breathtakingly long eyelashes. Now we decorate ourselves and don’t go out without preparing. Who else but a true lady knows that makeup creates the mood for the whole day. If you want to be a light and playful coquette, ask Barbie for advice. A girl in this style is distinguished by:
- refined taste;
- good manners;
- and most importantly - a sense of proportion.
The last rule is especially important to ensure that the doll’s makeup looks harmonious and not defiantly unnatural. In order for your skin to shine as if made of porcelain and have a velvety matte finish, special attention should be paid to the textures you use.
To prevent makeup from running away (this is true for all skin types in the summer), use mineral powder that matches the tone of your face and neck. It will provide gentle skin care, eliminating oily shine and allowing it to breathe.
Fans of the American diva are willing to arm themselves with the following life hack: dense, opaque textures of blush, foundation, powder and other cosmetics can be excellent helpers in masking imperfections, but the joy from this will last literally one evening. The use of such beauty tools sometimes leads to unpleasant consequences: pore contamination and redness. It can also cause your skin to look unhealthy overall.
Real Barbiegirls are careful about their appearance, so they carefully read the ingredients on the back of their miracle jars and palettes. They know that cosmetics that combine decorative and care properties are an excellent option for creating a unique image and improving facial health. That is why you should give preference to mineral products, because they will not only help you transform, but will also provide the necessary level of protection from environmental influences.
How to remove marks at home?
Ballpoint pen ink contains oils that can penetrate deeply into soft plastic, vinyl, or foam rubber. To quickly and effectively clean your favorite doll at home, you can use available products.
Lemon juice
A small slice of lemon or a pinch of citric acid will remove fresh ink stains from dolls made of rubber or vinyl .
The exposure method is suitable for fresh dirt, for the most exclusive toys, since the juice will not lighten the rubber.
You need to take 1 piece of lemon or ½ tsp.
acids. Rubbing process:
To protect the toy from damage, it is better to first wipe the area behind the doll's ear, at the back of the hairline, or in any other inconspicuous place.
Melamine sponge
The melamine sponge looks like a piece of white foam rubber and feels like glass or sandpaper. When wet, the sponge becomes pliable and soft. The surface is covered with small tendrils, which enhance the grip on dirt.
The process of removing pen stains with a melamine sponge:
Do not apply any household chemicals to the surface of the sponge, as this may provoke a dangerous chemical reaction.
An effective solution of bleach with vinegar
The combination of vinegar and bleach has a powerful cleansing effect. The method is suitable for cleaning a doll’s body or face without factory makeup. The smell of the product is quite pungent, so it is better to carry out the manipulation outside or in a ventilated room.
Required:
Removal step by step:
The video will show you how to wash the pen off the doll’s face:
Stain removers: Domestos, Vanish
Stain removers are most effective for removing gel pen from the rubber parts of the doll. For cleaning you will need 3 tbsp. l. stain remover and 1 liter of warm, but not hot water.
Ink washing method:
If there is a lot of paste, it is recommended to repeat the procedure.
Remove with vegetable oil
Vegetable oil softens the rubber texture and allows cleaning agents to penetrate deeper into the dirt.
Required:
Cleaning process:
Wipe contaminated areas with a toothbrush and rinse with warm water.
Acetone or nail polish remover
Acetone-free nail polish remover is an all-purpose cleaner that can easily remove ink from fabric, leather, and rubber.
Pros of wooden combs
The main advantage of a comb made from natural wood is its environmental friendliness. When in contact with the hair and scalp, such an accessory will not release harmful chemical compounds, but, on the contrary, with the help of healing essential oils, it helps improve the overall condition of the curls.
In addition, a wooden comb will not electrify your hair. Daily brushing will make them smoother and shinier. In addition, oak or juniper products will help cope with such an annoying problem as split ends.
If you have already asked yourself a question, do not rush to go searching, perhaps you yourself, or someone from your environment, will be able to cut it out. We will tell you how to do this below.
Baby shampoo
You don't need to use shampoo too often as this can damage your hair. Hair conditioners contain oils that can eventually damage your doll's hair, so it's best to choose shampoo instead.
Fill a bowl or cup with cool water. Choose a bowl that is large enough to hold all of your doll's hair. The water temperature should be cooler if your doll has curly hair. Hot or warm water can cause hair to lose curl.
- Also in Myshop
Add half a teaspoon of baby shampoo. Mix shampoo with water until completely dissolved.
Do not replace baby shampoo with regular shampoo!
Shampoo for babies is definitely safe for dolls, but the same cannot be said about regular shampoo. A shampoo for sensitive skin or weak colored hair may be suitable, but the best product is one that is suitable for bathing babies from birth.
Soak your hair and rub the product in with your fingers. Continue massaging the doll's hair until foam appears.
In addition to baby shampoo, you can dilute dish soap in water.
Leave for 10 minutes. This will help remove tangles and make your hair soft and shiny.
Rinse thoroughly, several times, until the water is clear.
Dry your hair a little. You shouldn't comb your hair when it's wet, but if it's a little damp, you should. To dry, you can hang the doll upside down and let it drain a little, or dry it with a towel.
When the hair is dry but still damp, we begin the combing process, as in the previous method.
Combs made from natural materials - wood. Advantages and disadvantages
Before the advent of carbon combs, this natural material was considered the most gentle for hair. A properly processed wooden comb is much safer for your hair than, for example, metal.
However, it was combs made of wood that lost ground long ago. Massage brushes - yes, please, but wooden combs for professional use are almost never made. Why? Because how do you shape wood into the shape of a modern shading comb? Firstly, it will be expensive - there is so much to cut out of a piece of wood. Secondly, the strength of thin teeth will differ little from the strength of a toothpick. Who needs it?
So at Mustang we use wood in massage brushes, where its gentle qualities come in handy - and we make working combs from other materials: