You don't have to buy a coffee grinder in a store. You can do it yourself. True, for this you need to have at least minimal engineering skills. You cannot do without the ability to work with a soldering iron and knowledge of the basic laws of working with electricity. Otherwise, you won’t be able to figure out how to make a coffee grinder with your own hands.
About the purpose of the device
Grinding simple coffee beans is the main function of any coffee grinder, regardless of whether we are talking about an electric or mechanical model. Sometimes devices are used to give cereals the form of finely dispersed simple powders. In this case, the reinforced design of all parts is important. Therefore, you need to study the instructions on how to make a coffee grinder at home.
Many people are able to grind spices using a coffee grinder.
The operating principle of the coffee grinder device is described as follows:
- First, the coffee beans are loaded into a special hopper. It is usually installed at the top of the structure.
- Inside the bunker there are millstones that grind the grains into a fraction of the required size.
- A simple bunker is installed below, and the finished powder is collected in this part.
- Additionally, simple buttons are installed to regulate the degree of grinding. There are often switches and portion counters, or a dispenser lever. A DIY coffee grinder is no exception.
A little history
The birth of the electric coffee grinder was noted in history on April 3, 1829. On this day, James Carrington received a patent for his electromechanical invention. Until this point, grinding coffee was done manually, using a manual coffee grinder. Its structure was a smaller copy of a mill, and the crushing of coffee beans occurred by grinding them between two millstones. With the use of an electric motor, two designs of coffee grinders appeared. One uses the same traditional millstones, and this type is called a millstone. In another, the role of the grinder was taken on by metal knives rotating at high speed and therefore the coffee grinder is called a rotary grinder.
Types of coffee grinders
It is worth taking a closer look at each type of coffee grinder to make a decision about what is needed in a particular case.
- Manual models.
Supplied with details in the form of millstones. First you need to operate the handles on the top of the devices, then these parts will spin and grind the coffee.
- Rotary devices of coffee grinders.
With a small volume, it allows you to prepare drinks for several people. The engine and the main mechanisms of the device speed up the work and grind the grains in the shortest possible time.
- Coffee grinder burrs.
The highest quality, most common variety. The inside of the container is equipped with millstones, and grinding occurs as they move closer to each other.
The latest type of coffee grinder is considered optimal for constant use. In this case, a do-it-yourself coffee mill is the easiest to assemble.
Changing the grinding fineness
Changing the grinding fineness allows you to grind coffee of any fineness for different purposes - from a coarse fraction for a French press to a dusty state for a Turkish coffee.
How does grinding fineness change?
There are 2 options - stepped and stepless and depends on the type of housing. The stepped one is used in coffee grinders with a European body and without a body, the stepless one is used in Turkish coffee grinders.
In the step version, the adjustment does not occur smoothly, but with some steps. To change the fineness, you usually need to unscrew the screw on the handle and turn the adjuster.
In the stepless version, just turn the screw that secures the handle, and the grinding fineness will change.
What materials can be used for manufacturing
It is necessary to decide in advance what exactly will be used in this work.
Of all the types of raw materials for coffee grinder parts, the following are the most widely used:
- Ceramics.
- Metal with the addition of titanium coatings.
- Stainless steel.
- Metal.
- Plastic.
Metal and high-strength ABS plastic are often used to make the body of coffee grinders. The latter type reduces weight, but there is a high probability of increased wear of parts and various parts. Metal devices are more reliable, including a DIY coffee grinder.
Stainless steel, titanium-coated metal, and ceramic are the most popular types of materials used to make coffee grinder burrs and other parts. Ceramic-based parts do not heat up and boast increased resistance to moisture. But getting foreign objects inside can lead to breakdowns of these parts. In terms of reliability and strength of parts, metal still remains the leader. If it has a titanium coating, devices and parts last even longer. Anyone can figure out how to assemble a manual coffee maker.
MYY48/MYM51
I'll start with Chinese coffee grinders purchased on a popular global trading platform.
Excellent coffee grinders in terms of design, convenience and ergonomics. An excellent option for an alternative, especially on hikes and trips where you need to save on the weight and volume of things. Therefore, the MYY48 was chosen as a hiking coffee grinder on a trip to Nepal and a visit to Everest Base Camp. I didn’t use it for grinding under espresso because of the slight play in the axle.
Since we were able to purchase both coffee grinders at a fairly low price with discounts, we can give them a bold 5 in terms of price/quality ratio.
Minuses
- Minor shortcomings in the quality of the millstone assembly (there is a slight play between the axle and bearings on my copy). But this minus is overshadowed by the pluses.
pros
- It is comfortable to hold in your hand due to the perforated case. Fits like a glove.
- Compact and with a nice design.
Features, design, equipment
The hopper fastening is threaded. The handle is removable. Available now with two types of millstones. G1 and GS2 Titanium with titanium coating produced in China.
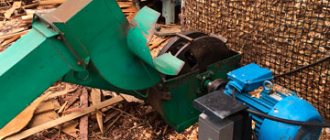
Assembly procedure for mechanical coffee grinders
You can assemble the following set with tools for making parts and coffee grinders:
- Wooden bars.
- Simple board.
- Fastening elements.
- Files.
- Strong vice.
- Chisel.
- “Skin.”
- Grinding machine for finishing corners.
- Simple drilling machines.
- Tin sheets with medium thickness.
Electric motors. You can take new ones or those varieties that have already been used before. A manual coffee grinder does not need them.
The assembly stages of this type of device are described as follows:
- The smaller the electric motor you choose, the better. Typically, power up to 300-700 W is enough. It is disassembled, the stator and rotor are separated from each other.
- A hole with a diameter of 8-10 millimeters is drilled inside the rotor, the minimum depth is up to 7 millimeters. The distance is no more than 9-16 millimeters. Some of the holes are located longitudinally, along the rotor axis of the engine of the device. It is necessary that there remain longitudinal lines running from top to bottom of the part.
- Using special grooves of 4-5 millimeters, the holes are connected to each other, the maximum depth is up to 5 millimeters. It's best to use a grinder to create grooves in this part of the grinder. Before starting work, this device is strictly fixed in a vice. At the bottom of the rotor, the grooves are processed especially carefully.
- The chamfer is removed from the top of the rotor. This is the next stage of working with details.
- The rotor is inserted into the motor stator. Small holes are also drilled in its lids into which grains are loaded.
- The loading container is easy to construct from a sheet of tin. The parameters of other parts depend on the engine dimensions. The top fastening is used to complete the work with the parts.
- A special handle is mounted on the shaft of the electric motor. It is this that gives the design of the coffee grinder the rotation effect. You can experiment with the appearance while working. A pin and bolt will help secure the parts.
- The coffee grinder is fixed on a special board.
- Tests are being carried out on finished devices to try out a simple grinding mode. It is better to set the indicator to several revolutions clockwise, and the same number – counterclockwise. A homemade coffee grinder made from a grinder is ready.
Important! Periodic simple cleaning is necessary for any coffee grinder rotor. It is not recommended to pour grains in large portions; because of this, the inside of the machines quickly becomes clogged and stops working.
Feldgrind 2
Feldgrind2 or Feld2 for short, also the brainchild of the Scottish company Made by knock, is the second version of the Feld coffee grinder.
pros
- Design.
- The build quality is better than my failed Aergrind. The axis of the millstones does not dangle in the bearings.
- Relatively compact. I often take it on hikes and outings outside the city.
Minuses
- The hopper is attached to the body using a rubber ring, which wears out during operation, and as a result the hopper tries to jump out.
- The coffee grinder handle is fixed to the lid, i.e. can be removed together with the cover, which creates minor inconvenience during transportation.
- Inconvenient grind adjustment. The grinding is adjusted by turning the knob relative to the fixed lid with a dial, and when the knob is removed, the grinding value on the lid sometimes gets lost, so you have to adjust the axial attachment points of the lid to the body. In the first version of the coffee grinder, the handle was removed separately.
- In terms of grind quality, it seemed to me that the Feld2 was more dusty than, say, Comandante, Kinu or electric coffee grinders with large burr diameters. I judge by how the AeroPress filter gets clogged with coffee dust and by the resistance when pushing the piston, respectively. But I do not have the technical ability to determine the amount of dust in the grind, so my opinion is purely subjective.
- Due to the relatively high body, the coffee grinder is unstable and tries to fall, so I store it disassembled, the body separate from the hopper.
Features of assembling manual coffee grinders
Here you cannot do without the help of such a set of tools for making parts:
- Dye. It is better to take acrylic varieties.
- Coffee beans.
- Stainless steel lids.
- A glass of yogurt.
- Wine corks.
- Medium size spatula.
- Furniture handles.
- Knives.
- Silicone glue is at a fairly high temperature.
- Plywood sheets, or simple inexpensive chipboard.
- High density cardboard.
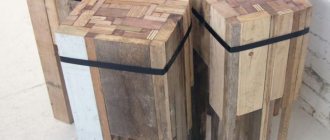
Do-it-yourself assembly from an angle grinder without this tool also has step-by-step instructions.
- A square-shaped piece of chipboard or the same plywood material will serve as a stand for the coffee grinder. Standard sizes are 14 by 14 cm. But you can change this figure depending on personal preferences.
- Carefully cut out 4 rectangles from cardboard, each 12.513 cm.
- Three sides of these forms are glued together with glue.
- The size for the next simple shelf needs to be measured especially carefully. The cardboard device is glued at a height of up to 3-4 cm from the bottom of the structure.
- Then the last of the rectangles is glued on top. It usually has a cutout for a drawer. It is at the same level as the cardboard shelf.
- All that remains is to cut out the other parts of the coffee grinder box. The size of each part is chosen depending on the choice of specific dimensions. At the end of the work, the structure is glued together using all the parts.
- The front side is approximately 9 by 4 centimeters or 3 by 7.5 cm.
- Separately, cut out the parts for the lid and attach the handle to them.
- Place the box on preheated silicone glue.
- Making a coffee grinder involves using a cardboard circle and a board, a furniture handle, a wooden ice cream stick, and a yogurt container.
- Gluing the lids and boxes together, the cardboard with glue is on top. Next comes fixing the stick and furniture handle. The board comes last.
- The surface of the product is painted with acrylic paint. Black shade is most often chosen. We have to wait until everything dries. Then you need to cover the structure with a white layer. If desired, you can choose other shades for a decorative effect.
- You can add other details for decoration.
- Decoupage a coffee grinder using a napkin. The work is completed.
Interesting. The coffee grinder does not need to be turned on at full load right away; it is better to test it first. Then it is easier to find out the strength limits and identify shortcomings if they were made. It’s not that difficult to assemble a coffee grinder from a grinder with your own hands.
Additional Tips
It is not recommended to store ground coffee inside the device for a long time.
It is best to wipe the inside of the container and blades with a cloth every time you use the grinder.
There is no need to immerse the entire coffee grinder in water. You can limit yourself to just wiping the surfaces.
A blender is used to grind other products; this is the optimal device.
If the body is plastic, then the likelihood of rapid failure increases, as with other parts. More often, modern coffee grinders are made of metal. The main thing is to promptly change the millstones or blades after they become dull. The drawing also helps to understand.
Millstone
Millstones for a manual coffee grinder are made in the form of cones, one of them is fixed, the other is movable. By moving this millstone, you can change the fineness of the grind. But more on that later.
Millstones are usually made from:
- Cast iron
- Hardened steel
- Ceramics
- Stone
What influences the material of the millstones?
The taste of the coffee, the uniformity of the grind and the durability of the grinder. Let's take a look at what each material is.
The cast iron in a manual coffee grinder is very good - durable, not afraid of impacts, very wear-resistant and cheap. On the other hand, cast iron millstones gradually grind down and these shavings end up in the coffee. Therefore, the coffee begins to give off a “metallic” feel. In addition, cast iron has a porous structure and absorbs odors well. Therefore, if you often change the type of coffee, the smells of the previous varieties may get into the new one.
Hardened steel is also good for durability. Its resistance to wear is somewhat lower than that of cast iron, so such millstones wear out somewhat faster. This problem is solved by coating the millstones, for example, with titanium. But this measure greatly increases the cost of the coffee grinder. Although the option turns out to be almost ideal - durable, wear-resistant, the dense and smooth structure of titanium does not allow odors to be absorbed and is easy to clean.
Stone millstones are an ideal option, but very expensive. Usually made from an alloy of ceramics and corundum. Why are they so good? Firstly, it is an environmentally friendly material. Secondly, stone millstones are the only ones that can grind coffee “to dust” for cooking in a Turk. Other materials cannot do this. Thirdly, the complete absence of foreign taste. The impact resistance and abrasion resistance of such millstones is excellent. If you don’t throw it away, you can give it to your grandchildren
What to choose?
If funds allow, then feel free to choose a coffee grinder with stone millstones. The only negative is that there are only a few models on the market, so there are no special alternatives.
What other nuances should you know about?
An important point is the correct installation of the mesh inside the coffee grinder; the performance of the device largely depends on this. A small protrusion is made at the bottom, just like on the ceiling. The sizes of the circles in each part must coincide with each other. The mesh, due to its elasticity, is independently built into place. Ensuring the correct position of the parts is not so difficult.
The main thing is to assemble such models of coffee grinders so that you can easily replace any of the parts or parts when the need arises.
Don't forget about additional protection. Motors often stop if the shafts become jammed. This occurs when overheated windings melt a fuse.
Be sure to connect the surge protector to the electrical part. Such devices are sold ready-made for washing machines. If necessary, the part can be easily assembled independently, based on a capacitor. Or you can look at washing machine websites, which provide detailed diagrams for internal electrical connections.
All that remains is to copy the element you like and assemble it. This helps protect home appliances from voltage changes.
You can borrow circuits for regulating speed from a food processor. The specified device already has all the necessary degrees of protection. But most combines cannot boast of high efficiency. Indeed, in most cases, people do not measure the energy consumption of devices that operate for no more than 15 minutes.
Washing machines usually have a Hall sensor, which is responsible for speed control.
In the specialized literature you can always find several simpler schemes. The main thing is to take into account the amplitude of the interference that is created by the collector spark. But even the highest quality boards will not completely protect the motor from stopping.
Hall sensors seem complicated, but they will allow you to fully control the work. Often, sanding wheels are generally mounted on rubber plates. This option is not always suitable due to the high probability of surface wedging.
Grounding for coffee grinders is also required. This is necessary to protect against electric shock. Although the device is, in principle, not intended for long-term operation. If it is necessary to process large volumes, it is permissible to use bimetallic plates, which simplify temperature control in the engine.
One of the common options is spare parts for an oil heater.
Standard breakdowns and their fixes
There are several types of malfunctions that device owners may encounter, even if they are made by themselves.
- Broken power cord, bad contacts in the socket.
You need to find the break point using a voltage indicator. Then it will be easier to restore the current, clean the contacts and isolate the junction.
- Damaged switch, stuck engine blocking drive.
In this case, the faulty switch is simply removed from the device. A new part is installed in place of the old part. Thoroughly clean the engine blocking drive, while the cover must remain open. Then you just need to carefully work out the free play.
- The motor runs intermittently. The speed of rotation of the working shaft changes briefly, or stops occur when the start button is turned on.
There is a high probability that this is due to worn brushes. Then simply replacing them is enough.
Sometimes this happens if the collector is dirty. It must be cleaned and wiped with a cloth soaked in cologne and alcohol.
Rewinding coil windings is a more complex type of repair. In most cases, you can easily do without it. It’s easier to replace the entire motor, which saves time and money.
Often owners of coffee grinders are faced with the fact that the bearings have failed. Usually, rubber boots are used to protect parts, but no one is protected from fine dust getting onto the working surface during grinding. Because of this, the armature of the electric motor begins to jam.
But solving the problem with parts is not so difficult. It is enough to clean the bearings and lubricate them with any type of mineral oil. After completion of such work, the parts will last for a long time.
If the knives start to jam, the reason is clearly that the motor winding has burned out. It is almost impossible to correct this situation at home.
Another thing is that if the device’s motor operates under voltage, burning smells appear. Here the reason most likely lies in contamination of the sliding bushings or bearings. You will need to free the shaft and wipe the part near the device with alcohol. Sandpaper or WD-40 is used if you are faced with obvious signs of corrosion. Then the work will become easier.
If a large amount of simple dirt is noticeable on the collector, you can also wipe all parts with alcohol.
How to grind coffee and use the unit correctly
True gourmets of the drink claim that when preparing coffee, the most important thing is its correct grinding. There is a whole science that describes all the nuances of this seemingly simple operation. Due to the fact that the popularity of drinking coffee has recently become enormous, specialized professionals in this field of cooking have emerged. Sometimes their opinions differ. However, when it comes to grinding coffee beans, experts are inclined to believe that proper grinding occurs either in a manual coffee grinder or in an electric one equipped with millstones. A rotary coffee grinder grinds less evenly, and the resulting final product contains particles of different sizes. In addition, at high speeds of the knives, the coffee burns, which leads to a change in its taste.
The grinding time should not be long. As well as the time from grinding to brewing the drink. The longer the coffee is ground, the more essential oils evaporate. Therefore, the optimal grinding time is considered to be no more than 20 seconds.
Over time, the coffee grinder began to be used not only for coffee. You can crush nuts, eggshells, cereals, salt, sugar and other bulk food products in it. For example, at home using a coffee grinder you can make powdered sugar from ordinary loose sugar.
To obtain powdered sugar, you need to load a certain amount of granulated sugar into the coffee grinder container and turn on the engine for a few minutes. To obtain high-quality powder, you need to bring the consistency of the powder to the state of fine dust. For a fragrant smell, add a little vanillin or vanilla sugar.
In culinary practice, powder mixed with fragrant nutmeg is also used. To do this, first grind a well-dried nut, and then add sugar to it and grind it all together.
How to disassemble a coffee grinder if necessary
The design of all devices remains approximately the same. The sequence of actions for the parts will be as follows:
- Be sure to release the knife of the device. To do this, a slot is found at the bottom of the case, a screwdriver is inserted into it, and the part is unscrewed counterclockwise. This also works for homemade devices.
- Usually, immediately under the knife there is a plastic nut or other fastening element of the devices. These parts are unscrewed with a spanner wrench and pliers. They go left or right, continuing to work.
- A plastic or other cup holder with a glass is also dismantled.
- A washer made of metal is removed from the holding axis.
- To get rid of the plate, simultaneously press it together with the blocker. Then this part of the device is turned counterclockwise until it comes out of the grooves.
- The fixing spring of the device is bent and the switch is released.
- The dirt-proof type of washer is removed from the axle.
- The ring at the bottom of the case is moved aside, the screws that secure the wire are unscrewed
- Pull out the engine of the device, of any type.
When the knife is removed, there is a high probability that the slot on the device will be torn off. After this, it will be impossible to completely disassemble the device. Therefore, it is better to pre-treat the part with WD-40 and wait a little. Then it is easier to unscrew all types of fasteners, and parts of the coffee grinder come off faster.
In most cases, the process of disassembling parts and devices should not be a hassle. It is enough to get rid of 2-3 screws, which are located in the lower part of the case. Sometimes you have to work with the latches to remove parts if necessary.
Final tips
The millstone of the device can be replaced with an emery wheel; it does its job perfectly. The degree of grinding is regulated by the mesh, so it becomes mandatory for any device. If this part is installed incorrectly in the device, the holes and protrusions will not match, and the parts will not give the desired result. Work will be stopped.
3 hinges on the bottom and ceiling of the coffee maker are used to protect and increase the reliability of parts and various parts. They help prevent emergencies, from the simplest to the most complex.
Download a video and cut an mp3 - we make it easy!
Our website is a great tool for entertainment and relaxation! You can always view and download online videos, funny videos, hidden camera videos, feature films, documentaries, amateur and home videos, music videos, videos about football, sports, accidents and disasters, humor, music, cartoons, anime, TV series and many other videos are completely free and without registration. Convert this video to mp3 and other formats: mp3, aac, m4a, ogg, wma, mp4, 3gp, avi, flv, mpg and wmv. Online Radio is a selection of radio stations by country, style and quality. Online Jokes are popular jokes to choose from by style. Cutting mp3 into ringtones online. Video converter to mp3 and other formats. Online Television - these are popular TV channels to choose from. TV channels are broadcast absolutely free in real time - broadcast online.
conclusions
Making a coffee grinder at home is not that difficult. Moreover, if you have at least minimal technical and everyday skills in working with parts. It is enough to be patient and ensure that all conditions and rules are followed. Manual and mechanical types of devices differ from each other, but there should be no problems during assembly work. The main thing is not to be afraid to experiment and follow the instructions for assembling the parts. Problem areas and details usually quickly catch the eye and are difficult to miss. All that remains is to eliminate defects in various parts, so that later operation and simple work can continue.