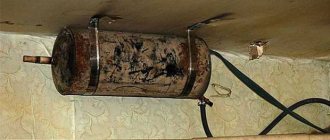
I used a 20 liter gasoline can as the basis for my DIY mini bar project. You can easily find one at your local store.
Materials:
- Canister approximately 20L
- Rubber seal (about 2.5 m long), like this: link
- Small screws, bolts and nuts
- Wood screws
- Hecks
- Loops
- Rivets
- Plywood 1 cm thick
- Polyurethane adhesive (for windshields)
- Matte black spray paint
- Clear primer for coating
Equipment:
- Drill and bits
- Tabletop and saw for cutting plywood
- Tool for fastening rivets
- Incisors
- A circular saw
- Drill
- Instruments for measuring and marking
I'm doing the calculations
After some thought, using a marker and a ruler, I mark the lines on the canister along which I will cut the opening. To get a nice and round corner shape, I used a plastic cover as a template.
Creating internal shelves
I measured and cut the necessary pieces from plywood. The interior was specially made with three sections for dedicated items:
- on the left for soda cans;
- middle for glasses;
- the right one is for a bottle of alcohol.
Gluing the parts together
In the middle section, two pieces of plywood have been added for separate storage of glasses. I glued all the elements together with wood glue, clamped them with clamps and left them to dry completely.
After that I applied 2 layers of clear varnish.
DIY island in the kitchen
My kitchen is quite large, so I could afford to arrange it in such a way that it would be spacious and convenient to use all its “benefits”. I decided to make a kitchen island, which is fashionable in the West, and it turned out that this was an excellent solution - it was very convenient to use. I will share my manufacturing history.
My goals when creating the island were the following:
- there will be a large dining room and work area;
- add food storage space in the kitchen;
- With this island there will be room for free movement inside the kitchen.
Step 1. Getting started
First I need to create the frame and vertical supports for the future kitchen island. I have to build them so that I can attach the rest of the structure to them in the future. To do this, I used 4.5x9.5 cm boards. I fastened them with metal perforated fasteners.
The frame is a necessary part of any structure
Step 2. Working with the upper part of the frame
On the vertical supports I also used the same sized boards and the same perforated fasteners. The result is a square structure on which the entire island will be located in the future.
Inside this structure I installed one board crossing half of the top of this structure. Why half and not the whole board? This is necessary for the next stage.
This is what the main structure looks like on which everything will be attached
Step 3. Alignment
To that half board I installed a long board, the beginning of which is at the very bottom, and the end is located above this structure.
Below I installed two boards in the form of a cross and at their intersection I secured that long board using corner fasteners.
Of course, I aligned the pillar both vertically and horizontally.
Important ! Once the post is installed, you need to install the center piece of the top of the island. It is better to do this before all other parts are delivered.
A pole is required for a suspended structure
Step 4: Fixing the top
I used the same wood as before. At this stage the task was to fix the upper part. To do this, I completely secured the post from the top of the frame (added three more half boards).
I then quickly made an H-shaped structure that needed to be secured to the top of the post using the same boards and fasteners. Next, I took a special metal support, which I installed in the very middle of the post and the H-shaped structure. It should hold the structure as straight as possible.
This support had holes that I used to attach hooks and a cable with a carabiner. I used hook screws to secure the boards and cable. Four such screws equal four cables.
It is quite difficult to install all these parts on top of the pole
Step 5: Installing Lower Shelves and Covers
To support the three shelves, I used the same metal fasteners and boards that I had used previously. Square holes were made in the center of each of the boards so that they fit into the post standing in the middle. By the way, the lumber I used was 18 mm thick, which was quite enough for using them as shelves.
I then used square boards to cover the sides of the entire structure.
The island is starting to look nice
Step 6. Assembling and hanging hanging shelves
For the hanging shelves I also used 18mm thick boards and long, even very long threaded screws.
Having created a square structure and secured it with drilled fasteners, I installed it on the H-shaped structure using long screws. On the other side of the square shape I used washers and bolts.
I then created the same square shape, but smaller, and attached them with the same screws to another square structure.
Quite difficult to hang
Step 7. Installing the countertop
For the tabletop, I took fairly thick boards and in a couple of them I made U-shaped holes - they will be located where the post is.
I applied varnish to the tabletop and it took on an extra beauty.
wood varnish
The countertop should be mounted at the end. This is how the kitchen island turned out
Now that the kitchen island is done and ready to use, I can breathe a sigh of relief and be happy about how useful a kitchen item I have made. My wife was very grateful to me.
Mounting the latches
The procedure is the same as with hinges - I outline it, then drill holes and secure it with bolts and nuts.
Drinking bowl for chickens
A device for providing poultry with fresh water can also be made from a 20-30 liter canister.
You will need to prepare a wide tray that does not allow moisture to pass through. Make slits in the bottom, then place the canister in the tray, leaving a gap of 1-2 cm between it and the bottom (for this you can make stands along the edge under the container).
The structure should be secured so that the water container does not overturn from an accidental push.
After filling, the liquid will flow evenly into the tray , from where the chickens can drink.
This drinking bowl for chickens is good not only for its simplicity, but also for the absence of the need to manually regulate the water flow.
Attaching limiter handles
I made three small limiter handles from a piece of plywood. They will keep the glasses in place and prevent them from falling out. I attach them to small nails.
Installing the rubber seal
I used a rubber seal to cover all the sharp edges. I'm lucky that no glue or other fastening product is needed, the seal holds well due to the internal clamps.
Design
The design of canisters is:
- vertical ones
are the most common, they are convenient to carry, but during transportation they require additional fastening to prevent them from tipping over. The side walls should have stamped stiffening ribs that increase the strength of the container. - Horizontal
- with a wide base, such canisters are longer than tall. Due to the horizontal distribution of the center of gravity, the risk of the canister tipping over during transportation is eliminated. The neck is located at the top; the canisters are often supplemented with a tube that simplifies the process of pouring fuel into the tank. - Combined
or two-section canisters consist of two containers. Fuel is poured into one, adhesive oil for chainsaw chains or motor oil into the other. These canisters are in demand among owners of garden equipment and gasoline-powered tools, which require adding motor oil to gasoline to refill.
According to their design, canisters are also divided into:
- solid
- the most common canisters; - folding
- these are polymer heat-resistant elastic canisters, popular among owners of ATVs, jet skis, motor boats, yachts, and snowmobiles; - backpack
- designed in the form of a backpack that can be carried on the back. Used by the military and tourists.
Each canister consists of the following elements:
- tank
- neck
- lid
- pen
Neck
The neck can be located in the center of the upper wall of the canister or shifted to the edge. The offset neck is more convenient and safer, as it provides an air cushion above the surface of the fuel and a smooth flow of fuel when pouring, without gurgling or pulsation.
A siphon tube must be built into the neck, which ensures the flow of air into the canister when pouring fuel. The neck seal must be of a design that does not prevent complete emptying of the canister. If it is made like a sippy cup, then you won’t be able to pour out all the gasoline completely.
Neck diameter:
- with a wide neck 50-90 mm;
- with a narrow neck 29-45 mm.
The diameter of the neck affects the speed of fuel transfer: through a narrower neck, liquid pours out more slowly.
Lid
Canisters have two types of lids:
- Threaded plug
— screw connection with thread and a cover made of stainless steel or plastic with a gasket made of oil-gasoline-resistant rubber. The threaded cap must be screwed on firmly to prevent fuel leakage. Over time, it corrodes and becomes difficult to twist. To improve rotation, you can lubricate it with oil. - The latch
is a clamping mechanism. The clamping mechanism is considered more reliable than a threaded cap. But in extreme heat, under the pressure of the vapors generated in the canister, the internal pressure can be so high that the clamp can break.
Sealing gasket
A gasket must be present with any lid closing mechanism. It has a very important function - it provides sealing inside the canister, thereby preventing evaporation and leakage of fuel.
There are two types of gaskets:
- gaskets made of oil-gasoline-resistant rubber
(MBR). They are used in fuel environments where the base is oil or gasoline. This rubber can withstand temperature changes from -30ºС to +80ºС. When exposed to fuel mixtures, MBS rubber retains its shape, structure and elasticity. Such gaskets eliminate gaps between surfaces, withstand shock loads and prevent the leakage of gasoline, diesel fuel, kerosene and oil. - Gaskets made of ethylene propylene rubber
(EPDM). They are mainly used when working with solvents, acids, alkalis, and alcohols. In the automotive industry, they are used to make door, hood, trunk seals, pipes, tubes, hoses, and gaskets.
A standard factory gasket must be included with the new canister. Over time, it can become unusable and lose its original properties. Then you will need to buy a new one, choosing the right size.
Pen
The handle is located at the top of the canister; it should be comfortable for carrying the canister and have a comfortable grip when pouring fuel. Sometimes metal canisters have three identical handles next to each other.
This design has three advantages:
- allows one person to carry a canister, or two people to carry one canister;
- one person can carry two empty canisters in one hand;
- It is convenient to transfer such canisters to each other along a chain.
Such containers are used mainly by the military.
Hanging planter
The canister in the country is used to decorate the area. Hanging flowerpots are made from it. A medium-sized container allows you to plant beautiful plants in it. For beauty, plastic is painted in bright colors or decorated in any way.
A container with a volume of up to 3 liters is ideal for a hanging structure. There are several manufacturing options:
- cut off the top, leaving the bottom for planting flowers;
- cut out one of the side parts and plant the plants in the entire container.
Hang the pots on ropes or screw them to a wooden fence with self-tapping screws. Make several holes in the bottom of the structure to drain excess moisture. Fill the soil and plant the plants.
Installing hinges
I mark the attachment points, then drill holes for the rivets in the door and in the canister itself. While the parts were not connected, I used spray paint to paint the inside of the canister matte black.
Using a riveter, I attached the hinges to the door and then to the body of the canister.
5.Sprayer
To buy a good bullet gun you need to spend a decent amount of money, but if you show the desire, you can make it yourself in just a couple of minutes!
To do this, you need to prepare: a small piece of hose, a rod and nozzles. Using a rubber nipple, we secure the valve, and our canister turns into a wonderful garden sprayer.
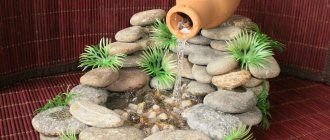
Flowerbed for the garden
Many owners arrange flower beds in the garden or front garden, and plastic canisters can be used for two purposes :
- Container for planting flowers . You will need to cut the product, turning it into two halves, and dig it into the ground, then pour the prepared soil with fertilizers inside and sow flowers. The canisters themselves can be decorated with colored paper, paint, or other methods if desired. In addition, the mini-flower beds themselves can be raised above the ground , as shown in the photo below: this is especially true if the soil is initially not suitable for specific varieties or is too wet.
- Fencing for a finished flower bed. This option is great for large flower plantings: canisters are dug in around the perimeter, blocking the plants. This design is more of a decorative nature . It is better to use colored containers of the same shade or alternate 2-3, then the fence will look aesthetically pleasing.
DIY kitchen cabinet
Once upon a time I made myself a kitchen, without thinking about the fact that I might be missing something. After actively using the kitchen, I began to understand how difficult the situation becomes when there is simply not enough space to store food. I decided to just add another kitchen cabinet with a small countertop. I think my instructions will help many who do not want to purchase ready-made cabinets.
About materials and tools
Assembling a kitchen cabinet is an option for solving any problem in the kitchen related to food storage. In addition, this cabinet does not require very complex actions to create it. It does not require “exotic” materials and tools.
Below I will tell you what materials I needed:
- boards 30.5×61 cm;
- boards 30.5x122 cm;
- boards 30.5×244 cm;
- plywood 6.5 mm thick;
- thick plywood (for shelves inside)
- cabinet parts.
Basic tools used to create a cabinet:
- a circular saw;
- cutting machine with table;
- milling machine;
- carpenter's square;
- device for connecting with self-tapping screws;
- Grinder
Step 1. Build the frame
The cabinet frame is the main part of it, inside which everything will be located. Typically, low kitchen cabinets are 870mm high and 610mm deep.
Important! Of course, custom fitting may be required. It all depends on the size of the kitchen.
The kitchen cabinet frame is very easy to make. Its creation involves two steps. First, you need to cut the plywood - a circular saw or a cutting machine with a table work well for this. Secondly, the finished boards will need to be attached to each other using pocket holes made with a special device for connecting with self-tapping screws.
The body is a fairly simple part of the whole structure
Step 2. Make the front frame of the case
The face frame will be secured to the front of the cabinet. It will run around the perimeter of the cabinet and can outline doors and drawers. It is usually made from thin and not too wide boards.
Important! Poplar is ideal for a face frame. The strength is high, but at the same time it will be easy to work with.
To make the face frame, you need to make a frame out of small boards, and they will be held together with glue and screws in pocket holes. The entire cabinet frame should be attached to the face frame using pocket hole screws.
With a front frame, the cabinet becomes more visually pleasing
Step 3. Assembling and installing drawers
The drawers are one of the important components of this cabinet, consisting of two plywood - one 20mm thick, the other 6mm, which I used for the base. I used a router to cut pocket holes about 13mm up and down from the lowest and highest points respectively.
Important! If you don't have a router, you can just use glue.
Before installing the drawers, you need to attach guide rails to the walls of this cabinet. When they stand, then you can install the boxes.
Without guides, the drawer cannot be installed
Step 4: Creating the Doors
I decided to make the doors from poplar 90 by 30 cm, as well as plywood 6 mm thick. I created an opening on the inside of each poplar board, since that's where the plywood door panel will rest.
Step 5: Painting
The last stage remains before the kitchen cabinet is put into operation - painting. First I applied two coats of water based primer. When the primer is completely dry, you will need to go over it with sandpaper to remove any excess. Afterwards, apply at least three thin layers of paint. It is better that it is also water-based.
It is recommended to paint the cabinet to make it look nicer
water based paint
results
I'm pleased with the result - the cabinet turned out quite good. You can make several of these at once so as not to spend money on “store-bought” options, especially since it is inexpensive and simple. I recommend everyone try it.
This is how the kitchen cabinet turned out
Thanks to unusual and useful products, the kitchen becomes unusual, original and truly unique. And how happy your soul is when every day you spend time in the kitchen, which you could only dream of and where you made a lot of things with your own hands!
Cutting out the opening
Using a grinder, I cut the canister along the marked lines. Then I clean everything up using a grinding wheel to remove burrs.
Fishing box
For this purpose, you can use 20-liter oil cans; side pockets, if necessary, are made from smaller containers.
The canister is cut, leaving a height at which the fisherman can sit comfortably for a long time , and the cut is reinforced with an aluminum strip fastened with rivets.
Inside you need to place a partition made of thick plastic: it not only divides the item into compartments, but also serves as an auxiliary stiffener and prevents the lid from deforming.
The lid is cut out of a thick plywood sheet and attached to hinges. The upper part is usually covered with soft material for comfort .
A strap is attached to the sides of the canister so that you can carry the fishing box on your shoulder. The internal compartment for tools can be divided into smaller segments (for equipment, rods, donks, circles, etc.).