Why is making paper crafts useful?
Making a phone from paper or cardboard will not only be profitable, but also useful, since working with such materials contributes to the development of a lot of positive qualities in a child. This includes not only perseverance and attentiveness, but also creativity and imagination. Working with paper, the child becomes more careful. He learns to use scissors and glue. Working with paper, the child becomes more careful. He learns to use scissors and glue
Making a phone out of paper is quick and easy. To do this, you do not need to purchase expensive materials and spend a lot of time. At the same time, the baby will have an interesting toy made with his own hands. Such things are always appreciated the most. But, even if a child ruins a paper phone, nothing will stop you from quickly making a similar toy. The second time the child can try to do similar work without the help of adults. But you still need to observe the process, since the work will be carried out using scissors.
INFO
Some F103C8T6 microcircuits have 128 KB of memory instead of the 64 KB stated in the documentation.
However, this refers to undocumented capabilities, and you should not count on an “extra” memory bank. Later (and as a nice bonus) I decided to add a 32 Mbit external persistent memory W25Q32 (PDF) to the project. This made it possible not to overwrite the flash of the microcontroller itself and store all contacts separately. In addition, it became possible to download pictures, symbols and other raster graphics elements to the phone.
The mobile phone circuit itself is quite standard and hardly needs any comments. SIM800C is turned on when the REST pin is applied low (transistor Q1 is used, connected to the PA0 pin of the microcontroller). Additionally, LEDs VD2 and VD3 indicate the status of the radio module. VD2 flashes when the connection is successful, while VD3 is lit as long as the SIM800C is active.
Schematic diagram of the device
The components are placed on two single-sided printed circuit boards, predominantly surface-mounted. The first board contains a radio module, a microcontroller, an external memory chip and connectors for connecting an antenna and speaker. The second board is entirely dedicated to the keyboard. The assembled structure is placed in a plexiglass case and secured to M3 racks.
Our device is powered by a 1500 mAh lithium-polymer battery. Its capacity is approximately two times lower than that of modern flagship smartphones, but it is enough for about a week in standby mode (consumption about 6 mA) or for a day of active use ( consumption about 40 mA).
How to make a paper phone-smartphone easily from paper and cardboard: master class, description, tips
In order to make the simplest paper phone, you will need to perform the following algorithm:
- First you need to stock up on a base that is similar in shape to a telephone. This can be a rectangular piece of foam rubber or polystyrene. But since it is sometimes difficult to find them at hand, it is better to opt for corrugated cardboard. From such cardboard you need to cut out rectangles with rounded edges, reminiscent of the outline of a smartphone.
IMPORTANT: Since the cardboard is thin, it is preferable to cut out 3 pieces of identical size from it.
- All rectangles are glued together. Thus, you get a fairly voluminous base, similar in thickness to a real phone.
- Then the back side of the workpiece is covered with white electrical tape. You can also use plain white paper and tape. Or paper with a glossy effect. In short, the craft should have a glossy surface.
- But the front side can still be made of plain white paper.
- Excess material must be cut off.
- The sides are covered with black paper or electrical tape of the same color.
- Then on the front part you need to draw a screen and a button.
- Next, the front side is covered with tape - the phone is ready!
It's so easy and simple to create a paper phone
What we do
Before buying raw materials, soldering and flashing, we need to decide what we want to get in the end. We need a phone that will perform the classic set of required actions:
- will make outgoing and receive incoming calls;
- will send and receive SMS messages;
- will become an alarm clock, if necessary;
- will save information about our contacts;
- will show the date and time on the screen.
Each of the assigned tasks will require its own hardware module or firmware. Let's start implementation.
How to make the easiest paper phone for dolls: master class, tips
For dolls, you can make a paper phone of the following design:
- A rectangle is cut out of paper, its outline resembling a telephone. There is no need to throw away the remaining paper - it will come in handy.
- The main leaf can be painted any color you want. You can choose a shade that matches the doll's dress to make it stylish.
IMPORTANT: It is advisable that the paper be thick. You can even use cardboard.
- Then you need to draw buttons on a white piece of paper. To avoid confusion, you can see how the buttons are located on a real phone.
This is how you can draw buttons for a doll phone
- This button blank must be glued onto a colored base. It should be located at the bottom, but at the same time so that there is some distance between it and the edge of the phone.
- A little higher you need to glue a white rectangle - this will be the screen.
- Between these rectangles you should draw buttons for accepting and ending calls and a menu. A regular black pen will do just fine for drawing.
This is what a paper phone looks like at this stage
- Now you need to paint the screen. The time, date, and main menu components may be displayed there.
- Above the screen, on the colored area of the craft, it is worth drawing the name of the phone model and speaker.
This makes a simple paper phone for dolls
Making a toy iPhone
In order to make an Apple brand cell phone, you will need:
- pre-prepared phone template;
- scissors;
- stationery knife;
- ruler;
- thick cardboard;
- glue;
- simple pencil;
- material for lining inside the phone.
Select a template
In order to prepare a template, you need to find and download a scan of the iPhone model we need on the Internet. There are many options: iPhone S, 5, 6, 7. It is best to print on glossy photo paper, but if this is not available, then the printout can be made on plain paper.
Tip: if you don’t have a color printer at home, then you need to download the template to a flash drive and simply print it in any photo salon.
What template you find on the Internet determines what the resulting phone will be like. Good templates are 100% similar to the original, and their printouts also have special cutouts in the side parts. Thanks to this, in the process of folding and gluing them, you will get a good copy of the iPhone. Most often, in the iPhone printouts offered on various sites, you just need to apply scaling so that the phone turns out to be the same size as the real one.
Step-by-step instruction
First you need to clearly cut out the template printed on paper along the lines. You need to know that you do not need to cut the parts (back wall, screen, side parts) separately from each other. Everything is cut out in one piece and then carefully folded along the fold lines. After the template is cut out, you need to place it on a clean, hard surface of the table or cutting board. Using a utility knife, narrow straight cutouts are cut in the side flaps, which will be used to fasten the iPhone model. To do this evenly, it is better to use a ruler. Place a ruler along the future cut and draw a straight line along the ruler with a knife.
Tip: if you don’t have a utility knife, then use a regular “Rapier” type blade and the like. It is very difficult to use scissors to cut long narrow holes in the side parts of a phone model. If you make the slots wider or uneven, the appearance of the phone after assembly will not be very neat. You must work with the blade very carefully; you should not trust this work to a child.
We are making a part that will be inside the iPhone. On thick cardboard, we outline the front part of the iPhone template with a simple pencil. We cut it out, slightly rounding the corners, like a real iPhone. This blank will make the inside of the screen more rigid.
To add weight to the paper phone model, you will need another blank. The material for lining the inside of the phone can be thicker, heavier cardboard. For example, from the lid of a shoe box. You can also use corrugated cardboard or an old unnecessary computer mouse pad. We cut out the part by tracing the back wall of the iPhone using a simple pencil according to the selected template. We cut it out with scissors and glue it with the part obtained from thick cardboard at the previous stage.
Now you need to bend the fold lines of the printed and cut out template at right angles, thereby obtaining a mock-up of the phone. The previously obtained part is glued inside, adding weight and rigidity to the “filling” made of thick cardboard. The side flaps are rolled up and inserted into the slots of the side ears. The sides of the phone are also lubricated with glue from the inside. All that remains is to hold the glued surfaces a little so that the glue sets, and the technological toy is ready.
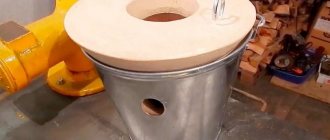
Options for steamship horn resonators
In total, I considered three options for resonators. The longer the resonator, the lower the sound. See photo. The specific sound is shown in the video.
Low sound
Medium sound
Alt
The choice of air source is yours. Watch a video of the buzzer in action.
Flip phone made of paper
There are several types of phone cases. Nowadays, all-in-one PCs with large screens are the most popular. But there was a time when sliders and clamshells were at the height of fashion. The last option is quite simple to make from paper. To do this, you need to follow the same scheme as in the previous description, but you will need two blanks. After that, they are connected to each other using tape. Inside you need to stick leaves with buttons and a screen. So in a matter of minutes you will get the most interesting gadget for your baby.
Attention! This is a fairly simple option for making a phone with your own hands. But there are also more complicated versions, such as a slider.
Such a scheme is considered far from the simplest, so the child will most likely need the help of an adult. First you need to prepare 3 landscape sheets. You can take A4 paper for the printer. One of the sheets is folded in half, then its corners are brought to the middle. This will create a triangle or some kind of arrow. Next, the side parts are folded again towards the center. After this, the workpiece must be turned over and the ends bent in the other direction.
The next step is to fold the product in half so that the sides meet each other. The end result should be a phone case. Next, the corners of the outer cover are inserted into the inner compartment, after which a small rectangular piece is obtained, which is set aside for now.
With the second piece of paper, similar actions are carried out with one small difference. At the stage when the workpiece was turned over to the other side, you will need to work according to the same scheme, but on the same side. After the base is ready, you should assemble the workpiece to get an even rectangle. Thus, you will get 2 elements of the future slider.
So in a matter of minutes you will get the most interesting gadget for your baby.
Now we need to begin one of the most important parts of the work: turning the two components into one whole. It is necessary to ensure that one part moves out of the other. To do this, you need to make a blank from the third sheet that acts as a joint. Cutting a strip to connect the parts is not difficult. It will be much more difficult to measure everything correctly. To do this, you need to take into account the width of the workpieces and their length. When folded, the strip should not sag too much, but when unfolded it will be tightly stretched. The connection is not allowed to wobble or extend beyond the workpiece.
One side of the strip is firmly installed in the slot of the first workpiece. Then the second part is applied, where you also need to insert the tip of the strip. Everything is secured with tape. This will be more reliable than glue. If everything was done correctly, you will end up with a paper slider. Here you can unfold your phone with one hand. Inside it is worth drawing buttons and gluing some kind of screen. Every child will find it interesting to play with such a toy.
Advice! As for how to make a phone case out of paper, all you need to do is glue a box that is slightly larger in size than the phone itself. Next, strings are attached to the case so that it can be worn like a bag.
WWW
The complete set of project source files is available in the GitHub repository.
The first step is to initialize UART1, because it is responsible for communicating with the radio module. Standard parameters: 115,200 baud and 8N1.
static void usart1_setup(void){ /* Enable clocks for GPIO port A (for GPIO_USART1_TX) and USART1 */ rcc_periph_clock_enable(RCC_GPIOA); rcc_periph_clock_enable(RCC_USART1); /* Enable the USART1 interrupt */ nvic_enable_irq(NVIC_USART1_IRQ); /* PA9 TX,PA10 RX */ gpio_set_mode(GPIOA, GPIO_MODE_OUTPUT_50_MHZ, GPIO_CNF_OUTPUT_ALTFN_PUSHPULL, GPIO_USART1_TX); gpio_set_mode(GPIOA, GPIO_MODE_INPUT, GPIO_CNF_INPUT_FLOAT, GPIO_USART1_RX); /* Setup UART parameters */ usart_set_baudrate(USART1, 115200); usart_set_databits(USART1, 8); usart_set_stopbits(USART1, USART_STOPBITS_1); usart_set_mode(USART1, USART_MODE_TX_RX); usart_set_parity(USART1, USART_PARITY_NONE); usart_set_flow_control(USART1, USART_FLOWCONTROL_NONE); usart_enable_rx_interrupt(USART1); usart_enable(USART1); }
After this, it is logical to somehow organize sending commands to the module. For example, using a third-party implementation of printf(). rprintf library is used for this . Its code is well optimized and takes up only a few kilobytes of memory. The library should be corrected to work with libopencm3, just a few lines.
#38 #define UART USART1 … #95 vfprintf_((&usart_send_blocking), format, arg); ... #142 ch = usart_recv_blocking(UART);
Now you can send commands like printf_("AT_command") to the module, and the module's response is received using interrupts and stored in a buffer. Once received, the content is analyzed, and if it is the expected response, the handler function is called, which is used to output SMS and USSD messages. It is also possible to directly display a message on the screen, which is very convenient for debugging.
Simple touch paper phone
This video will teach you how to make a simple touchscreen phone out of paper in just one minute. The assembly here is so basic that even the smallest children can handle it. But to turn this smartphone into a beauty you will have to try. The fact is that you will have to draw all the icons on the device. And the more beautiful you make it, the prettier your cell phone will be.
By the way, using small pieces of multi-colored paper according to this pattern, you can assemble a whole collection of origami phones for your favorite doll with your own hands. So girls, take note!
For assembly you will need: a square sheet of paper, colored markers or pencils.
How to solve connection problems
There are 6 reasons for connection problems:
- poor quality solder;
- low-quality materials of components, including the SIM card connector;
- absence or incorrect location of the SIM card in the slot;
- incorrectly selected antenna characteristics;
- programming errors;
- lack of communication in the area of use.
When working independently, the connection often fails due to an incorrectly selected antenna. The same module will not be able to receive signals at different radio frequencies equally effectively. Therefore, you should not try to use a UMTS antenna that operates on 2110-2170 MHz to receive GSM on 890-960 MHz if the manufacturer has not provided for this.
Very beautiful and impressive origami phone
In this video you will see the art of origami in all its beauty. From one sheet of ordinary paper, the master assembles a model of a telephone that is stunningly realistic. It has raised 3D buttons and a cute little antenna. In general, everything that a classic cell phone should have. The device is very nice. Special paper gives an additional design effect. It has a picture. You don't have to look for the same one. You can even assemble it from white paper, and then decorate your mobile phone beautifully with felt-tip pens.
As always, beauty doesn't come easy. And to make such a telephone from paper with your own hands, you will have to try very hard. Assembly will take 20-30 minutes, but what you get will look great!
To assemble you will need: a square sheet of paper.
Assembling the sound unit of the horn
I pulled the rubber onto the siphon, the degree of tension affects the volume and frequency of the sound, as well as the durability of the work. I did a little stretching.
Membrane
The membrane was secured with twine around the perimeter. There should be no folds.
The membrane is fixed
I inserted the cap tightly and secured it with electrical tape. With the installation of the cap, the membrane received protection from accidental damage and the sound became more directional.
Cap installed
I move on to the final assembly of the steamship whistle and the choice of sound tone.
Craft making process
To work you will need three sheets of A 4 paper, as well as colored pencils and markers. The first thing to do is fold one of the paper sheets in half lengthwise and tuck all four corners towards the center. The remaining straight sides of the sheet should also be folded towards the middle. The resulting diamond-shaped figure must be turned over and the sharp edges bent to form a rectangle.
Now you need to take the smallest side of the resulting square and bend it by about one third so that the protruding edge is hidden inside. Next, you need to fold the reverse side in the same way, only the corners of the rectangle should be placed in the pockets of the first edge.
Now you can fold the envelope in half and make a slit at the fold. This is done either with scissors or with your fingers. The main thing is that the entire structure does not break into two parts. The first piece of the paper phone is ready. You can leave it for now and take on the next element.
With a new piece of paper you need to do everything that you did with the previous one, but without putting the edges into pockets. Now we should put this detail aside for a while.
And you can already take the last sheet of paper, fold it three times so that its width easily fits into the holes of the original envelope. Then you need to push it through the outer part and the cut made in the middle of the first part of the craft. Now, on top of the resulting structure, you can place the component that was set aside, and the elongated square ends of the main part must be folded over it, stacked on top of each other.
Chelyabinsk resident Pavel, who spanked the girls with a belt, told his version of events
The man claims that he listened to the girls’ “party” for about two hours.
Pavel's house is located 70-100 meters from the place of all events. But because the houses along 40th Anniversary Street in Chelyabinsk create a tunnel, the sound resonates strongly, and the noise from this party was clearly audible in his house.
Here's the man's version:
“At 04:15 the girls left the house. It was probably the end of a birthday party in the apartment. They went out to the corner of the house, sat on the ramp and began their conversations. I woke up from these conversations. The time was 04:15–04:20. As usual, I thought, “Okay. They probably just go out and get into the car. It’s okay, you can still sleep.” I tried to sleep, music started playing from the car. Okay, God bless him. Who should I reprimand? You can’t make a comment to people who are sitting in a car listening to music. He waited quietly and tried to sleep. But it turns out that at 05:20 a hookah arrived, and the yelling and screaming began.
At 6 o’clock I simply couldn’t stand it anymore, I had to shout out and go out. Because nothing happens, no action either from the police or from the same “Security Academy”. Still, the most interesting thing is happening under the [Security Academy] cameras.
The situation was heating up, and other [neighbors] were already coming out. But the situation did not change. I just realized that I couldn’t stand it anymore, it was happening right under my window (Pavel lives on the fifth floor. - Ed.).
I had to directly go out and bark, because the distance [between the houses] is not small, and every time shouting out of the window is the same as hitting the radiator on the riser when someone from above is bothering you. I had to do this. I, of course, cried out emotionally, because my whole dream had gone wrong. [They received my words] with such ridicule, the answer was clear. When I went downstairs, I was, of course, overwhelmed with emotions. They present it as “here, look how crazy this person is,” but I didn’t just leave at 6 in the morning with such anguish and emotions. Some four girls send you, an adult man, away, they don’t react to your comments, with “poking”, “come on, come on, come out.” There was a specific provocation on their part.
When I started to reprimand them, instead of apologizing, we took the cover of our policeman husband. We then remove all this from the video, everyone understands that this cannot be brought up for general discussion. There were four girls, it was clear that three of them were under the influence of alcohol. The belt was taken in order to... Well, they don’t stop! I realize that there are four girls standing there, I can’t engage in assault, verbal persuasion leads to nothing, I had to use the good old Russian method of using a belt. I did not see any other solution to this situation. Especially when people hide behind their policeman husband. She specifically emphasized that if her husband is a policeman, then she has permissiveness, they can allow themselves to sit like this. The interpretation was that she could do anything with her policeman husband. How are you, a policeman's wife, standing here since 4 in the morning? And in general, I have a lot of questions for my policeman husband, how did he let you go in the first place? It's not about the hookah, I don't care about it. But standing there, recording video, yelling, cackling in four mouths? We have two tall buildings mirroring sound waves. People didn't have enough education, they had to do more. Yes, of course, it was aggressive, but people break the law and hide behind their policeman husband. I see the arrogant, simply arrogant attitude of people! If I had a desire to do something bad to them, I would have stayed there,” says Pavel.