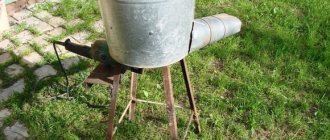
Potapov's vortex heat generator, or VTP for short, was designed specifically to generate thermal energy using just an electric motor and a pump. This device is used primarily as an economical heat source.
Today we will look at the design features of this device, as well as how to make a vortex heat generator with your own hands.
Principle of operation
The generator works as follows. Water (or any other coolant used) enters the cavitator. The electric motor then spins the cavitator, in which the bubbles collapse - this is cavitation, hence the name of the element. So all the liquid that gets into it begins to heat up.
The electricity required to run a generator is spent on three things:
- For the formation of sound vibrations.
- To overcome the friction force in the device.
- To heat the liquid.
Moreover, as the creators of the device, in particular the Moldovan Potapov himself, claim, renewable energy is used for operation, although it is not entirely clear where it comes from. Be that as it may, no additional radiation is observed, therefore, we can talk about almost one hundred percent efficiency, because almost all the energy is spent on heating the coolant. But this is in theory.
How many triggers does it take to be happy?
How to add powerful vibrations to the kick drum, punch to the snare drum, how to use additional effects without making the set heavier than 100,500 tons? The answers are in our article.
In the 21st century, computer technology has penetrated all musical styles. Hybrid drum kits are used by many famous drummers: Jo Jo Mayer, KJ Sawka (Pendulum), Tony Royster J. (Jay-Z) and others.
Whether you're playing hip-hop, drum and bass, or metalcore, you'll want to add some big vibes to the kick and some punch to the snare. You may also want to use additional effects or percussion. But how can you do this without spending a fortune on a new “kitchen” and without making your set so heavy that you have to buy a truck as well? Triggers will provide you with invaluable help in solving this problem.
Trigger. What it is?
A trigger is a device that transmits a signal from the vibrations of a strike (for example, on a drum membrane) to the sound module. What is a trigger for?
By placing triggers on an acoustic kit, you get the following advantages: • interesting hybrid sound of “live” and electronic drums; • smoother, clearer and denser sound; • unlimited number of sounds: from acoustic to electronic; • the ability to use various effects; • flexible work with a computer (MIDI, VST); • mobility.
And most importantly, why everything is started. Both you and your listeners will be satisfied with the resulting sound. They will be impressed!
Where is a trigger used?
When preparing for a performance in clubs with poor equipment, at outdoor concerts or local festivals, there is usually neither the time nor the technical ability to competently build the sound. Full-fledged drum miking in such conditions is fantastic. But you still want to sound professional in all conditions, right?
Installing the trigger is as easy as shelling pears, and the convenience of using it is obvious: no winding microphones or unnecessary noise. It’s also easier for the sound engineer to work, because the signals sent to the console are easier to monitor.
In large venues you will get smooth dynamics at any volume level. Moreover, triggering allows you to reproduce the sounds of those instruments that are impossible to take with you to the performance. For the sake of one song, buying and carrying a 20-inch hi-hat or exotic percussion every time is both unprofitable and difficult.
Do you work in electronic dance styles? Complete your sound with a variety of claps, punchy kicks. If your trigger module supports sampling, load it with any samples, from the classic 808s and 909s familiar to house and techno fans, to those you've recorded yourself. Or connect the module via MIDI to your laptop and get ample creative opportunities.
It is also worth noting that modern dance music is unthinkable without the use of sidechain processing. Triggers will allow you to use the bass drum as the source signal for the sidechain compressor. That is, the effect (most often a compressor) is triggered exactly at the moment when the signal arrives from a trigger installed, for example, on a bass drum. This way, the processed bass channel will not conflict with the kick drum and will not only maintain dynamics, but also gain additional dance quality.
How does a trigger work?
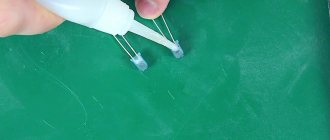
Depending on the mounting method, there are two types of triggers. In “clip-on” ones, the piezo sensor is glued to the plastic next to the rim, which creates a number of problems: false alarms due to undamped vibration and reaction to extraneous signals from neighboring drums.
Triggers with a piezo lightly pressed to the plastic do not have such disadvantages. Models can be found at ROLAND and DDRUM. Installing such triggers and the module does not require changes in the configuration of the drum kit: the convenience of playing will remain the same.
In the photo there is a trigger with a piezo lightly pressed to the plastic
There is an opinion that electronic sound is too flat and does not convey all the nuances of the game. Let's see if this is true.
A dual-zone trigger designed for a snare drum can handle this seemingly difficult task. It picks up different sounds from the head and rim. For the bass drum and toms, a single zone is sufficient. And then it all depends on your imagination: add various samples and processing (compression, reverb, gate, etc.).
ROLAND manufactures the RT-30K kick drum, RT-30HR snare, and RT-30H tom triggers. They are compatible with sound modules (designed for these triggers), TD series (for electronic setups) and SPD series percussion modules.
ROLAND produces triggers compatible with sound modules
Triggering technology has advanced so much that you can practice virtually silently at home by replacing the bass drum with a KT-10 (with hammer) or KT-9 (with weight) trigger pedal.
The operating principle is as follows. The pedals don't have a beater and don't require a pad, but still provide a natural feel. This option can be used at a performance if you are playing in a confined space, such as a small bar. The remaining drums are fitted with Kevlar heads to dampen the shock. And voila! Full sound without unnecessary noise!
In addition, the drum set can be expanded with the optional BT-1 trigger pad, which allows you to use even more different sounds during your performance. Thanks to its small size, it can be mounted anywhere on the installation.
Pedals do not have a beater and do not require a pad.
With hardware everything is different. Since the material of cymbals vibrates more when played, many drummers refuse to use triggers on them. It is especially difficult to remove the signal from the hi-hat (intermediate positions when playing with the foot). So using cymbal pads may be the way to go.
However, there is a solution for gourmets too. The ZILDJIAN company produces sets of cymbals made of a special alloy with a set of triggers, dampers and a sound module.
Pictured is a set of plates from ZILDJIAN
Studio work with triggers
Having played enough at rehearsals, you start to think about recording tracks, right? Let's say right away that the scheme we considered may vary.
Install your favorite DAW (software for working with music) on your computer. These could be LOGIC, CUBASE, FRUITYLOOPS, ABLETON, in general, whichever you like best. If you are running Windows and do not have an external sound card, you will have to install the ASIO4All virtual driver.
The fastest way is to immediately write an audio file using the sounds of the module itself. To do this, you need to connect the audio outputs from the module to the input channels of the sound card via a regular instrument wire. But in this case it will be difficult to work with the track, since all the beats will be in one sound stream.
It is much more convenient to work with a MIDI signal. MIDI is a kind of code that contains information about the note (each drum or trigger sensor has its own note), the duration of its sound and the strength of the blow. Depending on the connectors of the module and sound card, you will need a USB-USB, MIDI-USB or MIDI-MIDI cable.
Next, you will need a plugin that will overlay the audio signals received from the trigger. You can synthesize sounds yourself, use a sampler or classic plugins with live drum sounds, such as ADDICTIVE DRUMS, EZ DRUMMER, SUPERIOR DRUMMER, ABLETON DRUM RACK. Be sure to set up your MIDI map correctly via MAP WINDOW or at least select GENERAL MIDI so that most of the drums work correctly and match the plugin settings.
There are two main approaches to working with VST plugins. First: triggers work in real time, the plugin responds to the supplied signal and generates sound. You record it on a separate channel or send it to the output of your sound card. This is necessary in order to use sound during performances and rehearsals.
The second method involves recording a MIDI track and then selecting sounds. This method is convenient for the production of your future hit, since MIDI files can be exchanged (they, unlike audio tracks, require a small amount of memory for storage). It is convenient to work with MIDI data in a DAW. You can change the dynamics, reassign sounds, equalize the tempo, and more.
So, you have selected the coolest sounds. So, what is next? We convert the part into an audio file and send it to our sound engineer for mixing in the studio. That's exactly what Omar Hakim did when he recorded the drums for Madonna's latest album and Daft Punk's Grammy-winning hit, Get Lucky.
By the way, modern plugins have solved the problem of the “machine gun effect” (repeating the same sample several times). The plugin itself can cause different variations of samples within one dynamic layer, which is implemented, for example, in DRUMAGOG 5. It sometimes happens that the trigger is triggered, but the module does not read the signal. In this case, it is recommended to connect directly to the card and process the signals with plugins after recording.
Using the module and VST at concerts
Do you need the same high-quality sound at a performance as in a studio environment? Nothing is impossible! The trigger-module combination will be the simplest solution. Let's take a look at the ROLAND TM-2. It has two trigger inputs with support for dual-zone pads and triggers. You can load your own sounds, loops and songs into it from an SD flash drive. The module is compatible with RT, BT, KT, V-Pad, V-Cymbal series triggers.
Those who are not looking for easy ways and who are attracted by the thirst for experimentation will, of course, want to use VSTs and additional sample libraries. To do this, you will need to connect the module to the computer via a sound card, as mentioned above. You can even use the trigger to trigger entire phrases of music that you have recorded in advance. But here we may encounter the eternal problem of signal delay. Where does it come from and what to do with it? The delay is affected by switching, an ASIO driver (ASIO4All is not suitable for real-time operation, you will have to get an external sound card), a sequencer, and a digital-to-analog converter. To reduce latency, use a MIDI cable and do not overload your computer with unnecessary applications, disconnect all programs that require updating, and do not go online. Select the optimal ASIO driver sampling rate in your DAW settings.
An inexpensive desktop is suitable for comfortable gaming, but with a professional PCI card with a MIDI input, the delay will be unnoticeable. It’s inconvenient to take a desktop to concerts; modern laptops running Windows 10 and MAC OS X cope with their tasks. The decisive role is played by the sound card, the choice of which should be approached responsibly (read about sound cards on our website).
There is a long-standing debate about which is better and more reliable for music activities: MAC or PC? If you are working with a MAC OS, the driver problem is solved automatically, however, the price of the MAC Book Pro is significantly higher than that of a regular Windows laptop. It may be wiser to get a more powerful laptop and a higher class sound card. There is no clear opinion on this question. Apple supporters appeal to the reliability of these devices and their more stable operation. However, experience shows that with due care, a regular PC copes with its tasks adequately. Try not to load it with unnecessary programs (it is better to allocate a separate device specifically for music lessons), check it regularly for viruses, and there will be no problems.
How many triggers do I need to be happy?
For live performances you will need at least a kick drum trigger. No matter what style you play, a solid shot is always needed. Heavy styles often use a gimbal. The higher the speed, the less impact force and clarity. The characteristic click disappears. Dance styles require a barrel with a guy. In electronic music, low frequencies or various spatial effects are added. Also don't forget about the sidechain effect!
So, a minimum kit for live performances might look like this: Roland TM-2 module + RT-30K trigger.
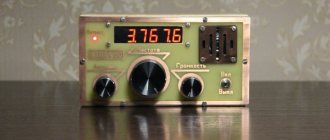
To sound the entire kit, you will need a more powerful TD-11 module and a set of triggers for each drum.
In the photo - module TD-11
When selecting modules and triggers from different brands, you need to be vigilant. ROLAND components are compatible with most other companies, including ALESIS, DDRUM, MEDELI, XM WORLD. Difficulties may arise with YAMAHA, but, as a rule, everything is solved by switching the polarity or re-soldering. Be sure to check how many trigger zones the module supports and what the number of inputs is in order to think through your future set in advance. And, of course, take the time to adjust the sensitivity and correctly assign sounds to the pads. However, it is better to use all the components from the same company, and then there will definitely be no compatibility problems.
There can be many configurations. It all depends on your imagination and what kind of sound you want to get. Each kit is absolutely functional and suitable for both performances and studio work; everything can be adapted to specific tasks, based on the allocated budget.
What is it used for?
Let's give a small example. There are a lot of enterprises in the country that, for one reason or another, cannot afford gas heating: either there is no main line nearby, or something else. Then what remains? Heat with electricity, but the tariffs for this kind of heating can be terrifying. This is where Potapov’s miracle device comes to the rescue. When using it, the energy costs will remain the same, the efficiency, of course, too, since it still won’t be more than a hundred, but the efficiency in financial terms will be from 200% to 300%.
It turns out that the efficiency of the vortex generator is 1.2-1.5.
Purpose of manual models
The main purpose of using pump-type equipment is to pump water from a source to certain points: to a residential building, bathhouse, garage, garden. In suburban areas, the source most often is wells and wells, less often - ponds and other bodies of water.
All residential or country houses can be divided into three categories: permanent, seasonal and periodic residence. Not all of them have electricity, and some are supplied irregularly.
If we summarize all these factors, we can draw the following conclusions:
- in permanent residences, electricity is used by default, so the main equipment for pumping water is an electric pump, and the manual model is a spare backup unit;
- if the cottage is used only in the summer and power lines are connected, then the energy-dependent option is also ideal, and the manual device plays a secondary role;
- a summer cottage without electricity most of all needs manual equipment.
To irrigate 2-3 flower beds, you can still draw water with buckets, but to ensure complete and daily watering of beds, greenhouses and lawns, a pump is needed. This is where a model that requires a pair of hands to operate comes in handy.
You can make a simple speaker yourself by using the skills of welding and assembling metal or plastic parts.
An example for making your own model can be a factory product assembled from durable cast iron or steel parts, with a comfortable handle for use
Some craftsmen build reliable equipment for wells and wells that serves well for years. We present an overview of homemade products, for the manufacture of which scrap materials were used.
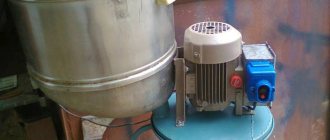
Installing the pump
Next we must choose the “right” water pump. The range of these tools today is so wide that you can find a model of any strength and size. We only need to pay attention to two things:
- Will the engine be able to spin this pump;
- Is it (the pump) centrifugal?
Next, the pump is installed in the same frame; if necessary, additional fasteners are attached.
The body of a vortex generator is a cylinder, closed on both sides. There should be through holes on the sides through which the device will be connected to the heating system. But the main feature of the design is inside the body: a nozzle is located immediately near the inlet. The nozzle hole must be selected purely individually.
Note! It is desirable that the nozzle hole be half as large as 1/4 of the total diameter of the cylinder. If the hole is smaller, then water will not be able to pass through it in the required quantity and the pump will begin to heat up. Moreover, internal elements will begin to be destroyed by cavitation.
To make the case we will need the following tools:
- Iron pipe with thick walls with a diameter of about 10 cm;
- Couplings for connection;
- Welding;
- Several electrodes;
- Impeller;
- A pair of pipes with threads;
- Electric drill;
- Drill;
- Adjustable wrench.
Now - directly to the manufacturing process.
- To begin with, we cut off a piece of pipe about 50-60 cm long and make an external groove on its surface about half the thickness, 2-2.5 cm. We cut the thread.
- We take two more pieces of the same pipe, each 5 cm long, and make a couple of rings from them.
- Then we take a metal sheet with the same thickness as the pipe, cut out original covers from it, and weld them where the thread was not made.
- We make two holes in the center of the covers - one of them around the circumference of the pipe, the second around the circumference of the nozzle. Inside the cover next to the jet we drill a chamfer so that we get a nozzle.
- We connect the generator to the heating system. We connect the pipe near the nozzle to the pump, but only to the hole from which water flows under pressure. We connect the second pipe to the entrance to the heating system, but the output must be connected to the pump inlet.
The pump will create pressure, which, acting on the water, will force it to pass through the nozzle of our design. In a special chamber, the water will overheat due to active mixing, after which it is supplied directly to the heating circuit. In order to be able to regulate the temperature, the vortex heat generator must be equipped with a special locking device located next to the pipe. If you slightly cover the constipation, the structure will take longer to move water through the chamber, therefore, the temperature will rise because of this. This is how this kind of heater works.
Read about other alternative heating methods here
What to look for when choosing
If there is an urgent need for a hand pump, then you should know how to correctly choose the optimal model.
- First of all, the parameters of the well (depth of the aquifer) and the parameters of the pumps offered for sale are compared. As already mentioned, most hand-held models are capable of working with sources located on the forehead at least 6 ÷ 8, rarely 10 meters. If the burial is deeper, then there is no alternative: you will have to install only a sucker rod pump.
- It is important to know the performance of the pump - how much water it is capable of pumping per cycle (or per unit of time - a minute, under intense load))
- The next parameter of the planned (or existing) well - the diameter of the casing pipe, also affects the choice of pump. If the pipe has a nominal bore of 4 inches (100 mm) or more, there are no problems, and you can purchase any pump. But in the case when the casing is narrower, the rod pump may no longer be suitable - it will simply be impossible to lower its working pump assembly into the water column.
- It is necessary to know the degree of contamination of the water from the well - usually the pump's specifications indicate the permissible level with which the equipment is capable of operating.
- It would probably be worthwhile to evaluate the ease of working with the pump. It is necessary to keep in mind that among the users there may be people of advanced age or children - will their efforts be enough to collect at least a small volume of water.
- It is necessary to think about how the pump will be installed - what mounting platforms or mounting holes, brackets or lugs, etc., are available for a particular model. It is also important to know the weight of the purchased device in order to foresee possible ways of installing it in advance - whether it will be a metal welded frame, a concreted platform, a flange connection to a casing pipe coming out of the ground, a wall mount, or just some lightweight option for seasonal use.
- Based on the expected operating conditions, you can determine the design features of the product. So, for installation only in the summer, you can purchase a lightweight plastic version. If a permanent installation is intended, then the choice is made in favor of cast iron or stainless steel. In addition, for temporary use you should purchase a model that is easy to quickly install and dismantle on your own.
- Finally, for many owners, the determining factor is also the external decorativeness of the pump - this has already been mentioned in the article. Of course, purchasing a pump that can decorate a site will entail much more serious financial costs.
The value of the pressure created by the pump is very often not assessed - such devices, as a rule, are not designed for pumping water through external pipelines. Water from them is most often collected into placed containers.
Increasing productivity
The pump loses thermal energy, which is the main disadvantage of the vortex generator (at least in its described version). Therefore, it is better to immerse the pump in a special water jacket, so that the heat emanating from it is also beneficial.
The diameter of this jacket should be slightly larger than that of the pump. We can use a piece of pipe for this, according to tradition, or we can make a parallelepiped from sheet steel. Its dimensions must be such that all elements of the generator fit freely into it, and its thickness must be such that it can withstand the operating pressure of the system.
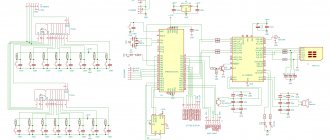
Transferring the circuit to a breadboard (soldering)
After successful testing and verification of functionality, you can move on to transferring the circuit to a breadboard. Standard Stripboard sizes may be larger than required, so any excess can be cut off, reducing the working surface.
Trimming the breadboard
Despite the isolation of the copper strips from each other, it is recommended to remove those that are not involved in the circuit. This can be done with a small drill, which can easily handle copper and break the bond. It is better to remove any remaining copper.
Breaking copper bonds with a drill
After you finish soldering and the circuit is completely transferred to the breadboard, we advise you to check the operation of the pedal again.
The future pedal assembled
We insulate the VTP
First of all, we put on the casing. To do this, take a sheet of aluminum or stainless steel and cut out a couple of rectangles. It is better to bend them along a pipe that has a larger diameter, so that a cylinder is eventually formed. Next we follow the instructions.
- We fasten the halves together using a special lock used to connect water pipes.
- We make a couple of covers for the casing, but do not forget that there should be holes in them for connection.
- We wrap the device with thermal insulating material.
- Place the generator in the housing and close both covers tightly.
There is another way to increase productivity, but for this you need to know how exactly Popov’s miracle device works, the efficiency of which can exceed (not proven and not explained) 100%. You and I already know how it works, so we can proceed directly to improving the generator.
FAQ
Or contact production in Moscow using the duty phone number +7
(24 hours a day)
Yes, there is a special mode for filling large containers with water.
It is activated by briefly pressing the pedal. The solenoid valves are moved to a permanently open position and water flows without your intervention.
Touch taps are not used in the kitchen. The reasons are as follows.
- It is difficult to set the sensitivity area for triggering the touch sensor and the universal time interval for which the water will turn on (setting such options in itself is only possible in expensive models).
- It is not convenient to change the water temperature . To do this, you will have to climb to the valves under the sink, or use a small lever on the mixer itself, or use the remote control (the last two options, again, are only available in expensive models).
- It is not convenient to fill a large container with water . To do this, you will have to keep your hand near the touch sensor all the time.
Ecopedal, in turn, was specially created for work in the kitchen. With it, the water temperature changes in the usual way, there is a special mode for filling large containers, and it works very clearly: step on the pedal - the water flows.
Source
Vortex damper
Yes, we will make a device with such a mysterious name - a vortex damper. It will consist of plates arranged lengthwise, placed inside both rings.
Let's see what we need for the job.
- Welding.
- Turbinka.
- Sheet of steel.
- Pipe with thick walls.
The pipe should be smaller than the heat generator. We make two rings out of it, about 5 cm each. We cut several strips of the same size from the sheet. Their length should be 1/4 of the length of the device body, and their width should be such that after assembly there is free space inside.
- We insert the plate into the vice, hang metal rings on one end of it and weld them to the plate.
- We take the plate out of the clamp and turn it the other way. We take the second plate and place it in the rings so that both plates are placed parallel. We fasten all the remaining plates in the same way.
- We assemble the vortex generator with our own hands, and install the resulting structure opposite the nozzle.
Note that the scope for improving the device is almost limitless. For example, instead of the above plates, we can use steel wire, first twisting it into a ball. In addition, we can make holes in plates of various sizes. Of course, none of this is mentioned anywhere, but who says you can't use these improvements?
And as a conclusion, here are some practical tips. Firstly, it is advisable to protect all surfaces by painting. Secondly, all internal parts should be made of thick materials, since it (the parts) will constantly be in a fairly aggressive environment. And thirdly, take care of several spare caps that have different hole sizes. In the future, you will select the required diameter in order to achieve maximum performance of the device.
The cavitation heat generator is characterized by good efficiency and compactness. It is rare that an owner does not try to save on heating or the consumption of other benefits, which become more and more expensive every year. To make the heating system of a residential or industrial premises economical, many people resort to various schemes and methods for generating thermal energy. One of the devices suitable for these purposes is a cavitation heat generator.
Assembling a homemade hand pump
Any man or woman can assemble a hand pump for water with their own hands. Follow the instructions and everything will work out:
All dimensions are in hand pump details centimeters
- Frame. As a housing, you can use a sleeve from a diesel engine or take a metal pipe. The required length is from 60 to 85 cm, and the diameter is at least 8 cm. The inner part of the workpiece should be turned on a lathe. The smooth surface of the inside of the cylinder will increase the efficiency of a homemade hand pump.
- The lid can be made of metal or plastic. You will need to make two pancakes according to the dimensions of the outer diameter of the cylinder. The top cover must have a hole for the rod, and the bottom for the valve.
- The piston can be made of plastic, wood or metal. The main thing is that the piston is equipped with a rubber seal, otherwise the water supply will be weak.
- The rod is made of metal or plastic. Often a polypropylene pipe is used.
- A valve is mounted on the bottom cover.
- The inlet pipe should be made of steel pipe, and it should be attached to the bottom cover.
- We carry out welding work, and then painting and decoration.
What is a vortex heat generator
A cavitation vortex heat generator is a simple device that can effectively heat a room while spending a minimum of money. This occurs due to the heating of water during cavitation - the formation of small steam bubbles in places where the liquid pressure decreases, which occurs either during pump operation or during sound vibrations.
A cavitation heater is capable of converting mechanical energy into thermal energy, which is actively used in industry, where heating elements can fail when working with a liquid that has a large temperature difference. Such a cavitator is an alternative for systems operating on solid fuel.
Advantages of vortex cavitation heaters:
- Economical heating system;
- High heating efficiency;
- Availability;
- Possibility to assemble with your own hands.
The vortex heat generator should not be located near a living space due to its high noise level
Disadvantages of the device:
- When assembling it yourself, it is quite difficult to find materials to create the device;
- Too much power for a small room;
- Noisy operation;
- Considerable dimensions.
What is a hand water pump
Having a source of water in your garden plot is the key to an excellent harvest. You also cannot do without it at home. However, water supply may be intermittent, and electricity supply in remote areas is unstable. In such conditions, it is necessary to purchase hand pumps for water at the dacha.
If you have shallow aquifers, you can drill a well yourself and become completely independent of the presence of an external water supply and poor-quality service from energy companies. The main thing is to choose the right hand pump for pumping water so that it gives maximum results with minimal investment and downtime for repairs and maintenance.
Standard design of a heat generator and its operating principle
The process of cavitation is expressed in the formation of vapor bubbles in a liquid, after which the pressure slowly decreases at high flow rates.
What can cause steam formation:
- The occurrence of acoustics caused by sound;
- Radiation of a laser pulse.
The closed air regions mix with water and go to a place with high pressure, where they collapse with the radiation of a shock wave.
Operating principle of the cavitation apparatus:
- The water jet moves through the cavitator, where the pump creates water pressure that enters the working chamber;
- In the chambers, the fluid increases speed and pressure using various tubes of different sizes;
- In the center of the chamber, the flows mix and cavitation appears;
- In this case, the steam cavities remain small and do not interact with the electrodes;
- The liquid moves to the opposite end of the chamber, from where it returns back for the next use;
- Heating occurs due to the movement and expansion of water at the exit of the nozzle.
This is how a vortex cavitation heater works. Its device is simple, but allows you to quickly and efficiently heat the room.
This is how it works
The water is turned on with a pedal. The tap remains open in the desired position. Temperature and water pressure are regulated by the mixer as usual
MORE SAVINGS
Water is used rationally. Losses will be reduced by 2 times. In a family of 3 people this is about 300 rubles/month
MORE CONVENIENCE
Turning on the water with a pedal is much more convenient, because in the kitchen your hands are often dirty or busy
MORE CLEAN
You can wash your hands without touching the tap
WILL HELP FILL LARGE CONTAINERS WITH WATER
There is a special mode so you don't have to wait until the pan is filled. It turns on with a quick, sharp press on the pedal.
EASY TO INSTALL YOURSELF
Installation will not require changing the pipeline
WILL NOT FAIL IN EMERGENCY LIGHT OUTAGE
The water will not flow on its own. The eco-pedal can be easily turned off and the tap can be used as before until the lights are turned on
OPERATES BOTH FROM MAINS AND BATTERY
Battery operation is important if your area experiences power outages
ONLY 6 RUB. PER YEAR FOR ELECTRICITY
The ecopedal consumes energy in very short bursts
SAFELY
Where you work with water, the voltage is only 12 volts
Economical DIY cavitation heat generator
It is quite possible to create a homemade vortex generator with cavitation if you carefully study the drawings and diagrams of the device, and also understand its operating principle. Potapov’s VTG with an efficiency of 93% is considered the easiest to create independently, the circuit of which is suitable for both home and industrial use.
Before you begin assembling the device, you should choose the right pump, based on its type, power, required thermal energy and pressure value.
Basically, all cavitation generators have a nozzle shape, which is considered the simplest and most convenient for such devices.
What is needed to create a cavitator:
- Pressure gauges;
- Thermometer for measuring temperature;
- Output and inlet pipes with taps;
- Valves for removing air pockets from the heating system;
- Thermometer sleeves.
You also need to monitor the cross-sectional size of the hole between the diffuser and the confuser. It should be approximately 8 - 15 cm, neither narrower nor wider.
Scheme for creating a cavitation generator:
- Selecting a pump - here you need to decide on the necessary parameters. The pump must be able to work with high-temperature liquids, otherwise it will quickly break down. He must also be able to create a working pressure of at least 4 atmospheres.
- Creating a cavitation chamber - the main thing here is to choose the right cross-sectional size of the passage channel. The best option is 8-15 mm.
- Choosing a nozzle configuration - it can be in the form of a cone, a cylinder, or simply be rounded. However, the shape is not as important as the fact that the vortex process begins as soon as the water enters the nozzle.
- Making a water circuit - outwardly it is a curved tube leading from the cavitation chamber. It is connected to two sleeves with a thermometer, two pressure gauges, and an air valve, which is placed between the inlet and outlet.
The body of the cavitation heat generator can be painted in any color
After creating the housing, the heat generator should be tested. To do this, the pump should be connected to electricity and the radiators to the heating system. Next comes connection to the network.
It is especially worth looking at the pressure gauge readings and setting the desired difference between the inlet and outlet of the liquid within 8-12 atmospheres.
Next, water is allowed into the system. If it heats up in 10 minutes by 3-5 degrees per minute, that’s good. In a short time the liquid will warm up to 60 degrees. This is quite enough for work.
Placing the board into the case and completing assembly
Once the circuit has been transferred and soldered onto the breadboard, you can move on to the final stage - assembling the case. To do this, we need an aluminum blank, which you can buy on AliExpress for 300-500 rubles.
Billet aluminum body with drilled holes
Having decided on the location of all the elements inside, drill four holes in the case: for the power connector, input and output jacks, and volume control. For drilling, it is better to use a step drill, if one is at hand.
Assembling your own pedal and not coming up with a unique visual design for it is a crime worse than those committed by Grindelwald. There shouldn’t be any problems with choosing paint, since today there is a wide variety of aerosol cans on the market designed to work with a wide variety of surfaces. You can always use fashionable stickers as a graphic component, unless, of course, you have artistic skills.
The result of all actions will be a real custom fuzz. If desired, the circuit can be complicated by adding the same bypass to the circuit. As you can see, building your own effects pedal is not as difficult as it seems.
DIY heat generator (video)
A cavitation heater is quite an interesting and economical way to heat a room. It is easily accessible and can be created independently if desired. To do this, you need to purchase the necessary materials and do everything in accordance with the diagrams. And the effectiveness of the device will not take long to show itself.
For heating rooms or heating liquids, classic devices are often used - heating elements, combustion chambers, filaments, etc. But along with them, devices with a fundamentally different type of effect on the coolant are used. Such devices include a cavitation heat generator, the work of which is to form gas bubbles, due to which heat is released.
How to install them?
If the pedal of a sewing machine breaks down, you need to determine what type it is. If the electric pedal of the sewing machine is of a rheostatic type, it can either be adjusted or repaired.
Those who have a sewing machine equipped with such a part as an electronic pedal need to stop their work for a while. After all, if it breaks, you will need to contact specialists. To repair it, you need special equipment, as well as at least minimal knowledge in such a field as radio electronics.
Among other things, the sewing machine pedal also serves to adjust the sewing speed. Modern sewing machines can be adjusted in 2 ways.
- a special regulator installed on the body of the sewing machine. It is especially important in cases where a child often works at the machine. In this case, you can set the regulator to the lowest speed.
- Pedal. The sewing speed will depend on how hard you press it. You can also adjust the idle speed of the pedal itself and the smooth change in speed. In some machines, the pedal is equipped with a mode switch. In this case, in places that are too difficult, you can choose a low speed.
In any case, if the pedal is well adjusted, the seamstress will enjoy her work, because the machine will work easily and smoothly.
Design and principle of operation
The principle of operation of a cavitation heat generator is the heating effect due to the conversion of mechanical energy into thermal energy. Now let's take a closer look at the cavitation phenomenon itself. When excess pressure is created in a liquid, turbulence occurs, due to the fact that the pressure of the liquid is greater than that of the gas contained in it, gas molecules are released into separate inclusions - the collapse of bubbles. Due to the pressure difference, water tends to compress the gas bubble, which accumulates a large amount of energy on its surface, and the temperature inside reaches about 1000 - 1200ºС.
When cavitation cavities move into the normal pressure zone, the bubbles are destroyed, and the energy from their destruction is released into the surrounding space. Due to this, thermal energy is released, and the liquid is heated by the vortex flow. The operation of heat generators is based on this principle; then consider the principle of operation of the simplest version of a cavitation heater.
The simplest model
Look at Figure 1, here is a device of the simplest cavitation heat generator, which consists of pumping water to the point where the pipeline narrows. When the water flow reaches the nozzle, the liquid pressure increases significantly and the formation of cavitation bubbles begins. When leaving the nozzle, the bubbles release thermal power, and the pressure after passing the nozzle is significantly reduced. In practice, multiple nozzles or tubes may be installed to increase efficiency.
Potapov's ideal heat generator
The ideal installation option is the Potapov heat generator, which has a rotating disk (1) installed opposite the stationary one (6). Cold water is supplied from the pipe located at the bottom (4) of the cavitation chamber (3), and the already heated water is discharged from the top point (5) of the same chamber. An example of such a device is shown in Figure 2 below:
Rice. 2: Potapov cavitation heat generator
But the device was not widely used due to the lack of practical justification for its operation.
The main task of a cavitation heat generator is the formation of gas inclusions, and the quality of heating will depend on their quantity and intensity. In modern industry, there are several types of such heat generators, differing in the principle of producing bubbles in the liquid. The most common are three types:
- Rotary heat generators - the working element rotates due to an electric drive and produces fluid turbulence;
- Tubular - change pressure due to a system of pipes through which water moves;
- Ultrasonic - the heterogeneity of the liquid in such heat generators is created due to low-frequency sound vibrations.
In addition to the above types, there is laser cavitation, but this method has not yet found industrial implementation. Now let's look at each type in more detail.
What is a sewing machine pedal?
Sewing devices are divided into:
Sewing machine pedal with rheostat
The consequences of ignoring the problem are dire: such a pedal from a sewing machine will one day simply shatter into fragments. In this case, restoring its functionality will involve gluing it back together piece by piece. And even then, it will be easier to replace the part with a new one.
How do you know that your sewing device has a rheostat option? In terms of weight, it turns out to be much heavier due to its internal design features.
Features of the pedal for an electric sewing machine
How can you understand that it is the pedal that is broken, and not the electric motor embedded in it? Firstly, the absence of smell will let you know: if there is no strong smell of burnt wiring, then the electric drive has nothing to do with it. Moreover, it will not be hot either.
Application
In industry and in everyday life, cavitation heat generators have found implementation in a wide variety of fields of activity. Depending on the tasks assigned, they are used for:
- Heating – inside the installations, mechanical energy is converted into thermal energy, due to which the heated liquid moves through the heating system. It should be noted that cavitation heat generators can heat not only industrial facilities, but also entire villages.
- Heating running water - a cavitation unit is capable of quickly heating liquid, due to which it can easily replace a gas or electric water heater.
- Mixing of liquid substances - due to rarefaction in the layers to obtain small cavities, such units make it possible to achieve the proper quality of mixing of liquids that do not naturally combine due to different densities.
What is a sewing machine pedal?
Sewing devices are divided into:
Sewing machine pedal with rheostat
The consequences of ignoring the problem are dire: such a pedal from a sewing machine will one day simply shatter into fragments. In this case, restoring its functionality will involve gluing it back together piece by piece. And even then, it will be easier to replace the part with a new one.
How do you know that your sewing device has a rheostat option? In terms of weight, it turns out to be much heavier due to its internal design features.
Features of the pedal for an electric sewing machine
How can you understand that it is the pedal that is broken, and not the electric motor embedded in it? Firstly, the absence of smell will let you know: if there is no strong smell of burnt wiring, then the electric drive has nothing to do with it. Moreover, it will not be hot either.
Advantages and disadvantages
Compared to other heat generators, cavitation units have a number of advantages and disadvantages.
The advantages of such devices include:
- A much more efficient mechanism for generating thermal energy;
- Consumes significantly less resources than fuel generators;
- Can be used for heating both low-power and large consumers;
- Completely environmentally friendly - does not emit harmful substances into the environment during operation.
The disadvantages of cavitation heat generators include:
- Relatively large dimensions - electric and fuel models have much smaller dimensions, which is important when installed in an already used room;
- Great noise due to the operation of the water pump and the cavitation element itself, which makes it difficult to install in domestic premises;
- Ineffective ratio of power and performance for rooms with a small square footage (up to 60 m 2 it is more profitable to use a gas, liquid fuel or equivalent electrical power with a heating element).
Advantages and types of hand pumps
The speed of pumping water mechanically and the resulting volume are significantly inferior to electrical analogues, however, the technique has a right to exist, as it has its advantages. The main advantage is autonomy, which minimizes risks. It is appropriate to use the technique if any condition exists:
- relatively low need for daily water volume;
- for a homemade shallow well or a well located on your own personal plot;
- a hand pump for pumping out water is used as an emergency source in case of a power outage at the main water intake device;
- for public use when there is no desire to use a traditional chain, crankshaft and bucket;
- if there is no electricity connection at the site.
In some cases, a mechanical piston unit in working form is used as a decorative element, complementing the created exotic surroundings of the site.
Such a unit can also become a decoration for the site.
Separately, the sites require fecal pumping units, which are used for pumping contaminated media, including for cleaning sewer pits, cellars and lower floors during flooding. The design includes a grinder designed for a certain particle size, which crushes foreign impurities during operation.
Operating the device has its advantages:
- quick installation;
- repairable units;
- low maintenance;
- unified components;
- long uninterrupted service life;
- minimum cost of the finished product.
The disadvantage in some situations is the need to apply physical force to pump. This makes the device inconvenient for use by elderly, weak people and children. The result will also be low productivity.
DIY CTG
The simplest option for implementation at home is a tubular-type cavitation generator with one or more nozzles for heating water. Therefore, let’s look at an example of manufacturing just such a device; for this you will need:
- Pump – for heating, be sure to choose a heat pump that is not afraid of constant exposure to high temperatures. It should provide a working outlet pressure of 4 - 12 atm.
- 2 pressure gauges and sleeves for their installation - placed on both sides of the nozzle to measure the pressure at the inlet and outlet of the cavitation element.
- Thermometer for measuring the amount of heating of the coolant in the system.
- Valve for removing excess air from a cavitation heat generator. Installed at the highest point of the system.
- Nozzle - must have a bore diameter of 9 to 16 mm; making it smaller is not recommended, since cavitation can already occur in the pump, which will significantly reduce its service life. The shape of the nozzle can be cylindrical, conical or oval; from a practical point of view, any one will suit you.
- Pipes and connecting elements (heating radiators in their absence) are selected in accordance with the task at hand, but the simplest option is plastic pipes for soldering.
- Automatic switching on/off of the cavitation heat generator - as a rule, it is tied to the temperature regime, set to switch off at approximately 80ºC and switch on when it drops below 60ºC. But you can choose the operating mode of the cavitation heat generator yourself.
Rice. 6: cavitation heat generator diagram
Before connecting all the elements, it is advisable to draw a diagram of their location on paper, walls or on the floor. The locations must be placed away from flammable elements or the latter must be removed at a safe distance from the heating system.
Assemble all the elements as shown in the diagram and check for leaks without turning on the generator. Then try the cavitation heat generator in operating mode; the normal increase in liquid temperature is considered to be 3-5ºC in one minute.
Full source code
He's right here
#include #include #include #define modeButton 6 struct pedal { unsigned char type;
//0 — real-time mode, 1 — trigger mode, 255 — pedal not assigned unsigned char act1[16]; unsigned char act2[16]; }; struct pedals[7][4] = { { { 255, {255}, {255}}, {255, {255}, {255}}, {255, {255}, {255}}, {255 , {255}, {255}} }, { { 255, {255}, {255}}, {255, {255}, {255}}, {255, {255}, {255}}, {255 , {255}, {255}} }, { { 255, {255}, {255}}, {255, {255}, {255}}, {255, {255}, {255}}, {255 , {255}, {255}} }, { { 255, {255}, {255}}, {255, {255}, {255}}, {255, {255}, {255}}, {255 , {255}, {255}} }, { { 255, {255}, {255}}, {255, {255}, {255}}, {255, {255}, {255}}, {255 , {255}, {255}} }, { { 255, {255}, {255}}, {255, {255}, {255}}, {255, {255}, {255}}, {255 , {255}, {255}} }, { { 255, {255}, {255}}, {255, {255}, {255}}, {255, {255}, {255}}, {255 , {255}, {255}} } }; char ports[4] = {8, 16, 15, 14}; char pos1[4] = {0, 0, 0, 0}; char pos2[4] = {0, 0, 0, 0}; char state[4] = {0, 0, 0, 0}; char oldState[4] = {0, 0, 0, 0}; char wait[4] = {0, 0, 0, 0}; void pedalAction(); char mode = 0; char curPedal; Thread pedalThreads[6] = {Thread(pedalAction, 10), Thread(pedalAction, 10), Thread(pedalAction, 10), Thread(pedalAction, 10), Thread(pedalAction, 10), Thread(pedalAction, 10)}; void setup() { pinMode(2, 1); pinMode(3, 1); pinMode(4, 1); pinMode(modeButton, 2); if (!digitalRead(modeButton)) { //Programming mode Serial.begin(9600); while (!Serial) { PORTD = 0b00000000 + (PORTD & 0b11101100); delay(250); PORTD = 0b00010000 + (PORTD & 0b11101100); delay(250); } Serial.println(F("***Programming mode***")); Serial.println(F("Write the command as ")); Serial.println(F("m - number of mode, one digit")); Serial.println(F(“p — number of pedal, one digit”)); Serial.println(F("c - command, it can be:")); Serial.println(F("\tr - read pedal info")); Serial.println(F("\tw - enter to writing mode and change pedal programm")); Serial.println(F("\te - erase pedal programm and delete it")); Serial.println(F("There are up to 7 modes and 6 pedals per mode can be configured")); Serial.println(F("Mode will be incative if there is no pedal configured in it")); while (1) { while (Serial.available()) { Serial.read(); delay(1); } PORTD = 0b00000001 + (PORTD & 0b11101100); Serial.println(""); Serial.println(F("Enter command")); while (!Serial.available()); PORTD = 0b00000010 + (PORTD & 0b11101100); delay(3); if (Serial.available() == 3) { int curMode = Serial.read() - 48; int curPedal = Serial.read() - 48; char cmd = Serial.read(); if (curMode > 6 || curMode < 0) { Serial.print(F("Mode must be in 0-6. You entered ")); Serial.println(curMode); continue; } if (curPedal > 3 || curPedal < 0) { Serial.print(F("Pedal must be in 0-3. You entered ")); Serial.println(curPedal); continue; } Serial.println(); if (cmd == 'r') { int beginAddress = sizeof(struct pedal) * (curMode * 6 + curPedal); Serial.print("type: "); int curAddress = beginAddress; Serial.println(EEPROM[curAddress++]); Serial.print("act1: "); for (int i = curAddress ; i < curAddress + (sizeof(struct pedal) - 1) / 2; i++) { Serial.print(EEPROM ); Serial.print("\t"); } Serial.println(); curAddress = beginAddress + 1 + (sizeof(struct pedal) - 1) / 2; Serial.print("act2: "); for (int i = curAddress ; i < curAddress + (sizeof(struct pedal) - 1) / 2; i++) { Serial.print(EEPROM ); Serial.print("\t"); } Serial.println(); } else if (cmd == 'w') { Serial.println(F("Enter type:")); PORTD = 0b00000001 + (PORTD & 0b11101100); while (!Serial.available()); int beginAddress = sizeof(struct pedal) * (curMode * 6 + curPedal); int curAddress = beginAddress; PORTD = 0b00000010 + (PORTD & 0b11101100); EEPROM[curAddress++] = (char)Serial.parseInt(); PORTD = 0b00000001 + (PORTD & 0b11101100); Serial.println(F("Enter act1 in DEC divided by space:")); while (Serial.available()) { Serial.read(); delay(1); } while (!Serial.available()); PORTD = 0b00000010 + (PORTD & 0b11101100); while (Serial.available()) { EEPROM[curAddress++] = (char)Serial.parseInt(); delay(1); } PORTD = 0b00000001 + (PORTD & 0b11101100); curAddress = beginAddress + 1 + (sizeof(struct pedal) - 1) / 2; Serial.println(F("Enter act2 in DEC divided by space:")); while (Serial.available()) { Serial.read(); delay(1); } while (!Serial.available()); PORTD = 0b00000010 + (PORTD & 0b11101100); while (Serial.available()) { EEPROM[curAddress++] = (char)Serial.parseInt(); delay(1); } PORTD = 0b00000001 + (PORTD & 0b11101100); Serial.println(F("Finished, don't forget to verify written data!")); } else if (cmd == 'e') { int beginAddress = sizeof(struct pedal) * (curMode * 6 + curPedal); Serial.println(F("Disabling pedal...")); PORTD = 0b00000010 + (PORTD & 0b11101100); EEPROM[beginAddress] = 255; PORTD = 0b00000001 + (PORTD & 0b11101100); Serial.println(F("Pedal disabled")); } } else { Serial.println(F("Incorrect command, please read help above")); } }; } for (int i : ports) pinMode(i, 2); pinMode(17, 1); for (int i = 0; i < 7; i++) { for (int j = 0; j < 4; j++) { struct pedal *p = &pedals [j]; int beginAddress = sizeof(struct pedal) * (i * 6 + j); int curAddress = beginAddress; unsigned char type = EEPROM[curAddress++]; if (type == 0 || type == 1) { p->type = type; for (int k = 0 ; k < 16; k++) { p->act1[k] = EEPROM[curAddress++]; } for (int k = 0 ; k < 16; k++) { p->act2[k] = EEPROM[curAddress++]; } } } } Keyboard.begin(); } int last = 0; void loop() { int current; if ((current = digitalRead(modeButton)) != last) { if (!current) { if (++mode >= 7) mode = 0; while (pedals[mode][0].type == 255 && pedals[mode][1].type == 255 && pedals[mode][2].type == 255 && pedals[mode][3].type == 255) if (++mode >= 7) { mode = 0; break; } } last = current; digitalWrite(2, (mode + 1) & 0b001); digitalWrite(3, (mode + 1) & 0b010); digitalWrite(4, (mode + 1) & 0b100); for (int i = 0; i < 4; i++) { pos1 = 0; pos2 = 0; state = 0; oldState = 0; wait = 0; } delay(50); } for (int i = 0; i < 4; i++) { if (pedalThreads .shouldRun()) { curPedal = i; pedalThreads.run (); } } } void pedalAction() { struct pedal *pedal1 = &pedals[mode][curPedal]; if (pedal1->type == 255) return; unsigned char *prg; char *pos; if (pedal1->type) { int current; if ((current = digitalRead(ports[curPedal])) != oldState[curPedal]) { if (!current) state[curPedal] = !state[curPedal]; oldState[curPedal] = current; } if (!state[curPedal]) { //act1 pos2[curPedal] = 0; pos = &(pos1[curPedal]); prg = pedal1->act1; } else { //act2 pos1[curPedal] = 0; pos = &(pos2[curPedal]); prg = pedal1->act2; } } else { if (!digitalRead(ports[curPedal])) { //act1 pos2[curPedal] = 0; pos = &(pos1[curPedal]); prg = pedal1->act1; } else { //act2 pos1[curPedal] = 0; pos = &(pos2[curPedal]); prg = pedal1->act2; } } while (1) { if (wait[curPedal]) { wait[curPedal]—; return; } else if (prg[*pos] == 250) { wait[curPedal] = prg[++*pos]; } else if (prg[*pos] == 254) { //Hold the key next to *pos Keyboard.press(prg[++*pos]); } else if (prg[*pos] == 253) { //Release the key following *pos Keyboard.release(prg[++*pos]); } else if (prg[*pos] == 252) { delay(10); //"Skip move", do nothing ++*pos; return; } else if (prg[*pos] == 251) { //Move in the program to a position in cell *pos+1 *pos = prg[*pos + 1]; return; } else if (prg[*pos] == 255 || prg[*pos] == 0) { //End of program, just a stub return; } else { //Send the keystroke Keyboard.write(prg[*pos]); } //Cyclically move forward to the cell after those commands after which this is necessary if (++*pos >= 16) pos = 0; } }
Finishing touches on the instrument
We recommend rounding the corners of the cajon body at the top where the player will be positioned. This will have a good effect on the convenience and appearance of the instrument. Use a grinder or file for this, trying to make the same rounding on all sides. Do not overdo it!
Using screws or nails, attach the legs to the bottom of the cajon. The legs are needed to cushion the instrument, because while playing the musician will not sit straight and quietly, and cork or rubber pads will help soften the impact of the musician’s movements on the instrument, and will also save you from scratches.
After completing the assembly, we also recommend covering the body with varnish or paint. You can ask an artist you know to decorate the instrument, or do it yourself. A unique design will make your Cajon unique and make it stand out from other instruments.