Organizer, pencil holder, stand for stationery - different names for one item. A simple subject, but at the same time important. Thanks to a pencil holder, your desktop is kept tidy and the necessary items are always at hand. Vintage, stylish or bright - it can become an interior decoration!
You can buy a stand at a stationery store or order a custom model. But if you love to create or you have children, then this article is for you! In it we will discuss how to make a pencil holder with your own hands.
Clay pencil
If you like clay products, you can make such a pencil holder with your own hands. Step-by-step instructions will help you with your work.
What you need for work:
- clay;
- wooden board and rolling pin;
- a piece of burlap;
- rough texture lace;
- sharp knife;
- stacks;
- ballpoint pen refill.
Manufacturing process:
Cover the board with burlap and roll out the clay on it. The length of the strip should correspond to the circumference of the pencil holder.
We lay the lace on top and roll it with a rolling pin to imprint the design.
Using a sharp knife, cut a rectangular strip of the desired size with a printed pattern.
We apply textured fabric to the longitudinal sections, pressing with our fingers, smoothing out the curved edges.
We coat the short side of the rectangle from the inside with liquid clay. We twist the strip into a cylinder and glue it together.
Turn the top edge of the pencil holder outward. Roll out a piece of clay for the bottom of the craft.
- Cut out a circle that is a couple of centimeters larger than the diameter of the pencil holder.
- We press down the cut of the circle with our fingers, making its edge thinner.
We turn the cylinder over and coat its lower cut with liquid clay.
Place the part on the circle with the moistened side. We also impregnate its protruding edge with liquid clay and wrap it onto the cylinder. If the wrapped part is uneven, so be it, the wavy surface has its own charm.
Roll small balls out of clay. Then we splash them with our fingers, and use the rod from the pen to make two holes in the middle. We decorate the pencil holder with these buttons.
Roll out a small piece on a textured fabric and cut out a pocket. We straighten the cuts and glue it to the cylinder using liquid clay. Using a stack, we finish the seams.
Roll out another piece of clay on a textured fabric and glue a patch on the back of the pencil holder.
Also read: Ideas on what you can make from an old sweater with your own hands
We burn the finished pencil holder in the oven and paint it with light brown paint.
DIY pencil holder from a tin can. Master class with step-by-step photos
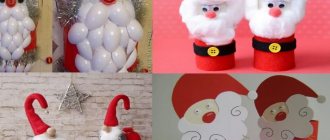
Description of work: Master class “Pencil holder from a tin” will be useful for teachers, additional education teachers, parents and all those who are interested in making gifts with their own hands. It can be used in technology lessons and extracurricular activities with middle school children. Purpose: Holiday gift. Goal: Making a pencil holder with your own hands. Objectives: - teach children how to make crafts based on the Kanzashi technique; - develop a respectful attitude towards your loved ones; - develop creativity, imagination, fantasy. Preface to the work:
The presented craft is made using the Kanzashi technique. The Kanzashi technique has gained great popularity recently. And a gift made using this technique looks beautiful, unusual and does not require much time. A pencil can be given to both a schoolchild and an adult, both a man and a woman for a birthday, March 8, February 23, etc. It can decorate the interior of a home, office, or school room. Therefore, I hope that you will like this material.
Tools and materials:
- can; - green satin ribbon 2.5 cm wide and 2 m long; - yellow satin ribbon 5 cm wide and 1 m long; — transparent glue “Moment”; - scissors; - ruler; - lighter; — several beads. Attention! When using a master class to work together with children, you must first conduct safety instructions. Sequence of work:. We take satin ribbons of different colors, select the color scheme you like
We take satin ribbons of different colors and select the color scheme you like.
Wrap and tape the tin can as shown in the photo. Cut off the remaining tape.
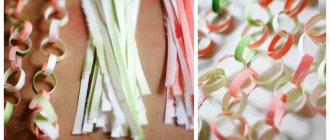
We begin to decorate the pencil holder with flowers and leaves. To do this, measure 11 cm and cut off strips of tape.
Fold the cut ribbon in half. Cut the folded tape diagonally at both ends.
We solder the last place of the cut with the fire of a lighter. It turns out this is a part that looks like a triangle glued on one side.
To make a leaf from this part, we turn out our “triangle”. We have our first leaf.
We will need about a dozen such sheets, depending on our imagination.
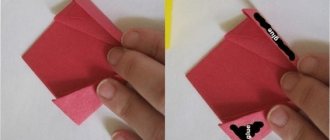
Let's start making flower buds. To do this, take a ribbon 5 cm wide, choose the color at your discretion, and cut it into squares.
To make a bud, you need to take one of the squares and bend it in half diagonally. You will get a triangle.
We bend the triangle the same way 2 more times. We solder the resulting small triangle using a lighter in the place shown in the photo.
We turn the resulting part inside out. We have a petal.
Then we form a bud from three petals. We take one of the sheets. We squeeze a few drops of glue from the tube inside the leaf and place our bud so that it is tightly attached inside the leaf.
After all the details for decorating the pencil holder are ready (about a dozen leaves, three buds and two petals), we begin decorating the pencil holder.
We complement our gift with beads. Don’t forget that the composition with which we decorate the jar should look harmonious from different angles.
We recommend watching:
Wall panel made of fabric “Basket with flowers”. Master class with step-by-step photos DIY lantern-lamp in Shabby chic style. Master class DIY gift for mom How to crochet roses
DIY paper postcard
DIY gift for a friend. Master Class
Plasticineography. Floral motifs
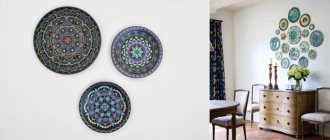
DIY plate decoration
Master class on ribbon embroidery for beginners
"Rainbow"
DIY walnut crafts - a selection of interesting master classes with photo examples
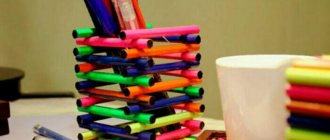
Pencils made using the modular origami technique are highly durable. The volumetric elements of which they are composed create additional stiffening ribs, increasing resistance to mechanical stress. The only difference between such products and their plastic or wooden counterparts is their “fear” of water. But this problem can be easily solved by covering the stands with two layers of varnish.
A pencil in all the colors of the rainbow will decorate a child’s room, and will bring a touch of summer warmth to a solid “adult” office, evoking a vacation mood.
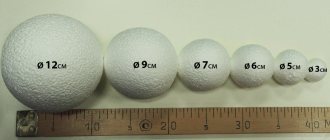
The product will require 68 modules of each color, size 1/32:
- red;
- orange;
- yellow;
- green;
- blue;
- purple.
Instructions for quick production of modules:
You will need:
2 sheets of each color,
- ruler,
- pencil,
- scissors,
- stationery knife,
- self-healing mat.
Fold one sheet in half three times in the transverse direction. Let's reveal. This simple technique allows you to divide the sheet into 8 equal parts. In the longitudinal direction, there will be half as many divisions - that is, 4. Therefore, we bend the sheet in half only twice. This is what we should get:
We stack 6 sheets of different colors, carefully aligning the edges. The top copy will be the one with the markings already applied. Using a utility knife under a ruler, cut the sheets into strips along the short side.
Then we work with scissors. We cut each stack into rectangles along the fold lines.
As a result, we get paper elements measuring 5.5x3.7 cm. We will make modules from them according to the following scheme:
Let's start assembling the pencil holder. To get rainbow stripes, we follow a certain algorithm:
- Let's take, for example, a red module.
- We apply orange to it.
- We connect them with a red module.
- Next, add a yellow one to the orange part, and so on.
Each color in one row is repeated 4 times.
Once the pencil holder is fully assembled, you can use the closed automatic handle to give each module a roundness. The product will be more accurate.
All that remains is to make the bottom. We measure the outer diameter of the module body. We reduce the resulting value by about 1 - 1.5 cm. Draw a circle on the cardboard, cut it out and glue it using a hot-melt gun.
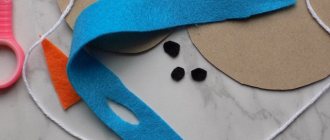
Felt monkeys
If not all, then many needlewomen love felt. It’s a pleasure to sew memorable souvenirs from it! Let's get straight to the point and see how to sew an adorable felt monkey with your own hands.
Option one
The author of this master class is NupiNupi. Unfortunately, I was never able to find the original MK; I offer my description of the process, based on step-by-step photos.
According to the pattern, cut out the required number of blue and white parts from felt.
Next, use Moment-Crystal glue to glue white felt inserts onto the ears:
And then we sew all 4 legs and the tail with a buttonhole stitch and don’t forget to put the filling inside!
We try on the position of the legs and tail relative to the body and fix it with several stitches to the back of the body.
If desired, embroider the navel on the front half of the monkey’s body in the form of a cross, and then sew both halves together with a buttonhole stitch. We stuff the body tightly with padding polyester and only after that we completely sew these parts together.
Now comes the most crucial moment - we will make the face. The overall appearance of the toy depends on how cute it turns out, so be careful!
Using a drop of glue, fix the white felt piece on the blue circle, then sew it along the contour with a buttonhole stitch.
Using a few stitches of matching thread, sew on the beaded nose and embroider the mouth with brown thread. Using regular pink blush we draw the monkey’s cheeks)
We connect the front and back parts of the head with a loop stitch, not forgetting to insert ears on the sides, and a loop on top for hanging the toy! In the neck area we leave a hole for filling, fill the head with padding polyester and sew it up. Then we sew on the beaded eyes.
All that remains is to sew the head to the body and the monkey is ready! She's really very cute, it would be nice to receive one as a New Year's gift)
Elena Babenko prepared this master class on sewing a very cute monkey with a felt flower.
Option three
If you don’t have time to sew a monkey with arms and legs, then sew only the head, it will be perfect as a keychain.
Author - Volga Koptsik
Option four
Such a monkey can be cut out of thick felt by gluing all the parts together. It will be faster, and it will look just as decent.
Author - Svetlana Voronina (Yuganochka)
Option five
Anastasia Kirilenko took the technique of decoupage on fabric as a basis and made felt medallions decorated with beads and sequins.
The medallions are perfect as decorations for the New Year tree, and Anastasia also suggests decorating gifts and champagne bottles with them.
Beaded monkeys
This very small monkey is woven from beads according to the following pattern:
For a detailed description of weaving a monkey keychain, see here.
And you can weave this beauty Rose if you purchase a master class from Marina Konstantinova.
Stationery organizer made from sticks
One of the best materials for such crafts is wood.
For a children's room it is important that everything is natural. No caustic paints or flowers
A pencil made from an environmentally friendly component will be an excellent option that meets all requirements. It brings warmth and comfort to the house. Fits perfectly into any decor.
How to make a pencil holder out of wood? Beginners can use wooden popsicle sticks.
For work you need: a tin can, sticks, paint, hot glue, decorative accessories.
- Each part must be coated with the selected shade of acrylic paints. It is more aesthetically pleasing to use two colors that are in harmony with each other.
- Paint the bottom of the jar.
- Using a glue gun, we glue the entire perimeter of the tin with pieces of wood, alternating shades.
- We cover the product with acrylic varnish.
- For decoration, you can take self-adhesive beads, rhinestones and other accessories.
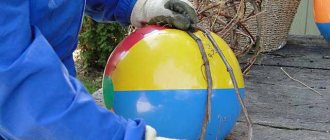
For craftsmen with experience and available tools, there is a more complicated option. In a short lesson we will tell you how to make an unusual craft. You will need a log; it is better to prepare birch or pear.
- It is necessary to cut a log 12 centimeters high.
- Sand on all sides.
- Drill the required number of holes of different diameters. No more than ten centimeters high.
- Sand each hole with sandpaper.
An unusual organizer is ready to take its place. A pencil or pen in such a glass will occupy a certain place. The craft will fit perfectly into a loft style interior.
Note!
- Kinusaiga technique for beginners: what is it, a description of creating paintings from threads
- How to weave a figurine from rubber bands: how to learn to weave animals, toys and what you can make from rubber bands on a slingshot
- How to make flowers with your own hands from paper, fabric and scrap materials. We create bouquets of homemade artificial flowers
Barrel of Honey
A cardboard barrel can transform your home interior and become a good storage place for all sorts of small items. How to make it with your own hands so that it makes you happy every day? To work you will need a standard stationery set. It is necessary to cut out the bottom and glue a paper strip around the entire perimeter.
Note!
- How to properly make a birdhouse with your own hands from scrap materials: we create an original birdhouse according to sketches
- How to make candles with your own hands: instructions for making wax, gel, scented, homemade decorative candles with a wick
- What you can make from foamiran with your own hands: we create flowers, Christmas tree decorations, snowflakes, three-dimensional paintings (photo + video)
One side of the strip should have teeth, using them to glue the two parts together.
We cut out strips of thick cardboard in the form of a fence and glue them. This craft can be painted like a barrel of honey. Or decorate with delicate artificial flowers and beads.
"Pencil"
A simple model of a stand in the form of a pencil will appeal to the youngest artists. The “glass” with a thematic design consists of three parts - two of them form the body, and the third serves as the bottom. You will need 3 squares of different colors 21x21 cm. One side must be white.
Step-by-step instruction:
- We place the first square with the colored side up and begin work. We divide the workpiece into 3 parts. Then, bending in half from left to right and from top to bottom, we outline the axes.
- We turn the top edge 0.5 cm. This is the lead of our pencil. You can make it larger by increasing the width of the bent edge.
- Fold the right and left corners towards the center.
- We bend the workpiece in half horizontally into a “mountain”.
- Repeat steps 1 – 4 for the second square.
- We insert both parts into each other.
- Place the third square first with the white side up. We outline the diagonals. We divide each of them into 3 parts. Bend the corners 1/3. Moreover, they partially overlap each other.
- We fold all the corners of the new square towards the center.
- Raise the triangles perpendicular to the base.
- Glue the bottom into the “pencil” body.
Glass jar pencil
To make such a pencil holder, you need a glass jar and napkins. It is very easy to make with your own hands. Photos and step-by-step descriptions will help you in your work.
What you need for work:
- glass jar (if it has an unusual shape, it will add zest);
- masking tape;
- pencil;
- scissors;
- red nail polish or red acrylic paint;
- red and white napkins;
- stapler;
- glue.
Manufacturing process:
Draw a heart on masking tape, cut it out and stick it in the middle of the wall of the glass dish.
We open the entire jar with varnish and dry it.
We take a napkin from the pack, fold it in half as it is, then fold it again to form a square.
We fasten the workpiece in the middle with a stapler.
Trim the edges in a circle with a wavy line.
We lift each leaf up around the fastener and crease it. When you reach the end, you will get a flower.
We fix the white and red flowers around the neck with glue. Remove the adhesive tape from the can.
There are many people with a profession for whom a pencil holder is an indispensable thing on their desk, not to mention schoolchildren. Of course, you can buy it in the store. But nothing can replace a craft made with your own hands. You can put unlimited imagination into it and make a unique thing that will only show off on your table.
Monkeys and decoupage
Fans of Decoupage will not be left empty-handed either)
You can purchase a variety of wooden blanks in the shape of monkeys from Andrey and Yulia Savchenko! And then - give free rein to your imagination and make your own unique, inimitable souvenirs for the holiday!
There are a lot of beautiful blanks in the shop Everything for creativity (dljatvorchestva):
I couldn’t ignore the Pencil with a Gorilla)
Paper pencil holder
Perfect for a children's room.
For work you will need:
- Cardboard toilet paper rolls;
- Cardboard;
- Thick corrugated paper of different colors;
- Scissors;
- Pencil;
- Ruler;
- Glue.
Pre-measure the circumference and dimensions of each sleeve: Length and width.
- Using the measurements obtained, cut out a rectangle from paper and a circle for the bottom.
- Glue the cut pieces onto the sleeve.
- For the stand, cut out 5 rectangles on cardboard: 3 long and 2 short.
- Glue them together and cover the corrugated paper with paper: Green for the lawn and blue for the sky.
- Decorate the product according to its meaning. Let there be flowers and butterflies on the lawn, and cheerful birds, clouds and sun in the sky.
- Everything is simple and tasteful.
Making a pencil cup out of paper: step-by-step instructions
Modular origami is a very beautiful and painstaking art. But there are times when time or paper resources are limited, but there is a desire to decorate your desktop with a cute and original stand for stationery. A master class on creating a cup for pencils from paper will come to the rescue.
To create a cup you only need one sheet of paper, but you have to be extremely careful, the paper wrinkles very easily. To prevent your craft from losing its appearance while working, you need to assemble the cup with light movements.
We make a square from a standard A4 sheet. To do this, take it by the corner of the short edge and bend it diagonally. Trim off the rest.
We bend the sheet diagonally and horizontally. In further assembly we will focus on the resulting lines. Fold the paper along the horizontal fold line to form a triangle.
The upper corner of the triangle needs to be bent about two centimeters, drawn along the fold line with a fingernail and straightened back to its original position.
We bend the lower right corner of the triangle to the left to the line marked at the top.
Fold the lower left corner of the craft to the right to the same mark. Next, fold the left fold diagonally to the left again. We hide the bottom corner down, between the layers of the product.
We carry out similar manipulations on the other side of the craft. Carefully smooth out the finished craft. Turn over and open the cup from the bottom. Use your fingers to smooth out the bottom of the cup from the inside.
Our stand is ready.
Felting monkeys from wool
Felting wool is a labor-intensive process, but monkeys made using this particular needlework technique look the most realistic!
Jeiana Johanssen shares a great master class on dry felting Varenka the monkey for free.
Wayward Gosha can be ordered from Lyudmila Kolykhalova (oliKA).
And Marina Kuznetsova has the Coco-fifi yoke.
Paper pencil holder
Paper is a wonderful budget material for crafts! The art of origami is wonderful for developing children's brains - it's a real puzzle. There are quite a few options for paper pencil holders - from a simple quadrangular box to complex modular (consisting of several elements) variations.
Reference! Modular origami, unlike classical, involves folding figures from several sheets of paper. Each sheet is folded into a separate element (module), then the parts are connected by gluing or inserting one into the other.
Step-by-step process for creating a modular pencil holder of a simple design:
- You will need 6 sheets of thick, shiny, bright, double-sided square-shaped colored paper (can be of different colors), scissors, glue.
- Take one square of colored paper. Fold it in half.
- Unfold the sheet and fold it in half the other way. Unfold the sheet again.
- Place the edges of the sheet to the center line, press the folds. Expand the sheet.
- Place the opposite edges to the second center line and press the folds into place. Expand the sheet. The result was a kind of marking into 16 equal squares.
- Fold all four corners, placing the corner to the nearest intersection point of the folds.
- Lay two strips with curved corners to the center line.
- Turn the rectangular shape over backwards.
- Fold the short sides up, placing them towards the center line. The result is a square with a diamond-shaped figure in the center.
- Insert the left strip into the triangular pockets of the right one until it stops to form a three-dimensional triangle.
- Press all three folds of the triangle again. The first module is ready!
- Follow the same pattern for the other five elements.
- If desired, you can insert a corresponding sized piece of colored paper of a different color into the diamond-shaped window of each volumetric triangle.
- Glue six modules together. Pencil holder with six compartments is ready!
Cardboard pencil holder
There are quite a few models of cardboard pencil holders - from simple ones to real works of art.
Template option. The easiest option is to find an origami box template of the shape you like on the Internet, download, print and cut it out. Transfer the contours of the template and fold lines to the cardboard, cut along the contour. Fold the template along the fold lines. Spread the shaded parts (the so-called allowances) with glue and glue them to the base.
Vintage masterpiece made from cardboard paper towel tubes
- You will need 3-4 pieces of cardboard tubes, strong glue, scissors, and a lot of decor.
- Make the tubes different in height. Cut cardboard circles of the required diameter for the bottoms, glue the bottoms to the tubes.
- Cover the outside of the tubes with vintage wallpaper or fabric; you can do decoupage. Decorate with roses, lace, ribbons, pearl beads.
- Prepare a round or fancy-shaped solid base from self-adhesive foam board. Remove the backing from the foam board that protects the adhesive side. Place the base with the adhesive side on the satin material, trim off the excess fabric along the contour, and melt it. Glue thin knitted lace along the contour.
- Glue the tubes with their bottoms onto the base in different places.
- Complete the composition with a vintage bird, a miniature in a frame, or a scattering of artificial pearls!
For girls
You will need a pineapple tin, scissors, glue, and decorating materials.
Cover the tin can with pink corrugated paper or fabric. Girdle the top, bottom and center of the jar with beautiful lace or ribbons, gluing them.
Glue tracks of rhinestones or pearl beads on top of the lace and ribbons. In the center, on the front side, glue a mini-composition of cut out lace elements, satin ribbon roses and beads!
For boys
Cover the jar with shirt fabric with a thin stripe or small check print. On the front side, from top to bottom, glue a row of shirt buttons.
Cut a plain rectangle from felt with a length equal to the circumference of a tin can - this is a collar. Glue the collar along the inner edge of the can, bend it outward. You can complement the composition with a mini tie!
The above examples of organizers made from scrap materials are just the beginning of a long list of possible models.
Ice cream sticks, stale markers, floppy disks, toilet paper tubes, shampoo bottles, plastic bottles - photos of various pencil holders show that the list of available materials can be continued endlessly. Create, move from simple to complex, and who knows what masterpiece you will be able to create one day!
From one sheet
Most models of pencil holders are assembled from several elements. But one sheet of paper is also suitable for creating small stands that can easily fit a mini-drawing set or a pair of pens. It is difficult to resist folding such models over and over again, providing them to all family members and friends.
The pattern of the first origami pencil is also quite suitable for food cups, where popcorn or sweets are usually placed at children's parties. Only ordinary paper will have to be replaced with craft paper - it was created specifically for storing products, including fatty ones or those that secrete juice.
Step-by-step instruction:
- We place the sheet with the wrong side facing us. We outline the diagonals.
- Fold from top to bottom. Then from left to right. We open all the folds.
- We shift the outer points on the middle axis to the center. Press the top and bottom valves.
- We get the “Double Triangle”. We place it with the top down. Bend in half.
- Raise the bottom point to the middle of the figure.
- Fold the right side of the top layer as shown in the figure.
- We do the same with the left.
- Bend the top flap along the dotted line.
- We wrap the protruding corner into the inner “pocket”. You can glue it to make it stick better.
- Repeat steps 6 – 9 on the reverse side. We open the workpiece from the inside, straighten the bottom.
- The pencil is ready. You can make several pieces by taking squares of paper of different sizes. And then glue the stands together to create a multifunctional organizer.
Double model
You will need an A4 sheet of paper. It is better to take paper with a pattern - this will give the pencil holder a stylish look.
Step-by-step instruction:
- Place the sheet with the long side facing you. We divide it into 5 parts and mark the fold lines. You can simply apply markings using a ruler and pencil, or make folds using the algorithm from the first master class.
- We bend the right and left edges by 0.5 cm, forming an edging. Moving slightly from the center, we make three vertical folds at the same distance from each other as the longitudinal divisions.
- Apply folds as shown in the diagram.
- We bend the workpiece “valley” along the second line from the top.
- We begin to fold the middle.
- We lift the sides vertically and make two boxes, following the drawn instructions.
Video explanation:
Finished pencil holder:
Model with relief
To make an origami pencil holder, you need thick paper so that the walls of the product do not bend or tear if a sharp pencil lead rests on them. It is best to use whatman paper or colored design cardboard with a density of 90 g/m².
If there are few drawing supplies, a small single stand with a laconic shape is suitable for them. Its main decoration is a relief rhombus in the central part. You will need a square measuring 21x21 cm.
Step-by-step instruction:
- Connect the lower right corner with the upper left. After the workpiece is opened again, a diagonal fold remains.
- We bend the lower part towards it. We return to the original position.
- We make a horizontal fold along the mark circled in the diagram.
- Raise the bottom edge, marking a line.
- We bend the figure along the second fold.
- The edge indicates the last division line, which should also be marked.
- We open the workpiece completely. It is divided into 5 parts.
- Rotate the square 90° counterclockwise.
- We outline small horizontal folds, as shown in the figure.
- Fold the bottom edge 1/5 in half. We do the same with the top one.
- We also bend the second and third sections from the bottom in half like a mountain.
- We outline the cross folds according to the sample diagram.
- This is the “drawing” that comes out. Fold the top and bottom edges by 0.5 cm.
- We fold the products along the vertical fold lines.
- We glue the outer sections together.
- We receive a box.
- We bend small folds in the central part, forming a convex rhombus on the front and back sides.
Crochet monkeys
Those who know how and love to crochet are unlikely to miss the opportunity to knit souvenirs with the main symbol of 2022 - a monkey! Especially for you, 10 master classes with Amigurumi monkeys and 4 master classes on knitting cozy little things for the home.
Monkey potholders
A pot holder in the shape of a monkey's face will lift your spirits every time. You can find a description of knitting here.
Svetlana Zabelina offers to buy a master class on knitted potholders “Baby Monkeys”.
An oven mitt can be used simply as a kitchen decoration or for its intended purpose. It fits like this.
Fabric monkeys
Do you prefer another fabric to felt? Patterns of monkeys - very, very different ones - have been collected especially for you!!! Choose any one you like and sew with pleasure!
Monkeys in Tilda style
Fans of Tilda dolls will definitely want to sew the symbol of 2016 using this technique. A master class consisting of 2 parts (part 1, part 2) will help you.
But you can sew such a monkey toy with your own hands if you purchase the pattern from its author (tilda4kids).
Coffee monkeys
Coffee toys are sewn from simple white fabric (for example, calico), tinted in a special solution of coffee, cinnamon and vanilla, dried in the oven, and then painted with acrylic paints. The technology for making such toys is described in great detail in this Cross master class.
Do you already understand where I'm going with this? Of course, this means that you can make coffee monkeys in the same way, which will fill the house with a wonderful aroma, and everyone who gets it will be in a great mood!
You can buy these naughty coffee monkeys here
Author - Maniko
Another good idea is to sew a pillow in the shape of a monkey. There are many options here, as they say, choose to your taste. Here are some ideas for inspiration!
You can buy this pillow