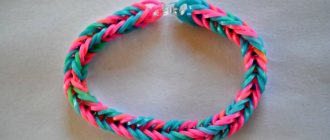
Weaving bracelets from rubber bands is a fascinating process that will captivate both children and adults. To work, you only need small Chinese rubber bands and simple tools that can be found in any home.
The easiest way is to use a ready-made weaving kit, which already includes a bag of multi-colored elastic bands, the necessary accessories and tools - a machine and a hook. Such kits, intended for children 8-14 years old, are sold in handicraft stores and on Aliexpress, but we do not recommend making such a purchase if you are just getting acquainted with weaving. In this case, we recommend purchasing special silicone rubber bands separately and buying accessories for exactly the number of bracelets you are going to make.
As for special machines, there is an easy way to replace them: you can weave a bracelet from rubber bands using pencils, a fork, a comb, and even your fingers . The details of the process will remain unchanged, so stock up on everything you need and let’s start weaving!
Weaving pattern for the simplest rubber band bracelet on fingers
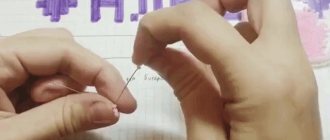
To start weaving rubber bands on your fingers, you will need three bracelet elements and your own hands. The index and middle fingers in the shape of the letter “V” will replace the machine, fork and other devices.
*photo MK: HonestlyWTF
For the first time, we advise you to limit yourself to single-color elements in order to understand the basic skills of how to weave bracelets from elastic bands, and not complicate the work of creating a pattern. To weave a fishtail, repeat the following free master class with pictures:
Step 1 . Place the first elastic band on your fingers, twisting it in a figure eight. Place two more over the first without twisting;
Step 2 . Pull each side of the figure eight up, placing it between your fingers so that the loop is in the center of the next two;
See it clearly in a short video:
Step 3 . Thread a clasp into the loop or secure it with a pin: this way you will secure the beginning of the work and it will not unravel during further weaving;
Step 4 . Place another elastic band on your fingers without twisting it (it’s yellow in the photo) - only the very first one has a figure eight shape.
We again pull the bottom elastic up alternately on each side, removing it from the fingers and placing it in a loop in the middle;
Step 5 . Thus we continue weaving to the desired length.
Step 6 . Remember to follow the pattern if you use different colors;
Step 7 . Upon completion of the work, remove the two loose elastic bands, and thread an S-shaped clip into the free edge of the bracelet - it will serve as a clasp.
Don’t worry if the Christmas tree seems uneven at first - it will take the desired shape as you wear it. Also, do not tighten a strong knot - everything will hold together just fine without it. The thin children's bracelet is ready!
Fishtail on a slingshot
Regardless of which tool you choose for weaving, the essence of the process remains the same. We suggest you see how to make a bracelet from rubber bands on a slingshot: after familiarizing yourself with the details of the work in step-by-step photographs, you can easily repeat each stage. Let's get started:
- twist the first elastic band into a figure eight and put it on the frame;
- put on two more without twisting;
- alternately grasping each side of the lower elastic band with a hook (or fingers), remove them from the frame and place them in the center;
- put on a new element;
- repeat the third step - remove the bottom elastic band and place its edges between the horns of the frame.
We continue weaving until the desired length, after which we attach the clasp.
- Remove the excess ring (cut with scissors and remove). Ready.
Rainbow Loom Tools
Modern weaving toys are sold in various configurations . But in each set, in addition to the packages with elastic bands themselves, there must be:
Machine. In the classic set of Chong Chun, the machine is assembled. It consists of three identical plastic bases with posts. They can be connected both in length and width. However, new versions of the toy also add a small oval frame. It is convenient to weave wide bracelets, cases, and toys in the amigurumi style.- Slingshot. Plastic two-horned fork, ideal for working with simple products: baubles, chokers, rings.
- Hook. A small plastic or metal hook. In size it corresponds to knitting No. 3−4.
- Accessories: plastic clasps, clips and ready-made pendants for decoration.
"Circular knots" on pencils
To weave such a bracelet, you will need rubber bands of several colors, a lock (S-shaped clip), and a device on which the work will be carried out. You can do it with a pen or pencil, as in our example, or replace them with sushi chopsticks. Instead of a hook, a toothpick will do just fine.
To ensure that the improvised machine keeps its shape, place a regular eraser between the pencils and secure it with tape as shown in the photo.
pencil machine
To create a rubber bracelet with the same pattern, repeat the following steps step by step:
1. Place a figure eight rubber band over the pencils.
2. We put on another one without twisting it.
3. We hook the “eight” with a hook, drag each side to the center, forming a hanging loop from the first.
It should look like in our example.
4. Attach the clip. You can start weaving the pattern.
5. Fold the colored element into two turns and place it on the right pencil.
6. Pass the hook through the colored elastic, pick up the bottom one, pull it out and put it on the left pencil. The colored one stays in place.
It will be like this:
7. Place a new background color element on both pencils.
8. Remove the color from the right pencil and throw it into the center.
9. Remove the bottom elastic band from the left pencil and place it in the center.
10. Again we put the colored elastic band in two turns on the right pencil, pick up the lower background one through it and drag the latter onto the left pencil.
11. We attach the bottom element of the background color to the left pencil, remove it from the base and place it in the center.
Now repeat all the steps, starting from step No. 7 to step No. 11: put the background color eraser on both pencils, shoot in the center, first the colored one on the right, and then the background one on the left.
As the length increases, the pattern will be clearly visible: all you have to do is carefully throw the remaining loops onto one of the pencils, thread the clip through them, and you can put the cool bracelet on your hand!
If the explanation of the method from the photo did not seem detailed enough to you, then in this video you can see how to make bracelets from rubber bands on pencils using this method:
Ideas for creativity
The list of what can be made from rubber bands, in addition to bracelets, is impressive in its diversity:
Cloth. It is impossible to weave rubber bands into an item suitable for daily wear. But some clothing models turn out surprisingly successful. For example, swimsuits, mittens, hairnets and headbands, decorative overlays on shoes look very unusual, and thanks to the stretchy material they fit the body perfectly.
Accessories. Using simple knitting patterns, you can make a bright summer bag, a case for a tablet or mobile phone, a belt, a strap, and pendants. Wicker items are beautiful, durable, resistant to moisture, and easy to keep clean. The main thing is to make them dense enough, intertwining the elastic bands in 2-3 layers.
"Sixfold fishtail"
This type of weaving is more difficult than the previous ones, so it is better to concentrate on the work and not be distracted in the process.
To work, you will need rubber bands of at least two colors, an S-shaped clip, a regular fork, a hook or something that can replace it - for example, a pencil or a sushi stick.
To weave complex bracelets based on it, see the step-by-step tutorial:
1. Pay attention to the position of the fork: it should be as in the photo. Place the elastic on the first prong and twist it in a figure eight. Do the same with the rest: as a result, two “eights” will be formed on the fork.
3. Repeat the previous step. The more colors, the “thicker” the bracelet will be.
4. Hook the first element from the front side, pull it up and back so that the loop is between the first and second teeth. It should lie on the top elastic band.
5. Now it’s the turn of the last left loop: pull it up and throw it over the last tooth. There will be two central loops left in the first row: they also need to be thrown over the tines of the fork. After you throw the first row back, the work will look like this:
6. Make another layer of figure eights by repeating step two. Just as in steps 4-5, pull the elastic of the previous row over the tines of the fork from the front to the back.
7. The weaving technology is maintained throughout the entire work: repeat steps 2-5, extending the bracelet to the required length. When several rows are ready, stretch the finished fabric a little to give it the desired shape - it will almost look like a French braid - and position the elements correctly.
8. Pull the bracelet over the fork to highlight two loops at the beginning of the braid. Attach a clip to them, hooking it on both loops. Then carefully remove the hinges. Before pulling them together, squeeze the weave at the base to prevent the fabric from unraveling. Secure the loops by hooking them with the free end of the clip.
Pay special attention to the last stage: excessive haste can lead to the dissolution of the canvas. The three-row bracelet is ready!
Flat bracelet on a fork
To weave such a decoration you will need a regular fork and hook. If there is none, then a simple toothpick will do. The most important “ingredient” is rubber bands of two colors, in our example they are orange and purple. A cool bracelet will turn out to be quite wide and bright, but not round, as usual, but flat.
Let's get started! Instructions:
1. Starting with the purple ones: fold the first one in two turns, and put it in a figure eight on the central tines of the fork. Also fold two more elastic bands in half and put them on the outer teeth as shown in the photo.
2. Alternately, use a hook or a toothpick to hook the lower central loops and place them on the reverse side above the teeth.
3. Roll the new purple elastic band in two turns and, without twisting, put it on the two outer teeth. We do the same on the other side. We alternate the loops of the previous row to the top, forming the next row. You should get something like this:
4. When weaving, we follow a checkerboard pattern: in one row we always put one elastic band in the center, in the other - two at the edges.
6. Every two rows we change the color. We continue weaving until we get a bracelet of the required length.
7. To make the tip of the bracelet neat, use our method: transfer the loops from the outer teeth to the central ones, and from the previous row to the top one. Fold the new elastic in two turns and put it on the middle teeth - you need to throw the remaining loops onto it in the center.
8. Secure the loose loops at both ends with an S-shaped fastener.
That's all the magic, the decoration is ready!
Rainbow "Dragon Scale"
Making this bracelet made from large rubber bands does not require any special tools: a couple of forks, a piece of tape and standard plastic clips will suffice. You will also need different colored rubber bands: 13 purple, 16 blue, 12 light blue, 16 green, 12 yellow, 16 orange, 12 pink and 16 red - a complete rainbow.
Before starting work, secure the forks with tape in two places, as shown in our example. This design will replace a huge machine for us.
The scheme will be like this:
1. We start weaving with red ones. The first row consists of four elastic bands placed in a figure eight over the 1-2, 3-4, 5-6 and 7-8 tines of the forks.
2. In the second row, we put pink elastic bands on 2-3, 4-5 and 6-7 teeth, without twisting .
3. We hook the red elastic bands of the first row on all the prongs, except for the side ones (there is simply nothing to fix on them), and transfer them to the back side of the forks. You should get it like in the photo.
4. Without twisting, we put four orange elastic bands on 1-2, 3-4, 5-6 and 7-8 cloves. Now you will need a toothpick or a hook, but with proper skill you can continue with your hands.
5. We hook the elastic bands from each tooth and put them on the reverse side as shown in the photo.
6. Introduce a new color - yellow. In this row there will be three elastic bands on 2-3, 4-5 and 6-7 teeth.
7. Repeat step No. 3, throwing all the loops, except the side ones, over the tines of the forks.
The principle of operation is maintained throughout the entire weaving. The bottom line is that you need to repeat steps No. 4-5-6-7, alternating the selected colors : when you throw on 4 elastic bands, then throw the loops from all the teeth back, and when you throw on 3, then from the 2nd to the 7th clove, i.e. except for the extreme ones.
In this way we weave to the desired length, not forgetting to check the size: for the pattern to look good, the rainbow dragon scales should be slightly stretched.
When the weaving is finished, it’s time to fasten. To connect both parts of the bracelet you will need four S-shaped clips. Slide all the loops on the forks to the very bottom.
There are two loops for each clip: alternately fix the loops with 1-2, 3-4, 5-6 and 7-8 teeth on the fasteners, and carefully pull them off the forks. Don't worry: the weave will not unravel, as the clips hold it securely.
On the back of the bracelet you need to find the red elastic bands that we used to weave the first row. In the same way, we attach two loops to the second edge of the clip.
Dragon scales are ready! If the description did not seem detailed enough to you, we recommend watching the video from the author:
Step-by-step weaving instructions
Handicraft classes teach perseverance, improve concentration, and develop creative abilities. Training master classes will help you quickly master weaving techniques using different tools.
Bauble on the machine
To weave a thick bracelet from rubber bands, you need to make four thin bracelets using the fishtail technique. It is braided by alternating three colors: blue, blue and white. For the side part, blue elastic bands are thrown on. You can choose any other combination or make the decoration monochromatic. The clasp for the bracelet will be four plastic clips.
For the bracelet you will need 250 silicone rubber bands:
- 50 blue elements for the chain, on the side of the bracelet;
- 200 multi-colored elastic bands for the main pattern.
The color ratio may vary. The work is meticulous and requires perseverance, but the result is worth it.
The machine is installed in such a way that the posts are staggered and the holes on them are on the right. The work will be done on the four outer columns. The process of creating a bauble includes the following steps:
- Place 4 blue rubber bands on the posts diagonally, twisting them in a figure eight. For the chain on the side, throw a blue horizontal one with 4 pins.
- The next circle is made of white material. Throw 4 diagonally, this time you no longer need to twist them, as in subsequent rows. After this, the horizontal blue one is thrown again for the chain. For the 3rd circle, all actions are repeated. The machine produced 3 elastic bands on each diagonal and four horizontal columns.
- At the next stage, the elastic bands begin to be removed. First, take the lower horizontal one and throw it over the pins. Place it so that it is in the middle of the product. Then, in the top row, they grab the blue elements one by one and throw them inside the machine. In the bottom row, the horizontal elastic bands are first pulled back, and then the elements of the first circle are thrown off, as in the top row.
- The elements are thrown off after 3 circles have formed on the machine. At the next stage, throw on 1 circle, as described in point 2, and begin to remove the elements, as described in point 3.
- All subsequent rows of the bracelet are woven in a similar way, not forgetting to alternate the colors of the elastic bands: 1st row - blue; 3 rows - blue; 1 - blue; 3 - white, then everything is repeated from the beginning. The last row should consist of blue elements.
- Once the bracelet is the desired length, the last horizontal elastic band is removed from the machine and set aside. The remaining horizontal loop is thrown through the columns into the product, then white loops are thrown in the upper and lower rows of the machine. As a result, blue rubber bands of the last circle remained on the machine.
- The loops of the top row are removed with a hook and thrown diagonally onto the posts of the bottom row. Plastic clips in the shape of the letter S are attached to the double loops. They are then very carefully removed from the machine. It is necessary to ensure that the clip does not fall off, otherwise the bracelet will unravel. At the other end of the bracelet there are double loops, which were formed from the first elastic bands in the form of eights. These are where the plastic clips go.
We recommend reading: DIY crafts from eggs and eggshells - photos of ideas for unusual crafts
Decoration on the fork
There is a fork in every home. Few people know that this is an excellent tool used for weaving bracelets from rubber bands. A simple master class on weaving jewelry for a beginner describes the following steps:
- The first rubber band is put on the middle tines of the fork in this way: fold it in half, then twist it in a figure eight and put it on the tines. The next two are twisted in the same way, but put one on 1 and 2, and the second on 3 and 4 cloves.
- Elements begin to drop. The loops of the 1st elastic band are removed from the teeth and thrown over the elastic bands of the 2nd row. To make this procedure easier, you can use a regular toothpick.
- At the next stage, the double elastic band is put on the middle teeth, but there is no need to twist it with a figure eight. Then remove the loops from the same teeth and throw them over the last element.
- The double elements are put on the outer pairs of teeth again and the loops are removed from the middle ones, as described in point 2.
- Then they continue to work according to the same principle. If you need to weave a multi-colored bracelet, change the shade of the material every two rows.
- After the bracelet has reached the required length, the final steps begin. The loops located on the outer teeth are removed and put on the adjacent inner ones. The middle tines of the fork made 2 double loops. The lower ones are removed by throwing them over the upper ones.
- Throw on the elastic band again and throw the loops through it. Then a loop is thrown from one of the teeth to the adjacent one. A clip is put on the elastic band remaining on the fork. At the other end of the bracelet, find the 1st loop and thread it into the other end of the clip.
Weaving on fingers
You can weave thick bracelets from rubber bands on your fingers. You should prepare material of different shades. The peculiarity of the weaving process is that the middle and index fingers are used. Then all actions are performed step by step:
- Take a rubber ring, twist it in the shape of a figure eight and put it on your fingers. The next two rings are put on without twisting.
- They begin to remove the rings from the very bottom row, throwing them inward over the fingers. They are straightened so that they are located in the middle.
- The next ring is put on, and the lower loops are thrown inside the product. Weaving continues until a bauble of the required length is obtained. During the process, when removing loops, there should always be 3 elastic bands on your fingers.
Initially, the product may turn out uneven. Don't be upset: after the work is completed, the product is straightened out a little and it takes the desired shape. At the final stage, two loops remain on the fingers. They are carefully removed from the fingers, connected together and the clasp is put on.
Bracelet made of hearts on a slingshot
An original heart bracelet is made using a special slingshot. The product should be multi-colored. The process is performed according to the following instructions:
- Take 1 white silicone ring and place it on the slingshot in the shape of a figure eight. Then put on an element of a pink shade, but there is no need to cross it.
- Remove the white loop from the left column so that it ends up inside the slingshot. The pink loop is removed from the right column and put on the left one.
- Again, a pink ring is placed on the posts of the slingshot. Then the white loop is removed from the right column inside the slingshot, and the pink loop is removed from the left one and placed on the right one.
- Throw a white ring over the columns, and then remove the middle pink loops inside the slingshot.
- Next, put on the purple rings one by one and repeat with them the steps described in points 2, 3 and 4.
- Throw on a white element and throw off the lower pink loops. The first heart is ready.
- Then the product is woven, following the following sequence in colors: take two rings of a certain color, one - white.
- Once the desired length of the bracelet has been achieved, proceed to the final stage of weaving. There should be one white ring left on the slingshot. A loop is thrown from the left to the right column. A clip is put on the double loop, the second end of which is attached to the first loop of the bracelet.
Product Wave crochet
To work, you need to prepare a hook for weaving and multi-colored rings. In the master class, elastic bands of four colors are used: pink, orange, blue and purple. To create a bracelet you need to perform the following manipulations:
- Take two pink rings, throw them on the hook, then twist them and put them on the instrument again. The next elastic band of the same color is touched with a hook and the 1st one is thrown onto it, placing it exactly in the middle. The second end of the single elastic band is put on the hook.
- The next element should be a different color, such as orange. It is thrown onto a hook, and the pink loop closest to it is thrown in such a way that part of the orange one is between two pink rings. It is pulled out and removed from the hook. The lower part of the orange elastic band, on the contrary, is placed on the hook.
- There are 3 loops on the hook. From right to left there are 2 pink and 1 orange. The next task is to change the sequence of loops. You can do this in the following way. The product is pulled back a little and pinched with your fingers so that the loops do not unravel. Carefully pull out the hook and insert it from the reverse side, throwing first an orange and then 2 pink loops on it.
- Take the orange ring again and perform all the actions exactly as described in point 2.
- Then the pink elastic band is touched by the hook and all 4 loops, which are placed in the middle, are carefully thrown onto it. Throw the free end of the pink elastic band over the hook and make 2 more loops.
- Then the process is repeated from point 2.
After the bracelet of the required length is woven, it is necessary to change the direction of work. On the side of the bracelet, find the first orange loop, located horizontally. Thread a blue elastic band into it and make a loop. Then insert the hook again into the next horizontal loop and do a similar process with the next blue elastic.
The operation is performed to the end of the bracelet and repeated on the other side of the product. In this way, you can add rows of other colors until you get a product of the desired width. At the end of the work, you need to attach the clip fastener.
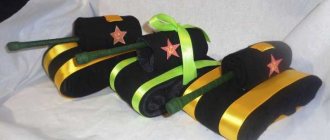
Silicone rubber baubles are becoming increasingly popular among children and teenagers. For needlework, you only need to purchase a special kit, which can be found in craft stores. With its help you can weave not only bracelets, but also other items, including cartoon characters. For example, a cool mangle made of bright rubber bands will not leave any young master indifferent.
Two-tone sidewalk
This cool friendship bracelet made from rubber bands is best made on a slingshot: it turns out fluffy and spectacular, and it’s quite quick to make, literally 5 minutes. At the same time, the essence of weaving is very simple, and the technique is no more complicated than the popular “fishtail”, and the outwardly thick sidewalk resembles a braid of spikelets.
To perform it you will need a slingshot (it can be replaced with two pencils with an eraser), rubber bands of two colors, one S-shaped clip and a hook.
The main difference from the “fishtail” is the number of elastic bands that need to be placed on the frame at a time - here there are not one, but two. You need to remove not from both sides, but only from one, and four elements at a time: you get a double braid. In short, look at the step-by-step photos of the process - and everything will be clear:
Step 1 . We put two yellow elastic bands on the frame, twisting them in a figure eight. Next we put on two green ones, without twisting them. We hook one of the lower yellow loops (double) and drag it to the center of the frame. We do this on one side only.
Step 2 . Throw on two yellow elastic bands without twisting. On the left side of the frame we have six loops: we hook four from below and drop them into the center of the frame.
Step 3 . We throw on two green elastic bands, hook four loops on the right, and throw them into the middle.
Alternating steps No. 2 and 3, we continue to increase the fabric to the desired length of the bracelet. In the end, all that remains is to manually secure the connector to complete the weaving. Here you can watch the video MK from the author of the master class:
Video master classes
There are many techniques for weaving from rubber bands, on the basis of which you can create very beautiful jewelry. We show here popular ideas for bracelets on a regular and mini loom, and invite you to familiarize yourself with the lessons provided. Try to repeat at least a few of them. We are sure that the result will please you!
Fishtail in a spiral shell
Using the simplest technique, you get a very beautiful, voluminous spiral bracelet that even a child can create. If you make the core bright and multi-colored, and choose monochrome shades for the spiral, the effect will be very interesting!
Crochet spider
It's called a spider for a reason: using only a crochet hook and having two colors of elastic bands in stock, you can easily make an unusual bracelet for a Halloween themed party. Jewelry made with luminous elastic bands will look especially impressive: both girls and boys can wear them. We invite you to watch the video below - even a beginner can do it!
Wide crochet bracelet
To create a four-layer bracelet with your own hands, you will need crocheting skills, but if you don’t have them, don’t rush to close the video or learn to knit! In appearance, circular knots are very similar to single crochets knitted from ordinary threads, and to weave you only need a set of elastic bands, a hook and your own patience. The number of rows can be any - a three-tiered bracelet using this technique looks very cool. You will learn how to knit a wide bracelet from the video tutorial.
Wide bracelet on the machine
The fabric of this bracelet is similar to a triple or quadruple knitted pattern. A spectacular and bright Rainbow Loom decoration will not require much time to create - make sure of this by reading the master class:
Wide rainbow ladder on the machine
A dense, bright ladder bracelet, the core of which is made of black, looks very original, like a real path. We advise you to repeat it, following the recommendations from the video lesson. The ladder will look better if you use bright colors for the side parts, and the tail for fixation can be made to fit any wrist size.
We hope that the weaving options given here for beginner girls and boys will help you learn how to weave jewelry from rubber bands at home and master this exciting area of needlework!
© text prepared by the website MirPozitiva
How and what to weave with?
You can weave bracelets from rubber bands using:
- "rainbow" machine;
- slingshots;
- forks;
- hook;
- fingers.
For a beginner in this business, a special kit is suitable, which includes material, various devices and connecting hooks. You should start studying this type of creativity with simple machine diagrams and gradually complicate the task.
Before you begin, you should decide on the colors of the product. You can choose one or several colors. As they gain experience, they begin to make bracelets from hearts and with decorative elements. Using a thin hook, beads, pendants, ribbons, flowers, stars and bows are woven into them.
Important! Rubber bands can be used in different shades, but they must be the same thickness and density.
A child who is interested in such creativity not only receives pleasure from the process and the result, but also develops fine motor skills.