DIY magician costume
DIY magician costume: master class with step-by-step photographs.
An interesting trick and a hat with a secret. Dear readers of “Native Path”! I am pleased to present to you another master class of the New Year's Masquerade competition. This master class on making a magician's costume with your own hands was sent to us by Irina Vladimirovna Usacheva and her son Anton (10 years old).
Irina Vladimirovna writes: “We would like to take part in the competition with our New Year’s costume. We made this magician costume together with our son - he helped paint and glue the decorations.
The child himself is delighted with the costume, the special interest lies in the fact that you can show a real trick - take a rabbit out of a hat, which he did on the Christmas tree ten times for everyone :).
We hope that our idea will be useful to someone else!”
note
So, let's start making the costume together with Irina Vladimirovna and Anton! And we thank the sponsor of the New Year's master class competition, the Games and Toys magazine, for their cooperation.
The magician's costume consists of two parts: a hat and a cloak.
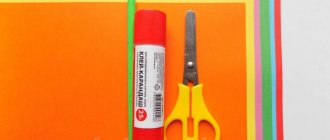
Materials for making a magician's costume
To make a magician's hat we will need:
- a large cardboard box (we used a pizza box for the base of the hat),
- gouache - a small jar of blue gouache and a little black,
- piece of hat elastic - 40 cm,
- black satin ribbon 60-65 cm,
- foam rubber if desired (and possible),
- glue.
For the magician's cloak you need:
- shiny fabric (taffeta) 80 cm with a width of 150 cm.
- to decorate the cloak - stars made of shiny fabric or foil paper, silver tinsel (you can use scraps of tinsel).
How to make a magician's hat with your own hands
Step 1. Wrap a strip of cardboard 17-18 cm high around the head, add 2 cm for gluing and the same amount for shrinkage (I didn’t know that cardboard shrinks when it dries, so our hat doesn’t fit on the head and sits on the top of the head, it’s better than this prevent and take into account in advance).
This is important: The strip must be cut across the corrugation lines so that it does not break, but bends evenly.
Glue the strip into a ring.
Step 2. Cut out a large circle with a diameter of 36-38 cm (the size is given taking into account shrinkage). We place a cardboard ring on it exactly in the middle and trace it exactly along the contour, without adding a single millimeter! We cut out the inner circle, without damaging it, with nail scissors.
Step 3. Cut out many strips of approximately 2 x 5 cm from plain paper (precision is not necessary, you can cut it by eye). Using these strips we connect all three parts of the hat: we glue the top joint from the outside, and the bottom from the inside. We try not to leave any gaps.
Step 4. Paint the magician's hat with gouache (a child can help you here). We painted the outside of the hat with blue gouache (it took almost the entire 20 g jar to paint the magician's hat), and painted the brim on the inside with black gouache. We didn't paint the inside of the hat so that the head wouldn't get dirty later.
Note from the site author: I will add advice from my own experience of making various attributes and games for children with my own hands. To prevent a painted hat or other item from getting dirty, you can apply varnish over the gouache with a brush.
The most common varnish for woodwork will do (sold in glass bottles in hardware stores). Then a protective layer is created. The finished item does not get dirty, is stored for a long time, and can be wiped with a damp cloth.
But the varnish smells strongly until it dries completely, and you won’t be able to stay in the room for 24 hours.
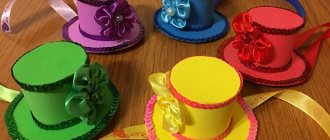
Step 5. Decorate the magician's hat with stars and pieces of tinsel (glue them with PVA glue). We poke holes on the sides of the crown with an awl, insert an elastic band, and secure the outside with knots. We cover the knots with a satin ribbon, which we wrap around the crown, stretch and fasten the ends with glue. The hat is ready!
How to make a magician's cloak with your own hands
Step 1. Fold the fabric in half and cut out a semicircle.
Step 2. Cut out a strip of fabric 4 x 30 cm. We process this strip in the middle of the top so that we get a drawstring. We thread the lace through for tying (our lace is made from the same fabric).
Step 3. Fold and hem all the edges of the magician's costume.
Step 4. Sew stars and tinsel to the magician's cloak.
To complete the look, wear a pantsuit with a tie under the raincoat and draw on a mustache with a cosmetic pencil.
Now attention! Cover the hat with a cloak! We make passes with our hands and say magic words! We remove the cloak and... there! Let's take the rabbit out of the hat!
How does this trick work, or a hat with a secret?
How does it work? The whole secret is in the magician's hat.
From furniture foam rubber (we had a piece 5 cm thick, it’s probably better to take 3-4 cm) you need to cut a circle that will fit tightly into the hat (To cut out such a circle, we turn the hat over and trace the top as a pattern). We put a toy in the hat and cover it with foam rubber. To quickly get the rabbit, you just need to press the edge of the foam rubber with your hand - it will stand upright and the toy can be easily removed.
You will find more master classes on making masquerade costumes for children with your own hands in the articles on the site:
— DIY elephant costume for a masquerade party for a child.
— DIY princess costume for a masquerade.
— How to make a Christmas tree costume with your own hands.
— How to make a half mask for a masquerade with your own hands.
Get a NEW FREE AUDIO COURSE WITH GAME APPLICATION
“Speech development from 0 to 7 years: what is important to know and what to do. Cheat sheet for parents"
Click on the link or course cover below to subscribe for free
The author of the course is Valasina Asya, candidate of pedagogical sciences, author of the website “Native Path”
Source: https://rodnaya-tropinka.ru/kostyum-fokusnika-svoimi-rukami/
DIY magician costume for a boy:
At children's parties or matinees at school or kindergarten, one of the popular costumed characters is a magician. The costume of this hero is quite colorful and interesting. There are outfits for both girls and boys. The costume consists of several mandatory elements, which can be varied by playing with a combination of colors and additional decoration.
In the article we will look at how you can sew a magician’s costume for a boy with your own hands, what is included in the components of the outfit, and how to make each element at home.
What is an outfit
A top hat is usually worn on the head. It can be either classic black or bright, multi-colored. The lower part of a magician's costume for a boy does not require separate tailoring; it is enough to wear black trousers, which are always in any child's wardrobe, as well as a white shirt.
Parents have to work on a bright vest. It is advisable to use colorful, shiny fabric. The bow tie will also be made from the same fabric. The final touch to the magician's costume is a cape in the shape of a cape.
Important
It will be interesting to sew it from two layers of fabric: the outer one is black, and the inner one should have the same color as the vest and tie. It can be bright red, light green, turquoise or pink. The main thing in choosing a color is to create a sharp contrast to black.
An outfit for a boy will look interesting if you take fabric in a checkered or striped pattern, with polka dots or diamonds.
Making a cylinder
A tall magician's hat can be made from cardboard. It is necessary to consider the height of the cylinder and measure the circumference of the child's head. A rectangle with these dimensions is drawn.
You need to add 2 cm on one side for gluing the paper. It is best to use PVA glue; you can simply fasten the sides with a stapler. Then they place the end part on the sheet and outline the base.
The resulting circle is cut out with small corners along the entire circumference.
PVA glue is applied to them and they are attached to the base of the cylinder. All that remains is to cut out a ring for the magician's hat, the inner circle of which is outlined according to the method described earlier, and the outer circle is made 4-5 cm wider. The photo shows that the central hole is made with corners along the entire perimeter. Glue is applied to them to attach the ring. The hat for the magician's costume is ready!
Decorating crafts
A cardboard headdress can be decorated in different ways. First, simply paint it with black gouache and cover it with acrylic varnish. If this is not done, the child may, as a result of touching, smear his fingers and stain other things. You can tie a bright satin ribbon around the top hat to match the rest of the magician's costume.
Secondly, the hat, which is made, as in the photo above, from thick paper with a print, looks interesting. The result is a motley model.
The bow tie
From the remaining fabric from sewing a magician's costume for a boy, it is easy to cut a bow tie. A rectangle is cut out, the length of which is equal to double the size of the future accessory. Width – according to two measurements of the width of the object. On the back side, the workpiece is sewn along the edges with stitches or attached if there is a sewing machine in the house.
The result is a fabric pipe, which is turned right side out with a seam in the middle. The side edges are folded towards the center and stitched together. When sewing, the central seams are located on the back side of the butterfly. Then work continues in the same way on the tie's jumper. When the fabric tube is sewn and turned out, it is wrapped around the first piece and slightly pulled together so that the butterfly is gathered. All that remains is to sew the edges of the jumper and straighten the folds with your hands.
You can fasten the tie with a pin, a metal clothespin, or attach an elastic band with accessories - a clothes hook.
DIY witch hat
Halloween began to be celebrated in our country relatively recently, but this unusual holiday almost immediately gained incredible popularity, reviving the tradition of carnivals.
As you know, no carnival is complete without costumes of witches, ghosts and other evil spirits.
Let's take a step-by-step look at how a witch's hat can be made with your own hands from scrap materials - paper, felt and fabric.
Paper hat
The easiest and fastest way to make a hat is from paper and cardboard. It will take very little time, and the result will look impressive and attractive.
- thick plain cardboard;
- scrapbooking paper with suitable patterns;
- ink;
- PVA glue;
- scissors;
- compass, ruler, pencil;
- decorative elements as desired.
To begin with, we decide on the size of the hat: the product can be large enough so that it can be freely put on the head, or small, which can be secured in the hair with clips.
We cut out a cone in the form of a quarter circle, for which, using a compass on colored scrapbooking paper, we draw two arcs with increments of 14 cm and 13 cm. One centimeter of difference will be used to form teeth for gluing.
We cut out the part with the teeth, carefully roll it up and glue the cone using PVA glue. We bend the cloves outward, as shown in the photo.
We cut out the brim of the future hat from paper and cardboard (you should get two identical parts). We measure the diameter of the base of the resulting cone and divide the resulting number in half. We set the pitch of the compass and draw a circle. Then add 3-5 cm for the margins and draw a second circle, cutting out the part.
We collect the hat. To do this, using the teeth on the cone, glue the top part of the hat to the paper part, and glue a similar cardboard part on top of it. The resulting structure can be placed under a press for a few minutes, pressing down the brim of the hat.
We eliminate visible defects, cut off uneven sections of paper, and tint the edges of the cardboard with black ink. We decorate the hat at our discretion: glue on buckles, ribbons, appliques made of paper or fabric. The witch hat is ready!
Felt hat
A miniature decorative hat can be made from felt. It will last longer than paper and, in addition, will become a wonderful decoration for the festive interior.
Necessary materials
- dark green and purple felt;
- black threads;
- needle;
- black half beads;
- black ribbon or braid;
- cardboard;
- padding polyester;
- scissors, compass, tweezers;
- glue gun;
- additional decor upon request.
Prepare a felt cone for the top of the cap. To do this, build a circle with a diameter of 14 cm and cut out one fourth of it. Glue or carefully sew the edges of the workpiece, and if desired, sew in a loop of thin braid.
We fill the cone a little with padding polyester so that the product holds its shape better.
For the base of the hat, cut out a circle of felt with a diameter of 8 cm and sew its edges with a buttonhole stitch using black threads. Glue the cone with a loop strictly in the center using a glue gun.
We try not to allow excess glue to get on the workpieces; it will be difficult to remove it from the felt.
note
We close the base of the cone with a silk ribbon and decorate it with a felt buckle of purple or any other color.
We decorate the hat with black half-beads, placing them on glue using tweezers. Bend the upper part of the cone slightly to the side. So that the hat can be worn, we sew or glue a hair clip to the base. The felt witch hat is ready!
Fabric hat
If you decide to sew a witch's hat from fabric, it is best to give preference to dense materials that hold their shape well. If desired, the product can be starched or treated with gelatin. Fabrics with a glossy sheen or unusual texture look great.
Necessary materials
- black fabric;
- cardboard for patterns;
- wire;
- needle and thread;
- scissors;
- wire cutters;
- decorative buckle and ribbon.
Operating procedure
We measure the circumference of the head and draw a pattern on cardboard. The fields can be of any diameter. We cut two pieces of wire, one of which is equal to the circumference of the head, the other - the length of the hat brim along the perimeter. We close the wire in a circle and twist it tightly or carefully solder it using a soldering iron.
We transfer the pattern to the fabric, adding allowances of 1.5-2 cm for each size. It is necessary to cut out one piece for the crown and two for the brim. We sew the cap together, securing a wire circle of smaller diameter in its lower section. We starch the crown, except for the tip, which will hang down effectively. You can not starch the fabric, but decorate it with folds and secure them with several stitches around the perimeter.
We fold the fields with the right sides facing each other and sew along the contour, sew in a wire circle of a larger diameter (you can replace it with a piece made of thick cardboard), turn it inside out and iron it. We sew the crown to the brim and decorate the product with a ribbon and a decorative buckle. The Halloween witch hat is ready!
You can make other options for carnival witch hats by watching the master classes below in video format.
Source: https://sdelala-sama.ru/podelki/3733-shlyapa-vedmy-svoimi-rukami.html
Prince in a beret with feathers
A fairly simple version of the headdress, which for some boys may be even preferable to a crown, is a luxurious beret with feathers. Be sure to make sure that you have fabric (its tone should match the tone of the suit and robe), feathers (they will be decorations) and brooches. The pattern is prepared in advance. After cutting out the paper parts, they are transferred to the fabric.
An indispensable attribute of the costume is the sword. The necessary materials for its manufacture are window glazing beads or wooden slats. For younger children, a cardboard sword is suitable (it is safer). We make a wooden blank (one meter is its minimum length). We clean it well with sandpaper and paint it with silver paint. We give the paint time to dry and decorate the sword. But first, let's add a handle. Take a plastic cover. A hole is made in it. Having put it on the sword, we tint it and let it dry.
We worked hard: the prince's costume turned out great. Available materials, a little time, a step-by-step diagram, your own imagination - and the child will definitely remember the New Year's performance.
DIY wizard costume
How you sometimes want to change your ordinary clothes to a bright festive outfit! The series of New Year holidays is conducive to this.
If you don’t have much time to prepare for the holiday, but you need to look impressive, then a magician-sorcerer-wizard costume is what you need! A wizard's carnival costume is an excellent solution for a school party, theater production or corporate party for adults.
There are only three main attributes of this outfit: a cape, a cap and, of course, a magic wand. Having all the necessary materials at hand, you can easily sew an original wizard costume for both children and adults with your own hands.
Cape
This mandatory attribute of a carnival outfit is easy to make.
We will need:
- a piece of satin;
- satin for finishing;
- satin ribbon 3-5 centimeters wide;
- decorative fittings;
- threads, needle;
- scissors.
- The cape for a children's wizard costume should not be tight-fitting, so you won't have to work on creating an accurate pattern. It is enough to fold a piece of satin in half, then in half again. After this, place a raglan of a suitable size on the fabric and cut out the cape, taking into account the required length of the sleeve and the cloak itself. The sleeves must be made flared, and the hem of the cape must expand from the waist. It is better to make the collar area V-shaped by cutting off excess fabric.
- Using a needle or sewing machine, carefully sew the cape, finishing along the edges of the sleeves and along the bottom. Cover all edges with satin and decorate with satin ribbon. All that remains is to iron the cape with an iron and the costume is almost ready! Keep in mind that satin is a delicate fabric, and ruining it with a hot iron can only take a few seconds!
Cap
The headdress for a wizard's costume can be made with or without a brim. To do this you will need thick cardboard, scissors and tape.
- Draw a circle on a sheet of cardboard, the radius of which will be equal to the height of the cap. Then measure 10-12 centimeters and draw another circle if you want to make a cap with a brim.
- Carefully cut out the parts along the previously drawn lines. After trying on, secure the resulting cone with tape.
- For a cap with a brim, you need to make several small cuts on the cardboard, bending the cardboard up. Using tape, attach the brim of the cap to them.
- It's time to start decorating the cap for the wizard's costume. To do this, cover the cone with satin fabric, securing it on the inside of the cap with a stapler. Be careful that metal clips do not cause injury during the carnival!
The brimless cap can be additionally decorated with edging. The edging with drapery made of small folds that adds volume looks impressive.
Braid, narrow satin ribbon, metal or plastic fittings in the form of chains, coins, pendants will also be appropriate in this case.
By the way, the joints of the fabric can be successfully hidden with the help of a braid attached vertically, and the top of the cap can be decorated with a large bead or a tassel with fringe.
Magic wand
Well, what is a magician and sorcerer without a magic wand? Making this essential attribute of the carnival is as easy as shelling pears! It is enough to wrap a wooden or plastic stick in fabric, foil or bright metallic paper, and decorate its end with a metal knob. Golden stars, tassels, pendants will definitely appeal to young sorceresses!
The cape, cap and wand are ready! All that remains is to try on a carnival costume and have fun!
You can also make a costume for another wizard - Harry Potter - with your own hands.
Source: https://womanadvice.ru/kostyum-volshebnika-svoimi-rukami
Image Basics
So, what will our costume consist of? It all depends on your capabilities and desires. Here is a list of the main details of the image:
- suit, preferably three-piece;
- cape;
- cylinder;
- additional attributes.
As you can see, the list of the main components of the image is not so long. If you are determined to create, then by making all the listed parts, you will get a great magician. We will consider the suit and other parts of clothing later in the article.
How to make a paper witch's cap and hat
This is an article from the “Holiday Props” series
How to make a paper cap?
For some reason, the conical paper hat is called a “birthday hat” on the Internet. I remembered this decoration from the movie “Always Say Yes.” Well, these are the traditions - in order to show themselves and others that it’s time to feel fun, people can put on caps. In general, let’s figure out what the pattern should be.
I am planning a cap for a small mannequin head - Manyasha. I take a sheet of paper, roll it into a cone and trim off the uneven bottom edge. Hmmm, perhaps it turned out a little high and, therefore, unstable. Like in the story about Robin Hood:
Robin Hood began to dress. First I put on my cap. And that cap stood like a stake,
He held on somehow.
Okay, I'll lower the height. The pattern turned out like this:
Paper cap pattern
I cut it out, roll it up and try it on again, gradually pushing the cap deeper and deeper onto the mannequin’s head.
Advice
There is a special allowance for the seam, so the cap can be made narrow, like Tove-Jansson’s Tofsla and Fifsla, or it can be made wider and pulled directly over the ears to hold it tighter.
Cowboy and pirate
The idea is certainly not new. But the costume is also very easy to make. Find a plaid shirt and jeans. Look for a suitable neckerchief in your wardrobe. Decorate a regular vest with fringe - you’ve got an almost finished cowboy costume. It's all about the cowboy hat. By and large, any hat with a wide brim (even a straw one) is suitable for a children's costume. You just need to fold its fields correctly.
Making a pirate costume is even easier. Pants, vest, bandana and black eye patch. And if the bandana is decorated with an applique in the form of a skull and crossbones, then the pirate will be irresistible. Oh, and don't forget that both of these costumes involve the use of an attribute such as a toy gun. Believe me, with a gun in hand, your child will be delighted with any costume!
How to make a hat from paper or cardboard with your own hands
If you have some kind of costume party or masquerade coming up, the idea of making a hat out of paper often comes up. Making such a headdress is quite simple and quick thanks to the development of geometric shapes from paper and the corresponding diagram. The hat will very quickly cheer up both the people around you and its owner.
DIY cylinder
A top hat is an extraordinary hat that can complement many looks. For example, this headdress is suitable for a Snowman, Dracula, a Wizard or a Magician.
For production you will need:
- Plate.
- A simple pencil.
- Stationery scissors.
- Glue stick.
- Colored cardboard.
Diagram of a paper cylinder:
- We cut the cardboard into 2 strips of equal width, which will be the height of the cylinder.
- We measure the circumference of the child’s head, divide the resulting number by 2. We get the length of each strip. On the gluing line we make an allowance of about 2 centimeters, and cut off the excess.
- We take 2 manufactured fragments and glue them along the transverse side to each other. The result is a rather long cardboard strip.
- We fold the strip so that the colored side is on the outside of the cylinder. After this, we glue the sides together with an overlap.
- We select the bottom side of the cylinder and make cuts on it about 2 centimeters long, they should also be approximately 2 centimeters apart. Temporarily remove the manufactured part to the side.
- To make the top part you will need a sheet of cardboard. We take the resulting tube and trace it according to the template.
- We retreat a couple of centimeters from the resulting circle, draw an outer circle, and cut out the part along it.
- At a distance from the outer to the inner circle we make cuts, retreating from each 1.5-2 centimeters.
- We lubricate the resulting cuts with glue, take the blank of the future cylinder and press it firmly onto its upper part. The top part is ready.
- You need to take cardboard to make the brim of your hat. To do this, place a regular plate on it and trace its outline with a pencil. Then we place the cylinder blank in the center of the resulting circle and also trace it. We cut along the lines, we get a kind of ring.
- We take the cylinder again and place it on the table with the cuts down. Apply glue or tape to the cuts.
- We put the previously prepared “ring” on the cylinder and carefully press it.
- If desired, to hide the gluing points, you can cut out another “ring” and glue it to the bottom surface.
- To complement the look, the cylinder can be decorated with a contrasting paper ribbon.
Source: https://natrukodel.ru/podelki/shlyapa-iz-kartona
Making a crown
What other parts do we need if we are preparing a prince costume? Of course, the crown. Leftover lace and jewelry are the main materials that will be used to make the headdress. You also need to stock up on acrylic paint (its color should be silver or gold), gelatin, and hard cardboard.
After cutting off the lace (we determine the length in advance), you need to sew the ends together to create a ring. To give the crown the necessary rigidity, you will need gelatin (one and a half teaspoons). To dilute it, prepare warm water. Leave to swell for forty minutes. Afterwards we place our part in the solution for half an hour.
Next, take hard cardboard. A blank of the required size is made from it to stretch the lace. Having stretched it, we leave it to dry in the microwave for about thirty seconds, from time to time again immersing it in the gelatin solution. And so on until we feel that the crown has become hard. Don't worry if sometimes things don't work out. After all, very soon the prince costume for the boy will be ready.
After drying the product, it must be removed from the blank. To decorate the crown, apply silver or gold paint to the lace with a brush. Let's move the headdress to the windowsill so that it dries completely. Light beads, rhinestones, jewelry - these little things can be used to decorate the finished part. To glue them, it is better to use a glue gun.
DIY hats for dolls, made of cardboard, paper, fabric, beads, master class
In addition to clothes, an important element in creating a puppet character is, of course, a hat.
Small or large, satin or paper, chic or modest - they can literally immediately transform your doll.
In addition, recently it has become very fashionable to use this toy accessory on its own as a brooch or hairpin. Our master classes with detailed photos will help you make a hat for a doll with your own hands.
Exquisite hat made of fabric, lace, ribbons and beads. Master Class
For the master class you will need the following:
- two pieces of dublin and one piece of cloth;
- lace and satin ribbons of different colors;
- 3 or 4 beads;
- sewing supplies (threads, needles, scissors, sewing machine).
- Fold two pieces of dublin together, place them on the right side of a piece of fabric and draw a circle of the required size.
- Sew the fabric and dublin together according to the marked markings.
- Cut the fabric at a distance of 3-5 mm from the edge of the circle.
- Make a cut in the middle of the circle on the dublin side with scissors and turn the fabric right side up through it. Carefully straighten the edges of the future hat and iron the entire part. The dublirin will stick together and the cap will take a rigid shape.
- Sew a piece of lace ribbon onto the top fabric part so that the stitches are not visible from the bottom side.
- Sew the satin ribbon with a basting stitch, placing beads on a needle 2 cm apart. Pull the thread and attach the ribbon to the hat with a few stitches.
- Without breaking the thread, sew a second lace ribbon of a different texture.
- Bend another satin ribbon lengthwise and sew it in the form of a piping. After gathering the ribbon, sew it into the middle of the hat.
- On top of the hat you can sew an additional piece of matching fabric, glue beads, a feather or fur.
The elegant hat is ready!
Using this master class, you can make hats for a wide variety of dolls with your own hands. Due to their luxurious appearance, they are especially suitable for tryapiens dolls.
Hat made of fabric, cardboard and plastic cap
It’s very easy to make such a hat from fabric and cardboard for a doll with your own hands.
To do this, you need to cut out one circle from cardboard, a second, larger circle from fabric, and a third also from fabric, but of such a size that when pulled together it covers the cap of a plastic bottle.
Then you will need to insert a cardboard circle and a lid into a fabric circle, sew the fabric with a basting stitch, pull it together and secure the thread. Now all that remains is to glue the cap to the center of the circle covered with fabric and decorate the hat with ribbons.
Paper hat
You can make hats for your dolls using beautiful paper and glue, the most important thing is to correctly draw and cut out the brim and crown, using cuts for gluing. The parts are attached with glue and decorated with ribbons, braid, linen threads and other suitable accessories.
Koschei the Deathless
The idea for this costume came from film adaptations of Russian folk tales. You only need to pick up a dark tights (pants) and a sweater. You will also need foil, from which you will have to cut out the skeleton parts and cover the crown with it, and black fabric for the cloak and appliqués. Find a picture of a real skeleton and, looking at it, draw (first on a newspaper) two details - the sternum with ribs and the pelvic bones. Make the pattern size in actual size. That is, the drawn bones must correspond to the size of the real skeleton and the height of the child. Then transfer these designs onto foil and cut them out. Glue the finished patterns onto a piece of black fabric, which you then sew to the sweater. Make a cape from the same fabric, and from whatman paper make a crown - a primitive jagged one. Cover the crown with foil, and trim the cape with tinsel on the occasion of the New Year.