You can light a fire using a battery and foil due to the fact that when an electric current flows through the metal, it heats up. This heating is stronger the more powerful the battery and the smaller the cross-sectional area of the conductor. In the case of foil, the smallest area will be in the narrowest part of the foil, which is where the heat will be sufficient to ignite the paper or other tinder applied to the foil.
Making fire using a battery and foil
The method of starting a fire using a simple AA battery, stranded wire and matches is based on the same principle (used when the box gets wet or to create alarms using pyrotechnics). In this case, a narrowed section is created by removing all wire strands except one. This core is wound around the match head and, heating up during contact closure, ignites the match.
In order to start a fire using foil and a battery, you need to take a chewing gum or chocolate wrapper (although almost any other foil, for example, food foil, will be suitable for these purposes). In survival conditions, foil can be found among the garbage, including even on the shore of an uninhabited island, where the foil can be washed up by a wave.
The best way to create a fire is foil with a paper layer, since the paper in this case acts as tinder, tightly pressed to the metal layer, and lights up when the circuit is closed. But regular clean aluminum foil will work too, although it will require more work.
Then:
- It is necessary to cut a strip of foil so long that its edges freely reach the battery poles. The width of this strip must be at least 5 mm. If the strip is thin enough, the entire foil will become noticeably hot and may burn your fingers.
- A narrowed section about 2 mm wide is made in the center of the strip. If this area is made too wide, the foil may not heat up to the desired temperature, and if it is too narrow, the foil may tear. The transition from the wide part to the narrowed part should be smooth. For convenience, fold the foil in half and cut off the excess.
- If the foil is without a paper layer, you need to use tinder, for example, dry cattail fluff. Two small balls are rolled from the fluff, and a thin piece of foil is sandwiched between them.
- With your index finger and thumb, both ends of the foil strip are pressed against opposite terminals of any battery - the circuit is closed, and the paper on the foil ignites, although only for a moment. At this moment, she needs to have time to set fire to the tinder or kindling, if, of course, these manipulations were intended to start a fire.
The video shows how to light a fire using a battery and foil:
In the case of clean foil and tinder, when the battery contacts are closed, a slightly different picture is observed. Here the tinder begins not to flare up, but to smolder. Therefore, to light a fire, it must be fanned, providing an influx of fresh air, and placed in the kindling.
If the strip of foil is too short and does not reach the battery terminals, or for ease of working with the battery itself, you can do the following. The side of the battery case from the negative terminal side is cleaned of glue and film. This stripped part has a positive charge, therefore one end of a strip of foil can be applied to this area.
When starting a fire from a mobile phone or smartphone battery, there is no need to make the foil strip so narrow in the central part: a width of 5–8 mm will be quite enough. The edges of the tape are folded into a “sausage” for better contact with the battery terminals. Also in this case, it is better to protect your fingers by placing some kind of heat insulator between them and the foil, for example, paper folded in several layers.
On a note
Some people think that you can start a fire with a battery and chewing gum, but this is not true. To light a fire, you will need not the chewing gum itself, but a foil wrapper from it, preferably with a paper layer. It is this foil, together with any battery, that will allow you to create a flame.
Battery disposal rules
It is highly recommended not to dispose of batteries that have become unusable as other waste. This is explained by the fact that the device contains various substances that cause significant harm to the environment, for example:
- electrolytes;
- acetylene black or graphite;
- steel capsule;
- plastic and paper components;
- manganese dioxide.
The body of the device begins to rust over time, which means it loses its original tightness. Because of this, toxic substances enter first the soil and then into groundwater. Then underground water flows carry them into large bodies of water.
Therefore, a system for recycling batteries has been developed in all countries. Products that have become unusable are widely used in metallurgy, in the manufacture of fertilizers or pencils.
Some large hypermarkets, for example IKEA, accept old power sources. To do this, they placed special bright yellow containers. You can also donate batteries to organized collection points.
If you want to make something original or extend the life of batteries, remember that your experiments must be safe. Do not involve small children in this process or use damaged batteries.
Salt, coal and graphite
Which battery to choose
This device does not require acid as it uses an alkaline reaction. How to make this type of battery? The basis of this type of energy storage device is a container with an electrolyte in the form of a solution of water and sodium chloride - table salt. To create it you need:
- graphite rods, with a metal cap for soldering the contact;
- activated or charcoal, crushed into crumbs;
- fabric bags for storing coal powder;
- container for electrolyte with a tight lid for fixing the ends of the electrode.
The electrodes are a graphite rod coated with dense carbon. Graphite can be used from deteriorated batteries, and charcoal can be used from charcoal or activated carbon from gas mask filters. To create a dense lining, coal can be placed in a water-permeable bag, then a graphite rod can be inserted inside, and the fabric of the bag can be wrapped with thread or wire with an insulating coating.
To increase the performance of this type of design, you can create a battery of several electrodes placed in one container.
Gas storage
Important! The storage capacity and voltage at the contacts of homemade devices for storing electricity are relatively small, but at the same time they are quite enough to connect a low-power light source or other purposes. A battery of several electrodes has higher performance, but they are more bulky
What can be made from a battery?
If you mobilize all your imagination, then even from familiar devices you can make something unusual.
Battery magnet
To make your own magnet, you will need:
- Copper wire. It is advisable to take a varnished one. This way the device will not short out during operation.
- New battery.
- A small carnation.
Carefully wrap the copper wire around the nail. The turns should be located as close to each other as possible. Connect the two free ends to the battery.
Stun gun
Prepare the following materials:
- Krona type battery.
- Transformer. It can be “borrowed” from a charger, modem or other equipment that has a 9 V power supply.
- Ebonite rod 40 cm long.
- Steel wire 5 cm long.
- Electrical tape.
Assembly steps:
- Attach 2 pieces of wire to one end of the ebonite rod.
- Connect both pieces of wire to the transformer.
- Connect the battery to the transformer contact.
- Place a switch at the other end of the rod. When you press it, an electric arc should appear.
Miniature hand warmer
As you know, there are two types of people. Some are freezing even in the middle of hot July, and some are ready to show off their bare hands even in the bitter cold. If you belong to the first group, then you simply need a mobile hand warmer. Take two batteries and wrap them in foil, carefully pressing them against the positive contacts. Press the “plus” and you will immediately feel how your hands warm up.
AA from AAA
Did you purchase the wrong batteries? It's OK. Using small pieces of foil you can turn AAA into AA. Insert the batteries into the device and secure them with foil.
Battery lighter
To make a lighter, prepare the following materials:
- “Krona” for 9 V, a new one and one failed one.
- Thin wire. If possible, replace it with nichrome.
- Cable.
- Glue.
- Soldering iron and all necessary soldering equipment.
- Two bolts with nuts.
- Button.
After all the materials are prepared, you can start assembling:
- Apply a thin bead of clear glue to one side of the battery and glue one of the bolts in place.
- Repeat the manipulation on the other side of the Crown.
- Take the Krona that has become unusable, disassemble it and take out the plate with the positive contacts.
- Use a soldering iron to connect one of the contacts to the bolt.
- Take a nail and wrap the wire around it. There should be a spring.
- Secure it to the bolts with nuts.
- Connect the second wire first to the button, and then to the “Crown”.
Fire from batteries
This is one of the most popular life hacks. To do this you will need a small piece of paper-based foil. For example, you can take a package of chewing gum. Attach it to the contacts of the current source and bring it to the object that needs to be set on fire.
Motor
Take some thin copper wire, a power source, 3 small round magnets, a couple of paper clips and some reinforced tape. Next, proceed to assembling the motor:
- Wind the wire around the battery. You should make at least seven turns.
- Remove the resulting “spring”. Bend the ends of the wire around it. Sand them thoroughly.
- Straighten the paper clips. Use tape to secure one paper clip to the end of the battery. Repeat the manipulation on the other side, taking a second paper clip.
- Bend them at a right angle and secure the wire spring.
- To set the motor in motion, place a small magnet on the battery.
Other ways
To use the second method, you will need to prepare a narrow metal tube. A hole should be made in it for the wheel. Place a special flint with a spring there. Remember that the first element should have a small elastic band. Even from a durable alloy or metal, make a lighter cap along with a wick. Next, solder a metal tube to the sleeve and fill the top of the device with fuel.
The third manufacturing method involves the use of parts such as a sleeve and a cotton cord. At the first stage, the cord must be cut, soaked in gasoline and lowered into the sleeve. Next, you need to ensure the interaction of the device with the flint - to do this, leave the outer part of the wick peeking out. The flint itself is made from a file. How to do it? To do this, solder a small piece of file (no more than 5 centimeters long) to the sleeve and pour gasoline into the latter. That's it - the device is ready for use.
DIY electromagnetic motor
This homemade electric motor can be easily made from scrap materials at home. It is worth noting that such a device can be used not only as a visual example, but also for its intended purpose, for example, by attaching a fan to the rotor.
To make it you will need:
- Spoke;
- Thin metal plates;
- Bolts with nuts;
- Copper wire;
- A piece of plywood.
From a metal sheet 0.2 mm thick, cut out 5 rectangular plates 40 by 15 mm. We make holes in the center of all plates and put them on the prepared knitting needle. Next, you need to secure the plates together with electrical tape.
Then, on the axis you need to attach a homemade current breaker, which is made of the metal from which the plates are made. The breaker dimensions are 3 by 1 cm. This plate is folded in half and placed on the axle.
Next, we make the base from plywood. To do this, drill three holes on a piece of plywood measuring 50 by 50 mm (two for bolts along the edges and one in the center for installing the rotor). We make a U-shaped holder for the upper part of the rotor from a metal plate. And drill a hole in it in the center.
After this, to make the stator, we cut out three plates from metal that will connect the bolts in the lower part of the structure and make two holes for the bolts in them. We put these plates on the bolts, and insert the boots into the holes on the wooden platform.
Next, the bolts are wrapped with electrical tape, and 500 turns of copper wire is wound onto it. A holder for a contact breaker is attached to one of the corners of the wooden structure. Electricity of 12 Volts is connected to the coils.
: Painting
It is not necessary to paint your electronic lighter, but it will definitely look better after painting.
First, cover with electrical tape those parts of the lighter that should not be covered with paint - the battery terminal, the spiral and the button.
Then coat the lighter with spray paint.
Read more about how to create an electromagnet
It's quite easy to build an electromagnet. All you have to do is wrap a few turns of insulated copper wire around the iron core. If you connect a battery to a wire, electric current will begin to flow and the iron core will become magnetized. When the battery is disconnected, the iron core will lose its magnetism. Follow these steps if you want to build the electromagnet described in our Magnets and Electromagnets experiment:
Step 1 – Gather Materials
To build the electromagnet described in our Magnets and Electromagnets experiment, you will need:
One iron nail 15 centimeters long. Three meters of insulated stranded copper wire. One or more D-cell batteries.
Step 2 - Remove some of the insulation
The copper wire must be exposed so that the battery can be connected well to the power grid. Use a pair of wires to remove a few inches of insulation from each end of the wire.
Step 3 – Wrap the Wire Around the Nail
Carefully wrap the wire around the nail. The more wire you wrap around the nail, the stronger your electromagnet will be. Make sure you leave enough wire unwind so you can attach the battery.
A wire is wrapped around a nail to create an electromagnet.
When you wrap the wire around the nail, make sure you do it in the same direction. You need to do this because the direction of the magnetic field depends on the direction of the electric current it creates. The movement of electric charges creates a magnetic field. If you could see the magnetic field around a wire carrying electricity, it would look like a series of circles around the wire. If an electric current flows directly towards you, the magnetic field it creates spins around the wire counterclockwise. If the direction of the electric current is reversed, the magnetic field also reverses direction and sends the wire clockwise. If you wrap part of the wire around a nail in one direction and part of the wire in the other direction,
Magnetic field around a conductive wire.
Step 4 – Connect the Battery
Attach one end of the wire to the positive terminal of the battery and the other end of the wire to the negative terminal of the battery. If all went well, your electromagnet is now working!
Don't worry about which end of the wire you attach to the positive terminal of the battery and which to the negative terminal. Your magnet will work just as well as it did anyway. Which will change the polarity of your magnet. One end of your magnet will be its north pole, and the other end will be its south pole. By reversing the way you connect the battery, you can reverse the poles of your electromagnet.
Tips for Strengthening Your Electromagnet
The more turns of wire your magnet has, the better. Keep in mind that the further the wire is from the core, the less effective it will be.
The more current passes through the wire, the better
Attention! Too much current can be dangerous! When electricity passes through a wire, some of the electrical energy is converted into heat. The more current flows through the wire, the more heat is generated
If you double the current passing through the wire, the heat generated will quadruple! If you triple the current passing through the wire, the heat produced will increase 9 times! Items can quickly become too hot to handle.
Try experimenting with different kernels. A thicker core can create a more powerful magnet. Just make sure the material you choose can be magnetized. You can test your core with a permanent magnet. If a permanent magnet is not attracted to your core, it will not make a good electromagnet. For example, aluminum rod is not a good choice for the core of your magnet.
Design and principle of operation of solar panels
The principle of operation and design of the battery consists of several parameters, among which are the following:
- several electronic devices that convert photon energy into electrical energy. Photovoltaic elements are connected in solar batteries in strict sequence, located parallel to each other;
- a battery that stores electromotive force;
- periodic voltage generator-converter;
- an electrical multi-position switching device that controls the operation of all devices in the battery.
Photovoltaic cells used to create batteries are made from silicon. However, purification of the material is a very expensive procedure. Therefore, recently manufacturers have been using copper and indium. Each element is an autonomous box that generates electricity. The boxes are connected to each other, forming a single platform. The intensity of the solar battery depends on its size. Therefore, the more solar station contains photovoltaic cells, the more energy it produces.
When the sun's rays hit an element, a photovoltage is formed in it, creating thermal generation of electron-hole pairs. Some of the extra electrons pass through the area of contact of two semiconductors with different types of conductivity from one layer to another. After this, voltage appears on the external section of the electrical circuit. In this case, a positive current pole appears at the p-contact, and a negative current pole appears at the n-contact. Once connected to the battery, the photovoltaic cells form a closed ring. As a result, the solar station operates on the “squirrel in a wheel” principle. Stably negatively charged particles “run” in a circle, and the battery gains charge.
A simplified model of a motor made from a battery and wire
There are many types of electric motors and they can be classified according to different criteria. One of them is the type of electricity supplied to them. We can differentiate between DC and AC motors.
One of the first DC motors was the Faraday disc, which like many motors was a reversible machine. After supplying mechanical energy, it produced electricity (unipolar generator).
Today we are going to build a simple but working model of a DC motor.
Materials
The materials needed to make a toy can be found in every home. We need:
A small amount of wire in enamel with a diameter of 0.3-0.6 mm R6 - 1.5 V battery The magnet can be small Auxiliary materials: tin, rosin, a piece of wire and part of a universal circuit board for the "deluxe" version Of course, we also need soldering iron with resistance or transformer resistance.
We are working
The enameled wires should be wound around the battery, creating a small circle that will serve as the motor winding. Then, with the ends of the wire, wrap the winding so that it does not develop.
To get the impeller ready, you must still remove the insulating enamel from the ends of the wire that will serve as the axle. Additionally, one of them will also be a primitive switch. Therefore, if on the one hand we remove all the enamel, on the other hand we must do it only on one side, top or bottom:
The easiest way to do this is to place the straightened end of the wire on flat air, such as a countertop, and then scrape away the enamel on top using a razor blade. I remind you that the other end must be insulated around the perimeter!
Finally, straighten the axle so that the impeller is as balanced as possible.
Then make two small hoops (bearings) in which the rotor will spin. The diameter of the rim should be about 3mm (it is best to use a winding nail).
Pieces of wire with bearings must be soldered to the battery. Then we will glue it together into a small magnet so that one of its poles points upward. It should all look something like this:
If you now turn on the rotor, it should rotate at high speed around its axis
Sometimes a little pre-start is required by gently turning the rotor until it "snaps" into place. This model of the electric motor performed during this action can be seen in the video:
We can also make a more durable version of this physical toy. I used a large magnet from an old speaker that I attached to a universal circuit board with wire scraps. Also, more rigid brackets are soldered to it. The 4.5V coin cell battery sits underneath the plate, and also underneath that are the cables that provide voltage to the brackets. The jumper visible on the right side functions as a switch. The design looks like this:
The work of this model is also depicted in the video.
How and why does it work?
The whole joke is based on the use of electrodynamic force. This force acts on every conductor through which electric current flows when placed in a magnetic field. Its action is described in the left-hand rule.
When current passes through a coil, an electrodynamic force is exerted on it because it is in the magnetic field created by a permanent magnet. This force causes the coil to rotate until the current is interrupted. This is due to the fact that one of the axes through which the current is supplied is isolated only along half the perimeter. Although the force is no longer working, the coil performs the second half of the rotation due to its inertia. This continues until the axis turns into its isolated side. The circuit will be closed and the cycle will repeat.
The presented electric motor is a simple but effective physical toy. The lack of any sensible practical applications makes the game very enjoyable.
Have fun and informative entertainment!
Still don't know how to entertain your children? Then try an experiment with a magnetic motor! It seems that this cannot be done at home. But you will be surprised at the ability to create an engine from simple items that you always have on hand. In this article you will find a diagram of the motor, as well as detailed assembly instructions.
Why does it work
Electric motor from a battery
begins to work because the movement of charged particles (electric charge) that occurs in the wire is affected by a magnetic field, which deflects the direction of their movement. In physics, this deviation is called the Lorentz force.
For a better understanding of the entire process, watch this video.
The other day I showed my child how an electric motor works. I remembered a physics experiment from school.
Source materials:
- AA battery
- Enameled wire 0.5 mm
- Magnet
- Two paper clips, about the size of a battery
- Stationery tape
- Plasticine
Bend part of the paper clip.
We wind a coil of enameled wire. We make 6-7 turns. We fix the ends of the wire with knots. Then we clean it up. We completely clear one end of insulation, and the other only on one side. (In the photo, the right end is stripped from the bottom)
We fix the paper clips on the battery with tape. Install the magnet. We attach the entire structure to the table using plasticine. Next, you need to position the coil correctly. When the spool is installed, the stripped ends should touch the paperclip. A magnetic field arises in the coil, and we get an electromagnet. The poles of the permanent magnet and the coil must be the same, that is, they must repel each other. The repulsive force turns the coil, one end loses contact and the magnetic field disappears. By inertia, the coil turns, contact appears again and the cycle repeats. If the magnets are attracted, the motor will not spin. Therefore, one of the magnets will need to be turned over.
People have been puzzled by the creation of a perpetual motion machine for a long time. In theory, the possibility of implementing this device is denied by the postulates of thermodynamics. And we won't even try. This is just for intrigue.
Let's take an ordinary AA battery, a neodymium magnet and copper wire. In addition to the aesthetic side, the wire must be bent so that it has a fastening and center of gravity at one point
This is important for the stability and rotation of the structure
Assembling an electric motor
We put a battery on the magnet and then place a wire heart on it. The system begins to rotate.
This happens because an electric charge arises in the wire. And this is nothing more than the ordered movement of charged particles. Each of them is subject to a magnetic field, which deflects the direction of their movement. This deflection is called the Lorentz force. In physical language, this is the force with which an electromagnetic or magnetic field acts on a point charged particle. A special case of the Lorentz force is the situation when the magnetic field is directed perpendicular to the velocity vector. In this case, the force becomes centripetal. f
acting on a charged particle (charge
q
) when moving (with speed
v
).
That is, charged particles move in a circle, creating rotation of the structure. Those who are especially curious can even calculate the rotation speed by obtaining its formula from the following expression:
The battery will run out after some time and the movement will stop. But the impression will remain. Memories do not live in a copper heart, unlike the present. Hmm... Impressions, memories, love, no matter how banal it may be - what is not a perpetual motion machine?!
So, what materials do we need for this?
During the work, you need to prepare several copper tubes with a diameter of 5 and 15 millimeters, two pairs of gears and one zipper. The latter can be taken from a regular Chinese-made disposable gas lighter.
Let us immediately note that you will not be able to make a device with the same ignition mechanism as before using these components - for this you only need to have original spare parts. And this is extremely difficult to do - it will be much easier to buy a new one in the store than to suffer with the old one.
To ensure that the opening and closing mechanism of the lighter is not excessively flimsy, the body must be monolithic. Otherwise, during use, the elements of the device will constantly move to the side.
How to do it The principle of resuscitating an old lighter is quite simple - all prepared elements are installed in place of the old ones, and the tool’s container is filled with gasoline. To prevent the fuel from evaporating, it is recommended to install a cap here. However, due to its flimsy design, part of it will constantly cling to the gear, so such a device is not suitable for frequent use.
In conclusion, about gasoline lighters, we note that all the main parts, namely flints, change in it, and therefore such a device will serve for a very, very long time.
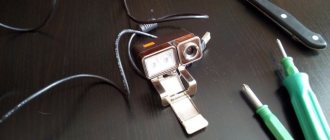
Battery stylus
This device will allow you to control your phone using your fingers. To complete it you will need:
- Current source, preferably a tablet-type element.
- Nail 15 cm.
- Sandpaper.
- Plastic bag.
- Metal file.
- Gel pen.
We cut off the ends of the nail. If you have an electronic sharpener, you can do this easily. After this, we polish our nail. Next, take a helium pen. We remove the cap from it. It needs to be glued to the nail. Some handles have cylindrical rubber bands. This is exactly what we need. It needs to be glued to a nail. Now we attach the battery to the stylus, stretch the bag and secure it with an elastic band. The excess can be cut off.
Details in the video.
https://youtube.com/watch?v=9MIRfb_QoTs
Comparison table of electronic lighters
| Name | Main characteristics | Price |
| USB lighter – Eagle | USB port: micro, material: zinc alloy, battery charge indicator: yes. | ₽ 1250 |
| Electronic USB lighter | Power: USB, 5V, battery capacity: 250 mAh, battery charge indicator: yes. | ₽ 250 |
| USB lighter Tiger | USB port: micro, material: aluminum alloy, battery indicator: no | ₽ 1645 |
| Rechargeable Tesla Lighter | Arc, rechargeable, has USB input | ₽ 699 |
How to make a stun gun from a battery?
For production you will need:
- Krona battery 9 volt.
- Conversion transformer. It can be removed from the charger or AC adapter.
- Ebonite rod 30-40 centimeters long.
- Insulating tape
- Wire.
Build process
To assemble a battery shocker, attach 2 pieces of wire to the end of the rod. Steel wire 5 cm long. They also need to be connected to a transformer and an energy source.
Next you will need to attach the battery to the two-pin connector of the transformer. At the other end they place a rod and attach a switch. If you press it, an electric arc will pass between the steel contacts. For the human eye to notice this arc, you need to press the button as many as 25 times per second.
In this homemade product, the current strength will be low and therefore it will not be possible to knock out anyone using such a stun gun. Therefore, it can only be used to intimidate as a means of defense.
Electricity in a bank
Even from an ordinary can you can build something similar to the very first battery in the world. To do this you will need:
- a simple glass jar (you can use a glass);
- zinc or aluminum plate;
- strip of copper;
- several wires;
- ammonia, also known as ammonium chloride;
- tap water.
Our battery will have an aluminum plate as the anode, and a copper plate will serve as the cathode. Their size must be selected so that their area is equal to the palm of a person. This will make our battery more efficient. Solder the wires to the plates. Now our task is to install the plates in the jar so that they do not touch each other. And the height of these plates should be greater than the can itself.
It's electrolyte time. It's easy to do. Mix ammonia with water. For every 0.1 liter of water you need to add 50 grams of powder. Mix everything thoroughly and pour into a jar. Instead of ammonia, you can also use sulfuric acid. To do this, it will need to be brought to a twenty percent state.
Important! If you make an electrolyte based on sulfuric acid, then when diluting it you need to pour the acid into water, but not vice versa. Otherwise, the water can simply boil, and as a result of a violent reaction, everything will splash out
In addition, do not forget that when working with acid you need to wear protective equipment.
Fill the jar with the resulting solution. If you combine several cans into a single circuit, you will get a very good battery, the energy of which is quite enough to charge a fairly powerful device. This battery is similar to salt batteries.