/Accessories and decor/Decoration/
This material is for romantics who like to arrange surprises and would not mind having breakfast in bed or just having a snack while sitting on a soft sofa. We have already talked about how to make a serving board from polymer clay, and now it’s time to make a serving tray - and this time from wood. We have selected the easiest and most accessible methods, so you don’t need carpentry talent.
What does it represent?
A rotating cake stand looks like a round, flat, thick tray on a leg. The fixed tray circle is driven by a bearing built into the leg. With a slight movement of the hand, the entire structure with the cake on top begins to rotate in a circle. This allows craftswomen to work on cake decoration as comfortably and ergonomically as possible. It is very convenient to rotate the cake, cover it with fondant and decorate it with small details. In addition, the stand can be used to serve dessert more effectively.
Beautiful examples
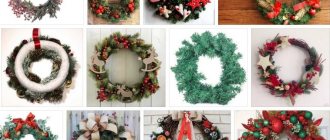
Our photo gallery shows interesting examples of ready-made designs for cakes:
- using available materials, you can make a beautiful stand for cake and pastries;
- original plywood construction;
- 3-tier stand for sweets;
- wedding cake stands;
- A cute design can be made from paper and cardboard.
You will learn more about how to make a cake stand with your own hands in the following video.
What are swivel stands made of?
In pastry shops today you can easily find a rotating stand for both professional and amateur pastry chefs. Typically, rotating stands are made in the form of a circle. But sometimes you can also find a square shape.
The material used to make stands varies. They can be:
- plastic;
- metal;
- glass;
- wooden.
Depending on the type of material, prices for spinning stands will vary. So, the most expensive will be metal products. They look solid, will last a long time, but themselves are quite heavy. A glass stand will cost slightly less and will have a light, presentable appearance. It is easy to care for such stands; unlike plastic and wood, they do not absorb food particles and retain their appearance for a long time.
A wooden stand will look solid and costs a little less than a glass one. The advantages are naturalness and attractive appearance. With proper care it will last quite a long time, but over time it may lose color and chips may appear. A rotating plastic stand is the cheapest option. It is light and comfortable. But such a stand may require replacement quite quickly if used frequently, just like a plastic cutting board.
There are also special stands with electric motors. They have the shape of a cylinder and can not only rotate, but also tilt at an angle. They are used at various large-scale culinary exhibitions and master classes to demonstrate sweet masterpieces.
Drawing up drawings
Before proceeding directly to production, it is necessary to create a drawing or sketch. You can choose a path more convenient for you:
- choose raw materials and build on their capabilities;
- create a sketch with measurements and select material for it.
Tray made of jute and burlap using the Jute filigree technique - Jute products - Jute craft ideas/© 2022
In any case, first think through all the parameters of the future tray. The product should not be heavy and uncomfortable to use, otherwise it will be inconvenient to move. After this, you should decide on the functionality - the product can be equipped with legs, sides, handles. In fact, a multifunctional tray can act as a small table.
Once the general idea has taken shape, it is necessary to transfer it to paper. You can use ready-made drawings on the basis of which you can create your own sketch.
The drawing should indicate not only the dimensions, but also the mounting locations. If you use plywood, consider:
Original set made of jute. Unusual and beautiful. Jute robe craft idea. Napkin holder. Napkin holder.
- places where the fittings will be located and attached;
- width and length;
- the thickness of the base and sides is also taken into account.
Products of a more complex type, for example, made from natural wood, are created on the basis of drawings, including:
How can I replace a cake turntable?
What is the solution for those who do not have a turntable? A very simple and affordable solution can also be found in almost any home. You can use a rotating plate from the microwave. Almost all models are designed in such a way that they have a glass plate and a round stand at the bottom. You need to remove the plate and the circle underneath it from the microwave. If the table surface is too smooth, you can place paper (a paper towel) underneath to reduce slipping. This way you can decorate the cake by smoothly rotating it around its axis. Also, a glass plate will not spoil the view when serving the finished decorated product.
Features of choice
In order not to make a mistake when choosing a good table, it should be assessed according to several criteria.
Rotation mechanism
The most important part of the model, without which the table simply will not spin, is the rotation mechanism. It is a metal bearing located under the table top, ensuring it rotates evenly around its axis.
It is recommended to choose a reliable turning mechanism to ensure uniform and non-stop rotation while cooking the cake.
Diameter
The most common tabletop diameter is from 26 to 30 centimeters. A standard size cake of up to four kilograms has these parameters.
But for convenience, it is better to choose a larger diameter so that you can rest your hand with the palette on the tabletop while working. This will help achieve a more accurate result.
Silicone feet
A necessary part designed to fix the structure in one place. This prevents the confectionery product from sliding on the surface of the countertop, thereby eliminating possible defects and damage to the cake during processing.
Such legs are quite inexpensive, around a few hundred rubles, but thanks to them the product will turn out perfectly smooth and without damage.
Marking
On the round surface of the tabletop there are special divisions that divide it into equal segments. This is markings that help create decorative parts that are completely even and identical in size. Plus, the pieces of the cake will be positioned at the right angles, which is sure to ensure a quality end result.
If there are no markings, you can apply them yourself using a ruler and compass.
How to choose a swivel stand
First, you need to decide which stand is more suitable for work - round or square. Then choose the diameter based on how large the items are typically decorated. The diameter of the circle of the stand can be from 20 to 40 cm. The material of the stand should be chosen depending on personal preferences, finances and purposes of use. It is clear that a novice housewife has no need to spend money on an expensive metal stand, which will probably gather dust idle most of the time. But to make custom cakes, you can spend money on a more expensive item for convenience and speed of work.
Materials
A rotating table can be made from any available materials :
- Fiberboard;
- MDF;
- plywood;
- tree.
Each individual option has its own advantages. Wood is environmentally friendly, safe, and has a texture that is pleasant to the touch . MDF and plywood are easy to process. In addition, this material has a low cost.
But chipboard is inexpensive, looks attractive, and is a pleasure to work with.
Tip : in order to save consumables, you can use a door from an old kitchen set to make a countertop.
Patterns for weaving trays from newspaper tubes
Following the step-by-step master class, even a novice craftsman can weave a tray from newspaper tubes. It is better to make the bottom of this product from cardboard or thin plastic, which will give it greater strength. The walls can be woven according to any pattern you like.
Stages of work
- First of all, form the bottom. Cut out the desired shape from cardboard and glue paper tubes along the edges. A second sheet of cardboard is glued on top to strengthen the bottom and hide the edges of the glued posts.
- Weaving walls. Beginners are advised to start weaving with simple patterns such as “rope” or “braid”.
- Coloring. The tray is primed and painted in the shade you like. For the primer, mix equal parts water-based paint with glue and water. Apply the composition with a brush to the surface of the product. Cover the dried paint with acrylic varnish.
Step-by-step instructions and weaving patterns
The tray can be made in any shape: square, round, oval or rectangular. It all depends on your imagination and experience. Following the step-by-step instructions, this will not be difficult.
Square
Square trays can be used to decorate the interior or be used for other purposes. In the second case, care must be taken to strengthen the bottom.
Materials required for work:
- newspaper tubes;
- moisture-resistant water-based paint;
- glue “Moment” and PVA;
- color;
- cardboard;
- varnish
Step-by-step production:
- Wind up two types of tubes: from newspaper and office paper. The first ones should be a little longer.
- Cut a square out of cardboard. Make a 2 cm mark. Glue the newspaper tubes around the entire perimeter with instant glue.
- Apply a thin layer of glue along the edge of the square and cover with a second square of cardboard.
- For the first row, simply wrap the tubes one after the other. We glue the additional tube and begin to weave the second and subsequent rows. We increase the tubes during the weaving process.
- Secure the working tubes to the nearest binding. Having retreated three rows down, insert the skewer so that it comes out not far from the working stick. Bend it and place it on a wooden stick. Remove the entire structure in the place where it was stuck. Trim as close to the weave as possible. Repeat with subsequent ones. Correct the weave so that the segments are not visible.
Round
Round shaped trays are popular. They can be used for interior decoration or for their intended purpose.
To work you will need:
- paper straws;
- scissors;
- Double-sided tape.
Step-by-step instruction:
- Glue two working tubes to two sticks with double-sided tape. Next, weave in a circle with a “rope” pattern.
- Mark the stand from which weaving began by putting a rubber band on it. This way you can control the number of rows.
- Make 12 rows so that the distance between the posts is about 2 cm. To prevent the weaving from becoming loose, it needs to be shortened. Using a knitting needle, pierce a place for an additional stand and insert a tube there.
- Continue weaving, spreading the posts and evenly distributing the distance between them.
- Weave the walls of the tray with a rope of three tubes. Start by placing or gluing the tube behind the stand. Considering the diameter of the tray, determine the height of the side, and accordingly the number of rows. Specifically in this case, the height of the wall is approximately 3-4 cm, that is, 4 rows with a “rope” pattern.
- Finish the job by cutting the posts tightly to the weave.
Step-by-step instructions for assembling a rotating table with your own hands
I outline all my actions in points in the following order.
- I determine the size of the rotating plane to be 600 mm. Since the diameter of the main table is 1300 mm, the table will not interfere with the plates around it.
- I fasten a sheet of whatman paper to the board with push pins.
- Using drawing tools, I draw a 600 mm circle on paper. I carefully cut out the table layout with scissors.
- Having attached whatman paper to a sheet of fiberboard, I trace it with a pencil. I use a jigsaw to cut out the lining for the tabletop.
- I perform the same actions with a piece of chipboard.
- Using pliers and a screwdriver, I remove the plastic roller from the metal hinge.
Rotational support for chair with fasteners
- In the middle of the block I make side cutouts for a tight installation of the support.
- Having installed the hinge strictly in the center of the beam, I drill a hole from the side through the openings in the metal.
Installing the hinge on the beam
- I apply the hinge area to the center of the fiberboard and mark the attachment points with a pencil. The hinged support will allow the table to rotate and turn in the desired direction at any time.
- In the fiberboard, following the markings, I drill 4 6 mm holes with a drill.
- I thread the screws through the holes in the sheet and support. I put washers on the side of the platform and tighten the nuts.
Attaching the support to the fiberboard circle
- I coat the screw heads with machine oil.
- I apply a circle of chipboard so that the outer boundaries of the two circles coincide.
- Using the marks obtained, I use a drill to make small indentations in the chipboard. They will allow the screw heads to not interfere with the tight fit of the two parts of the rotating tabletop.
- I apply a layer of liquid nails to the surface of the chipboard and connect both parts of the table. Having separated them, I wait 3 minutes. Then I finally connect the parts, loading the top with heavy objects at hand.
- I sand the side edges of the circles with sandpaper.
- I place the support beam in the center of the round table. I make marks at a distance of 30 mm from the edges of the plank.
- I drill through the marks through the timber and the tabletop.
- I thread two bolts. At the bottom of the tabletop I secure the bolts with nuts and washers.
- I put a hinge with the table top on the fixed support beam. I thread a bolt through a pre-drilled horizontal hole and tighten it with a nut and washer.
- I glue the tape along the end of the circle using an iron. I cut off the protruding part of the edge with a knife. The table is ready.
This instruction makes it possible to understand how to make a table with a rotating center with your own hands without much hassle and at minimal cost.
How to make straws - master class
An important stage in weaving products from paper wicker is the production of blanks. The operational and decorative characteristics of the finished structure depend on their quality. Before starting work, prepare the material and tools - newspapers, PVA glue, scissors, knitting needles.
Step-by-step method for making paper straws:
- Newspaper sheets are cut into strips 40 to 60 mm wide. Larger strip sizes may be required. It all depends on the thickness of the paper and the diameter of the knitting needle.
- Place a thin knitting needle at an angle on a strip of paper. The lower the degree, the longer the tube can be made.
- Gradually wind the strip of paper onto the knitting needle, making sure that it fits as tightly as possible. Twist the tube with rotational movements, holding the edge.
- Treat the remaining tip of the newspaper with glue and wrap it to the end.
The strips are wound both towards themselves and in the opposite direction. The knitting needle can be laid on top of the workpiece or below. Each master does this in the most convenient way for him.
How to paint tubes
It is better to paint with acrylic paint. It lays in a dense layer on any paper, does not flow, is odorless, and dries quickly. You can use a water-based, moisture-resistant stain. A paper vine coated with acrylic varnish with the addition of a coloring pigment looks especially impressive.
Painting each stick with a brush takes too long. A faster method: pour paint into the tray, lower the paper vine into it and gently mix, the workpieces are evenly painted. The painted sticks are dried by placing them on a layer of polyethylene. If staining is performed in a bucket, a stack of tubes is dipped alternately with the opposite end into the solution. Short tubes are painted by placing them in a bottle of paint. Then turn the sticks over and place them with opposite ends. Shake lightly. The shine of the finished work will be given by varnish, which is applied in several layers.
Step-by-step instructions for beginners: how to make a basket from newspaper tubes
Step-by-step instructions: weaving boxes of various shapes from newspaper tubes
Features of weaving a vase from newspaper tubes: simple step-by-step instructions
Types of rotating cake platforms
Specialized markets offer many tray stands from world-famous brands.
Someone wants to have compact products for a dessert bar (Candy bar) when serving sweets. Some people are impressed by rotating models with a tilt, while for others the ability to use only 2 tiers of the stand is not suitable.
Varieties of design
There are such models according to the form:
As well as shaped trays for an extravagant demonstration of confectionery creativity.
Materials used to make a rotating cake decorating stand
- Steel;
- Glass;
- Plastic;
- Ceramic;
- Wooden.
Plastic rotating cake stands are a rather fragile product. This is the most affordable option. Thanks to the last circumstance, it is also the most common. They are presented in a wide range of models, made with or without tilt. Plastic cake pans usually have a non-slip material, which promotes good grip on the table. It's quite convenient.
The glass rotating cake tray looks elegant. Made from high-quality tempered glass, often decorated with an original design. It looks neat, impressive - you can take a photo and serve it on a rotating plate. It has a non-porous surface, washes quickly and easily, and does not absorb odors.
Metal structures are heavy, but they are designed to last longer. They can withstand heavy cakes and do not deform over time.
The wooden cake maker is constructed from natural material and looks aesthetically pleasing. Sweet products can be served directly on it. The cost is higher compared to a plastic rotating stand for decorating cakes.
The optimal diameter of wooden structures is at least 34 cm. This cake pan is spacious, it is convenient to decorate products from three kilograms (or tiered ones) and make confectionery decor on them. The wide surface makes it possible to place the leveling spatula in a convenient way.
Work process
Making a turntable with your own hands is quite simple. First of all, you will need to draw a high-quality drawing. After this, we begin to work according to the following scheme. If you have two bearings, and not one pressed one, then we hammer the element of the smaller diameter into the larger one using nails. It is necessary to cut two circles with a diameter of 20 cm in a wooden slab. A hole is cut in the middle of one of the circles into which the bearing is driven. In this case, the two parts are twisted and secured with self-tapping screws. A bearing is placed in the center.
The DIY table is equipped with plastic tubes. The tube should connect the upper and lower parts. Keep this point in mind when making a drawing for the turntable. In this case, the tube must fit exactly into the bearing. The ideal length is 15 cm. Such a tube will not be too short or long, so you will not have to bend over while decorating the product.
The top is made of metal. In order for it to spin, pay special attention to its diameter. On average, the diameter of a metal circle should range from 30 to 40 cm. If you have the opportunity to weld the elements, that will be great. For those who are deprived of this opportunity, cold welding was invented, which looks like plasticine. The cake turntable also requires circles cut from plywood. The rotating part is installed on the pipe, and the elements are fastened with self-tapping screws.
The table can be made of wood:
OK it's all over Now. The cake turntable is ready. In order to give it an aesthetic appearance, you can cover the product with thin plastic. Another option is to purchase self-adhesive film. It is sold in wallpaper or supplies stores. This film is easy to apply and washes well.
Technology of weaving from newspaper tubes
To make tubes, you will first need paper. The density and quality of the vine depend on what kind of paper is used for these purposes. In addition, you will need tools for twisting and further work with them.
How to choose paper
Most often, old newspapers are used to make straws. However, this does not mean that magazines or office paper are not suitable for this. The main thing is to know the features of working with such material.
- Newspapers. It is important that the sheet is smooth, with intact edges. It is especially convenient to work with large copies, so-called newspaper books.
- Magazines. They are also suitable for weaving. Glossy pages make bright products. However, this material has a disadvantage - the paper is denser, and the tubes made from it are stiffer and less pliable. They are difficult to paint.
- Office paper. Like glossy, it is too stiff and not suitable for complex weaving. But this material has a definite advantage - white vine can be easily painted in any color. It is better to use thinner writing paper.
- PVA glue. It is used for making tubes, priming, decoupage and gluing structural parts.
- Polyurethane glue. These include “Moment”, “Titan”, etc. Some craftsmen additionally use a glue gun. With its help, a dense bottom of the products is formed and decorative elements are glued.
- Knitting needle or wooden stick. The metal knitting needle should be long and thin. It is needed for twisting tubes.
- Scissors and stationery knife. For cutting strips, trimming the ends of tubes of the finished product.
- Ruler. Used to mark paper before cutting so that the stripes are the same width.
- Brush. For uniform application of glue.
- Varnish. Used to open the finished structure.
- Paints or colors . For dyeing paper vines in the desired color.
- Tweezers. Helps guide the vine in the right direction during work.
- Form. To weave round structures, jars and other containers are used. Boxes and other objects can be used as guides for square products. Baking tray or wire rack. For coloring and drying paper wicker.
- Paper clips and clothespins . Used to fix the tubes while the glue dries.
- Decor. Finished products are decorated with the help of: ropes, pictures, beads, lace, leather, etc.
The most accessible materials are newspapers and advertising booklets. The product will look more impressive if you combine sticks from different papers. For example, the bottom of a basket or tray can be woven from dense tubes, and the sides from softer ones.
What tools are needed to work with straws?
For weaving you will need additional tools and equipment. The vine is made using a knitting needle, glue and scissors. Weaving products such as a vase, basket or tray is impossible without a form.
To weave a paper vine tray you will need all of the above tools. The product can be shaped into a square using a book or box. The sides for a round tray are formed using any container of a suitable diameter.
Basic option
The basic option includes a single-tier cake stand. It’s easy to make it yourself; this work will take no more than 15 minutes. To do this, you need to take a piece of polystyrene foam, which you can purchase at a hardware store.
Expanded polystyrene of the desired shape is combined with a special food substrate, which is a thin cardboard with a foil coating on one side. Such a substrate should have a round shape. Its diameter should correspond to the size of the confectionery product that will be created. Connect the substrate to polystyrene foam using double-sided tape.
If you can’t buy a store-bought backing, you can make it yourself. To do this you will need thick cardboard and scissors.
To make a round substrate:
- cut out of cardboard the most perfectly even circle;
- connect with polystyrene foam as indicated above;
- Using a sharp knife, carefully trim the polystyrene foam that extends beyond the edges of the backing.
After all the manipulations, you get a round cake stand. To prevent the edges from being rough, it is better to trim them with sandpaper and then tie them with a satin ribbon. Double-sided tape is used to secure the tape.
When using a homemade cardboard base, the surface in contact with the food must be covered. A hot tablecloth or adhesive glossy paper that can be washed may be suitable for this purpose.
Thanks to the materials used to create this stand, the product does not deform, since it is quite solid and will reliably hold even a heavy cake.
Rotating trays for decorating cakes
A rotating cake stand is an essential tool for pastry chefs, from beginners to true masters. If you want to be able to reach the cake from all sides at once, but without having to "cut circles" around it, definitely consider having a rotating cake tray. Only this will help make the cream decoration even. And the decorating process itself turns into a mesmerizingly beautiful event.
Such rotating stands for decorating a cake look great at a large feast, on the windows of cafeterias or pastry shops. If you want to present your handmade masterpiece in the most attractive way, you can use a rotating cake pan for this.
Source