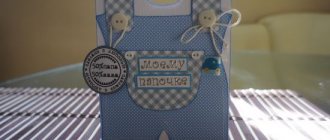
There is a wonderful tradition of bringing bags filled with sweets to kindergarten or school on your birthday.
The child makes a ritual round of all his classmates or classmates, presenting each of them with a lot of sweet and tasty candies. Do you want to make this pleasant moment more beautiful and unusual? Then you have to work a little harder.
In this article, the News Portal “Vtemu.by” will offer you several simple, but original options for packaging sweets to make the donation process look festive and beautiful.
DIY chocobox: easy and beautiful DIY gifts
- To make a shockbox, first of all, you need to select a template and print it on paper with a density of 220 g/dm. For example, let’s take a template for a box and wrappers for 9 “Bird’s Milk” candies.
- The printed template must be cut out. Now, using a knitting needle, you need to make creasing along all fold lines.
- We glue the outer edges of the future box with double-sided tape. Now glue the sides of the top and bottom of the shockbox as in the pictures below.
- Now all that remains is to wrap the candies with labels and pack them in a shockbox. You can tie it with a ribbon or decorate it with additional decor, such as butterflies or paper flowers.
Packaging Features
Where did the tradition of wrapping sweets in colorful pieces of paper come from? Who invented the first candy wrapper? Edison, a great scientist and inventor, famous for his serious inventions in the field of electricity, also came up with such a seemingly frivolous thing as a candy wrapper. It was his idea to create waxed paper, which became the first candy wrapper. And although the history of the candies themselves dates back to Ancient Egypt, they began to be wrapped in pieces of paper only at the end of the 19th century.
Shockbox template for educator
A chocobox is an ideal way to give a small but original gift to a teacher. As a rule, exclusive packaging consists of a pencil case or box and individual candy wrappers.
shockbox for teacher
Shokobox (box and wrappers) for the teacher “March 8”
chocolate boxes: templates
chocolate box template: bird's milk
Shokobox for “Bird's milk” (9 pcs.) for the teacher and nanny
Shockbox cover
Box base with sides
Shokobox option for the head of a kindergarten:
Snowman
Materials:
- thick white paper;
- Double-sided tape;
- pencil, black pen or marker;
- orange corrugated paper;
- glue;
- Red pencil;
- cotton swab;
- bright sock;
- needle and thread.
Step-by-step instruction:
- Cut out a sheet of whatman paper and wrap it around a chocolate bar.
- On the front side, draw the snowman's eyes with a black pen.
- Cut out a small rectangle from orange corrugated paper, roll the workpiece into a tube and twist the tip of the future carrot for greater realism.
- Glue the finished nose to the snowman and draw a smile.
- Using a red pencil, draw a thick line on a separate sheet of paper. Use a cotton swab to collect paint and rub the snowman’s cheeks.
- Take the sock and cut it behind the heel. Turn the top cut part inside out and sew up the hole. Gather the heel, forming a kind of pompom, and put the hat on the snowman.
- From the remaining part of the sock, cut a strip 1 cm wide in a spiral. Wrap the finished scarf around the “neck” of the snowman. Secure the ends of the scarf with tape.
You can use buttons, spruce branches, and fluffy wire as decoration.
Shockbox template for teacher
chocolate chocolate box template
A set of excellent shockboxes will be an appropriate and beautiful gift for your favorite teachers. For example, this could be packaging for chocolate and a box for sweets, such as dried fruits or nuts:
shockbox template for teacher
Shockbox template in soft colors for a present for a teacher:
Lid
Bottom of the box
Wrappers
template for March 8
Set of templates for shockbox on March 8th:
first teacher template
Wonderful shockbox for the first teacher:
Miniature shockbox for three candies:
template for the class teacher
Original template for chocolate wrapping:
Gift box and candy packaging templates:
How to make a shelving unit with corner slats
This rack is suitable for a wide variety of places and uses: its dimensions can be easily changed, and the reinforcement of the structure with a cross makes it stable and allows you to store a lot of heavy things in it.
What do you need
How to do
Cut eight narrow boards into 20 equal pieces.
Frame: MonsonSchoolhouse / YouTube
From these parts and four boards 250 cm long, assemble two identical “stairs”. The distance between the horizontal bars will determine the height of the shelves.
Frame: MonsonSchoolhouse / YouTube
Fasten the elements of the side posts to each other - use confirmations or self-tapping screws.
Frame: MonsonSchoolhouse / YouTube
Using self-tapping screws or confirmations, attach two boards crosswise to the side posts. Sand the surface of the wood, and if desired, paint along with the shelves.
Frame: MonsonSchoolhouse / YouTube
Place the frame in place in the room. Install the shelves on the side rails of the “ladders.” There is no need to attach them.
Frame: MonsonSchoolhouse / YouTube
What other options are there?
This type of design is also suitable for smaller racks:
And in this master class they tell you how to make a strong shelving for a workshop or pantry:
Teacher's day shockbox template
Chocolate box for chocolates:
chocolate template for teacher
Beautiful “Happy Teacher’s Day” chocolate box for sweets, consisting of a pencil case and 12 candy wrappers:
template for sweets for teacher
Candy wrapper templates for shockboxes:
Exclusive wrappers for chocolate 100 g:
chocolate boxes for candies
Only at Westwing
Top brands with discounts up to 70%
Exclusive new items every day
Multi-tiered cake stand: photos, styles, ideas
There is always a place for celebration in life. Bright, delightful, with memorable details. One such detail that is remembered and talked about may be a multi-tiered cake stand that supports grand desserts. The spectacular presentation of the dish at the end of the banquet is a bright chord of the entire festive extravaganza.
Shokobox for September 1: templates
Not only teachers, but also schoolchildren will be pleased to receive a shockbox on September 1st. Therefore, it won’t hurt to prepare a large, beautiful shockbox for the class teacher and small gifts in themed packaging for schoolchildren.
knowledge day template
Shokobox “Day of Knowledge! For 4 candies:
shockbox for a first grader
Template for a chocolate gift for first graders:
Template for “Martian” candies (80 g):
Another set of templates for students:
small chocolates template
Template for Toffifee Chocolate Box:
Template of gift box and wrapper for sweets with congratulatory inscriptions:
The tuxedo
On February 23, you can present chocolate in themed packaging. For example, you can wear a chocolate bar with a shirt, tie and jacket.
Materials:
- cardboard;
- colored or designer paper;
- glue.
Step-by-step instruction:
- Cut out a rectangle 22x17 cm.
- Using designer paper, separate the center section of the package and the two side sections.
- Cut out a pocket from cardboard.
- Decorate the front part with stickers. And attach small pockets for tea or coffee bags to the back wall.
You can also wrap a chocolate bar in checkered construction paper and attach a fabric tie on top or style it as a jacket with buttons.
Shokobox Teacher's Day: templates
chocolate box
A set of templates for the teacher - a chocolate box for 100 g chocolate, individual packaging for mini chocolates, a cube for assorted chocolate:
Chocolate box for Ritter Sport chocolate:
Shockbox template (box and candy wrappers) for 5 candies, for example, bird's milk:
chocolate box for chocolate
Universal templates for unnamed shockboxes in the form of a box:
Herringbone
Materials:
- colored paper;
- green corrugated paper;
- decorative ornaments;
- glue stick;
- scissors, ruler, colored pencils.
Step-by-step instruction:
- Wrap the chocolate bar in pastel colored paper.
- Cut a rectangle measuring 15x11 cm from corrugated paper.
- Cut the finished rectangle into 5 equal parts in width. At the same time, cut the sides of the rectangles at an angle of 45°. And pull the bottom edge so that the result is a wavy line.
- Adjust the width of the last two stripes to 9 and 7 cm.
- Twist the sides of the rectangles inward.
- Using a glue stick, glue each layer of the Christmas tree, gathering it in small folds.
Shockbox template for mom
A hand-assembled shockbox will be a warm and joyful gift for your mother for her birthday or other holiday. Using a ready-made template, you can think through the contents of the box, as well as personalize it and add heartfelt wishes.
A set of shockbox templates - a box and wrappers for mom’s favorite candies:
Chocolate box template with meaningful chocolates (box and 8 wrappers):
box of sweets as a gift
Decor
After some time, we were convinced that the structure was ready for decoration.
How can we register? We cut up our already purchased assortment and place the fruit on the lowest plate. You can sprinkle with powdered sugar to make the assortment look impressive. On the second plate you can put cakes, muffins, cake and many other sweets. You can put sweets, berries on the top plate, and you can also put a small teapot.
This bookcase will be a very useful thing in your home if you like to receive guests and treat them
a variety of sweets. Take advantage of this cool article if you like this idea!
Share
Chocobox for grandma: templates
A case for Toffifi candies and a shockbox in the form of a box for Bird's Milk candies with a cozy design will especially appeal to grandmothers who are handicrafts.
Candy case:
Template for a gift box with sides “To my beloved grandmother”:
Unnamed chocolate boxes for sweets that you can give to your grandmother:
template for chocolate Alenka
Box for chocolate “Alenka” (100g) in delicate watercolor tones:
New Year's shockbox: for grandma
Chocobox favorite: templates
You don’t need a reason to please your loved one with an unexpected surprise. But even without a reason, the gift should be creative and unexpected. If your surprise is sweet, then pack it in a delicate shockbox.
2 options for a chocolate box with romantic cats for your beloved with 4 candies that will remind her of your feelings:
Lovely shockbox pencil case for Toffee:
A caring chocolate box for candies with a sweet couple, which can be given to your loved one for any occasion:
Inspiring shockbox template for your beloved with a delicate design (3 parts):
Bottom of the box
chocolatebox chocolate
chocolate box for candies
If your loved one loves surprises, give her this mysterious shockbox in the form of a women's clutch. There are no inscriptions or other clues on it that would indicate the reason for giving the gift, or the contents of the box.
Shokoboxy for your loved one for candies, dragees, nuts and other delicious surprises:
shockbox for you beloved
Chocolates for chocolate boxes for your loved one can be wrapped in bright wrappers:
Chocolate Recipes
The simplest recipe is made from cocoa powder. You need to take the butter, melt it in a water bath or just let it soften at room temperature. Add sugar and cocoa powder there. Mix everything, put it in molds and put it in the refrigerator.
If you want milk chocolate, you need to add milk powder to the mixture. If you add delicious-smelling vanilla, the sweetness will be very tasty. You can choose the proportions yourself. The more cocoa, the more chocolatey your chocolates will be. Homemade chocolate is not as hard as store-bought chocolate because it does not contain lecithin. But all the ingredients are natural, and you can vouch for the quality of the product.
If you want the chocolate to turn out “like real”, you will have to put in a little more effort. To prepare you will need cocoa beans and cocoa butter. It is quite difficult to grind cocoa beans at home, so it is better to use grated cocoa beans. You can buy both beans and butter at a specialized confectionery store.
For 3 parts of grated cocoa beans, take 3 parts cocoa butter, 4 parts powdered sugar, if you want milk chocolate, add 2 parts milk powder.
Grind cocoa butter and grated cocoa beans with your hands, heat in a water bath, stirring all the time, so that they melt, add powdered sugar and milk powder. Mix everything thoroughly. Remove from the water bath, add vanilla, nuts or any other topping you like. Let cool a little, but not completely. While still warm, place into silicone molds. Place the molds in a plastic bag or close them in another way so that the chocolate does not absorb foreign odors.
You can also make white chocolate at home. To do this you will need cocoa butter, milk powder and powdered sugar. These ingredients are taken in equal parts; it is advisable to add vanilla for flavor. Melt the cocoa butter in a water bath, slowly and stirring all the time, add the remaining ingredients. Stir so that there are no lumps. If desired, milk powder can be replaced with infant formula. Pour liquid chocolate into silicone molds, as it will be very difficult to remove it from any other molds. Let cool, then cover and refrigerate for several hours.
March 8 shockbox template
March 8 is not complete without sweet gifts, so templates for bright, spring, and festive chocolate boxes will come in very handy. Templates for standard chocolates, candies such as Raffaello and Toffifi, as well as kits for creating gift boxes with small chocolates are offered to suit your taste.
Spring shockbox templates for ladies:
Comic shockbox for March 8:
Pencil case for a box of chocolates - template:
Shokobox for Raffaello:
Tools and materials for making bouquets
The main material used to create a bouquet is, of course, various types of sweets! It’s better if it’s sweets wrapped in candy wrappers. Don't just take the chocolate ones out of the box - even if you wrap them yourself, hygiene will not be observed.
The integrity of the wrapper should not be violated, only removing the tails is permissible.
In the case when you have to work with confectionery products with a soft filling (fudge, liqueur), remember that they are subject to deformation, so it is better to take hard candies such as praline or grilled. But in any case, first place all sweet materials in the refrigerator.
It is very important to pay attention to the shelf life of sweets, because before they are eaten, the bouquet will stand for some time, decorating the room.
The next material needed to make the base for a bouquet of candies is corrugated paper. The best option for such purposes is Italian, with a dense, stretchy texture and excellent shape retention. It is quite difficult to tear and is resistant to fading.
Chinese and German paper is much cheaper, but the quality leaves much to be desired.
There is also corrugated paper for children's crafts. It is completely unsuitable for creating long-term bouquets, as it is very soft and the shape is lost almost immediately.
Also stock up on tape - it has a light adhesive effect and stretches slightly. Used for wrapping skewers and wire. But you don’t have to take it exactly; replace it with green corrugated paper.
Wires of different thicknesses are also useful in your work - you can buy them in florist stores or in hardware departments.
Also prepare threads for fastening some individual parts.
Stock up on bamboo sticks, skewers, and toothpicks - they will come in handy when making stems. This option is cheaper, but they are not used when creating hanging (ampel) forms of bouquets.
Toothpicks will be needed in large quantities to secure the candies to the base.
And of course, you can’t do without a base for a bouquet of candies! For these purposes, use everything you have on hand: pieces of polystyrene foam, polystyrene foam, floral sponge, wire, newspaper and even thin twigs.
Shockbox template for February 14, Valentine's Day
Valentine's Day is still on the road, but there's no need to relax. Now is the time to think about future Valentines. A great idea - a sweet present, packed in original packaging. Hearts, teddy bears and kisses look beautiful as ornaments. For a special charm, you can wrap each candy or chocolate in individual colorful packaging.
Shockbox template on the theme of the legendary Love is... (box and candy wrappers)
chocolate boxes:
Elegant template for men's shockbox for February 14 (box + candy wrappers):
Shockbox with balloons for the conference box:
Shokobox (lazy box + candy wrappers) for Valentine's Day for sweets:
I love the shockbox
Template “I love you” for 4 candies (box + candy wrappers):
The basis
Lid
Wrappers
Cover template for Alyonushka chocolates for Valentine's Day:
sweet valentines: templates
Template for sweet valentines:
How to pack chocolate beautifully in winter
On Christmas days, you can present a chocolate bar in a chocolate bowl instead of a banal card. The main thing is to beautifully decorate the packaging in accordance with the New Year's theme. To make the decoration of the chocolate bar look truly New Year's, use glitter, broken glass, foil, serpentine, figurines and pictures of New Year's characters.
Christmas deer
To package chocolate in an interesting way, the bag is made with the face of a deer that is carrying Santa Claus' sleigh. Cut out ovals for the nose and eyes and glue them to the bag. The nose is smeared with glue and sprinkled with pink glitter. Horns are made from wire wrapped in thick threads.
Snowflakes
A simple and cute way to package chocolate beautifully is to cut out and glue a paper snowflake onto the packaging.
With lace
White lace looks great on Christmas gift wrapping. They create a winter atmosphere, reminiscent of fluffy snow.
Cones
To create a winter atmosphere and beautifully wrap a sweet gift, they use pine cones and twigs. They can be sprinkled with white glitter to imitate snow.
In a beautifully made package you can pack only sweets, but you can also invest money, other gift products and things, or a card with wishes. They present a sweet gift in a formal atmosphere, holding it carefully so as not to damage the created decor.
New Year's boxes: shockbox templates
Fill the New Year with a sweet mood! Be sure to please your loved ones and friends with chocolate chocolate boxes.
New Year's shockbox with Santa Claus (box with lid and candy wrappers):
New Year's chocolate and candy boxes:
Chocolate box for New Year's candies:
Shockbox template Mother's Day
On Mother's Day, it is customary to congratulate mothers with all our hearts. They remember not only their own mothers, but also their godmother, mother-in-law or mother-in-law. Please your dearest women and give them a sincerely created shockbox.
Soulful shockbox for sweets for mom:
An unusual solution - a shockbox with a place for a photo of your mother:
Beautiful shockboxes for mom for Mother's Day:
Shokobox for the expectant mother:
Foam base for a small bouquet
The advantages of such a base for a bouquet of candies are that the foam rubber can easily be adjusted to the shape, it can fill every gap very well, it can be easily compressed. A skewer or toothpick is simply inserted.
An important condition for this basis is that foam rubber is unable to withstand very heavy weight. The bouquet should be miniature and light, otherwise it will simply crumble.
Shockbox sister template
Chocobox for the best sister in the world with designer wrappers:
Shokobox for my sister's birthday:
Comic shockboxes for your sister for a great mood:
Templates for chocolate and candy boxes for sister:
Shokobox for a friend: templates
You can give your friend a glamorous printed shockbox with cosmetics for the holiday. Inside there will be 9 candies in designer packaging.
The “Girls, such girls” chocolate box will be the most pleasant sign of attention to a friend (a book-like box and candy wrappers that fit together like a puzzle).
Comic shockbox “Three Girlfriends”:
Shokobks for a cheerful friend “First Aid Kit”:
Templates of unusual chocolate boxes with animals and more for 100 g chocolate bars:
No. 4 Multi-tiered cardboard cupcake stand
This method allows for variations in stand width and number of tiers because you can cut the cardboard to the size you need.
So you can strictly follow the instructions below, or you can take it as a basis and make your own adjustments.
Necessary materials:
- Several polystyrene foam disks (you can also use something else, wide and quite low, to serve as a base)
- Tin cans for support between tiers (you can also use polystyrene foam cylinders as shown in the top left corner, but cans guarantee a more durable end result)
- Cardboard circles, two of each size, here we used circles with a diameter of 30 cm, 25 cm, and 20 cm, for a three-level stand
- Cardboard to cover the top of each level (optional), base and dividing posts (you can also use fabric or tape to cover the base and posts).
- Glue gun
- Ribbon for decorating tiers
- Ruler
- Stationery knife
- Pen
- Scissors
- About 30 minutes of your time (or 45 if you take photos as you work :))
How to do:
Step 1: Making the Base
First, you need to make the base of the stand by gluing the polystyrene foam discs together into an even column using a glue gun.
Step 2: Making Cardboard Circles
Glue together two cardboard circles of the same size, with the less beautiful side facing inward. I also use a glue gun.
The result will be a double layer.
Repeat with remaining measurements until all cardboard circles have been doubled in size.
Trace each of the cardboard circles onto thin cardstock and cut out. This will cover the tiers.
Glue these circles to our double cardboard circles using a glue gun (only on one side, which will be the top). Now they are ready.
If desired, the edges of these circles can be trimmed with decorative scissors to create a scalloped border, adding another detail to the overall look.
The result is these three circles.
Step 3: Making partitions between tiers
Now you need to cut out two strips of cardboard, the length equal to the circumference at the bottom of the cans, and the width equal to the height of the cans.
Use a glue gun to secure the cardboard strips to the tin can. Repeat the same for the second jar. The bottom column of polystyrene foam should be covered with cardboard in the same way as cans.
Tip: The glue can be very hot - too hot to touch - so you can use a ruler to press the cardboard strip firmly against the surface until it clicks into place.
You should now have two columns and a base covered.
Step 4: Putting all the parts together
One thing to keep in mind when assembling all the components is to position all the cardboard seams covering the Styrofoam cylinder and can columns to one side so they can be the "back" of the stand and not visible to guests. Simply place the stand with the side with the seams facing the wall so that they are not noticeable.
- To connect, you need to mark the center on each circle; this can be done in several ways: with a ruler, compass, thread.
- Now glue the styrofoam base in the center of the bottom tier (be sure to glue it to the bottom, the uncovered side of the cardboard circle).
Then glue the tin can column in the center of this circle, but on the other side. Now glue the next cardboard circle on top of the column. Check the stability of the structure.
Tip: Since the lid of the can may not have a smooth surface, you will need to glue the edges to ensure that the can has a firm contact with the cardboard circle.
