I have owned my dacha for a year now. I arranged everything a long time ago - I poured everything with new concrete, made a veranda, paths from decorative bricks, wood crafts for aesthetics and much more. And then suddenly I wanted to take up farming. I set aside space for fields with beds, dug them up, planted various crops: grapes, potatoes, peppers, tomatoes, cucumbers... But for some reason I was drawn to heat-loving crops. And I learned from a neighbor that our area has excellent soil for strawberries. Without thinking twice, I decided to make a greenhouse with my own hands. I decided to make it from polycarbonate, since it was available, and I didn’t really want to make it from glass. Glass breaks easily, and, more importantly, children often come to my dacha (grandchildren, godchildren, children of friends), I don’t want them to get hurt. So, everything is ready, only the polycarbonate doors remain, let's see what came of it.
Source remontbp.com
Kinds
Doors to the greenhouse can be in several versions:
- hinged - a one-piece product, hung on powerful hinges, which ensures a tight fit. Installation of the canvas is quite simple, especially if it is made of a wooden frame and covered with film;
- sliding is a very convenient option, since the door does not hit the jamb, and the opening of doors in the greenhouse is limited in movement. The tight fit is achieved due to the seal;
- The option with a window is possible if the design of the doors allows, but you will have to open the “window” manually.
The importance of ventilation
In spring, seedlings feel great in a polycarbonate greenhouse, because although it is still cool and cloudy outside, the temperature in the greenhouse is excellent for the development of various crops. The following factor plays an important role here: the vegetative development of most varieties of vegetables begins only when the thermometer readings are not lower than + 12 degrees.
But in summer there is a problem of too high temperatures. Temperatures that go off scale harm plant growth and the formation of new fruits. If the thermometer mark of 30 C remains below the mercury level, then you should not expect a good harvest. In such conditions, plants gradually die. How to lower the air temperature? The best way is to ventilate the greenhouse.
According to some gardeners, aeration also helps with pollination, supplying plants with carbon dioxide and controlling pests.
Design
There are several ways to make a door to a greenhouse. Doors that swing open on awnings, sliding and folding doors can be covered with a polymer panel.
The door can be made completely frameless; all the necessary fittings are attached directly to the polycarbonate sheet.
In this case, the rigidity of the structure is ensured by the material itself, so for this purpose it is recommended to use monolithic polycarbonate of maximum thickness. Naturally, such a door will not be cheap, but outwardly it will look presentable.
Cellular polycarbonate is not suitable for this option; it is less durable and much lighter, which is why it is used to fill or cover frames made of plastic, wood and metal. Samples of various designs can be seen in the photo of a door for a greenhouse.
Attaching polycarbonate to the frame
In general, it’s clear how to make a polycarbonate door into a greenhouse, but now we just have to figure out how to attach the sheet material. The easiest way to do this is with a polycarbonate profile. It is first attached to the fabricated door frame, after which the honeycomb carbonate panels are inserted.
The second most common option is to place a rubber band under the sheets. Thanks to this, you can achieve higher tightness and avoid the door from blowing out. It is also necessary to install metal plates attached with screws above the seams.
Another important point is to install the sheets correctly. The honeycombs should be placed in a vertical position to avoid liquid accumulation. Polycarbonate installation specialists recommend drilling additional holes at the bottom of the door and throughout the greenhouse (if it is made of the same material) to drain water. They should be located at a distance of 30 cm from each other, and the diameter of the hole should be no more than 0.6 cm. Thus, the moisture accumulating in the greenhouse will come out.
The size of the door in a polycarbonate greenhouse should not exceed 2.13 m, otherwise it will be extremely inconvenient to use. The width of the finished product should vary from 60 cm to 1 m. A larger width is made if the greenhouse is large and it is necessary to bring a cart or some other equipment into it.
Manufacturing
In order to make a reliable door of proper quality from a polymer material for a greenhouse, it is necessary to take into account some factors:
- If the entire greenhouse structure is sheathed with polycarbonate, then the procedure for working with the door trim will be the same.
- If only the door is made from this material, then the most important step in the work will be the correct manufacture of the frame; it should fit perfectly into the opening.
- If the frame of the greenhouse is made of metal, then the frame for the door should be made of a metal profile measuring 30x2 or 40x3.
- If the “skeleton” of the greenhouse is constructed of wood material, then the frame should be made of wooden beams with a cross-section of 50x50cm (it is advisable to take the timber from coniferous wood).
Having assembled the frame, you need to place it on a polycarbonate sheet and outline the outline. Then all that remains is to cut the polymer sheet according to the markings and secure it to the frame.
Drafting
Work on the preliminary design of a polycarbonate greenhouse is carried out in several stages:
First you need to choose a place to build a greenhouse. The evaluation criteria and their meaning are shown in the table below.
Table. Criteria for choosing a location for a polycarbonate greenhouse.
| Criteria | Meaning |
| Sunlight distribution | The area for the greenhouse should ideally receive sunlight from any direction from morning to evening. Shading from nearby buildings, fences and trees is undesirable. If this condition cannot be fully met, then at a minimum, the place for the greenhouse should be illuminated by the sun from noon until 6-8 hours. |
| Landscape | It is advisable to equip the greenhouse on level ground. If there is a slope, terracing will be required. |
| Orientation by cardinal directions | Ideally, the greenhouse should have its “long” walls facing north and south, and its ends facing west and east, respectively. In this case, ventilation windows should be located on the south side. |
| Winds | It is not advisable to build a greenhouse in a place regularly blown by cold air currents. Therefore, the northern slopes of the hills are hardly suitable for the construction of buildings. |
Important! It is also advisable not to set up a greenhouse in lowlands or on peat soils - the temperature in these places is not much, but below average, which will affect the condition of the plants.
The size of the greenhouse is selected based on the area of the plot, the budget for construction and the goals that the owner of the personal plot sets for himself. All greenhouses, except domed ones, have the shape of an elongated rectangle. Along the edges of the building there are beds with agricultural crops, and in the middle there is a path. If the greenhouse is wide, then it is possible to arrange several paths and rows with beds.
The optimal width of the bed is about 100 centimeters, the path is 60-70. At lower values, working in the greenhouse will become inconvenient. The width of the building is calculated as follows: the widths of the path (or paths) and all the beds of the greenhouse are summed up, and 10-15 centimeters are added to the resulting figure, taking into account the thickness of the walls of the greenhouse. The final result will be the width of your greenhouse. On average, it is from 2.5 to 6 meters.
The length of the building should be a multiple of 2-2.1 meters - the width of a standard polycarbonate sheet. The same 10-15 centimeters of the greenhouse walls are added to this number. The result is the final length of the object.
Advice! The building will be strong if the vertical frame elements are spaced at intervals of 1 meter. Take this into account when calculating the length of the greenhouse.
The height of the greenhouse depends on the shape. For arched buildings without a plinth, it is limited to 2.1 meters at its highest point. To make the greenhouse taller and more convenient to use, you will need to create a base using stone, timber or brick. For other types of greenhouses, the height is chosen at the request of the site owner.
Separately, it is worth mentioning the size of the greenhouse-bread bins. In most cases, such greenhouses are extremely small in size, allowing you to work with plants or seedlings without entering the greenhouse. Accordingly, there is no need for a track. The height of such greenhouses should not exceed human height, otherwise raising and lowering the doors will not be very convenient.
The shape of the greenhouse is selected based on the personal preferences of the owner of the plot. More details about the arrangement of each of them will be discussed below.
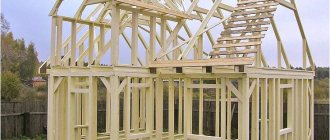
The greenhouse frame is made of the following materials.
The type of foundation depends on the expected mass of the building. If you plan to build a small greenhouse-breadhouse or another, then there is no need for a foundation. For medium-weight buildings, a point foundation or a timber-based structure is preferable. If you plan to build a long and high greenhouse, then it makes sense to equip a strip foundation made of concrete.
Prices for PVC profiles
Calculation of doors and windows is carried out based on data on the length and width of the greenhouse. In addition to the “bread bins,” all other greenhouses must have at least one door. The optimal dimensions are 1.7-2 m in height and 0.75-0.9 m in width. For greenhouses longer than 6-8 m, it is desirable to install two doors at opposite ends of the building.
In small-area greenhouses, ventilation can be carried out through the same door. If we are talking about buildings of significant size, then there is a need to install ventilation windows, which must be evenly distributed along the entire length. Folding transom windows equipped with thermal cylinders are best suited.
Important! To protect plants from hypothermia, ventilation windows should be installed on the south side.
Now it’s time for the final stage - drawing up the drawing. If you have not had experience in drawing before, then use graph paper or regular double sheets from a squared notebook - it’s much more convenient to work this way. Instead of pens, use a pencil - it’s easier to erase a mistake or omission than to redraw everything again. For summer residents more experienced in design, it makes sense to draw up a drawing in CAD programs.
You need to carry out the plan in at least two projections - from the end and from the long wall. Another view, in isometry, can give a better idea of the building.
The drawing is performed step by step as follows.
Step 1. The scale is determined.
Step 2. The external contours of the greenhouse are drawn, the length, width and height of the building are carefully observed, adjusted for scale.
Step 3. The base of the greenhouse is applied.
Step 4. Vertical supports of the walls emerge. If we are talking about a single- or double-slope greenhouse, then the rafters are also drawn.
Step 5. Horizontal frame elements, slopes and lintels, doors and ventilation windows are applied to the drawing.
Step 6. The drawing is supplemented with notes, local views (especially useful when creating a fastening diagram) and calculation of the amount of materials needed.
The following are drawings of the most popular types of greenhouses. Attached to the drawings are descriptions and some features of designing such greenhouses.
Dimensions
Before cutting polycarbonate for doors, it is necessary to take the exact dimensions of the opening in the structure frame. Basically, the opening is left for doors of standard dimensions; they are suitable for almost any design:
- height - one and a half meters;
- width - one meter.
If you do not plan to roll any garden equipment inside the structure, then the width can be reduced to 0.6 m.
Experts advise: how to stretch film onto a greenhouse
At first glance, it seems that covering a greenhouse frame with film is a simple matter. But this work also requires some effort and compliance with certain rules. If the width of the film coincides with the width of the greenhouse, that’s great, because you won’t need to glue the material together for installation. To correctly measure the required length for the covering, you need to throw a roll of film over the entire frame - from one end side to the other, close these parts of the structure and add an overlap of 30 cm on each side. This will be needed to attach the film to the ground.
If the width of the material is not enough, it can be overlapped with tape or using hot gluing (soldering iron, iron).
It is recommended to stretch the film in calm, warm weather; heat can cause the material to stretch, which will lead to sagging, and at low temperatures the film tends to narrow, which leads to cracking.
Material cutting
Once you have the exact dimensions, you can start shaping the door. In order for the cutting of polycarbonate to be correct, it is advisable to use a circular electric saw for cutting, or, in extreme cases, a simple construction knife.
During the cutting process, the resulting polycarbonate particles should be blown off with a stream of compressed air.
Often the door leaf is cut according to the installation location, and not separately according to size. In such cases, an error in size is unlikely. If desired, you can cut out a small window at the top and install a door closer.
Do not forget about the handle that the door must be equipped with. It can be made of metal or durable plastic. If the structure is equipped with a window, then you can also install a small handle on it.
For fasteners, holes of a suitable diameter are drilled in the material using an electric drill. You can use a regular metal drill. You need to drill between the polycarbonate stiffening ribs. The holes should be no closer than 40mm to the edge of the canvas.
Having cut out the polymer sheet for the door, you can, if desired, paint it in any color. But before that, sand and treat the surface with a protective agent.
Advantages
The advantages of polycarbonate are as follows:
- lightness, feeling of airiness;
- higher reliability compared to glass;
- safety - if cracked, it does not crumble into small fragments;
- ease of care.
Taking into account such features, sliding doors made from polycarbonate will serve for a long time and will delight the owners with their durability.
Doors can be built in two versions: hanging and sliding. The second option is the most common. Sliding doors have a compartment design. Those. their doors move apart along the wall. To make such doors, you need to decide whether they will have a frame or not. Metal, wood or plastic structures are often used as a frame. With the frameless type, no other materials are used to create the door, with the exception of polycarbonate itself.
Required Tools
To figure out how to make a polycarbonate sliding door on your own, you need to understand that creating a door without a frame will take a lot of material costs than creating a frame door, but it also looks much richer. There are no difficulties in manufacturing, but the material you need is basic:
- electric drill and drill bits;
- screwdriver (screwdriver);
- tape measure and level;
- cutting machine (jigsaw);
- square
If the door is framed, then you must have:
- polycarbonate sheet (you can use pieces ready-made according to the size of the openings);
- corners made of metal or polymer (for the opening);
- self-tapping screws and angles for attaching frame sides;
- fasteners for the box.
Doors without a frame are secured using one fastener and polycarbonate sheets.
Stages of creating a polycarbonate sliding door
- The opening is measured taking into account that the frame is made one to one and a half centimeters smaller than the opening in order to close tightly and not touch the box.
- The rectangularity of the wooden opening is measured with special care using a square. If you make mistakes at this stage, the door simply will not fit into the opening. For metal and plastic, this is not necessary.
- The frame of beams is assembled using metal corners.
- The assembled frame of their wood is sanded and treated with varnish (or stain) for an aesthetic appearance.
- Keep in mind that the frame can be made using an old canvas, on which the bars are placed around the perimeter and the necessary measurements are taken. Then, using a jigsaw, the frame is assembled and the polycarbonate sheet is attached with self-tapping screws.
- For greater aesthetics, self-tapping screws with decorative caps are used.
- Afterwards, canopies are attached to the frame and frame to install the door and, finally, the structure itself is mounted.
Thanks to the lightness of the material, this work can be done even by one person. The frameless option is even simpler: a polycarbonate sheet is applied to the old door leaf and cut to the desired size.
Assembly
To assemble sliding doors you need the following tools:
- the polycarbonate sheet is five to six centimeters larger than the opening;
- metal guide tube, twice the width of the opening;
- fasteners and anchors;
- list of previous materials.
Installation begins with a retractable structure - a guide.
The tube is attached at a height of five or ten centimeters above the opening. One half is attached above the door opening, the other is shifted in the direction of movement of the door along the plane. Afterwards, rings are attached to the polycarbonate sheet. For this, fasteners are used. They are screwed to move the door along the guide. The door should be one to one and a half millimeters from the floor. If there is a threshold, the canvas is lowered slightly below it. This will allow the door to close more tightly.
Restrictions are set on the guide at the ends. In this case, the rings with the polymer are hung on the guide. If necessary, handles are attached to the sheet. Once the door handles are installed, you can say that a modern and stylish door that is also durable and safe is now installed in your home! In addition, you can be proud that the doors are made by yourself! They will fit into a variety of interiors to suit every taste and will look beautiful in the living room, between rooms, in the bathroom and in the kitchen (more about the interior of kitchens at https://rubicks.su/kuhni/loft/).
Polycarbonate material today is one of the best, if not the best, option for bringing the most daring ideas to life. At the same time, the costs of installing the door and purchasing materials are minimal! Feel free to grab your tools.
If you want to make a high-quality and attractive polycarbonate sign, then read our recommendations on how to do it correctly and quickly.
Are you planning to renovate your balcony? Then take a closer look at polycarbonate, this material will make a reliable and warm balcony, read about it further...
Source of the article: https://moypolikarbonat.ru/razdvizhnyie-dveri-iz-polikarbonata-svoimi-rukami-ves-protsess-sozdaniya/
Installation
The sheet must be secured to the finished door using self-tapping screws and special sealing washers, which provide protection against moisture and dirt; in addition, they make the fastening points airtight.
They will also prevent damage to the material when installing the door, since the leaf will fit tightly to the frame, eliminating shifts and loosening of the fastening points.
For complete sealing, it is advisable to use a special adhesive aluminum tape. It is advisable to use perforated tape at the bottom. Such means will prevent dirt from getting inside the structure, and the perforated tape will ensure condensation escapes.
To install doors in new places, awnings are required. In addition to performing the main function (opening/closing the leaf), they give the doors stability and reliability.
The canvas may not hermetically cover the entire opening; small gaps around the perimeter are allowed. The door frame should even be smaller than the opening by about 1.5mm. This can be corrected with insulation.
If a sliding sash is planned, then installation of a special mechanism is necessary. This action requires special attention; any mistake will lead to incorrect movement and disruption of the tight fit of the door leaf.
How to make a sliding roof with your own hands
You can build polycarbonate greenhouses with a sliding gable roof with your own hands.
It’s not difficult to make the simplest sliding roof with manual opening; let’s look at options for installing a roof for a polycarbonate greenhouse.
This is the simplest version of a sliding roof, but it is quite possible to create a completely sliding system yourself.
The roof segments drop down, leaving the top completely open.
Arched polycarbonate greenhouses with a sliding roof can be placed on runners, then the segments will diverge to the sides, running over each other and completely opening the desired area (like a “matryoshka doll”). In this case, the radius of the frame arcs should be different - the upper segments have more, and the lower segments, respectively, have less.
Or, as an option, the roof can slide along transverse runners in one direction or the other, revealing part of the greenhouse along its entire length.
Insulation
The structure is insulated with special seals. The most common type of such products is made of rubber.
A rubber seal for a door in a greenhouse retains heat and moisture inside the greenhouse, provides protection from adverse natural phenomena and increases the strength of the entire structure, since it reduces vibrations that occur during gusts of wind.
A high-quality and well-sealed door should protect the internal atmosphere of the greenhouse from the adverse effects of the external environment.
Answer
Hello Regina. The issue of heat preservation is very important for greenhouses, because even in the southern regions frosts occur in the spring. In this case, the seedlings may simply die. As in any other room, heat escapes through door and window openings. Well, since the walls and ceiling of the greenhouse are, one might say, one continuous window, it is very important to properly seal each glazing element.
In principle, instead of sealant tape, you can use silicone sealant, or one of the variants of construction mastics. Acrylic glass, as well as silicate glass, can be sealed using any method suggested above. Well, drafts from the doorway will be blocked by ordinary door insulation and polyurethane sealing - it all depends on what kind of door is in your greenhouse.
Source
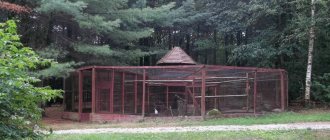
Photo of doors to the greenhouse
How to secure the film to the greenhouse arches using clamps and clips
Clips are used for fastening films to greenhouses, the frame of which is made of metal-plastic pipes or fittings. The pipe diameter can be 25, 32 or 60 mm. It is not very convenient to stretch the film onto the frame, but they are attached very easily using special clamps. They are put on the pipe, grab the plastic film and press it against the arches.
Similar clips can be found at any hardware store. But if they are not available or it is not possible to purchase them, you can make such clamps yourself. To do this, you need to take a plastic pipe and cut pieces 4-5 cm long. Then you need to cut off the side of each tube - the cut should be of such a size that it can be attached to the arc of the greenhouse.
In a similar way, you can make clamps from a rubber hose, but rubber tends to dry out, so this method is short-lived.
You can also use large stationery binders to attach the film to the frame. They can be attached to the frame if the diameter of the pipes allows.