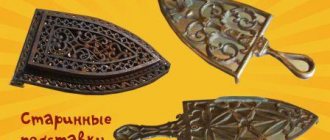
It is difficult to imagine the life of a modern person without bank and other plastic cards. They are used to pay wages, loans, benefits, and discount cards are used in chain stores, cafes, restaurants, and salons. And this does not take into account the constant discount and bonus cards that overflow our wallets and business card holders. Despite this indispensability, all plastic cards have their own expiration date; some can be used for only a year, others for a decade. But there is no point in throwing away such once irreplaceable things prematurely, because plastic cards can be used in everyday life. All you have to do is use your imagination or use existing life hacks!
Each of us understands perfectly well that a plastic bank card is intended for withdrawing funds, replenishing accounts, and accessing online services. But these are the basic functions of working cards that ordinary people are accustomed to. Real craftsmen and inventors have found much more practical, extraordinary and even patent-worthy ways to use plastic cards that have already expired. Such life hacks may seem crazy to some, but they will definitely come in handy in everyday life!
Headphone holder
Of course, this is a very loud name for such a simple device, but it is done quite quickly and simply.
First of all, you need to mark the plastic card. Then the marked edges are cut off using sharp scissors. Next, special holes are drilled where our headphones will be placed. In this simple way, you can solve the problem of regularly getting tangled wires, and we’re not just talking about headphones. To facilitate the process of bending the future holder. It is recommended to preheat the card, making it more elastic and pliable. Unusual ways to use ordinary vinegar at home
Just a map
It turns out that even in their original form - a plastic rectangle - cards can be very useful. For example, I wrap decorative cords around them for needlework: they are stored compactly and do not get tangled. Let me give you a few more examples:
- Knife. This function is especially relevant somewhere on an outdoor picnic. Taking a knife with you is not always convenient and safe. But the card is compact, convenient, and not dangerous.
- Scraper for cars. The card is ideal for clearing snow and ice from windshields in winter.
- Putty knife. And what? Plastic can successfully replace this tool during repair work. They say that cards are sometimes even more convenient than a professional tool.
- Shoehorn. A portable assistant will help out if you don’t have a real spoon at hand.
- Ruler. A plastic cutter will help you quickly draw a small straight line when you don't have a real ruler nearby.
- "Portion man." The card can divide bulk solids into equal parts. For example, to prepare a dish, a cleaning product, a mask: take 1 part of this, 2 parts of that... Sound familiar? It is convenient to separate these parts using a map.
- Keyboard cleaning tool. The thickness of the card makes it easy to scoop out all the junk that magically accumulates between the buttons on your keyboard. And if you wrap the card with a damp cloth, there will be dust too.
A plastic card will make an excellent multifunctional toy. Give it to the baby. You'll be surprised how many ways he can use it. It will be a table, a rug, a sled, a crib, money and God knows what else.
Personalized pendant or logo
Each personalized bank card has the holder’s full name engraved in Latin. Once the card is no longer needed, you can cut out your name and use the resulting logo as an original accessory. By gluing, for example, on a purse, folder, bag, laptop monitor. By making small holes and covering the carved initials with varnish, you can make a beautiful personalized pendant.
Well, don’t forget about other useful little things. A plastic card can perfectly serve as a bookmark, a phone stand, a deflector for an external camera flash, and much more!
Origami cat from one sheet
First, we will learn how to make a simple cat from a sheet of paper, and then we will use several sheets.
To assemble, we will need paper (can be multi-colored), scissors, felt-tip pens.
Volumetric figures
An origami “cat” made from modules is called a three-dimensional figure. This is a complex structure that consists of separate parts. They can have a wide variety of shapes.
It is necessary to create individual modules strictly according to the instructions. This is the only way to get a truly beautiful craft.
The size of the finished figure depends on the size of the original parts. The eyes, mouth, mustache and nose are created and painted separately.
Even experienced craftsmen have to spend a lot of time developing such models.
Wooden piggy bank with movable mechanism
Necessary materials:
- Wooden tray transparent plexiglass sheet
- Wood crafts
- Miter saw
- A circular saw
- Drill
- Kraft paint
- Paint brushes
- Glue E6000
- Screws
- Screwdriver
Master Class:
- Use a circular saw to cut the plexiglass to the size of the wooden tray.
- We drill pilot holes in each corner of the plexiglass, leaving a sheet of protective coating.
- Use a Dremel tool to cut a coin slot approximately 1 1/4′′ x 3/16′′.
- We use a miter saw to cut the wood strips on the ramps.
- We cut them short enough so that there is enough room for a large coin to fit through all the passages.
- Paint the inside of the wooden tray. Let the paint dry completely.
- Use glue to glue the roller ramps into place. We start with the one that is located directly under the coin hole. Glue it low enough under the coin hole so that a large coin can fall onto it.
- Glue the second ramp in place following the same instructions. Give the glue time to dry completely.
- We screw the plexiglass into place, remove the protective covering and start saving money!
It's so cool! Watching the coins roll down these ramps.
This piggy bank is interesting because you cannot take out the money until you unscrew the front part.
So, when it’s full, unscrew it and make a plan for this money!
Kitten face
The photo of origami “cat” displays the skill of forming simple images. One of them is considered to be a kitten's face, which even a child can create.
To get started, you need to prepare a square piece of paper. It is pre-bent diagonally.
The triangle is folded in half and straightened again, creating the main line. The lower corners are folded towards the center, forming the ears of the animal. We wrap the upper part away from ourselves at the bottom.
Turning the craft over, we get the simplest face of a kitten. Eyes, mustache and mouth are drawn on it.
Cat assembly
You need to draw a square. The larger the sides, the larger the cat will be. Next, take scissors and cut out a square, erase the lines. After this we begin to fold the cat.
We fold it the way we once folded a kite (bend it diagonally, then bend the corners so that the side of the square meets the diagonal of the line along which the bend was made). Fold the bottom and side of the product.
We combine the two longest sides. In the resulting triangle, bend one side along the line of the perpendicular lowered from the largest angle. Separate the top layer and bend it.
Bend the cat's ears and press them inward. Let's bend the corner of the paws back and make the origami cat's tail the same way we did the ears.
Making a cat from two sheets of paper
The head will be made from one, and from the other we will make all the other parts of the origami cat. Then we will put them one inside the other.
Take two pieces of paper. Cut a square out of each. The squares must be the same size.Let's take one square and use it to form the cat's body. Fold the square diagonally (combining the top left with the bottom right). Fold one corner (bottom left).
Take the second square. Fold the cat's head. Fold it diagonally. Rotate so that the longest side of the triangle is at the top. We bend the upper corners so that the two upper ones touch the one below.
We bend the corners upward to form the cat's face. Lightly pull the two corners. Let's level it up. Let's layer the workpiece. We form the ears (press the paper inward at the corners). We bend the crown back.
We attach one part of the cat to the other. We insert the head into the body, move the tail to the side. We make the origami figure stable on a flat surface.
Next, you can take pencils and draw the face of the resulting cat.
Glowing water lily
An original idea for a garden craft made from spoons – a water lily with a built-in lamp. Due to the resistance of materials to moisture, such products can be used to decorate a garden or local area. They can even be placed in a small garden pond.
Materials and accessories:
- Disposable plastic spoons;
- Polystyrene foam, preferably dense enough;
- Hot melt adhesive;
- Waterproof paint, preferably acrylic;
- Stationery knife;
- Miniature lamp with solar battery;
- Scissors.
Step by step course
If you are already set to work, look at the photos with diagrams and read the instructions:
Prepare a black sheet of A4 paper from which you will need to cut 2 squares. Take the first piece and fold it in half diagonally, exposing the white underside of the sheet.
Fold the upper corner of the resulting triangle to the diagonal of the square and smooth out the folds with your fingers, as in the figure. Bend the triangle in two, with the bends up, insert your finger into the “pocket” to add volume, straighten the module. Bend the lower corners upward symmetrically, forming the legs of the cat - the base of the body is ready, it can be put aside.
For the head, bend the second fragment in half diagonally in half so that the black part is on top. Fold the blank for the muzzle again, as in the photo, and form a base with right angles downwards, towards the base of the triangle. Next, this module needs to be unfolded so that a fold is formed.
Fold the bottom edge to the fold line and carefully straighten it - a triangle with 2 horizontal lines will come out.
Fold the resulting triangle in half again, bringing the right and left corners together, and fold the straight part, as in the diagram, to the line of the initial fold.
Form volume with your finger and press upward, hold the opposite corner with your other hand. Completely form the head, as in the figure, and use the two resulting modules to connect the figure, securing it with glue.
Next, we form the eyes, draw a muzzle and add a bow to the neck, which will hide all the flaws with glue. The paper cat is ready.
If at the initial stage you doubt your abilities, do not rush to abandon your plan. Nothing is impossible if you master any business according to the principle “from simple to complex.” In our video, for clarity, we have prepared a master class on origami cats, where everything is shown in great detail.
Which material to choose?
It is recommended to vary origami techniques, including colored flat applications and three-dimensional crafts. Enthusiasts of this exciting activity have developed many options on a cat theme. Most schemes do not take much time, which is what inspires beginners.
Asians put a special meaning into everything, and through animal figures they tried to appease the sky and convey their requests and desires to the divine powers.
Cranes are the personification of renewed strength and health, dog figures are the search for a friend. The European mentality is simpler, and children independently choose a cat figurine because they love animals or simply dream of a fluffy kitten.
The most popular pattern is borrowed from the step-by-step Black Cat folding for beginners from the Japanese origami master Fumiaki Shingu. If you want the same one, repeat as in the picture, and everything will work out.
In Asia, rice paper was used for crafts. The raw materials for washi were poured onto a special machine and dried. In India, gray kami paper was made from recycled dung from elephant farms. The ancient Egyptians used traditional papyrus made from reeds in North Africa.
It is much easier for us to find suitable material - for work you will need:
a sheet of white or colored paper, “reaper” or cardboard;
scissors;
a pen or pencil (for marking) and a felt-tip pen (for depicting a face);
glue stick.
Real origami masters use only special paper produced in Japan. Today, ordinary thick paper is widely used for crafts - it is more convenient than cardboard, and figures are more stable than those made from notebook sheets.
You can do without scissors and glue when the cat is made from one sheet of thick paper. You have to merge the head and body of the animal, made of 2 parts.
If you choose a figure with a curled tail, this element is screwed onto a pencil at the end of the work. The “figurine” will be stable if it is made according to the tripod principle.
Some people like an elegant cat, others like a stocky, folded cat. Many children like origami kittens - funny little ones with big green eyes. Parents can choose the simplest model for implementation together with their child.
We suggest you start mastering the “art of paper folding” with step-by-step instructions on how to make origami cats with your own hands.
Main pedagogical tasks
- instill in children an interest in mastering paper-based arts and crafts;
- Using the example of the origami Cat, introduce children to the traditions of other peoples, in particular Japanese handicrafts;
- develop imagination, aesthetic taste and creative inclinations;
- promote the development of fine motor skills, spatial thinking and “eye perception”;
- instill perseverance, accuracy, independence and patience.