There are a large number of techniques that allow you to create original decor for cans. They accumulate at home and clutter up the space. By putting a little effort into their design, it is easy to get beautiful accessories that can highlight the style of the interior. We'll tell you about the simplest methods of decoration, about the materials that may be needed for work. Photos and videos will show what results can be achieved by using your imagination.
A little imagination and unnecessary jars turn into beautiful accessories Source dekormyhome.ru
Tin jars
They remain after the house runs out of coffee, tea, honey, and baby formula. The containers are quite durable and it’s a shame to throw them away. If you put a little effort into them and decorate them further, you can reuse them for a variety of purposes. From these we get:
- pots and vases;
- storage organizers;
- candlesticks and lanterns;
- cookie cutters.
To create them, you don’t need much: cut off the top lid, remove sharp edges with pliers, make drainage holes in the bottom with a nail, clean the factory paint with sandpaper, degrease the surface with white alcohol, apply a new paint coat and buy plastic plates for the jar at the store. You can grow indoor plants and seedlings for your garden in pots and vases.
Flower pots made from tins Source brzempreendimentos.com
Painting is the easiest way to decorate. You get beautiful jars if you use a brush and stencils to create a multi-colored pattern or a geometric pattern on them. The paint containers themselves are well suited for growing large plants. You can grow cacti and succulents in a small container. Wrap them in birch bark and you will have some very interesting decorative items. They will fit well into an interior decorated in country style or eco-style.
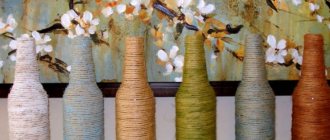
If you have dry tree branches on hand, you can make beautiful jars by cutting them to the same length and placing each one on the surface of the container. For fixing, ordinary twine is most suitable. Each branch is tied with it, neighboring elements are tied into knots, and only then the finished tape is applied to the container. It is useful to first tie it with a canvas napkin. This way the paint of the can will not bleed through the flagstone.
Beautiful silver vase Source izdoski.com
See also: Catalog of projects of houses with a second light and a garage
Many of us have old leather jackets stored on the mezzanine. You can rip them apart, cut the canvas into narrow straps, and then wrap them around the body of the can. The leather is attached to the metal base with a glue gun. You need to work with it very carefully, as the device produces hot glue.
When you don’t want to tinker for a long time, a method that allows you to quickly make decorative jars will do. To do this, you just need to wrap them with colored paper or lace ribbon and tie them with a rope. Paint them, attach artificial flowers to them, you will get very beautiful accessories that can be used to decorate a wedding or any other special event.
Look at the photo, you can see how beautiful the decoration of jars for the kitchen with burlap and lace looks. Metal containers are well suited for storing a variety of small items, for storing cutlery or office supplies. Inside them you can hide balls of yarn, neatly folded light handkerchiefs or spring scarves. Attach a few jars to a board and nail it to the wall, and you will have a storage system for buttons or spools of thread in your house. The jars can be wrapped with a strip of fabric on which pockets were previously sewn. Experimentation in this direction is allowed ad infinitum. The main thing is to turn on your imagination and think about what materials will be easier to implement it in practice.
Burlap and lace can significantly transform the appearance of any utilitarian item Source 3.bp.blogspot.com
Knowing how to decorate a jar helps you create beautiful lanterns and candlesticks. Objects that have holes made in the walls with a nail or drill are effective. Using them, a simple drawing is formed. Its contours begin to be clearly visible in the dark when a burning candle is placed inside the jar.
The decoupage technique helps to decorate the tin. Its essence is extremely simple: using PVA glue, a paper napkin with a pattern is glued to a previously degreased surface. After it is completely dry, two layers of acrylic varnish are applied over the sticker. Art stores sell ready-made decoupage kits. They have everything you need for such work. If metal handles are attached to such a jar, a flashlight or lamp can be hung from the ceiling.
Decorating tin cans
If you get creative and use some tips, you can turn boring cans and other tins into unusual home decor items.
Preparing for work
- First of all, you need to clean the surface of the cans. Remove labels, rinse and dry walls. If there are any unevenness, sand them with sandpaper (one or zero).
- If the metal is prone to rust, or the product will be actively used in contact with water, treat the surface with a special product. Construction and creative stores offer a large range of sprays: rust converters, anti-corrosion, inhibitor compounds, lithium or silicone grease.
Clue. If the surface of the tin can is to be covered with acrylic paint or primer, no additional means should be used - their composition additionally protects the metal from corrosion.
- The necessary materials and adhesives are selected.
- The edges of the jar are checked. The cut should not be sharp (for example, like in canned food). If there is a possibility of cutting yourself, it is better to process the top with a file, coarse sandpaper, or glue a strip of fabric.
The main difference between products made from tin and glass is that such containers can be modified. For example, drill holes to make special fastenings (to hang the product on a hook or attach a convenient handle). To do this, you may need a drill, knife or other sharp object.
Video description
The video shows a master class on making lamps from tin cans:
See also: Catalog of companies that specialize in lighting, including decorative
The master class clearly demonstrates how simple and easy it is to decorate jars in an original way. When aluminum cola or beer containers accumulate at home, resourceful housewives cut out strips from them, and then create molds according to the prepared template for forming and baking the dough. They can be used to cut cheese, vegetables and fruits into shapes, and then decorate holiday tables with them. Thick markers are used to round the shape, and pliers are used to create knots. The ends are overlapped with superglue. The end result is the product shown in the next photo.
Beer can cookie cutters Source: lh6.googleusercontent.com
Paper figures
Proper lighting works best to create a magical atmosphere. And to make the decorated jar look impressive, you just need to add candles or a garland. The second option is safer. Moreover, now in stores you can find very short ones - 20-30 cm each. It’s just convenient to put them in a jar.
As for paper decor, you need to print a stencil on a white sheet of paper and cut along the outline. If you plan to insert a candle inside, then you can only glue the paper on the outside. If it is an LED strip, then the cut out shapes can be inserted inside. There is no need to glue them, you just need to roll the sheet into the shape of a jar.
Glass containers
They stay home from baby food, canned food, juices and soft drinks. If it’s a pity to throw them away, you can also do a little magic, use your hands and make original accessories. Here are examples of the most interesting works.
It is advisable to start decorating glass jars by removing all labels and tags. A clean glass container itself looks very beautiful. A bright lid will make it stand out. You can decorate it using the decoupage technique. The result will be fun products suitable for storing aromatic spices.
If you want to display them, attach an animal figurine or a wooden door handle to the top of each lid. Pre-paint them in bright colors, get a set that you can put on a tray and make it part of your kitchen decoration.
The decoupage technique allows you to make a beautiful set for storing spices Source svoyabesedka.ru
Fabric and twine
Small scraps of fabric, ribbons, twine can always be found at hand and turned from unnecessary trash into impressive decor. Besides them, you only need scissors and glue. You can also add dried twigs and herbs, paper, and glitter to the compositions.
It’s not just paper that looks very impressive, but old sheet music or excerpts from old, outdated books. Add gold paint, a couple of fir branches, a candle, cut out a few stars on the page - and an exclusive New Year's decor that puts you in a sophisticated mood is ready!
Overall, the glass jar itself looks pretty decent. It doesn’t always need to be hidden under a thick layer of decor. It is enough to glue a thin lace ribbon, insert wildflowers or dried flowers and it will turn from a jar into a neat vase. A great option for the holidays if you want to make your own decor.
It is worth covering the jar completely with fabric if you want to make it an accent piece of decor or it is important for you to emphasize the chosen style. This solution is especially relevant for the rustic style, which is also called country or rural. In other cases, it is better to leave at least part of the glass in sight.
Briefly about the main thing
Skillful decoration helps improve the design of glass and tin jars that remain in the house after tea, coffee, and baby food. They can be reused, formed into ensembles, and organized using convenient storage systems. You don't need any artistic or construction skills to do this. Just look carefully at the photos of finished works and study the video master classes. They give a complete understanding of existing techniques, the use of which allows you to create original accessories.
Toys
Now we will reveal the secret of how to make trendy decor with minimal investment and in literally half an hour. You will need jars with lids, small toys, glue and paint. You can buy the cheapest toys, for example, at FixPrice.
Glue the toys on top of the jar and paint them the same color as the lid. They can be used to store sweets, hairpins, small stationery or other toys. To make the decor look especially fashionable, choose candy or golden shades of paint. These are the colors that are trending right now.
Jam as a gift - a great idea with a beautiful design
Sweet surprises are so nice. It’s even nicer when the edible gift is incredibly tasty and healthy. These include jam - aromatic, soft, with pieces of berries or nuts.
Sunny greetings from the hot summer in a jar - an excellent gift for relatives and friends, neighbors and colleagues. What sweet treat is most appropriate as a gift and how to beautifully package jam as a gift?
LiveInternetLiveInternet
- Registration
- Entrance
—Rating buttons “Yandex.blogs”
-Always at hand
—Tags
-Video
—Categories
- Handicrafts (1540)
- Knitting (435)
- Sewing (332)
- Crochet (328)
- Handmade other (286)
- I have an idea! (85)
- New life for things (75)
- Decoupage (40)
- Weaving, macrame, knot techniques (33)
- cross stitch (27)
- Beading (10)
- Patchwork (9)
- Quilling (7)
- Satin embroidery (5)
- Scrapbooking (3)
- Marbling (3)
- Thoughts on beauty (445)
- Interesting (377)
- Thoughts about home (286)
- Home interior (87)
- Home renovation (34)
- Thoughts on cooking (279)
- Baking (83)
- Main courses (55)
- Desserts (48)
- Snacks (33)
- Salads (23)
- Drinks (17)
- First courses (3)
- Thoughts about health (236)
- Thoughts about children (156)
- Thoughts on fashion (156)
- Lyrics (135)
- Personal thoughts (98)
- Other (tests and sundry) (65)
- Travel thoughts (46)
- Plants - garden and vegetable garden (44)
- Thoughts about animals (9)
- Music (8)
-Music
—Search by diary
—Subscription by e-mail
-Statistics
Great occasion
There may be no reason to distribute your own or purchased tea preparations. After all, sometimes you really want to do something nice for someone just like that. You can give jam:
- For the birthday of a friend, mother or sister.
- For the New Year. A large family can be presented with several jars of jam as a gift.
- In honor of a professional holiday - to a beloved teacher, colleague or grandfather.
- For our wedding anniversary.
It has been proven that jam contains many healing properties. It can be given to friends who have a cold during the cold season.
And if you dreamed about it, then, according to the dream book, receiving jam as a gift means that profit, luck and love await the person. And it’s not surprising, because such a sunny treat for tea simply cannot represent failure.
Layering vegetables
If you're making salads or assorted vegetables, you can try layering the ingredients. It looks very interesting and elegant. Become a child for a while and play with the foods, placing them in the order you like best. “Striped” roll-ups look quite stylish. You will have time to mix them later - when in the cold winter you open the jar to enjoy the gifts of your own garden.
Master class: how to beautifully decorate a jar of jam?
A jar of jam is a tasty and healthy gift. It’s just that presenting an ordinary liter jar (even if filled to the brim with a delicious delicacy) is somehow indecent. What if you design it using improvised means!? Easily!
From my own experience I will say: a stylishly decorated jar of jam is a good present in honor of any festive event, which will not only pleasantly surprise the hero of the occasion, but will also subsequently delight his stomach.
Decorated jar of jam - an unusual gift
I’ve been giving cute jars of jam to my friends for years now with or without any reason. And last summer, I rolled up and decorated about 40 small jars of strawberry jam that my son and his young wife gave to their guests at their wedding.
Making jars is simple, but the result will exceed all expectations!
What materials and tools will be needed?
In principle, you can decorate jars of jam with whatever your heart desires : fabric, thread, paint, plastic, paper.
However, on the eve of summer, I suggest you decorate your jars in a berry theme.
To complete the work we will need:
- felt in white, red and green colors,
- red satin braid 0.5 cm wide and a length equal to the circumference of the jar + 24 cm for bow loops + 2x12 cm for strawberry pendants,
- a little padding polyester for stuffing,
- red, green and ocher “Iris” threads,
- sharp scissors,
- needle with a long eye.
In order not to make a mistake with the calculations of the amount of materials used, the first thing you need to do before starting work is to measure the diameter of the cover.
How to make a “skirt” with scallops?
Measure the diameter of the lid. To the resulting size, add a few more centimeters for the skirt (the size of the increase depends on the length of the skirt and the height of the can) and draw a circle on paper.
Decorate its edges with even and identical scallops (teeth): bend the paper circle many times (as for making a snowflake), draw a semicircular scallop and cut it out, unfolding it. The result should be a pattern with identical and even scallops.
What do we need for decoration?
First of all, we need a jar of jam) It is advisable that the jar be small in volume ( 300, 400, 500 ml ), and even better, that it be of some unusual shape.
We will also need all kinds of decorative elements. Here you can already turn on your imagination and take out ribbons, beads, flowers, threads, etc. from your secret chests for needlework. and so on.
I will list only the most basic things that may be useful to us.:
For each decor option, we will once again list what we need for work. So let's get started!
Pebbles
If you want sparkle and shine, you simply cannot think of a better way to decorate than with decorative stones. With their help you can create the effect of real magic. Especially if you use a decorated jar as a lantern with a candle inside.
Banks decorated with pebbles in the same color scheme look more impressive and elegant. They will shimmer due to the play of light and look multi-colored. You can find pebbles in any craft store. Alternatively, instead of them, you can use smooth pieces of glass collected on the sea coast.
And if you think carefully, you can stick absolutely anything to the bank. The main thing is to choose a single concept, add paint and ribbons. For example, you can use popsicle sticks that have been pre-painted in different colors. Or keys, bolts, coins - any unnecessary small parts, of which there are quite a lot in any home.
