HomeMiscellaneousTulle bows
A large number of materials are used to make accessories in the form of bows. One of them is tulle. This lightweight translucent fabric is made from polyester thread. Tulle has different hardness.
The fabric easily takes a given shape and holds it, which makes it possible to create special, unique accessories for various applications. Making a tulle bow with your own hands is very simple.
Let's consider several tailoring options.
Master class on tulle flowers
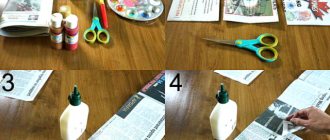
Making airy, light flowers with your own hands is not at all difficult. For this flower you will need:
- a piece of tulle;
- scissors;
- needle and thread.
The fabric is folded into a tight roll approximately 1-1.5 cm thick. Carefully cut out a multi-layer droplet from it. This is what it looks like.
The droplet should produce many transparent petals. 40 pieces are selected for work. First, take one of the petals and, after threading a needle and thread through it, secure a knot on it. Next, use a stitch “forward needle” to fix the second petal, slightly shifting it to the first.
In exactly the same way, sew all 40 droplets one after another. The result is a kind of “ribbon” of parts.
Next they begin to assemble the middle. To do this, the first 3-5 petals are placed in a bag and stitched with thread at the base. Then proceed to the next row, which should be slightly higher (literally 1-2 mm) than the middle. It is also secured with thread.
In this way, the entire flower is attached row by row. Each next row should protrude slightly above the previous one. When they reach the last two or three rows, each of the petals is fixed separately with a thread, having previously given them a cup-shaped shape.
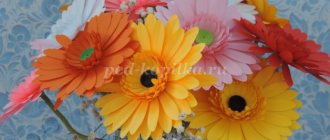
The result is a neat flower that looks like a rose. You can decorate a dress with this flower, attach it to the base of a brooch, or fix it on a hat or handbag.
Bow flower
To make an exquisite and original bow in the form of a flower, you will need eight squares of tulle measuring 20x20 cm. Each square of fabric is folded four times, as for making paper snowflakes, after which the upper part of the workpiece is cut in the form of an inverted V.
The unfolded part should have the shape of a flower with elongated petals. The blanks are placed on top of each other, placing the petals in a checkerboard pattern, after which all the parts are fastened together in the center using a needle and thread. The petals of the flower are lifted up, and its lower central part is slightly pinched and pulled out, forming a narrow base of the flower. The shape of the base is fixed with several stitches of thread matched to the color of the bow.
The central part of the finished product can be decorated with round beads, and the petals can be embroidered with sparkles or beads. The flower is secured to a hair comb, hair clip or elastic band.
Step-by-step creation of a bow for a hairpin
DIY tulle flowers master class is a frequent request on a popular hosting with video. The essence of such numerous videos comes down to one thing: fabric is wrapped around a piece of cardboard in the shape of a donut , then cut along the perimeter and tied with a rope or hemmed with thread.
If you need to create a voluminous decoration, then do not skimp on the fabric; however, you can always make a couple of test copies from cardboard donuts of different diameters before deciding on the size of the intended finished product.
A minimalistic version of the hairpin involves cutting tulle fabric in circles and folding it into segments. The next step is sewing it to the base, so you get the effect of hydrangea flower petals. For realism, you can sew a bead or something like a stamen into the core of the flower.
Wedding decorations
Tulle, thanks to its name, is very often associated with a veil, and therefore with a wedding. A lot of decorative elements for a solemn ceremony, and even just wedding decorations, are made from tulle. Decoration of glasses, arches, simple decoration of a banquet hall, decoration of a wedding procession.
Tulle pompoms can become a universal decor for any celebration. Such decor will always look original. Making a pompom from tulle with your own hands is very simple. A piece of tulle is wound onto a round blank. Then it is cut along the diameter and the middle is sewn together. A thread or ribbon is sewn to the center, which can be used to attach a pompom for room decoration.
Making such smaller pompoms can be used as bows on the head or for decorating clothes.
Small pom-pom bows can also be made using another, faster method. Below is an example.
Related article: DIY Baba Yaga’s nose made from paper using papier-mâché technique with photo
More openwork and delicate tulle bows are obtained if you collect them in layers. To make it, take soft tulle and fold it into a square of the size required for the bow. Fold it twice again. You should get a square again. We turn it into a diamond shape and fold it into a triangle. We cut the edges into an isosceles triangle. Let's unfold the workpiece, we get a multifaceted part. In the same way we make several more parts; the size of the square can be reduced with each layer.
The number of blanks depends on the desired splendor. The blanks are stacked on top of each other, then stitched in the center. Another option could be the method of assembling parts in a bundle. An elastic band, hairpin or hoop is attached. If necessary, the bow can be decorated with sparkles or glued in the middle, smoothing out the tulle. Detailed example in the photo.
Spectacular hairpin
The use of tulle flowers with your own hands is very diverse, all kinds of headbands, headbands and decorative elements. One of the interesting options can be called a lovely bow on the head; this idea will fit perfectly into the image of a young lady preparing for a prom or just an everyday outfit for an educational institution. To start creating a future masterpiece, you will need to make certain preparations, including the following components:
- Main material.
- Special glue gun and refill for it.
- Spectacular stasis.
- Sharp scissors.
- Small tweezers.
- Satin ribbon.
- Cardboard mold.
How to make a bow on your head
You can make a lot of things from tulle. For example, you can make your own bow for Malvina, a headband or headband with a flower, a hairpin, decorative elements, or a simple bow for a girl, which will be discussed step by step in this lesson.
For work you will need the following materials:
White tulle with a 15 cm splint.- Moment glue and glue gun.
- Colored or plain rhinestones.
- Lighter.
- Scissors.
- Tweezers.
- Satin ribbon blanks 5x5 cm and 5x2 cm. It is best to choose the color to match the bow - white.
- A round felt base with a diameter of 3-4 cm. You can take a cardboard blank, as in this case.
First you need to create the petals of the flower bow. They are made from tulle squares 7.5x7.5 cm. There should be 25 such squares. Each petal is formed from two such square blanks by placing one on top of the other. At the initial stage it looks like this.
Let the first layer of the product be the top square, and the bottom the second. Next, the two-layer base is bent so that the lower corner of the second layer falls between the upper corner and the upper right corner of the first. This is how it should turn out in the end.
Having carefully examined the resulting piece of the craft, they look for the topmost tip and place the tooth closest to the fold line and the right edge of the product on it. You can also mentally imagine how the original workpiece is folded three times. Then the desired result can be obtained after the first bend. The photo below shows the result of the work.
Wonderful seven-flowered flower
The original head hat in the form of a fairy-tale flower is similar in its creation to how to make a tulle bow on the head. This version of the evening headdress will be enthusiastically accepted at graduations, social events, and charity balls. A multi-layer cut cardboard bagel made of fabric of several colors, even using the entire rainbow gamut, will add optimism and allow you to stand out in the audience.
Do-it-yourself tulle decorations, created with love, can become excellent decorations for a family celebration or children's party, and they will also decorate the photo zone for guests of the feast who wish to capture happy moments.
The efforts spent on this decor will more than pay off with the delight of visitors.
Crafts made from tulle are accessible to even a first-grader who has barely learned how to handle fabric and scissors, let alone mature individuals with developed aesthetic perception, because for them creating fancy shapes from the most delicate tulle will be a tremendous pleasure.
Even in ancient times, flowers were used to decorate rooms, festive clothes, and hairstyles. And it doesn’t matter at all whether they were fresh flowers or artificial ones made by a skilled craftsman. The result was always beauty and high festive mood. Modern craftswomen create amazingly beautiful flowers with their own hands from a variety of fabrics, threads, wool, corrugated paper, foamiran, polymer clay, cold porcelain and other materials. Let us also try to create a delicate fantasy flower from tulle with our own hands, using the step-by-step master class “Flower from tulle. Beauty with your own hands."
We will prepare everything you need for work
Before we begin creating a future flower, let’s prepare all the necessary tools and materials for the job:
- It is advisable to choose tulle in two shades, but you can get by with one color;
- thin colored paper of different colors;
- sharp scissors;
- durable cotton threads;
- and definitely a good mood.
Step-by-step guide to action
- We cut colored paper and tulle into 6 rectangles of the same size, 2 of which will be made of tulle, and the remaining 4 from thin colored paper. We will try to make our first flower from rectangles with sides of 25 cm and 40 cm. In the future, we will be able to work with blanks of other sizes. Then it will be possible to get, depending on your desire, larger or very miniature flowers.
- Stack all the rectangles. There should be tulle blanks on top, and paper ones underneath. By the way, if you have paper or tulle of different shades, then the darker ones should be lower than the light ones. Carefully begin to fold the stacked parts into an “accordion”, trying to make the folds at the same distance of approximately 2 cm.
- The finished accordion must be bent exactly in the middle and, at the bend, pulled tightly several times with cotton thread, tying it tightly with a strong double knot. We are not in a hurry to cut off the remaining long ends of the thread; they may still be needed if you need to assemble the finished products into a garland, attach a flower to a base for a brooch, a gift box or a hat. We form pointed petals by cutting off the corners on each fold of the accordion with scissors. We try to cut so that the petals are approximately the same.
- All that remains is to form a three-dimensional flower, and for this we need to straighten our product. First we work with one half of the future flower, and then with the second. We start with tulle. We carefully lift each layer of it up in turn.
- After this, we lift the petals of the paper layers. Both tulle and paper are rigid enough to hold the shape of the petals. So quite quickly and without much effort we end up with a surprisingly delicate three-dimensional flower in our hands.
A beautiful fantasy tulle flower is ready. Making such beauty was not at all difficult. However, the proposed master class is by no means something permanent and final. It serves only as an initial basis for the use of your limitless imagination. You can vary to your taste not only the size of the flower being created, but also the color scheme and materials. If desired, you can exclude paper and use only tulle of different shades or combine it with lace inserts. The resulting flowers can not only become a brooch on a dress, decorate a hairpin or hairband. They will help transform gift wrapping and even be used to create an original interior topiary.
To create this decoration, it is not necessary to buy expensive tools or materials; it is enough to purchase a piece of fabric. A tulle flower is a wonderful decoration that can be easily made by anyone, even a novice craftsman. An unusual flower can be used to decorate anything - a bouquet, a dress, a hairpin; it can be attached to a handbag or a headband, and the accessory will become truly unique. And all you need is a little tulle, thread, scissors and a little imagination. This master class provides step-by-step instructions with photos on how you can make an original decoration yourself.
Option #3
You will need: the base of the headband is a ribbon or elastic band, the material for making the flower is soft fabric, felt or foamiran, a needle, threads, a centimeter.
Master Class
- Cut 10 circles of fabric for the flower.
- Sew them together.
- Pull the main thread tight to form a flower.
- Take a head circumference measurement.
- Cut the required length of ribbon or elastic.
- Sew the ends.
- Sew the flower onto the headband. You can sew several flowers of different sizes, colors and create a whole bouquet on a headband that looks great!
I recommend watching this video!
DIY rose from ribbons MK kanzashi headband DIY rose flower Headband kanzashi 髪のヘッドバンド
Further manipulations
The resulting base for the tulle hairpin must be bent so that the corner of the first layer intersects with the second. Now the uppermost tip is visually determined, from which the workpiece begins to be folded three times. Thanks to the video master classes, you can consider in detail all the unclear points and identify your mistakes and shortcomings, if any.
At the next stage, the structure is bent again, as a result of such manipulations, a multilayer triangular petal should be formed. It is important to ensure that all components made in its likeness do not differ from each other.
DIY tulle flowers
Even in ancient times, flowers were used to decorate rooms, festive clothes, and hairstyles. And it doesn’t matter at all whether they were fresh flowers or artificial ones made by a skilled craftsman. The result was always beauty and high festive mood. Modern craftswomen create amazingly beautiful flowers with their own hands from a variety of fabrics, threads, wool, corrugated paper, foamiran, polymer clay, cold porcelain and other materials. Let us also try to create a delicate fantasy flower from tulle with our own hands, using the step-by-step master class “Flower from tulle. Beauty with your own hands."
We will prepare everything you need for work
Before we begin creating a future flower, let’s prepare all the necessary tools and materials for the job:
- It is advisable to choose tulle in two shades, but you can get by with one color;
- thin colored paper of different colors;
- sharp scissors;
- durable cotton threads;
- and definitely a good mood.
Step-by-step guide to action
- We cut colored paper and tulle into 6 rectangles of the same size, 2 of which will be made of tulle, and the remaining 4 from thin colored paper. We will try to make our first flower from rectangles with sides of 25 cm and 40 cm. In the future, we will be able to work with blanks of other sizes. Then it will be possible to get, depending on your desire, larger or very miniature flowers.
- Stack all the rectangles. There should be tulle blanks on top, and paper ones underneath. By the way, if you have paper or tulle of different shades, then the darker ones should be lower than the light ones. Carefully begin to fold the stacked parts into an “accordion”, trying to make the folds at the same distance of approximately 2 cm.
- The finished accordion must be bent exactly in the middle and, at the bend, pulled tightly several times with cotton thread, tying it tightly with a strong double knot. We are not in a hurry to cut off the remaining long ends of the thread; they may still be needed if you need to assemble the finished products into a garland, attach a flower to a base for a brooch, a gift box or a hat. We form pointed petals by cutting off the corners on each fold of the accordion with scissors. We try to cut so that the petals are approximately the same.
- All that remains is to form a three-dimensional flower, and for this we need to straighten our product. First we work with one half of the future flower, and then with the second. We start with tulle. We carefully lift each layer of it up in turn.
- After this, we lift the petals of the paper layers. Both tulle and paper are rigid enough to hold the shape of the petals. So quite quickly and without much effort we end up with a surprisingly delicate three-dimensional flower in our hands.
A beautiful fantasy tulle flower is ready. Making such beauty was not at all difficult. However, the proposed master class is by no means something permanent and final. It serves only as an initial basis for the use of your limitless imagination. You can vary to your taste not only the size of the flower being created, but also the color scheme and materials. If desired, you can exclude paper and use only tulle of different shades or combine it with lace inserts. The resulting flowers can not only become a brooch on a dress, decorate a hairpin or hairband. They will help transform gift wrapping and even be used to create an original interior topiary.
Fabric headbands
Depending on the purpose, material, shape and decor, the names are different - headband, turban, solokha, elastic band, hoop, bandana, headphones, etc. The uniqueness of the headband is in a variety of style trends - sports, classic, vintage, Greek, doll, thematic.
Models for infant girls are a work of art, often representing compositions of openwork with a flower. Skilled needlewomen manage to create a beautiful, unusual headband even from nylon tights.
Main types:
- narrow headbands - ribbons, laces or braids to decorate a Greek hairstyle for a girl;
- wide – sporty, for cold weather or fixing thick, curly, long curls;
- synthetic materials - usually used to decorate headbands;
- summer - made of cotton, tulle, knitwear, lace, chiffon, stretch, denim, silk, organza and other thin fabrics;
- warm - headbands made of fur, cashmere or acrylic yarn, wool, velvet, felt.
Let's take a closer look at the different shapes and decors of fashion accessories for girls.
Headscarves
This is the simplest, but very elegant type of headband.
A thin scarf can be folded or twisted. You can wrap it around your head and tie a bow or knot on the side or top. This season, a headscarf is a must-have for a little girl. It doesn’t matter whether it’s a designer scarf or a democratic option from a mass-produced line. It is better to wear a headband in its original form, like our grandmothers. If you do designer embroidery, paint it using the batik technique, or trim it with beads (rhinestones, buttons), then even a baby girl will look like a real fashionista.
Ribbons
This material is most suitable for decoration. Rep, satin, airy stripes are used for weaving or different techniques for making flowers. Can be worn as a stand-alone hair decoration.
Solokha
[ads-mob-2] [ads-pc-2] This is a boho chic headband that has a flexible design with a wire inside. It is securely and easily attached to the head with one movement of the hand. Simply twist the ends of the bandage to form a knot or bow. This is a very convenient accessory for the head, especially if the girl is mobile. The headband is firmly held on the hairs, without falling off even with strong wind, running or active movements.
For young girls, solokha is usually performed without wire. It is better to use knitwear for the headband, which, due to its properties, sits well on the head. Retro pin-up style can be done simply: gather your curls in a high bun and put a solokha on top of your hair. Tie a pretty bow at the front or side.
Rubber bands
The optimal choice is a thick headband 15 mm wide. Rubber bands come in glitter, plain, multi-color, and printed. The material is very soft, stretches well and does not squeeze the head. Often, even for newborn girls, elements for insertion are cut out of it, and for older princesses you can make a completely rubber headband.
Bandanas
If you fold the scarf diagonally, you get a triangle scarf. The bandana is tied on the girl’s head in the usual way, but a double knot is formed not under the chin, but at the back (above the free edge).
There are ready-made products for sale. You can create your own masterpiece of a headband with embroidery or other original decor.
Turban
The peculiarity of this bandage is a wide strip with a twisted knot in the center of the front. It may have one twist. In this option, a two-color solution looks most stylish - small peas on the left, large polka dots on the right.
A head turban can be made with two or more twisted links, moving the center slightly to one side. The accessory is easy to sew or knit with your own hands. Older girls often wear it on their head instead of a warm hat. For babies, it is better to choose bright colors or the color of clothes.
Turban
Because of the drawstring in the center, many people confuse this headband with a turban. However, there is a significant difference. The turban does not have a twist; the center accent is made either by a hidden thread or decoration (ring, large buckle, brooch). Head models decorated with stones, beads, and metal elements look very stylish.
A large knit turban in an oversized style is suitable for cold weather, and any fabric is suitable for summer.
Fatin
This is a transparent shell, an almost weightless mesh, immersing the girl in a fairy tale. The fabric is produced in any color of the rainbow; it can shimmer, shine or be matte. There are canvases with etched, embroidered or three-dimensional designs on sale.
The mesh is ideal for decorating headbands for girls. It can be sprayed with silver or golden shades. Many craftswomen trim fabric with sequins, rhinestones, pearls, beads or appliqués.
Headbands in the form of headphones
This stylish accessory is easy to make with your own hands. This is a regular headband with fur pompoms attached. You can sheathe and decorate the base or elements for insulating the ears.
Sports headband
This option is made of elastic material that fits tightly to the head and absorbs moisture well. Such headbands are usually produced with the logos of famous sports brands. This is a must-have for girls who are interested in dancing, tennis, running or any other type of active leisure.
Bows
Such head models are adored by very little children or elementary school girls. There are a lot of dressing options. One large or miniature bow, corrugated, double, with an elastic band, rim, hoop, or formed from soft ends. For little girls, they are often embroidered with miniature elements.
Headbands with ears
The rabbit band style model looks funny and unusual. More often these are knitted or knitted headbands, decorated with the ears of a rabbit, giraffe, panda, frog, fox, etc. A frame is inserted into a thin fabric; woolen ones hold their shape well.
Holiday decor
A tulle flower will help you decorate your home for the occasion; a master class on how to make it is available to everyone. Buds suspended from the ceiling look very elegant and stylish. They can be created from tulle, paper, napkins and fabric.
What you will need to make such an unusual decoration:
- Threads.
- Fatin.
- Scissors.
- Stapler.
The manufacturing process is very simple. Many round parts of different diameters are cut from tulle. Then, several pieces at a time, to make the flower lush, connect the elements with a stapler in the middle. Straighten each layer with your hands, attach a rope and hang it from the ceiling at different levels.
This decoration is perfect for creating decorations for a birthday. In pink for girls, in blue for boys.
Nothing extra
Do not rush to throw away the remaining scraps of fabric from previous works; they can also be used. It’s easy to construct small elastic bands from tulle, and you don’t need a lot of material to make them; recycling the scraps will be beneficial and will delight you with new masterpieces. The list of things is small, but you will still have to purchase some small things:
- Remaining strips.
- Small rhinestones or beads.
- Threads.
- Paper base.
- High quality glue.
The abundance of tulle color will play a role, the craft will turn out bright and catchy, such an accessory is perfect for tying your hair into a ponytail before a morning run. Exercising in the gym will become much more convenient, and your appearance will acquire spring lightness and freshness.
Progress
We thread the snake onto the needle with the side where there are no teeth and form a flower.
Then we string beads, 3 pcs. at a time.
Then we fold the material in layers and cut out the petals.
We overlap the petals and sew them on the back side in a circle.
The volume and splendor of the flower will depend on the length and number of petals; the more there are, the more magnificent and larger the flower will be.
Let's use the second part of the snake to make another simple, cute flower.
Using this photo pattern, you can make flowers from any other materials you like.
These are the cute flowers we made from tulle.
Simple tulle flower
You can make beautiful accessories with your own hands. Hair ties decorated with flowers look very gentle. To make it you will need:
- a piece of satin ribbon 20 cm;
- tulle;
- scrunchy;
- needle, thread, scissors;
- big bead.
How to make a flower from tulle:
- The satin ribbon is folded in half and the middle is sewn together.
- 6 round parts are cut out of tulle and joined together, tightening the thread, in the shape of a flower.
- The core is decorated with a large bead.
- A piece of satin ribbon is sewn to the hair tie, and then a tulle flower.
This decoration can be used to create hairstyles for school or for the holidays.
Required materials and tools
Here is a list of what a decorator will need if he decides to decorate the surrounding space with fancy fabric flowers:
- Cardboard.
- Scissors.
- Pieces of tulle fabric.
- Needle.
- A skein of thread.
You will also need inspiration and a great mood. A tulle flower can decorate the wedding procession of the newlyweds, the arch for the newlyweds, the groom's jacket and even the bride's headdress. A bow made of weightless tulle will transform a headdress or bodice of a dress, giving the appearance an elegant and romantic look. A DIY tulle bow is a classic that will never go out of style.
Headband decoration
If you are thinking about how to make a tulle bow on your head for a headband, just start by folding the fabric in half. Folding in several layers is acceptable. Tie the resulting rectangle in the middle with a tourniquet or ribbon, cut the connected edges of the rectangle with sharp scissors. The resulting cute bow can be sewn manually to the finished base for the headband, or you can use superglue or a special glue gun.
It is permissible to decorate the center of the bow with lace, a button, or a brooch, but the edges of the finished product can be either overcast or left in their original form, and can also be delicately ruffled with the appropriate cuts of scissors.
You can sew beads and glass beads around the perimeter of the decoration to add shine to the finished decoration.
Lush hair bow
To make a simple but elegant hair decoration, you will need a small piece of tulle, which is cut into equal-sized squares. The size of the finished bow will depend on the size and number of blanks. Each square is folded four times, turned diagonally to form a diamond, and secured with a needle to maintain its shape. A round base for the future bow is cut out of thick fabric: felt, felt, drape. You need to make a small hole in the center of the circle through which you can thread a hair elastic. Each piece is manually sewn onto the base, placing the diamonds so that the free edges of the piece face up. The middle of the bow is decorated with beads or seed beads, an elastic band is threaded through the hole in the base or the finished product is secured to a hairband.
Pompom flower
This flower can be used not only as a decoration for an elastic band, but also for any other accessories or decor - they are often used to decorate holiday rooms.
For this you will need:
- tulle;
- thick cardboard;
- ribbon or strong thread;
- scissors.
First of all, you need to make two identical round blanks from cardboard. The size of the future pompom will depend on the diameter of the workpiece. You need to make holes in the center of the blanks. After this procedure, you should get two identical “donuts” made of cardboard.
The blanks are folded together, while hiding a ribbon or strong thread between them. It will be needed to pull the future pompom. Tulle needs to be cut into long strips. The optimal width of the ribbon varies from five to seven centimeters, depending on the desired size of the pompom. You can use two or more colors of ribbon, winding them alternately. Pom-poms made from tulle in all colors of the rainbow look very original.
Once the tulle strips are wound, you need to carefully cut the tulle along the edges of the donut. Next, you need to pull out the edges of the ribbon or thread, after which the pompom is pulled together in the middle. The cardboard blanks are removed, after which you need to straighten and fluff the finished pompom.
Thus, by connecting several pompoms together, you can get a wonderful holiday garland. Regular large pompoms can be used to decorate the room.
Small pom-poms are perfect for a variety of purposes - they can decorate a little schoolgirl’s hairstyle or party shoes, or they can be used for original decoration of pastry chef’s masterpieces and table settings.
Delicate rose
A rose bow for a girl will be a cute accessory on her head and not only. With its help you can easily decorate clothes or attach an elastic band.
Materials for creating a flower:
- a piece of tulle;
- thermal gun or Moment glue;
- circle of felt or lace;
- beads for decorating the middle.
Let's proceed to the step-by-step design of the bow.
We twist the tulle into a strip. Starting from the center of the felt blank, glue in tulle, as shown in the photo.
We twist and glue the tulle along the entire size of the base.
We hide the end under the bottom and glue it.
Let's decorate the middle by gluing beads in the center. The bow is ready.
Volumetric flower
Tulle flowers made using this method are most conveniently used as decoration for a room or clothing.
You can get such a craft using the same method as many pom-poms.
First of all, you will need to take a sheet of cardboard. Draw two identical circles on it with a small hole in the center. Cut a long strip of tulle. Connect the two circles together and begin to wrap the diameter of the workpieces with material. The tulle does not need to be smoothed, try to have a lot of folds. Then the flower will eventually turn out lush and voluminous.
When you have wrapped the entire piece, secure the end of the tulle with a drop of glue from a glue gun. Move the material a little and insert the scissor blade between the cardboard blanks. Cut the tulle. Move the pieces apart a little and tie the tulle in that place with a ribbon or thick thread.
Now you can remove the cardboard blanks. They can be used to make other flowers of similar size. By the way, the purpose of the tulle depends on the length of the ribbon with which the tulle is tied. If it is short, then such a flower is used as a decoration for a dress or decorative items and accessories. And if it is long, then the craft can be hung from the cornice or ceiling.
How to decorate a skirt
It is not always appropriate to use tulle decor on a mesh basis, so it is better to choose brighter decorative elements - beads, sequins, beads, rhinestones, satin and satin ribbons. Beads can be sewn along the edge of the skirt or around the entire perimeter. Using the same principle, you can arrange rhinestones and sequins. Satin ribbons are mainly sewn as an edging along the edge of a petticoat or to form a belt with a fluffy bow. Decoration should not be too active, as the details of the decorations will weigh down the lush texture of the main material.
You might be interested in: Making simple patterns for wraparound robes
For a gift
Most people, when thinking about a present, increasingly give preference to durable souvenirs, whether it is a ball of tulle or a flower does not matter, living plants will soon wither, and the craft can decorate the house or clothes for many years. Don’t forget that the creator puts a piece of himself into every handmade work; for some, such gifts can become a real talisman.
Note!
How to make candles with your own hands: instructions for making wax, gel, scented, homemade decorative candles with a wick
What you can make from foamiran with your own hands: we create flowers, Christmas tree decorations, snowflakes, three-dimensional paintings (photo + video)
- DIY glass crafts: what can be made from glass bottles, liquid glass, broken glass (photo + video)
Flower with beads or rhinestones
For this flower, you can use leftover fabric from sewing a tutu skirt. It will make a wonderful decoration in the same style for clothing or a headband. You can glue the flower to the brooch base and decorate your blouse.
Let us describe step by step the process of its creation.
You will need:
- Fatin;
- Threads to match;
- Felt circle for the base;
- Scissors;
- Glue (hotmelt adhesive or moment crystal);
- Center decoration: beads or rhinestones.
Progress:
- Cut the tulle into squares of the same size.
- Take one square and fold it with a corner to form a sharp petal.
- Sew it to the felt base. You can also use glue, but sewn petals will stick better.
- Do the same with all the other squares. Make sure that the petals are evenly spaced in a circle. Don’t let the threads scare you at their very sight - they will be decorated later. It’s better to make not one layer (circle), but two or three: it will turn out more magnificent. Sew each of the petals of the new layer between the petals of the previous one.
- Cut out five or six circles from tulle of the same or contrasting color according to the size of the center. They are needed to hide the seams. Carefully, using small stitches, at a short distance from the edge, sew them to the middle of the flower.
- Glue or sew a large rhinestone (bead) in the center of the flower. You can stick a scattering of small adhesive rhinestones on the petals in any order.
IMPORTANT TO KNOW: How and with what to wear a culotte skirt
Cute bow
It’s very easy to make elegant bows for girls from tulle. This master class will be a good example for beginning needlewomen.
Materials and tools for sewing:
- tulle with border;
- scissors;
- needle and thread to match the tulle;
- beads for decorating the centers.
Step-by-step instructions for sewing a bow for a girl are provided below.
To sew this bow you need 3 layers of tulle. It is the bottom layer that should have a border. We cut the fabric 15 cm long and 4 cm wide for each bow.
On the unedged side we sew the cut with a “forward needle” seam.
Tighten the thread and sew the edges well. This results in a circle for the base of the bow.
For the second tier, take a piece of tulle 2 cm wide and 20 cm long. A longer length will ensure the pomp of the bow.
Like the first tier, we assemble the cut with small stitches.
Tighten the thread to make a small bow. We sew it so that the ends do not unravel.
- We sew both blanks in the center.
- For the third tier, cut tulle 1 cm wide and 30 cm long.
- We stitch along the length of the third piece with a “forward needle” seam.
We tighten the thread, sew the middle similarly to the previous blanks. Sew a bead in the center.
- We sew the third tier to the workpiece.
We sew an elastic band on the wrong side. Using the same sequence and technique, we sew the second bow.
- Tulle decorations are ready for the holiday.
Lush flower
This easy way to make an elegant bow can be useful for a beginning needlewoman. We make the size of the bow as desired.
Source: https://nsfabrika.ru/raznoe/banty-iz-fatina.html
Tulle flower with cone-shaped petals
To make a flower you only need scissors and a needle and thread. And, of course, tulle, one or more matching shades.
- Fold the tulle into several layers and secure it with a few stitches in the middle.
- Cut a circle of the required diameter with the center at the point where the layers join.
- Make several slits from the edge to the center of the circle, not cutting a little to the very middle. The number of slots will correspond to the number of petals.
- Now wrap each layer of tulle into a cone. These will be the petals.
- Sew a bead into the middle of the resulting flower.
This simple and quick flower can be used to decorate a little girl's hairpin or headband.
Lush flower
This easy way to make an elegant bow can be useful for a beginning needlewoman. We make the size of the bow as desired.
Materials:
- tulle;
- needle and thread to match the tulle;
- rubber;
- bead or half bead for the middle.
Step by step execution. We cut the tulle into 2 strips with a width equal to the diameter of the desired size of the accessory. We tighten each part in the middle.
Fold the blanks crosswise and stitch in the middle. Decorate the center of the bow and sew on an elastic band. The bow is ready.