Tinsel costume
Let's look at the simplest version of a dress costume using tinsel.
The dress from the last matinee, how to make a Christmas tree out of it?
We trim the dress left over from the last matinee with tinsel in contrasting colors, for a Christmas tree in a green dress - white, golden, light blue with white tips... Does your Christmas tree have a white dress? We choose rain – green or light green.
Tulle suit (tu-tu skirt)
Tutu skirt + T-shirt or jacket
- We make a tutu skirt without sewing from tulle, described in detail in this video tutorial and photos.
- Then we decorate the skirt with New Year's toys and plastic snowflakes.
- We sew tinsel or any other green material onto a T-shirt in the shape of a triangle, a Christmas tree.
We decorate the Christmas tree on the blouse with toys and a star on the top of the head.
Video tutorial on creating a tulle skirt
Video about making a Christmas tree from a narrow ribbon and beads to decorate a T-shirt. The T-shirt is replaced with a turtleneck or any other suitable sweater.
Cape for a forest beauty
Do you know what will be cool in the hall? Then the cape will save the day and decorate the suit. Make sure that it fits harmoniously into the upper part of the suit and does not hide all the beauty of the dress.
A chiffon or organza cape will turn your snowflake into a Christmas tree. Pay attention to the photo. Here you see light capes in green tones and crowns in the shape of Christmas trees. This option is ideal when your child plays 2 roles at once.
Looking at the Christmas tree costume in detail, a crown for a girl will always be relevant; you want to make it special for the forest beauty with your own hands. Look at the ideas, as well as the embodiment of the craftswomen’s ideas into reality.
Fairies are very popular, especially during the New Year holidays. How to make a fairy costume for a girl with your own hands, a master class with detailed explanations will help you do everything simply and with a bit of magic, described in detail here
A butterfly costume for a girl, do it yourself for the New Year in 1-2 evenings, you think it’s impossible, just read the material at this link.
We sew a beautiful light blouse and cape for the Christmas tree with our own hands
We cut 2 parts from satin or silk. Measurements and shape in the photo. We cut and sew, the straps and neckline are made of velcro. We decorate it with swan down or similar, rain will do.
What to do if you only have a white T-shirt or blouse?
Buy: a sheet of felt and multi-colored small balls at any store, and also a star embroidered with sequins.
You will need: scissors, thread and needles.
We draw a Christmas tree on felt, cut it out and try it on clothes. You can lightly baste it, and then remove it and use it for another costume next year.
We sew or glue small multi-colored balls onto the Christmas tree, and a star on the top; we recommend choosing a red one.
This simple trick will allow you to turn any costume into a Christmas tree, all you have to do is add greenery to the skirt and decoration on the head.
And if you want to get ready in advance and make your daughter wear a mega exclusive dress at the matinee, then take the hook in your hands.
Crochet Christmas tree dress
A spectacular crocheted dress is also suitable for a matinee in the garden, if the threads chosen are cotton, and in a palace of culture, but then you will need a cape or a white turtleneck underneath.
Block two - sewing for needlewomen
Here you will have to spend more time and materials, since there is no ready-made base. But the result will be simply amazing.
Tutu
The entire outfit will consist of a tutu skirt and a decorated top. The Christmas tree will be lush, just like a real one. Materials include organza, tulle, satin, elastic ribbon and thread. Of course everything is green.
- The top should be waist-length or even slightly lower. It is not necessary to make it tight, although this option looks much more interesting. To make it, you need to take two identical cuts from satin of the required length and width (child’s dimensions). There is a cutout for the throat on top, and cutouts for the arms on the sides. It is sewn only in four places - shoulders and sides. On the one hand, it is better not to sew it up completely, but to make a zipper or simply attach hooks.
- The top is decorated using tulle. Tapes 10 centimeters wide, gathered at the top, are sewn in layers to the finished product.
- Now the next stage is making a tutu skirt. There is practically no need to sew here. First you need to decide on the length. All further work depends on this. For example, half a meter. You will need a lot of organza. It needs to be cut into narrow strips of about 15 centimeters. Length is two lengths of the skirt (in this case – 1 m) plus a little more for the knot.
- When the strips are prepared, you can work on the belt. It is made of elastic tape. The length is different in each case, because it all depends on the waist size. The measured tape is sewn into the ring. This belt will be the basis for the skirt.
- Now we begin to tie the folded organza strips on the belt with a regular flat knot. You need to tie it very tightly, almost going over the previous knot. When there is no more free space left on the belt, the skirt is ready.
All that remains is to put on your outfit and celebrate New Year and Christmas.
Trapezoid
A very easy option to make, in which you need to sew a simple dress in the shape of a trapezoid. It is better to use thin fabric, such as silk or satin.
Anyone can make a pattern. It is very similar to the top described in the previous costume. Only the length and shape of the product have been changed. Length - just below the knees. The only caveat is that you need to make a lot of small loops along the bottom edge of the dress from the inside. Then, when the product is ready, a thick, rigid wire is inserted into them, which will help the hem not to fall, but to stand. The last step is simply decorating the finished outfit with rain, snowflakes and other New Year accessories.
What to wear on your head? or Headdress, Christmas tree crown
Hats, caps, crowns, hoops. What will decorate the beautiful head of your Christmas tree? Picture her in different headdresses from a crown to a headband. Choose a cap like a wizard’s or a hoop with a Christmas tree, and your hairstyle can also become a good decoration and addition.
There is a star on the top of the head, and the hat is my mother’s beach hat or kokoshnik trimmed with tinsel, as in the photo; another option is a star on a headband or hoop.
How to make a Christmas tree on a hoop?
Video on making a Christmas tree on a hoop
Herringbone hairstyle
Braid across the head and you have a Christmas tree, and for those with hair below the shoulders, we recommend taking a look at the hairstyle with a “skeleton” braid, beautifully decorated with Christmas tree decorations, you get a real Christmas tree.
A variant of several tall bagels with a backcomb will turn your hair into a Christmas tree.
Braids and ribbons will make both horizontal and vertical ribbons. Red and green contrast and help achieve the desired effect.
Video on how to create a herringbone hairstyle Video on how to create a herringbone hairstyle on medium-length hair? Video on how to create a Christmas tree on short hair with a ribbon Training video on how to make a Christmas tree with lacing on 2 braids for medium-length and long hair
How to decorate Czech shoes for the New Year with your own hands?
We decorate shoes or any other shoes with tinsel, fluff or leftover fabric. Sew mini shoe covers without soles with elastic bands, add decorations like on a dress, skirt or hat.
The second option for decorating shoes is to attach stencils cut from leather or fabric to the front.
A bow in red and green tones is an ideal combination, which we play up both in the hairstyle by weaving ribbons or a hoop and on the dress itself, choosing red Christmas tree toys for decoration.
A chic option is to glue half beads in a circle and add an organza flower. Glue the half beads using glue second and a pencil.
Ideas for inspiration
Options for Christmas tree costumes may vary.
Here are some ideas for inspiration on how to sew and decorate an outfit for a matinee. Tulle dress with a wide red satin ribbon belt. Small shiny Christmas balls are used as decorations. The headdress is a cap on a rim, decorated with a gold star.
Felt Christmas tree. Warm and cozy suit for baby. The basis for the pattern can be any trapezoidal baby dress of a suitable size. Decorations: pompoms of different sizes, gold braid. Soft felt does not prick or rub. This option is suitable for the little ones. Lush dress made of elastic top and tulle skirt. The highlight of the outfit is the bright red satin bows decorating the straps of the bodice. A multi-tiered dress looks impressive. Complete with a magic hat, it creates a complete image of a forest beauty.
Tights, socks, knee socks
White tights or knee socks or socks look very festive, but if you don’t have them, try using those that are available. Supplement them with tinsel or figure out how to divert attention from them, for example, slightly lengthen the dress.
The ruffles in a herringbone dress are a great focal point to make the dress as long as you like.
If you want to add more sparkle, add rhinestones to your tights or knee socks.
Video on how to decorate tights with rhinestones
What if you don’t have time to sew a dress?
To create a Christmas tree costume, you can use a simple green dress or T-shirt, as well as a matching skirt and tights. But this outfit needs to be improved:
- Tinsel is suitable (it is advisable to choose one color), which can be sewn along the edge of a dress or skirt. It is appropriate to use Christmas tree decorative garlands, small bows and plastic toys.
- The simplest solution for decorating your head would be various headbands with bright figures.
- You can wear any shoes or slippers on your feet.
It wouldn’t hurt to ask the child himself what he would like his costume to look like: children often have really interesting and creative ideas. And a costume made according to the wishes of the “customer” will delight its little owner even more.
Makeup for a Christmas tree costume or Ideas for face painting
Do you want your daughter to wear makeup? Draw a Christmas tree on the cheek, just a green twig. The makeup is restrained and only slightly emphasizes childish beauty and naturalness.
These are the simple and easy methods that mothers make for Christmas tree costumes. We wish you good luck and inspiration, so that your Christmas tree glows with happiness, like a New Year's beauty with garlands.
In the fall, you increasingly begin to think about the coming of the New Year with its festive mood, meetings with friends and family and, of course, gifts. In addition, since childhood, we have all associated the New Year with the Christmas tree! That's what we'll talk about)
Fortunately, people are increasingly thinking that it is not worth cutting down a live Christmas tree for the sake of a few holidays. Krestik and I fully support this decision and believe that a DIY Christmas tree is much more interesting and humane! In addition, these are excellent options for those who have nowhere to put a large Christmas tree (for example, there is no free space, or there is an active small child in this free space).
We bring to your attention a large selection of master classes on creating a decorative Christmas tree with your own hands, which will serve as a wonderful decoration for your home and an original gift for a wonderful holiday!
Christmas tree in a pot
DIY Christmas tree for 2022.
ideas and master classes on making Christmas trees from different materials Take a pot and paint it white. It is best to use acrylic paint. Take green tulle and cut a strip equal in width to half the selected pot. In the same way as when making a Christmas tree, assemble the strip into a skirt. Only in this case the inner circle should be wide.
Wrap the skirt around the base of the pot so that the outer edges stick up. Fix the tulle in this position with thread and glue. At the very base, tighten the skirt with white satin braid and secure it.
Glue green satin tape along the top edge of the pot so that it forms a circle. When the braid is dry, glue a white lace strip on top of it. The bottom layer must be made so that it is necessarily partially visible.
Pour gypsum solution into the pot. Take a tulle Christmas tree and bend its leg into a hook shape. Place the tree in the middle of the pot. While the plaster is not completely dry, decorate its surface with beads and snowflakes. You should end up with a beautiful translucent Christmas tree that sparkles and shimmers thanks to the satin braid inserts and the mother-of-pearl coating of the beads.
It can be placed in the central room where everyone gathers for the holidays, and if it is small in size, it can also serve to decorate a formal table. Your child will ask you to take it to class to show what a master he is, and tell him how you and he studied the MK on creating Christmas trees, did everything with your own hands, and what came of it.
In order to give the product an even more festive look, you can decorate the Christmas tree with garlands. However, only LED varieties can be used for this purpose. Otherwise, the fabric may fade and lose its presentation. In the worst case scenario, the Christmas tree may catch fire, since tulle is a flammable material.
You have made a Christmas tree, and now you can conduct your own tutorials on making Christmas trees with your own hands, taking this master class as a basis and demonstrating your masterpiece. And one more thing... now you know what gift you can give to your dearest people.
Christmas tree made of pine cones
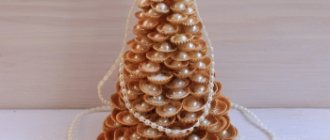
You can make a very original Christmas tree with your own hands from pine cones. But we will not use the whole cones, but will use only their scales so that the tree is not too bulky.
So, first, let's separate its scales from the cone. This can be done with a sharp knife, wire cutters or pruning shears.
Be careful, take care of your hands!
The next step is to make a cone from thick paper or cardboard, which will be the base of our Christmas tree. We roll the paper into a cone, glue it on the sides and cut off the excess at the base.
Then we simply take the scales in our hands and glue them in a circle, starting from the base of the cone.
You can glue each new row in a checkerboard pattern, or, like here, on top of each other.
You can glue a clove to the top of the tree (such a spice))
After the glue has dried, you can start painting our beauty. To do this, you can use spray paint or regular acrylic paint.
If you choose acrylic paint with a metallic effect, your Christmas tree will look much more impressive.
Then we cover the ends of the “twigs” with PVA glue and sprinkle glitter on them.
This is the beauty that results from these simple actions:
Using exactly the same principle, you can decorate the cone with chains and beads, decorative cords, ribbons, braid, etc.
Another very popular way to make artificial Christmas trees with your own hands is to weave them from beads. This is perhaps the most painstaking method, but for lovers of beadwork nothing is impossible!
The detailed process of weaving Christmas trees from beads cannot be contained in one article, so we are sharing with you links to master classes previously published on Krestik.
New Year's crafts for children: Christmas trees-cones
How to make a butterfly with your own hands - step-by-step master classes from popular materials (66 photos)
Beautiful does not mean difficult, so many models of Christmas trees made of cardboard can actually be made even by children. Although they look very impressive, they can serve not only as an excellent craft for kindergarten or school, but also as a pleasant addition to gifts for family and friends.
Made from cardboard and tinsel
For production we need very few materials:
- white cardboard (it is advisable to take different formats - traditional A4 and larger ones from A1 to A3);
- tinsel, green or multi-colored - as you like;
- glue stick;
- double sided tape;
- compass;
- sweets in beautiful wrappers - round truffles look especially impressive.
Here's how to make such a Christmas tree:
Step 1. First you need to make a cone. To do this, draw a circle of arbitrary diameter on cardboard using a compass, depending on the height of the tree: 15 cm, 20 cm or even 30-40 cm. Then we cut off exactly a quarter of this circle and glue the remaining parts together, forming a cone, as shown in the figure.
Step 2. You can immediately make cones of different sizes, but their shape should be approximately the same - the upper corner is quite sharp.
Step 3. Now, using a glue stick or PVA, simply stick on the tinsel - in a circle to the very top of the head. For beauty, you can take 2 different tinsel in contrasting shades and simply alternate them in a spiral.
Step 4. Now let's attach the candies. This can be done with glue, but it is most convenient to use double-sided tape. The result is such a delicious beauty - a great gift for a baby, and he can make it himself.
And once again we will repeat the entire sequence of actions in the photo.
Made from cardboard and cotton pads
This craft takes a little longer to make because it requires more painstaking work. However, all the steps are simple enough for younger students to cope with.
We will need again:
- cone,
- a lot of cotton pads (100-200 pieces depending on the size of the model),
- glue,
- stand. It can be made from some container, a pot, which is best decorated with tinsel first.
The sequence of actions is as follows:
Step 1. First, as in the previous case, we make a cone.
Step 2. Now we prepare the cotton pads. They just need to be folded in half 2 times, then apply glue to the bends and fix them on the surface of the cone, as shown in the photo.
Step 3. And so we paste the disks over the cone to the very top. This needs to be done quite carefully, in even rows. For convenience, on the surface of the cone, you can first (still on the circle) draw several even rows with a compass for reference.
Step 4. Now let's make the stand. To do this, you need to take a small pot and wrap it in shiny paper or tinsel, securing it with glue.
You will also need to make a “trunk” from a cardboard tube, onto which to glue a circle of cardboard. It is attached to the inside of the cone, after which the structure becomes quite stable.
Step 5. Well, now the most enjoyable stage - we decorate the Christmas tree as your imagination dictates. Ribbons, bows, tinsel, sparkles, and colored paper figures are suitable. It turns out to be a real collective creativity, in which several kids can participate.
You can see the whole process visually here:
In general, making Christmas trees from cardboard based on a cone is a fairly popular technique that allows you to use your creative imagination in all its glory. After all, along with cotton pads and tinsel, you can use a variety of materials - for example, threads, self-adhesive rhinestones, etc.
Christmas tree made of paper and cardboard
If you have nothing to do at work) or just want to add a little holiday to the office, make a Christmas tree out of paper. What's easier?)
And this tree is very similar to a designer one, don’t you think? It’s all because of colored designer cardboard, which is so beautiful and bright that you don’t even need to decorate the Christmas tree with anything else), which simplifies the process of making a Christmas tree with your own hands.
Secondly, to make a designer Christmas tree, you can use threads that are wound on a paper cone using the technology of making openwork balls.
Thirdly, flower net and bouquet net.
The technology for making these three Christmas trees is very similar, so the process of creating them is shown in one master class.
