The most popular hobby among needlewomen is cross stitch, which requires perseverance and great attention to detail.
Sometimes it happens that we want another type of activity, similar to this type of creativity, and we begin to be interested in such things.
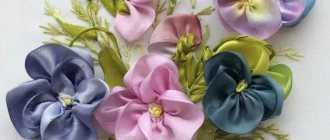
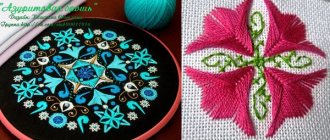
Having learned about satin stitch embroidery, at first you are afraid that the result will be unsuccessful due to the lack of a pattern, but in fact, in the end, the paintings made using this technique turn out to be very bright!
This article covers the necessary knowledge needed to get started in satin stitch embroidery.
Main types of satin stitches
First of all, you should learn how to perform basic types of stitches. It should be taken into account that each embroidery method has a number of characteristic features.
Straight stitch
This method is most often used when making three-dimensional parts and for processing the edges of the picture. Stitches are made in sizes ranging from 1 to 10 mm. The direction is not of fundamental importance.
Split stitch
With its help, the contours of patterns are most often drawn out and the drawing is filled. When using this interesting technique, the first stitch is made from the front to the back. Then the needle is brought out in the center of the previous seam and thereby separates it.
Loop stitch
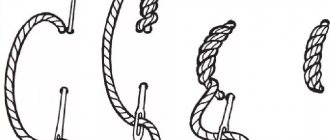
Embroidery technology involves stitching from left to right, moving the needle from top to bottom. The thread is brought to the face at the bottom of the stitch. It is sewn in with a needle and the thread is pulled until a loop is formed.
Stem seam
A seam consists of stitches that overlap one another. In the old days, it was used to mainly create plant motifs.
Video: Stem stitch
Holbein seam
As a rule, it is used in the embroidery process using the blackwork technique. The seam is named after the artist from Germany who presented it in his paintings.
Video: Master class on satin stitch embroidery
Traditional style
This style is made using the double-sided satin stitch technique. It is also called removable applique. It is performed as follows:
Using an iron, you should thoroughly smooth the fabric for embroidery.- Apply the desired pattern to it.
- Place auxiliary fabric under the main fabric. Then complete the first row of stitches.
- Sew a series of stitches along the second tier.
- Complete the last tier. Then you should insert a thin wire along the edge of the resulting part. This will give the product the desired shape.
- Sew the wire with a compacted seam (loop stitch).
- Cut out the resulting piece using sharp scissors as close to the sewn edge as possible.
Next, all the resulting parts are attached to a special base. This ends the composition. The background can be either monotonous or embroidered.
Satin stitches
Regardless of whether embroidery will be done with floss, wool or silk threads, you need to understand the intricacies of the most popular options. After this, it will be possible to begin transferring simple patterns onto fabric and creating real masterpieces.
Seam “forward with a needle”
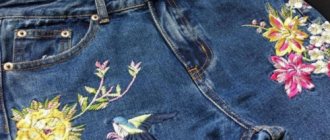
This is one of the simplest embroidery techniques. The main stitches end up looking the same on both sides. Most often, they are used to create straight contours. For example, this method is used when using satin stitch floral patterns on clothes.
With the help of this seam, the contours of the pattern are formed, moving the needle from right to left, but exclusively forward, performing several stitches at once.
Back seam with needle
They begin to embroider using the following technology:
- The needle is brought out to the front part.
- The second puncture is made a little to the right than the first one. This distance should be equal to the length of the stitch.
- After receiving the first front stroke, the needle is brought out to the wrong side.
- The thread is pulled slightly to the left of the first puncture at exactly the same distance on the face.
- Now they start playing from left to right and make a puncture in the place where the previous stitch ended.
- Again, transfer the thread to the wrong side and transfer it to the face a little to the left of where the second stroke is located.
Stem seam
The stem stitch is used to create pictures on cotton fabric and linen. In this case, the stitches fit tightly together. As a rule, small elements are embroidered using a stem stitch.
This is a fairly simple embroidery method that involves stitching from right to left.
Video: Satin embroidery for beginners
Chain seam
Chain stitches are used to embroider on various types of fabric. They can be used to create letters, straight lines and various patterns. It is recommended to use linen, cotton or silk threads.
When making seams, movements are recommended to be made from top to bottom. The needle is brought to the front side, a loop is formed and returned to the original point. There is no need to tighten this loop too much. This way it turns out to lead one loop into another.
Goat seam
Decorative goat stitches are often used when performing work. They are made by crossing long stitches. Embroidery begins from the bottom. Initially, the fabric is pierced on the left, picking up three threads on the needle. Then the needle is pulled towards itself, the thread thrown back, and a puncture is made diagonally. Most often, this seam is used when decorating the edges of a picture.
Frequent goat stitch
Also done using crossed long stitches. True, in this case they become more frequent.
French knot stitch
Seams in this technique are used to create bright accents or, for example, to decorate a flower in the center. Even novice needlewomen should try to embroider it themselves. Initially, the thread is brought to the front part and circled twice around the needle. Then, holding the previously wound thread, you should insert the needle as close as possible to the place where it came out.
Seam - rococo stitch
In order to master this technique, you only need to study the instructions in the picture.
Technique for transferring patterns to fabric
If the pattern is selected from a magazine, it can be transferred to fabric using carbon paper or transparent paper - tracing paper. If tracing paper is used for this, it must be placed on top of the drawing, then traced around the outline.
You can use carbon paper. It is placed on a clean sheet with the painted side, then the selected design is placed on top. The outline of the drawing is outlined with a pencil. This must be done very carefully so that the paper does not move, as this may distort the image.
Transferring a drawing using carbon paper
Types of surface
There are many varieties of smooth surface. Each embroidery method has a number of distinctive features. Regardless of whether such work is embroidered with colored or plain threads, in the photo they look excellent in any case.
Simple stitch
It is embroidered with dense strokes that lie separately from one another. A distinctive feature of this technique is that the pattern when used looks the same on both the back and the outside. Even a novice needlewoman can decorate the product in this way.
Flat surface
Floral ornaments, narrow and even wide patterns are most often embroidered in this way. Initially, the needle is drawn from the inside out across the entire width of the element, and then brought out onto the face. A flat stitch is made by overlapping stitches one on top of the other. They can be either oblique or straight.
Russian (Vladimir) smooth surface
In the case of the Vladimir smooth surface, the work should be carried out following certain rules. Using a thin needle, the ornament or design is embroidered only strictly along the contour. Small stitches are made exclusively on the inside, and long stitches are made on the front side. When choosing threads, preference is given to only one color.
Chinese smooth surface
Chinese embroidery has become extremely popular lately. True, during the work you also need to take into account a number of nuances. For example, in the case of Chinese satin stitch, transparent silk or black satin fabric is used.
Exclusively Chinese natural and plant motifs should be used. For example, sakura, birds or fish. True, only experienced craftswomen will be able to work on the finest material in such a complex technique. Beginner embroiderers should first understand in the smallest detail the simpler variations of needlework.
Artistic colored surface
To create smooth transitions of colors and obtain an extraordinary shadow effect, artistic satin stitch is used. This technique also has a number of features.
To embroider with a smooth transition of colors, to set shadows and shades, a tonal satin stitch technique is used, called artistic colored satin stitch. When using colored artistic embroidery, the stitches are made without covering and exclusively oblique. To perform the shadow technique, only silk threads or floss are used.
Artistic color embroidery involves using dark colors in the center and lighter colors towards the edge. This way it is possible to provide a beautiful transition and give the image volume.
When performing each row of a separate tone, alternating long and short stitches are performed.
Choosing colors and additional tips
Another point is the combination of colors in the created picture. There are white and colored surfaces. The choice of color significantly affects a person’s well-being, emotions and mood. Even psychologists note the effect of certain color shades on people. Therefore, it is important to first decide what emotions the embroidered picture should evoke and whether the selected colors will be appropriate for the plot. 1. To obtain a pattern with a smooth surface, it is important to apply the stitches in parallel.
2.If you need to complete the work in a short time, it is better to choose a thicker thread or fold it 2-3 times.
3. It is advisable not to use too long seams. Otherwise, the work will turn out sloppy. Therefore, it is better to divide the details of the design into sectors and embroider each one separately or direct it in different directions.
4. It is also allowed to use similar color shades. The ideal way to fill a large detail is with artistic satin stitch. Line and stem stitches are best suited for emphasizing the edges of the design. It should be noted that the process of embroidery itself has a calming effect on a person. Tactile sensations contribute to the mood for harmonious relationships with the outside world. Therefore, this is not only useful, but also an enjoyable activity.
Ways to secure a thread
Embroidery always begins by securing the working thread. These actions are also performed upon completion of the work. Regardless of the thickness of the threads, such manipulations can be performed in several ways.
Method 1, at the beginning of embroidery
From the inside out, one seam is made in such a way that a small tip of woolen threads or others that are used during the work remains. Then make a movement across it and hide the remaining tip. This way the surface will be smooth and the tip will be securely fixed.
On the wrong side, make a stitch so that a small tail remains,
Method 2, fastening in embroidery with two threads
If the needlewoman prefers to take two threads of floss at once, then in this case the following instructions will help her:
- A thread folded in half is threaded into the eye of the needle.
- Several threads of fabric are caught on the same needle. Just 2 or 3 is enough.
- Pull out the thread and thread the resulting loop through the needle.
- Tighten it as tightly as possible.
After completing these steps, the main pattern can be executed.
Method 3, finishing the job and securing the thread
When working with special or ordinary threads, at the final stage you need to perform the following steps:
- Pull the thread under the already made seams.
- Trim the tip with scissors.
If the thread of the desired color runs out, it can be closed with a regular seam. The main thing is to do it repeatedly.
Schemes of patterns for satin stitch embroidery
Regardless of whether the images are embroidered with small or large elements, to successfully complete this work you will need diagrams. This way you will be able to understand exactly how a flower petal or the chosen ornament should look.
Satin stitch for beginners step by step
The following recommendations will help novice needlewomen perform delicate work that requires special care:
- To keep thread consumption to a minimum, regardless of the thickness of the fabric, a new row should be started as close as possible to the previous one. In this case, you need to stretch the thread across the already made element.
- If, at the end of the process of decorating the garment, the fabric was tightened in certain areas, the base was over-tightened or lay too loose on the hoop.
- It is unacceptable for the base to peek beyond the edges of the motif. To do this, lay out the threads in as dense a layer as possible.
- To create a shadow effect, it is recommended to use several tones of threads.
Also, beginning embroiderers should take care of the availability of ready-made needlework kits and patterns.
Frog embroidery
A diagram will help you embroider individual elements of the picture. Just transfer it to the fabric and you can start working.
Stitch embroidery of a poodle dog
When completing the work, simply transfer the pattern onto the canvas and begin the embroidery itself. Even a beginner can cope with the task.
Stitch embroidery pink flamingos
Thanks to extraordinary color transitions, you can create an incredibly beautiful drawing. You just have to study the stencil.
Stitch embroidery animals: sheep
On a white canvas such an image will look amazing.
Insect satin stitch embroidery: ant
If you carefully draw all the small elements on the canvas, the work will exceed all expectations.
Insect satin stitch embroidery: butterfly
Even with ordinary floss, using this pattern you can create a real masterpiece.
Anyone can master the technique of embroidery on thin and thick fabrics. Such extraordinary designs decorate clothes, interior items, and create paintings. The main thing is to understand the features of the technology, choose the appropriate thread tones and choose a successful stencil. At the same time, the resulting products will certainly decorate any room.
