Friends spontaneously got together for a long hike and invited me. I saw no reason to refuse, so I decided to agree. They also asked to take some kind of saw with them to cut wood for firewood. I realized that in that situation, a saw for cutting along curved lines, which I did not have, would be more suitable. So there was an urgent need for such a saw. I asked my friends - no one had any, I looked in stores in my small town - I couldn’t find it anywhere, I decided to order on the Internet, I found it, and the price suits me and the quality seems good, but it will take almost a week to arrive by mail, which is too long. So I decided to assemble a bow saw with my own hands. This is what came out of it.
Source barx.org
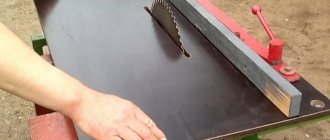
Typical bow saw design
The saw is called a “bow” not because you can shoot from it, and also not because it is similar to Robin Hood’s weapon; its design is based on the same principle of elasticity as in the ancient bow.
- The basis of the entire product is a machine made of durable, carefully processed and often varnished racks. There are three of them - two lateral and one horizontal. The stands are made of hardwood (oak, hornbeam or ash). At the bottom of the vertical posts there are symmetrical through holes for attaching handles. The horizontal stand is called the center;
- The working handles of bow-type saws are not even a subject of carpentry, but of carpentry; the convenience and productivity of work depends on their quality. The general shape of the handles is round; in the end part there are cuts and holes for attaching the working blade.
- Thin strips of tool steel with a slight “notch” are most often used as blades. The wider the blade, the less maneuverability of the saw, and the weaker the tension force in the clamps.
- Each bow-type saw is equipped with a bowstring, which brings it even closer to the throwing weapons of ancient eras. But the purpose of this bowstring is purely peaceful - it serves to firmly and reliably tension the working blade between the handles. The bowstring is usually made from natural materials (linen rope or hemp twine). Synthetic cables as a bowstring have not yet proven themselves - their elasticity and durability are not sufficient for cutting solid wood;
- Along the axis of central symmetry, between the center post and the bowstring, there is an auxiliary bar - an arrow. When the arrow bar rotates, the hemp or linen bowstring is stretched, the hacksaw blade freezes firmly between the handles - you can begin sawing woodworking.
Thanks to the threaded fastenings of the handles and the solidity of the entire structure, bow-type saws are effective for short and long cuts, for cutting wood along and across the grain, they can “overcome” knots and are capable of sawing along radii and curved patterns.
Interesting ideas on what can be made from a two-handed saw
If a two-handed saw is not used for its intended purpose or a certain number of teeth are missing on the blade, then there is no need to rush to get rid of it. If it cannot be used as a large saw, then many different, interesting and useful devices can be made from it. First, let's find out why a two-handed saw is used to make various devices? The reasons for this popularity are as follows:
- The instrument of the USSR era was made using high-quality high-strength steel grade 9ХФ, with a thickness of 1 to 3 mm. Nowadays it is almost impossible to find such steel
- Strict compliance with GOST 980-80 and manufacturing standards, which improves the quality of the canvas
- Corrosion resistance
Now that we know why it is worth choosing a two-handed saw of the “Friendship-2” type for making various devices, let’s figure out what can be made from it.
- Hand saw.
The first thing you can make from the two-handed hacksaw Druzhba-2 is a hand hacksaw. The principle of making an ordinary hacksaw is simple - you need to draw the shape of the future tool on the canvas with chalk or pencil. Then, using a grinder, cut it according to the template, and attach the handle to the resulting workpiece. The handle can be bought or removed from a Chinese file - Knife from a two-handed saw Friendship 2
(or throwing knives) - similarly, the blank of the future knife is cut out using a template, and then the blade is sharpened and the handle is prepared. When sharpening, you must take into account that this must be done with a file, but not emery. After all, excessive heating of the metal will lead to a decrease in strength properties - Spring
- the type of device in question has enormous shock-absorbing properties, which allows the device to be used for the manufacture, for example, of a catapult or other similar devices
There are many options for using unnecessary crosscut saws on the farm. What to make from it all depends on what is needed on the farm - a good knife, a hand saw or other tools.
https://youtube.com/watch?v=pwK2lk-TJUY%3F
To summarize, it should be noted that a two-handed saw is worth giving it a second life. After all, Druzhba-2, even from those times, is a real rarity that can last at least a couple of decades. Today you can also buy modern two-handed hacksaws from manufacturers such as Zubr, Matrix, Sibrtech and others. If you compare their quality with domestically produced files, they cope with the tasks no worse. The cost of a new cross-cut saw ranges from 400-600 rubles, which depends on the manufacturer.
Publications on the topic
Choosing pruners with a ratcheting mechanism, how to sharpen and repair the tool
Learn how to use a liquid nail gun correctly first
Types of wood planes and how to use the tool correctly
Hacksaw for cutting drywall tool efficiency
Bow saw blade
The versatility of this tool also determines changes in the design of the saw blade, in particular its teeth. Most often used:
- Saw blades with uniform tooth pitch. They are designed for smooth cutting of wood with a relatively short length.
- Canvases with the so-called “American” tooth, when after 3.4 ordinary teeth there is a double or “Kremlin” tooth. This configuration of the cutting part of the saw blade allows for longer and more complex cuts. The frequency of alternation determines the accuracy of the result: the closer the double teeth are located to each other, the less clean the cutting line will be.
- Spatial teeth with wide spacing. A blade with such teeth is useful for maximum cross-sectional sizes of wood being cut. The cutting force and the amount of waste increase, but sawing productivity becomes the highest possible.
Depending on the tasks assigned, the material of the saw blade also changes. For tools of relatively small sizes (350 mm, partly 530 mm), blades with a uniform pitch are used, which are made of structural chromium-nickel steel of type 45Х, 40ХН or 45Г. The blades undergo high-frequency hardening, as a result of which their surface hardness reaches 45...48 HRC. However, such blades are very sensitive to changes in the sawing axis, which easily changes due to the flexibility of the blade, and break at extreme bends.
READ What Saws Are Used For Cutting Plywood
For blades with double teeth, high-carbon steel 7HF or even high-speed steel is used. The durability of such blades (if they are not made in China) is very high, since as the percentage of carbon in steel increases, its elastic properties increase. In addition, the blades do not need to be cooled, since the vanadium and tungsten contained in such steels are highly heat resistant.
For teeth with wide spacing, the decisive factor for durability is considered to be abrasive wear from wood rubbing against metal. Therefore, the Finnish company Fiskars applies a Teflon coating to the tools it produces, which reduces the coefficient of friction, thereby increasing the durability of the saw blade. Other manufacturers (for example, Bahco) produce bimetallic blades: the base is made of structural steel, and the cutting part is made of tool steel.
about everything a little or soTourist blog
DIY saw handle |
Saw handle
Somehow I needed to buy a miter box, but the tool store only had a miter box complete with a miter saw. The miter box and saw were very Chinese, but the urgent need for a miter box forced me to purchase this set. Time passed and I decided to try this Chinese saw at work. After the first pass, the handle of the saw broke and not only broke, but shattered into pieces, and I injured my hand with the sharp edges. Oh, and for a long time I remembered this “wonderful” saw. Some more time passed and I examined the blade itself and decided that it could be useful for precise cuts, and the blade on the saw would make it even. All that remains is to make a new handle for it. And so, the topic of the article is a DIY saw handle.
Making a handle is very simple; for this we need a small piece of plywood 7–9 mm thick, three M3 screws and two M5 screws with nuts, a pencil, a jigsaw, sandpaper, and a drill.
First we need to find out what size the old pen was, for this we collect its fragments and glue them together, maybe not very accurately, only the outline is important to us.
Broken pen
Gluing an old pen
As you can see in the photo, the old saw handle has a weak point, so we will strengthen it in the new handle. Next, we need to make two blanks for a new handle, since it will consist of two halves. To do this, you need to place an old pen on a piece of plywood and draw two contours of our blanks with a pencil. Then, using a jigsaw, you need to cut out two blanks. Then you need to put them together, while ensuring that the dimensions match as accurately as possible. We drill through holes for fastening screws and for mounting screws. We fasten the two halves using M3 screws and process their edges in a yew until they become one whole, without any gaps. It is very good to use sandpaper, since plywood can be easily sanded.
Two halves of the handle
It is also necessary to make recesses for the hacksaw blade and the backing at the place of their attachment.
Recesses for the canvas and backing
Then you can put everything together.
Saw handle
After assembly, I recommend sanding the handle with fine sandpaper and varnishing it.
Finished saw
After the handle was made, the saw was tested and passed all tests. You can bring back to life not only saws, but also other tools by making handles using a similar method.
How to make a bow saw for wood convenient and safe for work
When preparing the instrument for use, you should adhere to the following procedure:
- Insert the blade into the slots of the handles and fix it through the side holes with dowels,
- They bring the saw to the chest so that the bowstring touches the body, and with one eye they carefully study the position of the blade. It should be located strictly perpendicular to the line of sight,
- Slowly and carefully turning the handles (namely the handles, not the blade!), achieve an even position of the serrated blade in the fixing slots,
- Having aligned the canvas, carefully rotate the arrow, twisting the bowstring and stretching the racks to securely fasten the canvas.
It is not recommended to sharpen and edit working blades for bow saws with your own hands. It is better to purchase factory ones, which are distinguished by their sharpness and precisely adjusted “toothing” of the blades. Therefore, it is prohibited to be distracted during any cutting, otherwise you can saw off your own fingers along with the board. During a forced break, it is not recommended to leave the saw sticking out in the workpiece - there is a high probability of the blade breaking, and it is more difficult to resume work from this position.
Before starting work, it is necessary to inspect the instrument and make sure that there are no cracks or damage on the wooden parts of the stands, and that the bowstring is intact. The saw should be carried carefully, making sure to point the sharp blade down and back in the direction of movement (that is, with the bowstring forward and up). To make it easier to make cross cuts, the wooden pieces should protrude (“hang”) from a fixed support. If you have experience, the sawing process begins from the thumbnail of the hand that holds the beam or timber.
When the blade has “bitten” into the wood, it is lightly supported not on the nail, but on the joint of the thumb. However, to improve the accuracy of cuts (and for any curved cuts), it is necessary to use templates or a miter box.
For longitudinal cuts, the blade is fixed at an angle from 0? up to 90? relative to the horizontal post. The force applied will be lower than with cross-cutting, so the process will take longer and is carried out with both hands. In this case, it is convenient to lay the board or timber horizontally and guide the saw towards you, holding it by one of the handles and the side stand. If it is necessary to make a curved cut, it is not enough to select a blade with a narrow width (from 6 to 8 millimeters).
Blades for curved slots must have rectangular teeth and a significant spread - up to 2.5 times the nominal thickness of the blade. When you have to cut a massive problematic board with numerous knots, oblique layers of wood, etc., you should choose the widest hacksaw blade (up to 5 cm). Its spread should be small, but the thickness should be significant. It is not recommended to make figured and curved cuts on problem boards.
Popular posts
- How to make a bottle holder from chipboard How to prepare a hide for duck hunting with your own hands How to make a boat from foam plastic How to make welding pliers for spot welding How to make a drain from plastic bottles with your own hands: Instructions Video How to build a stable for horses Squishy: what is it and how to make it DIY anti-stress toy Wi-Fi signal jammer: review of factory and homemade jammers
Saturday, March 15, 2014
You need different saws. Or how I came to the bow saw.
Homemade bow saw. According to the classical scheme. Collapsible.
Introductions or ode to camp saws.
I almost always take a saw with me into the forest. For PVD/autumn, a small saw is enough.
There is a large selection here:
Pros: -compactness -weight -efficiency -price - you can cut alone
Cons: - low reliability - gets dull quite quickly - cutting thick trees is quite difficult
I went with Tajima
ALOR-
A240 - Aluminis
t Black 240, Folding Saw, 9.4in 9 TPI (Japan).
I like this saw.
But it has a minus - the price. Our saw costs about 2000 rubles, replacement blades for it are quite rare and cost about 800 rubles. One blade is enough for 1-2 seasons of intensive use. I'm disappointed, it's Japan after all. The company specializes in professional hand tools. Among the advantages we can note: - compactness - relatively light weight (approximately 340g) - high efficiency (when the canvas is fresh)
We went on a boat trip to Karelia, we had a two-handed saw =) Naturally, watermen don’t care about weight, but it’s still too much. As a result, I only took out the two-handed tool once; the rest of the time I prepared firewood with a Tajima hacksaw. The saw did an excellent job with trees 20-25 cm in diameter.
But when it gets colder and you go overnight, you want to sit by the fire longer. Or in general, that hike requires something more serious. Options? petrol is clearly not our tool =) is there a two-handed saw left? Only if it's a ski trip. Those. I need a saw that is light, compact, and has high performance. To prepare firewood in large quantities.
Everything is new, well forgotten old.
In the old days, this was the main tool of a carpenter. High productivity, precision cutting, low weight, ability to work alone.
Bow saw according to the classic design.
These are not currently on sale. I was surprised when the sellers at Lirua threw up their hands when asked about the availability of such a saw. They just don't know. And they have a saw. But from an aluminum pipe
You can carry such a saw on your backpack, but I don’t like it. And her weight is clearly more than 400g. + Price approximately 1000 rub.
What to do? Do it yourself.
Go.
I bought a canvas Bahco 607mm (Sweden). The company produces extremely high-quality tools.
In Liroy I bought a pvc pipe for heating d25, and an aluminum pipe, plus a couple of snap hooks. I made a frame for the saw according to the classic design with a crank.
All together weighs 340g. My Tajima folding hacksaw weighs this much. I like. A long blade will increase productivity and the diameter of logs that can be cut.
Pricing: Canvas bacho 630mm - 450 RUR, tubes from lyroy - 250 RUR
Manufacturing is very simple. You don't even need a drill. All you need is a torch and a piece of old metal cutting cloth. The main thing is to carefully mark future holes. By heating the transverse tube we form holes on the PVC tubes. The horizontal crossbar should be slightly shorter than the saw blade itself. We heat the old metal blade and form holes in the pvc tubes for the saw blade. Everything fits me perfectly. We assemble the saw, insert the carabiners (fix the blade). We put on the laces with any stick and twist them with a sliver. There is no need to over-tighten, just adjust the rigidity of the frame and the normal tension of the canvas.
My tubes bend a little, so I want to try to do the same but with all aluminum tubes, I wonder how much stronger and heavier it will be.
How to carry a saw? I need to sew a cover. The canvas can be protected with thin plastic, for example from a stationery folder, or simply take a stronger fabric for the cover.
There is another option to carry the saw blade in a bowler hat. Twisting it. I got this idea from Grigory Sokolov’s video, link to YouTube, for which I thank him. I'll try.
UPD
I’ll definitely write after I try the saw.
UPD_2
The saw passed the first test. Peels. Two problems have been identified: 1. Coupled snap hooks must be replaced with any non-coupled ones. The thread is capricious and jams.
2. It is necessary to replace plastic tubes with aluminum or wood. Insufficient saw blade tension. The tubes are bent. You can see it in the photo.
The saw cuts, but it is noticeable that the blade is moving. You can cut alone, but the output is small. If you cut together, it’s a song. It will take 3-5 minutes to fell a pine tree and cut it into logs for “nodya”. Swedish canvas - pass!
Here I found a youtube video. Probably the most correct saw, from my point of view. The crossbar is rectangular, the grooves on the crossbar are rectangular, i.e. torsional rigidity. + the canvas is retracted into the handles.
Source: widermove.blogspot.com
Grinding saw
Sanding materials in hard-to-reach areas can sometimes be difficult. I decided to make a sanding “saw” that would make this task easier. I hope my idea will help you too!
: Materials and tools
Materials:
- maple and oak boards;
- beech wood (wooden rod 380×25 mm);
- leather;
- linseed oil;
- sandpaper.
Tools:
- pencil and ruler;
- Japanese saw;
- clamp;
- small square;
- mini file;
- rasp;
- flat wooden bats;
- wood carving set;
- end plane;
- plane;
- engineering angle;
- adjustable corner template;
- chisel (several types);
- scrapers;
- dowels;
- semicircular wood chisel;
- spokeshave;
- rotary cutter (mill);
- hammer.
Saw handle and support
The first thing to do is draw the outline of the saw handle on a piece of wood. I used white maple as the material, but others can be used. I cut the straight line with a Japanese saw, and the curves and so on with several tools: a chisel, a saw and a scraper.
I sanded another piece of wood and made it rectangular. Its height coincided with the height of the handle.
The first and most necessary thing is a handle and a support.
Making space for a wooden rod
Since I didn't want to use glue, I decided to connect the two pieces using threads. To do this I used a wood carving kit and made holes on both sides of a beech wood rod.
I then marked the center of the pieces and drilled them with a flat wood drill bit. I drilled the handle with a 22 mm drill, and the rectangle with a 23 mm drill.
This way I made a place for a wooden rod
Installation of the rod
Now it's time to cut the wooden rod to a length of 380 mm. Before drilling the holes, I coated it in linseed oil and wrapped it in foil. This way I was able to ensure that the oil was absorbed and made it easier to install into the threads.
I also made carvings on both sides of the rod.
Important! Flaxseed oil should also be applied to the hole in the handle.
The rod is ready for installation
Saw handle grinding
To make it more enjoyable to use and have a firm grip on the handle, I used a variety of tools: a wood chisel, a miter plane, a curved plane, and 280-grit sandpaper.
For the inside I used a half circle wood chisel.
Now, as for the handle, everything is more or less ready.
Wooden nuts
For the nuts I decided to use oak. To make them, I first had to take a compass, draw a circle, draw diagonals, and make a hexagon inside the circle. In the center of it all I needed to make a cutout and to do this I used a 22mm drill bit and made a thread.
Then I cut the board to the shape of the nut. So I made two pieces.
Nuts are a fairly reliable fastener
Making space for a belt
Once all the parts are done, I only have one more thing left to do before creating the grinding saw. To do this, first I need a body and a rectangle.
I'm leaving a PDF file that marks where to drill the holes for the sandpaper.
Important! If the dimensions of your tool are different, then you need to change the dimensions.
It was necessary to very precisely drill out the place for the belt
Sandpaper belt
To avoid tearing the paper while sanding the material, I created a "belt". I sewed two small strips at the ends, but you can glue them together with glue.
The belt is quite easy to make
Full assembly
The last step is to connect everything. I took all the parts and sequentially connected them to each other until my tool was ready.
This is how my grinding saw turned out
Afterword
It has become much more convenient to work with such a grinding “saw”. Yes, of course, you can’t use this tool inside, but for outdoor work it’s just right.
Tips to make your saw obedient
The saw must be moved in the cut along the entire length of its blade, which guarantees effective removal of the resulting sawdust.
The cause of the saw getting stuck in the cut may be insufficient tooth set or structural features of the material being processed. In the latter case, the hacksaw blade can be lubricated with soap or wax, and a wedge can be inserted into the cut.
When sawing layered materials or wood with a coarse-tooth blade, the saw should be slightly tilted towards the surface (15÷25 degrees). In this case, the material will be in contact with only three to five teeth, and this will eliminate the likelihood of individual fragments breaking off.
To avoid splitting when finishing the cut, place a block of wood directly under it.
So, we have introduced you to some important points that will allow you to choose the right type of hand saw, properly prepare it for work and work with it so that the work you do is enjoyable.
Folding bow saw
I found this gadget on one of the sites,
and folded _
TTX: Folding saw with handles. Canvas length: 32 cm Size in working condition: 40 x 19 cm Size when folded: 41 x 2.5 cm
How to cut with a two-handed saw alone
It often turns out that it is difficult to find a partner for sawing, so it becomes necessary to use the tool alone. It is impossible to do this without first modifying the saw, so it remains to figure out how to turn a two-handed hacksaw into a one-handed one, while maintaining the length of the blade. There is a way out, and it is quite simple - turn a flexible hacksaw into a rigid bow saw. All you need to do is make a frame.
- The first way to make a frame is to attach a beam or a narrow board to the existing handles on top with self-tapping screws. At this point, the manufacture of a long saw for hand sawing can be considered complete. The disadvantage of homemade products is that the blade will vibrate, so if you want to get a more reliable tool, you should choose the second option
- The two-handed saw uses two wooden handles that are removable. In the cylindrical holes on the canvas, it is necessary to install two elongated sticks, between which a rail of the required length should be placed crosswise. In the upper part, parallel to the rail, pull a rope, which ensures tension of the web. As a result, you can work the device alone without a partner, adjusting the degree of tension
If you plan to use the hacksaw for work yourself, then the frame can be welded from metal pipes. This design will be more reliable and will last no less than the tool blade. The principle of the conversion is simple and uncomplicated, so if you have accumulated a bunch of thick logs, then it’s time to cut them with a two-handed hacksaw alone.
This is interesting!
You can buy a crosscut saw, since modern manufacturers continue to produce this type of device, allowing themselves to modernize it.
Instead of primitive handles in the form of cylindrical bars, full-fledged handles are used, as on ordinary hand hacksaws. https://youtube.com/watch?v=8dZ5o6lG3xI%3F