This step-by-step master class covers a chrysanthemum made from foamiran for beginning needlewomen. It is easy to find a practical use for a luxurious flower. It can be used to decorate brooches, hairpins, and hairbands.
If you have a lot of time, make a bouquet, wreath or flower arrangement in a basket. Flowers made of plastic suede look like natural plants. Thanks to tinting, the petals turn out natural and very believable.
How to make a chrysanthemum from foamiran: brooch MK
From my master class you will learn how to make a chrysanthemum from foamiran of the “Valentina Tereshkova” variety.
I made a chrysanthemum for a brooch. To create a chrysanthemum brooch we will need:
- foamiran for chrysanthemum flowers from foamiran white and green for sepals, leaves;
- lilac, green oil pastel and sponge;
- acrylic lacquer;
- iron;
- second glue;
- soldering iron
- scissors;
- lighter;
- brooch holder;
This is the kind of brooch I suggest you make.
Recommendations
If you plan to make original and attractive chrysanthemums from foamiran with your own hands, you should listen to some useful tips and recommendations.
To cut the necessary parts from foamiran of any type (Iranian, Chinese, marshmallow and any other), you must use scissors with sharp blades. If the tool is blunt, it will not be possible to carefully cut out the components, which will negatively affect the appearance of the flower craft. Before starting work on making crafts, you definitely need to think about how you will continue to use foamiran chrysanthemums. Often these products are complemented by women's accessories, for example, a hairpin or comb. You can make a spectacular bouquet and present it as an original gift. Most often, dry pastels or acrylic paints are used to tint ordinary white foamiran. But the use of simple gouache or watercolor is not prohibited. The only thing that the master needs to take into account when using such components is that they will interfere with the removal of dust from the surface of the flowers. After wiping painted foamiran crafts, the applied paint will also be erased from them. To give the components one or another shape, craftsmen most often use a heated iron. But you can get by with a regular flame from a lit candle.
If you choose this method, you will need to strictly follow safety rules and exercise maximum caution. If you use an adhesive solution while making foamiran flowers, you should not apply too much of it to the parts and base. A craft filled with glue will have an unattractive appearance and will seem careless. It is recommended to buy all components for making crafts from the material considered at specialized retail outlets that sell various creative products. Regular PVA glue will not work for gluing foamiran parts.
It is advisable to buy a more reliable composition, for example, “Moment-Second”. Some craftsmen even sew on foamiran parts using threads and needles. If this is your first time encountering foamiran crafts, you should be patient. There is no need to rush when making flowers from this “flexible” material. Otherwise, you risk making many mistakes, not all of which can be corrected later.
To learn how to make a bush chrysanthemum, see the following video.
Pattern for a brooch with a chrysanthemum
These are the templates I got.
Let's start making chrysanthemums: step-by-step master class with photos
To do this, according to the pattern, we cut out petal circles in size 4. One petal circle with a diameter of 5 cm. Three petal circles with a diameter of 7 cm. Three petal circles with a diameter of 6 cm. Three petal circles with a diameter of 8 cm. Cut all petals leaving 2 cm in the center.
Using a stick, apply the texture of the petal, in the form of an oval, on all the petals.
We tint the petal circles with lilac oil pastels. We tint the small petal circle completely. As the petal circles increase, the toning becomes smaller and weaker. We apply tint on both sides.
Then we process each petal of the first three petal circles on the tip of a soldering iron, heat it, fold it in half and pull it to the bottom. It turns out like a claw. Then we collect all the petals upwards, heat the middle of the coma, as conveniently on a soldering iron or iron, and treat the wrong side with a boule or an auxiliary object.
We process the remaining petal circles with a soldering iron in the same way, but we will process it with a loaf of paper from the front side of the petal circle, where the texture is applied. And we process the last petal circles with a little bit of bulk.
This is how we processed all the petals on the petal circles.
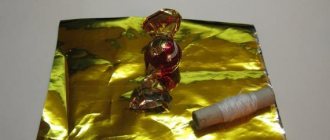
We make the base of the flower from foil, that is, we roll up a ball and begin to paste it with a small petal circle.
So that the foil is not visible.
So we glue three petal circles, applying glue to the base and slightly lifting the petals, pressing them against each other.
After the third petal circle, the chrysanthemum begins to open. Apply glue only to the base of the petal circle. We try to place the petals in a checkerboard pattern. So we collect the chrysanthemum until the end, until we glue all the petal circles.
From green foamiran we cut out a sepal, a leaf and a circle for attaching a clasp for a brooch.
Materials and tools:
- — foamiran Silk LUX apricot color;
- - dark green foamiran;
- - scissors;
- - stick or toothpick;
- — second glue;
- - two sheets of thick white paper;
- - sheet mold;
- - foil;
- — pastel white, orange, red, green;
- - iron;
- - base (rim, comb, clip, pin);
- - enormous patience.
Chrysanthemum can be almost any color. Translated from Greek, the word “chrysos” means golden, and “antemos” means golden flower. Translated from Japanese, chrysanthemum means sun and is called “kiku”. In any case, it is understood that the color of the classic chrysanthemum varies from yellow to yellow-orange (sunny).
In our version we will use apricot colored foamiran.
Cut out squares: 10 pcs. size 12 cm, 2 pcs. — 10 cm, 1 pc. - 8 and 9 cm.
We iron each cut. We place the fom sheet between sheets of white paper, iron it on both sides, wait for it to cool, and separate it from the paper.
By subjecting the foamiran to heat treatment, we thinned it and it became more elastic.
Cut out circles from the squares. This can be done by eye or using a template.
We find the center. We mark the circle with a stick into 8 sectors, each sector is divided into 5 equal segments.
From the marks to the center we cut the entire circle and get 40 future petals.
Cut off the ends of each petal on both sides.
We tint the ends with white (one side only) and orange pastel (both sides).
On the side where the tips of the petals were tinted with white, we enhance the brightness with red pastel.
On one blank (12 cm in diameter) we tint it green. This will be the very last part in the assembly.
We paint blanks with a diameter of 8 and 9 cm in the same way as all the details, but we make the tips of the petals green.
We stock up on patience and begin to form the petals. We apply the tip of one petal to the iron, fold it in half and slightly flatten it and fold it up.
///Attention! The white tip should be on the convex side, which means that you need to apply the unpainted tip to the iron. ///
We form petals on all 14 parts. If we make a mathematical calculation, then we need to give shape to 560 petals (14x40).
Cut out leaves 8 to 10 cm long.
Since chrysanthemum is an autumn flower, the color of the leaves should be appropriate. First of all, we draw veins along the leaf with green pastel on both sides. Add a little orange and yellow to the front side of the sheet.
Heat the sheet and apply it face down to the mold. Using our fingers we try to press the foamiran well into the mold. Fold the sheet in the center and bring the fold to the iron for less than a second. Press the bend with your fingers.
We apply a section of the sheet (from the end to the central vein) to the edge of the iron - we get a convexity.
Take a small piece of foil.
Roll into a ball and place on a toothpick.
Cut out the part shown in the photo.
Glue it to a ball of foil. We tint it green. The center of the chrysanthemum is done.
We begin assembling the chrysanthemum with the smallest part (8 cm).
Lubricate the entire round center with glue and lift all the petals.
We plant a second piece measuring 9 cm.
Apply glue to half the height of the glued part, raise part of the petals.
Glue all the petals in small sections. Using this method of fixation, the petals are glued more evenly.
We add two more parts, but apply the glue a little lower.
Glue all the remaining parts. Each time we apply the glue lower and lower so that the flower is not in the form of an eternal bud, but blooms.
Don't forget that the very last part should have a faint green tint.
Remove the toothpick from the chrysanthemum.
We cut very thin strips (tendrils) from apricot foamiran, stretch them, heating them on an iron. The length of the strip almost doubles. Tint red and green on both sides. Glue together approximately seven pieces, making three bunches.
Do-it-yourself beautiful chrysanthemum from foamiran - step-by-step MK
This step-by-step master class covers a chrysanthemum made from foamiran for beginning needlewomen.
Craft materials
To make a beautiful chrysanthemum with your own hands, prepare:
- foamiran green and the color of baked milk (size A4); What kind of material is this and how to work with it, read in our introductory publication;
- simple and manicure scissors;
- notebook and landscape sheets;
- glue;
- acrylic paints in pink and marsh shades;
- pencil, pen with a non-working rod.
Additionally, you need an iron with a temperature switch.
If you have never worked with foamiran and are afraid, try starting with an even simpler craft - a keychain in the shape of a funny dog. However, handicrafts with this material cannot be considered difficult.
Preparing patterns for petals and leaves
First you need to make a chrysanthemum pattern from foamiran:
- From a notebook sheet, cut out a square with a side of 10 cm.
- Fold it in half.
- Fold the resulting rectangle in half again.
- Bend the square diagonally.
- Fold the triangle in half too.
- Cut the resulting segment roundly into the shape of a petal.
Unfold the blank, you should get a flower template. Trace it with a pencil on a landscape sheet and fold it again. Trim about 0.5 cm from the edge. You should end up with a smaller template.
Repeat this four more times, cutting out a smaller template each time. The smallest blanks should have thinner petals. There are six patterns in total.
To pattern the chrysanthemum leaf, first draw a trefoil. From the top draw three more petals. Draw the cloves of the shamrock.
How to make a chrysanthemum from foamiran
Place the paper blank on the foamiran and trace it with a pen with a non-working rod (no paste!). Cut out the leaf and draw veins with a pen.
Also, using a non-working pen, make flower blanks. There should be 9 layers in total, more is possible. Also cut out a circle with a diameter of 2.5 cm and cut its edges with a fringe of 1 mm.
Lightly dilute acrylic paints with water. Using a brush or fingers, apply the tint in a circle. The edges will appear.
Cut out all the layers of the flower; it is more convenient to do this with nail scissors. Tint the reverse side. Let it dry. Heat the iron to the "Wool" setting.
After a few seconds, the edges of the workpiece will begin to bend inward.
Also tint and treat the leaves of the flower.
Now you need to give the chrysanthemum made from foamiran a realistic shape. To do this, bend the petal and carefully rub it left and right with your fingers. Be careful not to tear.
In this way, you need to process each petal. For the center, prepare a strip 25 cm long and 1.5 cm thick. Cut the fringe 0.9 cm long and 1 mm thick along the edge. Iron for 2-3 seconds. Coat the edges with glue and roll it up.
Paper flowers - templates for cutting out petals of different colors
All volumetric paper flowers are made according to the same pattern. To begin with, petals of the same shape but different sizes are cut out, then they are glued to a wire stem or paper base and straightened, and finally a pistil is glued to the middle of the flower. And the main difficulty is precisely to cut out beautiful petals, thanks to which the flower will look like a real one. And if a child does not know how to draw petals, but wants to make beautiful flowers out of paper on his own, cutting templates will be very useful for him.
Templates for cutting out petals of the most popular flowers
Patterns for peony, lily, tulip and rose
Patterns for carnations, chrysanthemums, daisies and dahlias
Templates for flower leaves
- Foamiran flowers: 9 patterns and templates with photos
By the way, to make paper flowers made from templates even more beautiful, you can paint veins on them with a thin brush or coat the tips of the petals with glue and sprinkle them with golden sparkles.
Chrysanthemum from foamiran - how to make a hair decoration with your own hands
With the arrival of autumn, it’s time to remember another seasonal flower - the chrysanthemum. She is sung and revered by poets and artists. Many myths and legends are dedicated to her. It is known that archaeologists found images of the solar flower on fragments of pottery and marble, on ancient coins and in patterns of oriental porcelain. As you may have guessed, this master class is dedicated to chrysanthemums made from foamiran.
Stencils for windows Snow Maiden
Invite the main characters of the New Year's fairy tale to visit!
For this purpose, stencils for the Snow Maiden windows are the most suitable option. Nobody knows what Santa Claus's granddaughter should really look like, so there are a lot of images on the Internet.
Choose any image you like from this small selection of cute Snow Maidens, the stencil that you like the most, download and print. The ideal print size is A4, suitable for any window.
New Year's stencils serve as a successful alternative to painting; there is no need for an artist's talent. Decorating windows with paper templates is easy for everyone.