When presenting a New Year's gift, beautifully designed packaging will play a special role. A wrapper in the form of paper, cellophane or a standard purchased package looks ordinary and uninteresting. So if you want your gift to stand out and be memorable, it's worth taking the effort to make your own New Year's gift bags. A little imagination with design and the result will be interesting packaging.
Gift bags for large gifts
Bulk gifts require large packaging. Therefore, before taking a piece of fabric, you need to measure its length and height, do not forget to add width and seam allowances. The gift must be loose in the packaging. It is advisable to make it double.
The inner side is usually made green or red, and the outer side is colored or gray. Sewing a double bag will take longer, but the result will be much better:
- Having taken measurements, add 1 cm to the seams on the sides, height – 4-5 cm.
- Having laid out the main and lining fabrics, we cut out the measured parts. Let's iron them.
- Fold the parts and sew from the wrong side, departing from the edge about 1 cm.
- We turn them inside out and put them face to face.
- Now we make a seam around the perimeter, as shown in the photo. It is better to start stitching from the inner fabric, leaving an opening of 7-8 cm unstitched.
- Turn the product right side out through the opening and align. Sew the opening with a blind stitch.
- Place a pad inside and decorate the outer side of the bag.
- Sew the tie on the side.
- You can decorate it by sewing on a snowflake, bell or Christmas tree.
Decor ideas
The main decoration of any bag is, first of all, its ties . For example, for red fabric, white or blue ribbons will be an effective decor.
But as ties you can use a variety of materials: - satin, grosgrain or nylon ribbons, - decorative cords, - braid, - lace, - twine, - a fabric belt.
Curly stamps
For such finishing you will need knowledge of hot embossing or stamping techniques. It will also be necessary to purchase special materials in the form of a stamp and glue. First, you will need to stamp the design with glue using a stamp, then pour in a special powder that becomes convex when heated. The drawing needs to be processed with a hairdryer.
When working, by the way, you can replace purchased special materials with a simple figure cut out of cardboard. The figure is smeared with glue, and beads and seed beads are sprinkled on it.
Embroidery
You can decorate the bag with embroidery made with floss threads, beads or sequins. This will take quite a lot of time, but embroidery will become an elegant and practical decoration that will not wear off over time. The simplest idea for embroidery is simply the first letter of the recipient's name.
You can do embroidery in three ways: - take canvas as material for the bag, do embroidery on it, and then sew the bag, - take thick fabric (for example, canvas) and stitch the finished embroidery to the front side, - do embroidery directly on the fabric using water-soluble canvas, and sew interlining at the back to give the material the necessary rigidity. After washing, the canvas will dissolve, and only the completed design will remain on the surface of the fabric.
Small packaging bags
Small bags for tiny gifts are sewn in a similar way, taking into account that the selection of fabrics can be more varied. Silk, velvet, satin look great. If the gift is intended for a child, bright cotton will do.
Important! Fabric for embroidery is well suited for packaging; you can decorate it with embroidery on a New Year's theme. For example, New Year 2022 is the Year of the Pig, so pink piglets will look not only fun, but also relevant.
Required materials and tools
First, determine the size of the New Year's bag: to do this, lay out the expected capacity on the table and estimate how much space it should take up inside the package. Keep in mind that a couple of cm should be left for allowances. It’s better to make the bag more spacious than later it turns out to be small.
During the work you will need the following materials and tools:
- Fabric or felt. Choose a rag that has a festive color and is not fuzzy. Before cutting, wash the fabric thoroughly in warm water and iron it to avoid shrinkage of the finished product. It is better to sew the bag from a single piece so that there is no seam at the bottom.
- Small bright pieces of felt or other material with a non-flowing edge for appliqués. Before choosing a color, think about what exactly you plan to depict on the bag.
- Red nylon braid, approximately 1 cm wide.
- The burgundy ribbon is the same width.
- Multi-colored floss for embroidery.
- Thick or medium-thick yarn in white and red colors.
- Scissors: large for cutting and small nail scissors for cutting out small parts.
- Needle and sewing pins.
- Chalk, a piece of soap or a pencil - for transferring the drawing.
- A measuring tape and a regular long ruler.
- Transparent glue Moment Crystal.
- Pattern: it is better to immediately print it on thick cardboard and transfer it from paper to cardboard by hand.
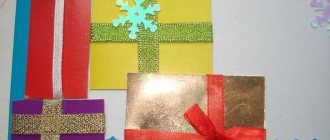
Packaging for sweets
Mostly children receive such gifts, but often adults also love when they are given a box of good sweets. Therefore, you must know who the gift will be for. When choosing fabric, pay attention that it is not fleecy; satin, linen or chintz are best.
Do you want to do something interesting and unusual? Sew a handbag. Select two different pieces of fabric. Choose the color as you wish, size - according to the number of sweets:
- Place them face to face and stitch around the perimeter, leaving an opening.
- Turn it inside out and straighten it, sew the opening with a hidden seam.
- Fold the corners towards the middle and stitch as shown in the photo, do not forget to step back from the edge.
- Stretch two ribbons (laces, braids). One clockwise, the other counterclockwise.
- If you pull them, the product will fold into a beautiful and unusual bag. The decoration can be a postcard or small balls attached with thread.
Do not doubt that your handmade New Year's gift bags will arouse admiration among those for whom they are intended. The work will be appreciated, since such packaging is unlikely to be thrown away; they will come in handy after the holiday for storing all sorts of small items.
Materials for work and instructions
The source of all photos in the article is etsy.com
The best material for a beautiful bag is high quality cotton fabric. For example, cotton is ideal for patchwork. It has a lot of the most fashionable and modern colors for every taste and color. The photo shows what New Year's bags with gifts for all family members might look like. You can also sew ties from fabric or buy ready-made ribbon, lace or decorative cord. A gift bag that combines two types of fabric will look original. For example, an eternal classic is a combination of a plain fabric and a fabric with a pattern. Here is a detailed master class on how to sew a double bag with drawstrings with your own hands. And here is what will happen as a result of the work:
However, you can use not only cotton, but a wide variety of types of fabric: embroidery canvas, velvet, satin, organza, canvas and even regular burlap!
Eco-style is always relevant, so you can always remake an old bag into cute miniature bags tied with twine and decorated with lace, hearts or fabric flowers.
To make such packaging you will always need: - a sewing machine or a regular needle and thread, - scissors, - a ruler, - a pin.
We will sew a simple single-layer bag . This is the easiest and fastest method, which will only take about 30 minutes. 1. Cut out two rectangles, taking into account the location of the picture, if there is one. 2. Using a sewing machine, sew 3 sides of the rectangles folded together (two long and one short) at a distance of 1.5-2 cm from the edge. We sew all the edges, including the unstitched side, using the same machine with a zigzag. On the long sides, we do not bring the stitching to the very end, leaving 3 cm free. 3. Fold the remaining edge inside out by 3 cm. and sew with a regular seam at a distance of 2 cm. 4. Using a pin, thread a ribbon or decorative cord along the edge. The gift bag is ready! All that remains is to choose how to decorate it with your own hands.
Bags for New Year's gifts made of burlap
Burlap is great for packaging; the decor can be used to mark the age of the recipient. The size of the flap is selected according to the size of the gift; you will also need a cord or ribbon.
For those who cannot or do not want to bother with sewing, you can buy adhesive tape and glue it with it:
- We cut out a piece of fabric the size of a gift, taking into account seam allowances.
- The burlap does not have a front side, so we fold the flaps in half and sew on three sides.
- Turn it inside out so that the seams remain inside.
- We decorate. You can use a hot gun and use it to decorate with beads, snowflakes, and lace.
- We attach a tie to the side.
What you need for sewing
To make gift wrapping you should prepare:
- Textile.
- Threads in color or contrasting (in accordance with the plans of the craftswoman).
- Needle, scissors and measuring tape.
- A beautiful cord or ribbon.
- Decorative elements: appliqués, beads, embroidery threads and other materials.
Any bag pattern is a rectangle. The length of its sides varies depending on the size of the product planned. The selected fabric for the bags is very convenient to cut.
If a craftswoman needs several identical products, she can speed up the process by automating each stage. For example, you should cut out several rectangles at once, then baste them all, sew them, iron them and attach them with laces.
If we are talking about making embroidered bags, then you should take care of the decor even before sewing a bag with ties. Embroidery is done on a cut out rectangle, otherwise it will be very inconvenient to do it later.
Interesting packaging ideas
Well, if you don’t know sewing and knitting at all, try making New Year’s gift bags with your own hands from scrap materials. For example, you have an old children's sweater or blouse lying around. Cut the sleeve to the size of the gift, turn it inside out and sew up the bottom.
Attention! Make the decor as you wish, do not forget to sew a ribbon for tying.
An ordinary oven mitt can serve as a package; put some accessories in it, attach a bow, and the package is ready. Unexpected and interesting, any housewife will be happy with such a gift.
How do you like the article?
Cutting blanks
Decide on the size of the future New Year's bag that you are going to sew with your own hands. Fold a piece of fabric in half so that the wrong side is on the outside. Using chalk, a simple pencil or a bar of soap, draw the parameters of the future bag.
Pin the fabric inside the outline and only then cut it, otherwise the two parts of the product may not turn out the same.
Sew the side edges using a machine overlocker or by hand. Felt and other materials with non-flowing edges do not need to be processed.
Iron the piece through wet gauze, steaming the seams especially carefully. Along the way, you need to iron 0.5 cm of the upper cuts inward. To make the bend even, make small, inconspicuous marks on the front side of the fabric and bend along them.
Another hem should be at a distance of 5 cm from the edge, so that later you can thread the ribbon or lace there.
Fold the piece in half, marking the location of the bottom.
Now you need to cut out the parts of the applique. To begin, pin the finished paper patterns to the felt. Place them closer together so that there is less waste. Trace and, without chipping, cut out the parts.
For the edges of a small pocket on a fabric bag, try using scissors.
Ideas for creativity
Sew cute long ears to your bag and you will get bunny bags.
If the fabric is used with a pronounced print, then the decor should be minimal. Use a simple plain ribbon or twine.
Having mastered the technique of sewing a simple bag, you can turn ordinary pouches into a handbag or backpack.
Sewing a pouch is an easy task. Decorate as you wish. And these examples will help you make original gift packaging that everyone will like.
Decorating the finished product
The packaging for a New Year's gift definitely needs to be decorated. The decor can be sewn on - it’s more reliable, or placed on transparent glue - it’s faster.
Draw on the bag the symbol of the new year 2022 - a yellow pig, deer, hares, snowflakes, Santa Claus in a smart suit.
A cute white pompom will help decorate the red cap on the winter wizard. It's easy to make by wrapping thick crochet yarn around a fork and then knotting it in the middle.
In decoration you can use not only appliqué techniques, but also embroidery. It is better to embroider the product before assembling the product, but if you have to embroider on a ready-made bag, use a small incandescent lamp to stretch the fabric. The hoop will get in the way in such a delicate matter.
Embroider the bag with shiny threads, sequins, sequins and beads. The holiday bag should be bright!
Place beautiful star-shaped beads on the ends of the laces and secure them with knots or attach small bells.
Place the gift inside and tighten the lacing and tie the ends into a beautiful bow.
Place a note with your wishes inside the small pocket.
How to beautifully pack a box in fabric or paper
If you don’t have time to build a beautiful box, this does not mean that you are deprived of the opportunity to aesthetically pack a gift.
In such cases, it is useful to have a small supply of wrapping paper in the house. Modern printing capabilities and store services offer to make a custom inscription on the print and deliver a roll of paper directly to your home
The gift can also be wrapped in fabric
Material selection
Before sewing a bag with ties, you need to decide on the fabric. The most elegant and most suitable for packaging is organza. However, sewing bags from organza is a little more difficult than from other materials (cotton, linen, wool or synthetics). This fabric “floats” and constantly frays. This means that all seams must first be carefully basted and ironed, and only then stitched on a machine. In addition, organza is transparent, so all edges will have to be carefully processed with an overlock or fine zigzag.
If the craftswoman is intimidated by such difficulties, she can easily get by with beautiful cotton fabric. Nowadays stores sell a variety of materials with amazing colors. The best thing here is that many of them can be bought in pieces of 30 cm. This is quite enough for several bags of the same or different sizes.
Adviсe
At each stage of creating a holiday bag, do not forget to iron the fabric with a hot iron - this is necessary to ensure maximum accuracy and evenness. This way, your packing bag will have straight seams and crisp edges. No one will guess that you sewed it yourself and didn’t buy it at a New Year’s decor store.
The person to whom you give this bag will only have to pull the string and be delighted with the original design of the gift. If you wish, you can complement the holiday wrapping bag with a greeting card with warm wishes for the coming year.
As you can see, original packaging is an effective way to present even the simplest and most inexpensive gift in an original way. I hope my detailed instructions will be useful even to those who have never sat down at a sewing machine.
Found a violation? Report content
How to make a house from branches with your own hands
A house made from natural materials, in particular from twigs, looks very cool. Even residents of big cities can find such material without problems. In addition to the branches themselves, you can additionally use cones, acorns, moss and other natural materials that are available.
Wooden hut made of twigs step by step with photos
Let's look at how to make a New Year's house from branches step by step. We will need even branches of the same thickness. Cut branches to the same length. We cut holes in each to connect them to each other. Lay out a square. We continue to lay out the house, connecting all the branches with wood glue. Leave holes for windows and doors. We shorten the branches towards the top. We make a roof from parallel branches. We build a chimney from a thick branch. The result was a miniature model of a log house. If you paint it blue, you will get an ice house from a fairy tale.
House made of branches on a cardboard base - step-by-step MK
Another idea is a house made of branches and other natural materials. We glue the cardboard box. We cover the walls with twigs. We build a roof out of cardboard for the house and cover it with tassels of reeds. Place dried leaves on the bottom of the box lid. We glue people together from acorns and matches. We decorate the patio with flowers and a twig.
Fireplace with round portal
This fireplace is quite basic, so it will require several large cardboard boxes. Using this drawing you can calculate the details for your fireplace
First we glue the base, and for strength we need to glue the stiffeners inside. Since the top of the fireplace will not be easy, and the use of decorations is also provided, without this reinforcement the bottom of the fireplace will sag.
We glue the ribs every 5 cm using tape. Additionally, glue the base on all sides.
Next, you can cut out the front and back. First we will decorate these parts, and then glue them. Draw an arch on a piece of cardboard. We cut out the bricks and glue them to the base. After the glue has dried, you can begin assembly.
Making a fireplace roof. To create it, we need not only cardboard, but polystyrene foam. We glue all the cardboard-expanded polystyrene-cardboard parts together. Let it sit for several hours so that the glue dries well. You can put a load on top.
To cover all the unevenness, cover the top of the fireplace with paper.
We take paper towels and PVA, which must be diluted with water 1:1. Place the resulting solution in a spray bottle. Dampen the napkin and squeeze a little. A wet napkin will give an interesting relief. We cover the entire fireplace with such napkins and wait for it to dry.
Take paint of two colors (red-brown and beige). We will paint the surface of the fireplace beige and the bricks red.
Once all the paint is dry, you can add a little shine using a brush and gold paint. Using an almost dry brush, go along the seams between the decorative bricks. You should not apply a lot of paint; it should be practically invisible.
Options for shapes of New Year's fireplaces made from boxes
A false fireplace can be made in various shapes using improvised materials. It all depends on your imagination and the availability of boxes in your home.
How to make a house from paper vines (newspaper tubes)
Let's prepare brown and blue paper tubes. We weave the bottom from brown tubes. We form a pot from blue tubes. On top we weave a roof with a window. We decorate the house with flowers and twigs. Add a braided braid to the door. The decorative house made from paper tubes is ready.
Making bags for aromatic herbs
The described method of sewing bags is excellent for making herbal compositions. Despite the fact that specialized stores offer a huge amount of synthetic desiccant agents that repel moths and other insects, many housewives prefer to use environmentally friendly products.
They sew bags for herbs with their own hands and put a special mixture of several types of herbs into them. The most commonly used combinations are lavender, mint, thyme, rosemary, cloves, cinnamon and cedar shavings. In this case, it is not crushed materials that work better, but seeds, stems and leaves. To the delight of many girls and women, bags for home use require much less attention than gift wrapping. Here you can use leftover fabric, from which it is no longer possible to sew any large product. Ordinary strong threads can serve as ties. Considering that no one will look inside, the seams do not need to be overlocked.
How to sew a bag with drawstrings: step-by-step master class
This and the next paragraph will describe the process of sewing a bag. All steps are provided with photographs, so it will be difficult for even a beginner to get confused.
- First of all, you should overlock the rectangle around the entire perimeter.
- Next you need to fold it in half (or combine two identical rectangles if you couldn’t cut out one large one) and sew it on the sides. In the case when two parts are combined, three sides are sewn: the sides and the bottom. When performing this stage, you should pay attention that the stitching ends at a distance of 5-6 cm from the edge.
- Overlocked but unstitched edges are folded inward and smoothed with an iron. To avoid deforming the fabric, you can first baste the hem.
4. Then the edge is folded in half and attached to one part of the bag. How this is done is shown below.
Attention: many craftswomen inadvertently sew a seam on two parts at once.
Then you have to rip it apart, so you need to immediately bend one edge. At the last stage, the tape is threaded through the holes formed. That's the whole story about how to sew a bag with ties.
Making ties
In the event that the craftswoman was unable to find ribbons that match the color or structure, she will have to sew the ties herself.
To do this, cut out a ribbon three centimeters wide (the length depends on the size of the bag). Sequence of further work:
- Fold and hem the edges. The fold should be at least one centimeter, and the stitching should be laid very close to the edge.
- Next, the strip of fabric is folded in half and ironed.
- When you unfold it, you can see a clear fold line. Both edges are folded towards the center and smoothed in this state. If this is difficult to do and the tape constantly unrolls, you can baste the seams and remove the basting after ironing.
- The workpiece is folded along the ironed fold and stitched. Here you also need to try to get the seam as close to the edge as possible.
Now the plot is ready. It is threaded into gift bags and knots are made at the ends.
This is optional, but helps prevent tape loss. It should be noted that sewing organza ties is an extremely difficult and thankless task. It is better to decorate organza bags with purchased ribbons.
Winter house made of cotton pads - applique for kids
For the New Year, you can make applications from colored cardboard and cotton pads. We cut out houses from colored paper and glue them onto cardboard. We cut the disks in half and place them on the houses as a roof. We draw a tree trunk with branches and complement it with round disks. We decorate the picture with snowflakes cut out with a figured hole punch. Similarly, you can make the second option with multi-story buildings and a purple background.