How to make a nut cracker with your own hands
In the fall, when it’s time to collect walnuts, many people wonder how to make a homemade walnut cracker. Peeling nuts with a hammer is not very convenient and takes a long time, but a hand-made mechanical nut cracker is quite capable of effectively coping with the task.
On the Internet you can find many diagrams and designs of homemade nut crackers. Some of them will require wood to make, but stronger structures are better made from metal. How to make a nut cracker with your own hands will be discussed in this review of a construction magazine.
DIY nut cracker
Autumn is in full swing, which means it's time to harvest all sorts of crops. On our website you will find many different devices for processing crops. These include juicers, presses, feed cutters, etc. Today we suggest making a nut cracker yourself.
By analogy with the video of one American, we will try to do something similar.
The author of the video talks about how he created the machine and its detailed structure, albeit in English, but after watching the video, you can easily and simply understand how this machine works.
Operating principle of the nut cracker:
nuts are sprinkled on top. They fall between the shaft and the wall (bar), breaking apart and falling down. A drill or milling cutter can be used as a motor.
Homemade nut cracker for chopping hazelnuts
However, even in solving these issues, home-made masters are ready to help. And in this review, we’ll look at how to make a homemade nut cracker for chopping hazelnuts.
The first step is to make an improvised wheel from nuts, with the help of which you will chop hazelnuts. To do this, take 14 nuts and weld two identical gears from them.
We connect the two gears together and screw a long bolt into the central nut. We screw in two more bolts along the edges, and cut off everything unnecessary. We fix it by welding.
Main stages of work
At the next stage, the author cuts out two plates from sheet metal and makes a housing from them, inside of which there is a gear wheel made of nuts. The long bolt in the central nut acts as a shaft.
Next, we weld a piece of metal strip to the body of the nut cracker, at the bottom of which you will need to attach a homemade clamp (like on a meat grinder) to fix it to the table.
At the last stage, all that remains is to make a receiving funnel from thin sheet metal. We install it on top of the body.
Then all structural elements must be cleaned and painted, after which we proceed to assembly.
The nut cracker can be easily adjusted to accommodate different nut sizes by increasing or decreasing the gap between the gear and the inner wall of the housing. And to speed up the process of chopping nuts, you can use an electric drill.
You can watch the video below for details on how to make a nut cracker for cracking hazelnuts with your own hands. This review is based on a video from the YouTube channel Rough Hands and Unusual Ideas.
Did you like the article? Subscribe to the channel to stay up to date with the most interesting materials
How to make a nut cracker with your own hands
So, let's start making.
We create a small box, sheet thickness from 2 to 4 mm. Wall size: two plates 120x250 each, with studs welded to them. And accordingly, the second pair: 200x250 in them we drill holes for the studs.
At the bottom of the box there is a shaft mounted on bearings (everyone can have their own shaft size). It is also necessary to make a calibration bar.
Using the adjusting screw, we change the distance of the bar to the shaft, so you can adjust the machine to different sizes of nuts.
The shaft was ordered externally. It was turned and milled to the specified dimensions. Bearings and axle boxes were purchased at the store to match the shaft size.
Next, watch a video of how a DIYer creates a machine for crushing nuts.
Now the principle of operation of the nut cracker:
Place the nut under the handle and press. The size of the nut can be any, here I have not limited it in any way!
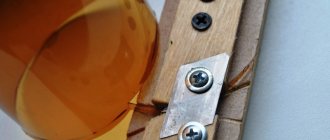
Photo: wooden nut cracker in action Photo: wooden nut cracker Photo: wooden nut cracker
If you liked this idea for making a nut cracker, then using this guide, you can make one for yourself.
And subscribe to the channel!
All the best! Photo: wooden nut cracker
DIY nut cracker video
After the machine is ready, it is necessary to make a bunker - a receiver for filling nuts. It can be made from sheet iron, 0.3 mm thick, or simply by taking a 5 liter plastic bottle and cutting off the bottom.
It is also necessary to think about how the machine will be securely attached to the container where the crushed nuts will be poured.
Please remember safety precautions when using this machine.
How they created, improved, and also more detailed dimensions of the nut cracker can be found on the channel Barber of the Lame Yosyp
Source
Hello DIY friends, today I would like to show you how to make a nut cracker from wood. The nut cracker is designed for both large nuts and smaller ones. The stroke of the handle is limited, and therefore the nut shell bursts, but the kernel itself remains intact. A nut cracker makes it easier to peel nuts from their shells. The nut cracker is made of hardwood and will work for a long time. Making a nutcracker is an interesting and creative process. A homemade nut cracker will be a good gift.
The productivity of this nut cracker is much higher than that of screw nut crackers.
List of tools and materials:
- Walnut wood - Beech wood - M6 bolt with nut - Beeswax for impregnation - Aluminum tube - Electric plane - Drill or drill press - Sandpaper of different grits - Circular saw - Jigsaw - Drill bits - Good wood glue - Clamp - File - Saw metal
Let's get started, take a walnut board 25 mm thick and mark a workpiece measuring 46 mm by 220 mm on it
We cut out the workpiece using a circular saw and plan it on all sides with an electric plane
On the resulting workpiece you will need to cut two rectangles measuring 15 mm by 40 mm using a jigsaw.
Next, I found an old beech parquet in the “needed garbage”, it has a thickness of 15 mm
From paper we cut out such a template with a width of 40 mm and a height of 55 mm
We trace our template on the parquet; we will need two such blanks
We cut out the blanks using a jigsaw and sand them well with sandpaper
Next, we take and glue all the blanks with wood glue and wait for it to dry.
Well, while the glue dries, let's start making the handle. On exactly the same parquet we draw by eye, a handle approximately 220 mm long
Cutting the handle blank using a jigsaw
We thoroughly sand the handle using sandpaper, and also drill a hole with a diameter of 8 mm in the workpiece.
We make a recess in the handle for smaller nuts such as hazelnuts, almonds and others.
From an aluminum tube with an outer diameter of 8 mm and an inner diameter of 6 mm, cut out a sleeve 15 mm long
Insert the sleeve into the hole in the handle
After the glue on the large workpiece has dried, remove the clamp and see that there are protruding parts left
Sand the workpiece with a file and sandpaper
After we have sanded the workpiece, we drill two 6 mm holes
Using a drill and sandpaper, we make such a chop with a diameter of 6 mm
Coat the chopstick with wood glue and glue it into the lower hole in the workpiece
After the glue has dried, cut off the chop with a metal saw and sand it with sandpaper.
Using a jigsaw, we give the workpiece a shape that is convenient for holding in the hand
We drill out the hole by 6 mm to 12 mm.
Take an M6 bolt 35 mm long and a nut for it
We twist the two parts with a bolt and check the stroke length of the handle
To remove the hole in the workpiece, using a drill and sandpaper, grind out a chopper with a diameter of 12 mm and cut it into two parts
Glue the chopstick into the hole with wood glue
After the glue has dried, cut off the chop with a metal saw and sand the area with sandpaper
We impregnate the nut cracker with natural beeswax, it will give the workpiece a finished look and protect it from moisture
Source
Homemade nut cracker for chopping hazelnuts
Hazelnuts are very tasty and healthy, but chopping them by hand is very time-consuming and tedious. Especially if you need to process large volumes.
However, even in solving these issues, home-made masters are ready to help. And in this review, we’ll look at how to make a homemade nut cracker for chopping hazelnuts.
The first step is to make an improvised wheel from nuts, with the help of which you will chop hazelnuts. To do this, take 14 nuts and weld two identical gears from them.
We also recommend reading the article: a device for quickly cracking hazelnut shells.
We connect the two gears together and screw a long bolt into the central nut. We screw in two more bolts along the edges, and cut off everything unnecessary. We fix it by welding.
Main stages of work
At the next stage, the author cuts out two plates from sheet metal and makes a housing from them, inside of which there is a gear wheel made of nuts. The long bolt in the central nut acts as a shaft.
Next, we weld a piece of metal strip to the body of the nut cracker, at the bottom of which you will need to attach a homemade clamp (like on a meat grinder) to fix it to the table.
At the last stage, all that remains is to make a receiving funnel from thin sheet metal. We install it on top of the body.
Then all structural elements must be cleaned and painted, after which we proceed to assembly.
The nut cracker can be easily adjusted to accommodate different nut sizes by increasing or decreasing the gap between the gear and the inner wall of the housing. And to speed up the process of chopping nuts, you can use an electric drill.
You can watch the video below for details on how to make a nut cracker for cracking hazelnuts with your own hands. This review is based on a video from the YouTube channel Rough Hands and Unusual Ideas.
Reinforcement bender made from a connecting rod with a pin and scrap metal
Next post
Tabletop air freshener made from glass bottles
Comments
Site headings
- Aviation
- Auto and motorcycle
- Army and Navy
- Archeology
- Animals
- Health
- Celebrities
- Games
- Interesting
- Internet and computers
- Story
- Space
- Cooking
- Culture and art
- Fashion & Style
- Music
- Science and technology
- News
- Society
- Hunting and fishing
- Policy
- Nature
- Incidents
- Psychology
- Travel and leisure
- Entertainment
- Religion
- Rodnoverie
- Needlework
- Garden
- Homemade products
- Sport
- Construction and design
- Secrets and myths
- Economy
- Humor, jokes
- Sandbox
latest comments
Afraid!? )))) So we are doing everything right.
I would advise buying a wardrobe whose frame is made of 18 mm thick chipboard. He would.
My sister always had low blood pressure, but somehow she didn’t really notice it. And one day L.
crest is a diagnosis.
When I play Topigr, I would like us to be completely free of problems, and not bess.
Now there is so much that is inexplicable in the world that mom, don’t worry.
Pindos, admit that you have not been to the moon and we will leave you behind.
Basque is the same banderlog as Rotaru! Basques, why aren’t you going to perform in Crimea and Donbass?
Do it yourself wooden nut cracker
The private house I rent is rich not only in apple harvests, because of which I had to squeeze apple juice. With a plot area of eight acres, it can accommodate five walnut trees growing on the borders of the plot.
Therefore, in addition to apples, in fruitful years, a large number of nuts also appear. Much is given away, the rest is consumed locally.
The classic local device for cracking nuts is a hammer with a plank. The speed and convenience of splitting leaves much to be desired.
Of course, you can buy pliers for cracking nuts, but this is certainly not our way. In search of the design of manual nut crackers, we dive into the vastness of the Internet. After some time, there is a page for creative nutcrackers, on which, among others, there is this photo
This design is more than suitable for us, since it does not require complex equipment for its implementation - a jigsaw and a drill are enough. In addition, the nutcracker was originally supposed to be made of wood, so the above option is more than satisfactory for us.
We begin work with the main detail: a sketch of the handle of the nut cracker. We lay a sheet of A4 paper in front of us, take a pencil with an eraser and take a sketch of the pen by eye, adjusting the outline at our discretion. We attach a sample of the nut to the drawing, look - everything seems to suit us in terms of dimensions.
Then we cut out the sketch along the contour to use as a template when cutting.
We glue the paper template onto a piece of solid oak furniture board 18 mm thick. At the same time, we position the template so that the handle consists of almost one shield die.
After waiting about ten minutes for the glue to dry, we cut out the handle along the contour of the template using a jigsaw.
We lay out the cut out handle on the board of the shield, apply the board as an imitation of the base of the nut cracker, and thus mark the eyes for the pin under the handle.
The marked eyes are ready for cutting.
After cutting out the eyes, we put the parts of the eyes and handles together and check that the contours match. In any case, there are small deviations, since the jigsaw file, when cutting in a curved direction, often bends and bevels the side edges.
We cut out the base for the nut cracker from the same furniture board. We connect the parts together. We are making changes to the design along the way. Not being able to make cylindrical parts from wood (of course, it would be possible to make a small lathe based on a drill), we replace the handle axis and pins from the model design with metal elements.
We replace the pins securing the eyes to the base with pieces of a hundred and fifty millimeter nail (diameter 6 mm). We drill through holes, insert the pins with glue, and cut off the protruding parts with a grinder.
We use an M10 hairpin as an axis for the handle (we had scraps on hand). The washers and nuts are screwed onto the stud rather by inertia of thinking; in this case the stud works to shear.
Of course, the product still requires smoothing of edges and sharp edges, grinding and opening with oil. But there is no time to do this, it’s time to try the device for its intended purpose!
Gas key
You can use a gas wrench to shell nuts without damaging the core or using too much force. It is most convenient to crack the shell with a small-sized wrench, but a large one will do. First you need to adjust it to the size of the nut, move the metal jaws to the required distance and place the nut between them.
Then press lightly on both sides so that the shell cracks, but the kernel remains intact. Once you get used to this tool, you can quickly peel a whole mountain of nuts in just a few minutes.
Homemade mechanical walnut cracker
You can make a homemade mechanical nut cracker for cracking walnuts with your own hands from leftover materials. To facilitate shell breaking, the lever principle is used. The device looks interesting, the lever is quite large and even a child can handle the job of peeling the nut from the shell. The nut shell cracks easily and quickly.
You can buy it ready-made in this online store.
The base of the nut cracker is a pine board. The dimensions of this part are length 66 cm, width 95 mm and thickness 25 mm. Corners and edges should be rounded. The handle of the device is made of steel tube. Its length is 64 cm. The outer diameter of the pipe is 25 mm.
Assembly
The center of the hole is marked at a distance of 25 mm from the end of the tube. A through hole with a diameter of 8 mm is drilled from the center of the pipe along the diameter. The center of the second diametrical through hole is designated perpendicular to the line of the hole. The distance from the end of the pipe to the center of the second through hole is 110 mm. The diameter of the second hole is 4 mm.
Craftsmen buy inventions from the best Chinese online store.
Cut two steel corners from the profile according to the markings. After the corners have been cut, all sharp corners and edges need to be rounded. This operation is performed with an electric sharpener, but you can also use a file.
After processing to get these dimensions. The height of the bottom shelf is 35 mm. The height of the shelves is 72 mm higher. Bracket length 55 mm. Material 3 mm thick. The centers of two holes are marked on the shelf.
The distance from the bottom plane to the center of the hole is 20 mm. The distance from the left edge of the corner to the center of the hole is 15 mm. The distance between the centers of the holes is 25 mm.
Holes with a diameter of 6 mm were drilled along these centers.
On the larger shelf, in the center, at a distance of 12 mm from the edge, mark the center of the hole. A hole with a diameter of 8 mm is made in this center. The same holes must be made in the second corner. The corners are connected to the lever using a 70 mm long hex bolt, the length of the smooth part of the bolt is 26 mm and the length of the threaded part is 37 mm. Bolt thread M8.
The M8 wing nut is screwed on. The wing nut may not be tightly tightened. The lever should move freely. The lever is located in the center of the board. The offset from the edge of the board to the corner is 10 mm. An awl is used to mark the centers of the holes for attaching the corners to the board.
DIY electronics in a Chinese store.
The corners are placed on the protruding parts of the screws and secured with four M6 nuts. The nuts are tightened with a wrench. The head of the furniture screw should be recessed into the wood on the back side of the base.
Two metal parts were removed from two faulty hydraulic front shock absorbers of the Lanos car. The first part is connected to the lever. To do this, use a screw 50 mm long, M4 thread.
The screw is inserted into the hole of the part. The screw head must be recessed. The screw is inserted into the hole in the lever and secured with a washer and an M4 nut. The second part is attached to the board through a wooden spacer.
Its width is 35 mm, thickness 10 mm, length 95 mm.
The position of the lower metal piece on the board is determined using a walnut. In a certain position, the backing is attached to the board using screws. Through the hole, the metal part is attached to the lining and base. For fastening, use three wood screws 32 mm long. All screws are tightened until they stop. The heads of the two screws should be recessed into the wood.
Limiter
The stopper is necessary to ensure that your fingers do not hit the base while cracking the nuts. The dimensions of the limiter are length 90 mm, height 35 mm and thickness 25 mm. The distance from the edge of the board to the stopper is 26 cm.
The limiter is attached to the base with two screws 50 mm long. They are screwed from below through pre-drilled holes. The screw heads must be recessed into the boards.
In the lower position of the lever, the distance between two metal parts is 10 mm. After control assembly and operation check, the nut cracker is disassembled. Wooden parts are puttied and painted. The corners and pipes of the handle are cleaned and painted.
After drying, the nut cracker can be assembled into working condition. A PVC garden hose is placed on the free end of the lever. The length of the hose is 30 cm. The material of the hose reduces hand discomfort when touching metal.
The walnut nutcracker is fully assembled and ready to use.
Another article discusses the method of fastening wood.
Large screw nutcracker
This is a nutcracker that is simple and enjoyable to use. It breaks sturdy nuts with a smooth turning action and offers elegant control. The design is a combination of wood and metal construction. You can hold it with one hand with the nut in place and turn the screw with the other hand. It is very convenient and pleasant to use. This Instructable section describes the basic design details involved in making this Nutcracker style.
Step 1: Materials
You will need a large screw and a small piece of strong wood. The nut crackers shown here have large 3/8-16 stainless steel cap screws that are 3″ long. The pressure pad for the end of the screw was made on a lathe from 3/4″ diameter stainless steel rod and 3/4″ diameter brass rod for the threaded sleeve.
Step 2: Shaping the Body
The rectangular body of the nutcracker measures approximately 3-1/2" by 3" by 1-1/2". The nut pocket was gouged out with a 2-1/8" diameter Forstner bit to a depth of 1-1/4"; this left a 1/4” thick wall behind the cavity, adding much needed strength to the cracker. The round shaped cracker started with a slightly wider piece of wood to leave a slightly thicker wall around the nut pocket; After boring the cavity, the workpiece was cut and ground to a round outline. This shape fits the palm very well. The hole for the brass bushing is centered so that the axis of the screw is in the center (that is, front to back and side to side) of the nut pocket. Threaded bushings are shown in the photo.
Step 3: Processing the Large Screw
The end of the screw was turned to the smaller thread diameter for a short length as seen in the photo. These particular screws have very finely machined smooth and almost polished threads to ensure the nutcracker operates smoothly. The pressure pad is made of 303 stainless steel. The concave tapered end helps lock and hold the nut in place when turning the screw.
Step 4: Processing
Step 5: Applying Beeswax
Treatment with a mixture of beeswax and pure mineral oil. When used, this compound is warmed slightly until it becomes very soft and almost liquid, then rubbed in. After some time, the piece is polished with a soft cloth. If the wood is sanded nice and smooth, this beeswax finish gives the piece a nice velvety finish.
Step 6: Final Assembly
Step 7: Two Finished Nutcracker Nutcrackers
How to peel walnuts so that the kernels remain intact
Nuts are used in the confectionery industry. They are added to salads and also eaten as a separate dish. In order to always have high-quality kernels at home, you need to know how to choose, how to store and how to crack walnuts.
How to select and store walnuts?
The nuts begin to ripen at the end of August. Some fruits fall from the tree on their own, while others need to be removed. To collect nuts for storage, it is recommended to choose dry weather.
The fruits are cleaned of any remaining peel and leaves and lined. They should dry within 4-6 days. If weather conditions do not allow drying outside, then they are laid out in the house.
It is recommended to lay the fruits on a fabric or paper litter.
Drying is one of the important stages of storage. If you neglect it, the walnut fruits will quickly begin to mold. After drying, the shell is re-inspected. It should be free of chips, cracks, mold and other defects. It is recommended to store nuts in fabric bags or paper boxes at a temperature not lower than +10°C, but not higher than +15°C.
To make the right choice when purchasing, you need to pay attention to the absence of:
- mold;
- cracks;
- dried dark peel.
The fruits may be empty inside, so when purchasing, you should pay attention to their weight. A few nuts can be shaken near your ear. If the kernel clicks on the shell, it means the fruit was stored incorrectly.
Preparing to clean the product
If you need to shell a large number of kernels, then preliminary preparation will help simplify the work. Small nuts need to be separated from large ones. The hard-fruited variety also requires additional processing. An oven in which the nuts are kept for 10 minutes at 200°C will help to simplify the process of separating the shells from the kernels of such fruits.
How to clean and with what. Cleaning Rules
Peeling a walnut from its shell can be done in several ways. Some raw material processing methods make it possible not only to separate the contents from the shell, but also to preserve the integrity of the kernels as much as possible.
With a knife
You can crack the walnuts using a kitchen knife. To do this, you need to insert the sharp edge of the cutlery into the small hole, which is located on the flattened edge. With a gentle movement, the knife is turned, and the shell splits in half. The nucleus is also often divided into 2 halves. With practice, you can learn to separate the shells without damaging the contents.
The disadvantage of this method is that it is not always possible to open the nut with a knife. Only part of the shell may break off, and through the resulting hole it will not be possible to get the kernel. If unsuccessful, you can use another cleaning method.
With a hammer
You can break the integrity of the shell using a hammer. The impact force must be correctly calculated, otherwise you can get a large number of fragments and damage the core.
To properly crack nuts with a hammer, it is recommended to use a wooden board. You can additionally make a recess in it. It is designed to simplify the process of getting the job done.
Once the fruit is placed in the cavity, it does not need to be held with the other hand. This safety technique helps prevent damage to your fingers and will also prevent scattering of shell fragments.
door
One of the simple methods, which is suitable not only for chopping walnuts, but also, for example, hazelnuts, is to use a door. It is not recommended to take this method as the main one, and resort to it only as a last resort. Using the door this way will quickly lead to damage and deterioration of its appearance.
The fruit must be placed in the space between the jamb and the door leaf. The nut cannot be held in your hands; it is placed on the floor. As the door closes, the shell will begin to crack. To prevent debris from getting into the product or the need for cleanup after cracking, it is recommended to place the nut in a cloth bag.
Nut cracker
To crack the nut without damaging the kernel, you should use a nut cracker. The tool consists of 2 metal plates fastened together, which have a recess. They put a walnut in it and begin to squeeze the hands. Under pressure, the shell bursts.
To protect your eyes and prevent debris from being scattered around the room, you should cover the walnut fruit with the palm of your other hand while chopping.
The nut cracker can be made of wood. It has the shape of a mushroom. There are 2 holes in the leg. One is located on the side, the fruit is placed in it, and on top there is a press (in the shape of a spiral). To get the kernels and shells, they begin to turn the top cover. As it descends, the shell is compressed and loses its integrity.
Pliers
You can chop walnuts at home using pliers. The principle of their operation is similar to a nut cracker, but if the fruits are large, they may not fit into the space between the jaws of the working tool. Pliers can also be used as a hammer.
Softening with water
To make the shell easier to crack and the kernels not to be damaged when removing the plates, it is recommended to place the fruits in a saucepan or other suitable container, and then pour boiling water over them (no need to boil). After half an hour, drain the water and place the fruits on a napkin. After drying, you can start chopping. For this you will need a knife. It is inserted into a small hole and carefully turned.
Salt water can help remove husks, shells and plates from nuts. For 1 liter of liquid you will need 1.5-2 tbsp. salt. The fruits are kept in brine for an hour and then placed on a napkin. When the remaining liquid has drained, you can start chopping. To do this, use a knife or fork.
Softening using an oven or frying pan
You can soften the shell using high temperature. To do this, place the fruits of the walnut tree on a baking sheet and put them in the oven for 20 minutes. They begin to crack the shell after it has cooled. You can use a hammer or nut cracker.
If there is no oven, the heat treatment procedure can be carried out in a frying pan. The fruits are fried for 30 minutes. It is necessary to stir them all the time, otherwise the kernels may deteriorate (burn).
After heat treatment, the shell becomes fragile and its integrity can be broken with your hands. To do this, take 2 fruits in one palm and squeeze.
Chopping nuts on a bottle
To maintain the integrity of the kernels, you can try separating them from the shell on the bottle. To do this, it is recommended to take a champagne container or other similar container made of thick glass. A thick-walled bottle is less fragile, so it is less likely to be damaged when the shell is cracked.
Additionally, you will need a hammer. You can take a kitchen one, which is designed for beating meat.
It is recommended to carry out the procedure for separating the shell from the kernels while sitting. The bottle is clamped between the legs. The nut is placed on the neck so that its sharp side faces the bottom, and its flattened side faces up.
The shell must be carefully struck several times with a hammer. When it cracks, it can be removed without damaging the core.
Unusual and different nutcrackers for nuts
Surely, everyone loves nuts - some walnuts, some pistachios, some hazel, some all in a row. But it’s unlikely that anyone enjoys cracking nuts. Inventive designers are working to make this process more enjoyable and convenient. I offer a selection of the most interesting tongs for cracking nuts)))
Elegant solution in high-tech style)))
This is probably the most elegant option - it was invented by Christopher Kuh . All you need to do is put the nut inside this aluminum tube (with the cutters inside) and turn its halves in the desired direction. And there is no need to knock, risking hitting your fingers)))
They put it in, twisted it, poured it out, ate it)
The best master at cracking nuts is, of course, the squirrel. And designers never tire of playing with this theme. The squirrel is made of heavy metal so as not to be cracked instead of a nut.
Scoiattolo Nutcracker by Andrea Branzi
This thing reminds me of some kind of weapon of the medieval inquisitors - complex, iron, terrible) Five points of contact ensure rigidity and reliability, increasing the chances of getting a solid core.
Reed's Rocket Nutcracker
A very portable and practical nutcracker called the Drosselmeyer Nutcracker , it has a double action lever inside and a container for collecting the shells. Truly a very convenient device - the nut splits easily without flying apart, it is convenient to use and clean. Made in Sweden, technology patented.
This thing is called the Nambe Eclipe Nut Bowl and is a massive wooden bowl with tongs. Designer Wel Young is its author, and it costs a lot - $75, thanks to the unique alloy (from which the tongs are made) and the design of the heavy bowl (from acacia).
Hillary Nutcracker is a nutcracker with the face and “character” of Hillary Clinton. In addition to direct functionality, it carries features of subtle American humor)
This snub-nosed nutcracker is called Cracky. According to the authors (designers Jack Mankiewicz and Odin), the profile belongs to half dolphin and half Tyrannosaurus rex. A nut of any size and any “breed” will fit into this mighty mouth (except, perhaps, coconut).
Antique style Victorian Crescent Moon Ironwork Nutcracker . This cool nutcracker is cast from iron and works to last.
An unusual fish-shaped nutcracker is called Fish Nut Cracker. Made of stainless steel, designed by Philippi designers.
Here's an interesting thing - Bruno Christesen Nutcracker , nutcracker and anti-stress in one item. The nut is placed on a metal platform, covered with a rubber dome and cracked when struck with a fist. In fact, everything is easy, no great force is needed thanks to the well-thought-out metal design.
Hammer
The procedure is best performed using a small hammer weighing about 200 g and a stable platform for chopping (for example, a wooden block).
Place the nut on the platform and hit it lightly with a hammer. The place of impact should not be at the joint of the shell, but along the side. As a result, a small crack will appear at the junction.
Now turn the nut with its nose up and give it another light blow. Then carefully separate the shell from the kernel and remove the partitions. This life hack allows you to get undamaged “butterflies” using a very ordinary hammer.
Video:
DIY industrial nut cracker
This is the hardest part and took me the most time because by nature I like to make my projects complicated.
I started with a regular steel pipe and welded some plates on it to cap both ends. I then drilled smaller holes in the now closed sides that matched the shaft I was using.
Electronics for DIYers in a Chinese store.
In the video you will see that I used a lathe to cut down the diameter of the shaft. This is an unnecessary step. I did this because the pipes were imperial diameter and my bearings were metric, so the pipe was a few millimeters too thick for the bearings and I needed to trim it down.
The shaft must be strong enough because relatively large forces can be generated when the nut cracks. I then welded some cross members to the roller so it could grip the nuts more effectively.
If you don't have all that metalworking tooling, you could probably skip the hardwood roller and you could screw some metal plates onto it to act as teeth for gripping the nuts.
The plate is just 2 thick pieces of rolled stock (5mm thick) that I welded together to get the required width. It must be strong enough to withstand the forces required to crack the nuts without bending. I used some primitive DIY hinges to hold the plate in place. Behind the plate is a large screw that pushes the plate forward to set the desired operating gap. I also added another screw for the anti-rattle system. It's basically a screw screwed into the plate itself and you use a nut to tighten the plate back so it doesn't rattle or bounce as the nuts crush, causing unnecessary noise.
The frame is made from 12x12cm steel section and is full of holes and welded add-ons because I made it up as I went along.
I used a speed reducer from a broken pellet stove which was driven by a small motor to feed the pellets into the stove. It had a 1:14 gear ratio which was ideal for keeping the revs and torque down.
I made a rough coupling so that I can disconnect the gearbox if I need to use it anywhere else during the year.
In the video, I powered the machine using a cordless drill, and as you can see, there was more than enough power to get the job done.
I was planning on installing an induction motor on the speed reducer, but I abandoned the idea as the planter was quite powerful and the machine only runs a few days a year, so I saved the money earmarked for the motor to buy more tools.
I screwed everything to an old wooden board and the car was done. The machine can eat several kilograms of walnuts per minute. I have not yet experienced this with other nuts. Now we can crack all the walnuts very quickly. Source
Category: Do it yourself!
Travertine and Venetian plaster: DIY decor
Decorative plasters have recently become very popular in apartment decoration. In this review we will tell you how to make a decorative coating yourself without spending a lot of effort.
Despite the fact that the technology is quite accessible and understandable, you will still need a little experience working with decorative materials.
The following materials are required for work: quartz primer for porous surfaces, decorative lime plaster, decorative paints, masking tape.
- brushes;
- sandpaper;
- metal trowels;
- spray.
You will also need to prepare a small piece of plastic entrance mat (or a special sponge), a regular roller with a small pile and a foam roller with the smallest pile.
Main stages of work
First, prepare the surface and mark the area with masking tape. At the top and bottom we will mark the boundaries of the strips of future travertine.
Now you can carefully roll up the entire surface using quartz primer (it resembles water-based paint with an admixture of quartz inclusions; you can also consider the option of concrete contact). Due to its rough surface, the plaster layer will adhere very well.
After the soil has dried, you can begin applying plaster. Apply in small vertical sections 1-2 mm thick and several stripes wide.
Next, using arbitrary movements (jabs) using a sponge, we will create the texture of the future decor. After half an hour, you can smooth out all the protruding edges of the plaster using a trowel.
The next day, using sandpaper and a block, smooth out all remaining unevenness. Use a brush to clean all the grooves in the texture.
Using a foam sponge, apply a base dark layer of decorative paint. This must be done carefully, without missing a single section.
After another day, you can apply the base, the lighter part of the decorative paint. We apply it with a foam roller with minimal lint. And then we smooth it out with the flat of the trowel, having previously sharpened its edge a little.
Having obtained a matte surface, you can begin to iron the entire surface. We carry out the same procedure with light paint and now try to achieve a glossy surface with the entire surface.
We highlight the vertical textured stripes with a dark base layer and smooth everything down to a glossy surface.
Without waiting for it to dry, carefully remove all the masking tape and enjoy the work done! Details can be seen in the video below. The material was prepared based on a video from the YouTube channel “ Vladislav Demchenko ”.
Do-it-yourself nut cracker: made of wood, electric and mechanical
How to make a nut cracker with your own hands
In the fall, when it’s time to collect walnuts, many people wonder how to make a homemade walnut cracker. Peeling nuts with a hammer is not very convenient and takes a long time, but a hand-made mechanical nut cracker is quite capable of effectively coping with the task.
On the Internet you can find many diagrams and designs of homemade nut crackers. Some of them will require wood to make, but stronger structures are better made from metal. How to make a nut cracker with your own hands will be discussed in this review of the construction magazine samastroyka.ru.
DIY wooden nut cracker
The nut cracker is made of wood and has a rather interesting and original design. To make it, it is enough to use a two-centimeter edged board, from which you will need to cut out a shaped handle and a base for the nut cracker using an electric jigsaw.
You will also need two side bases, to which a handle will be screwed through a pin. It must be made in such a way that when pressed, it crushes the walnut peel with its protrusion. It goes without saying that on the base, in the same place, there should be a small recess for the nut itself.
Mechanical nut cracker made from pipe
A more complex design, which is much stronger than a wooden one, is the design of a mechanical nut cracker. As in the first case, this homemade nut cracker consists of a base, which can be used as a board or MDF board.
Two metal corners are screwed to the board at a short distance from one edge, and a movable handle is fixed between them on a pin. A small nut stop is attached to the handle itself, and exactly the same one is installed on the wooden base. The advantage of a mechanical nut cracker of this design is much greater stability and ease of use.
How to make an electric nutcracker
If you need to peel a large amount of walnuts and doing it by hand is problematic, then you can make an electric walnut cracker with your own hands. Such a nut cracker is capable of splitting a bucket of nuts in one go, and more, it all depends on the size of the loading hopper and the length of the metal rollers.
The design of an electric nut cracker is as follows:
An electric motor from an old washing machine is quite suitable as a motor for a nut cracker.
Rollers can be made from two identical pieces of metal pipe, an inch and a quarter or more. Thus, you can quickly peel a walnut at home, and then sell it for a much higher price or eat it all winter while preparing delicious pies.
How to split hazelnuts and quickly peel them
Hazelnut is a small nut with a fairly strong shell. Often, attempts to crack it with a regular hammer or heavy stone result in the nut slipping out and the hammer injuring your fingers. In addition, when you try to split hazelnuts at home in this way, a lot of fragments scatter throughout the kitchen, which is not very pleasant.
p, blockquote 1,0,0,0,0 –>
In fact, there are many other, more convenient and safer ways to open hazelnuts.
p, blockquote 2,0,0,0,0 –>
Methods for deshelling
In the industry, special equipment is used for chopping hazelnuts, which allows you to obtain tons of clean kernels within a few minutes. To quickly and easily clean hazelnuts at home, you can use:
p, blockquote 3,0,0,0,0 –>
- Garlic press.
- Nut cracker.
- With pliers.
- Gas wrench.
- With pincers.
- Hammer for beating meat.
- A homemade device made from two bars and a loop.
- With a regular hammer and electrical tape.
If you don’t have the right tool at hand, you can make a nut cracker yourself.
p, blockquote 4,0,0,0,0 –>
Garlic press
Most models of garlic presses are equipped with small recesses on the handles, which many use for chopping nuts. However, the diameter of the hazelnut is so small that if it is placed between these grooves, the nut will not be crushed.
p, blockquote 5,0,0,0,0 –>
p, blockquote 6,0,0,0,0 –>
But this does not mean that the garlic press should be put aside. Take one nut, place it inside the device (where garlic cloves are usually placed), and crush it. The advantage of this method is that the shells remain in the garlic press and do not scatter throughout the room.
p, blockquote 7,0,1,0,0 –>
Nut cracker
Today on sale you can find a variety of models of devices designed for cracking nuts. Many of these models are able to cope with all types of nuts, while some can chop only small nuts, or, on the contrary, only large nuts. This must be taken into account when purchasing a nut cracker.
p, blockquote 8,0,0,0,0 –> Universal customizable nut cracker from Aliexpress.
Advice: For those who love nuts and buy them quite often, it is better to purchase a convenient and high-quality device for cracking nuts that will serve its owner for many years.
Pliers
If you don’t have a garlic press or a nut cracker at hand, you can use regular pliers. Since the diameter of the hazelnut is small, it can easily fit into the recess that is provided on the metal part of the pliers.
p, blockquote 10,0,0,0,0 –>
p, blockquote 11,0,0,0,0 –>
It is necessary to wrap your hand around the working part of the tool, fixing the nut in the desired position, and applying a little force, squeeze the pliers so that only the shell cracks.
p, blockquote 12,0,0,0,0 –>
The advantage of this method is that the broken shells end up in the hand and do not scatter around. The disadvantage is the danger of pinching the skin of the hand with pliers. You need to be careful when peeling hazelnuts from their shells.
p, blockquote 13,0,0,0,0 –>
Gas key
If you have a gas wrench at hand, you can safely use this tool. The key is set to the minimum position, a hazelnut is inserted between the jaws, the shell is clamped and cracked. This method is distinguished by its simplicity; it allows you to crush the nut without damaging the kernel itself (as happens when using a hammer, you just need to adjust the key to the desired distance). Using a gas key, you don’t need to put in much effort at all, which is especially important if a child or woman decides to eat the nut.
p, blockquote 14,0,0,0,0 –>
p, blockquote 15,1,0,0,0 –>
Ticks
Another tool that can be used for other purposes is plumbing pliers. Using this tool, you can control the degree of compression, which allows you to keep the kernel intact, and also use the key to crack both hazelnuts and walnuts or other types of nuts.
p, blockquote 16,0,0,0,0 –>
p, blockquote 17,0,0,0,0 –>
Meat hammer
Another tool that can be found in almost every kitchen is a meat hammer.
p, blockquote 18,0,0,0,0 –>
p, blockquote 19,0,0,0,0 –>
Compared to a regular hammer, it is equipped with spike-shaped protrusions that will prevent the nut from slipping out, which means it does not need to be held with your fingers. Although this eliminates the risk of injury, this method has several disadvantages:
p, blockquote 20,0,0,0,0 –>
- The impact scatters fragments throughout the kitchen.
- Loud noise created when struck with a hammer.
Tip: To avoid making too much noise, it is recommended to break the nuts on a kitchen towel folded several times.
Hammer and tape
For those who are accustomed to using a traditional hammer to crack nuts and do not want to change their habits, there is good news. You can easily protect your fingers from impacts, and the room from flying shells, with a regular roll of electrical tape. Simply place the electrical tape on the table and place a nut in its center.
p, blockquote 22,0,0,1,0 –>
p, blockquote 23,0,0,0,0 –>
Homemade device for chopping hazelnuts
You can make a device for cleaning hazelnut shells with your own hands. To do this, it is enough to connect two bars with a loop, inside which two holes should be made corresponding to the diameter of the nut.
p, blockquote 24,0,0,0,0 –>
This device will allow you to easily and quickly peel hazelnuts without damaging their kernels.
p, blockquote 25,0,0,0,0 –>
p, blockquote 26,0,0,0,0 –>
Methods for peeling
When preparing desserts and some other dishes from hazelnuts, it is necessary to carefully clean it from the thin shell covering the kernel. In order not to waste a lot of time and effort, it is better to prepare in advance and find out how to easily and quickly peel hazelnuts.
p, blockquote 27,0,0,0,0 –>
To remove the thin skin from the kernels, you will need to dry them in the oven at 150ºC for 10 minutes and cool. Then the cooled nuts are poured into a paper or cotton towel, wrapped and gently rubbed with your hands. As a result, all the skins will easily separate from the kernel.
p, blockquote 28,0,0,0,0 –>
p, blockquote 29,0,0,0,0 –> p, blockquote 30,0,0,0,1 –>
Instead of a towel, you can use a fine mesh sieve. You need to pour the nuts into it and rub them with your hands on the walls of the sieve. As a result, all the peel will remain at the bottom.
DIY nut cracker
DIY nut cracker
Peeling a walnut so that it remains intact is quite problematic, since most often the kernel splits into many parts. In many cases, a hammer and various devices come to the rescue, helping to greatly simplify the cleaning of walnuts.
However, it is problematic to peel many nuts with a hammer, and in this case it is also difficult to maintain the integrity of their kernels. Therefore, many people will find such a device useful on the farm as a homemade nut cracker; making it at home will not cause any serious problems.
What to make a homemade nut cracker from
You can make a nut cracker with your own hands from various materials, so the design of the nut crackers can be different. But the essence is the same: some pressure must be applied to the nut shell to crack it. There should also be a limitation so as not to crush what is behind the nut skin.
In most cases, homemade nut crackers are popular because their operating principle is reminiscent of a vice or a hand-held device in the form of a press. Its design includes the following elements:
In fact, a do-it-yourself nut cracker has a fairly simple and uncomplicated design. You can see it with your own eyes in the pictures, but you can learn more about making a nut cracker from the second half of this article on the construction site https://remstroisovet.ru.
So, you should start making a nut cracker with your own hands by making a base, which can be used as a thick edged board. On one side, along the edges, you will need to attach L-shaped holders cut out of metal for the handle of the nut cracker.
On one side, the holders are screwed to the board using self-tapping screws, and in the other, upper part, one hole should be made for a long bolt, which will hold the handle itself.
The handle of the nut cracker is best made from a half-inch pipe, about 60-70 cm long. At one edge of the pipe, a through hole should be made, the same diameter as the hole in the L-shaped holders. It is designed to fix the nut cracker handle to them using a bolt, two washers and one nut.
At a distance of 10-15 cm from the holders, it is necessary to provide two seats for nuts. They need to be made of durable materials that can, under some pressure arising from the handle, act on the skin of the nuts.
Cleaning walnuts. How to chop fruits at home?
Dealing with several walnuts is quite simple - just crush them with the first object that comes to hand. But if you need to clean a large crop harvested at the dacha, then the task becomes much more complicated. You also need to be careful not to crush the fragile kernel. There are many ways to accomplish this task.
How to remove the skin from the fruit before removing the shell?
Fresh nuts that have fallen from the tree have thick skins. Color can vary from green to dark brown. The easiest to clean is the yellow-green one, as it can be easily removed. If the peel is green and unripe, then the nut can be put aside for a while.
If the shell dries out too much, cleaning will be much more difficult.
Removing the peel involves the following steps:
- Removing the shell by hand or with a knife. It is advisable to use gloves to avoid brown marks on your hands.
- Removing mucus and peel residue from peeled nuts. To do this, you can take a metal brush and then wash the crop in water.
- Drying.
How to prepare the product?
After harvesting and removing the skins and husks, do not immediately begin opening the nuts. First, a disinfection procedure is performed, since a lot of dirt and various bacteria accumulate on them. Before eating, young nuts are prepared for cleaning in one of the following ways:
- Washing with laundry soap. The shell is wiped with a soapy sponge, and then everything is washed off with warm water.
- Processing in soda solution. A tablespoon of baking soda is diluted in 1 liter of water. The nuts are soaked for a few minutes and then washed.
- Scalding with boiling water. The nuts are poured with boiling water for 1-2 minutes, after which they are washed in cold water.
After applying any processing method, the fruits must be dried. They are laid out on paper napkins and left for 2 days. After this, you can start opening the nuts.
Drying can be completed in 2 hours. To do this, the fruits need to be kept in the oven at a temperature of 100 degrees.
List of devices for injecting at home
The most popular devices used at home:
- Hammer.
- Wire cutters.
- Pliers.
- Board with a notch.
- Knife.
- Bottle.
- Nut cracker.
Each device is widely used. But they have different effectiveness. They also differ in how safe they are for the core.
Hammer
It is very easy to break the shell with a hammer, but you need to calculate the force of the blow. Otherwise, the core will be damaged, and the fragments will scatter in different directions.
To properly open the fruit into two halves, it is advisable to use a wooden kitchen hammer. The tree will absorb some of the energy.
If you hit too hard, there will be fewer fragments.
Wire cutters
The lips of the nippers are located along the junction of the shell halves. After this, you need to start gently pressing the handles. The nut is very easy to clean in this way.
This method has a big drawback. Very often one of the halves completely falls apart. In this case, the core is severely damaged.
Pliers
Pliers are used to quickly peel nuts . But this method does not involve pricking the shell. Usually the core is not preserved intact.
The kernels will not be damaged only if you break off the shell very carefully and in small pieces. When splitting in this way, the nut is placed in pliers, after which squeezing movements are performed.
Because of this, the shell begins to burst. You need to be careful not to pinch the skin on your fingers.
Board with notch
For this method you need to prepare a thick board. A recess is made in it so that a medium-sized nut fits almost completely there (about ¾). After this, take a wooden rolling pin, press it against the board and roll it over the nut. Opening a nut this way is quick and easy, but this method requires proper preparation.
If the recess in the board is made too small, it will be difficult to clean. Also, due to this splitting, the core is severely damaged.
Knife
You can chop walnuts with a regular knife, but you need to be careful so that it doesn’t fall off and hurt your hand. You need to insert the sharp edge into the small hole located on the flattened side. After this, the knife is turned and the shell is divided into two halves. Often the core also splits in half.
With a little practice, you can learn how to peel a nut without damaging the contents. But this method has a drawback. It is not always possible to clean with a knife. In some cases, only a small part breaks off, and through the small hole it is impossible to get the core. We have to use some other method.
Bottle
To keep the kernels intact, use the method of separating the shell on the bottle. It is necessary to take a thick-walled one to reduce the likelihood of damage. A champagne bottle works great. This method will also require a hammer.
The bottle is placed on the table or clamped between the legs (the procedure is performed while sitting). The nut is placed on the neck so that the flattened side faces up and the sharp side faces the bottom. You need to hit the shell with a hammer several times. Once it cracks, it can be easily removed without damaging the core.
Nut cracker
A nut cracker is a special tool consisting of two metal plates with indentations. It allows you to peel the nut without much damage to the kernel. The fruits need to be placed in the recesses and the handles should begin to be squeezed. The applied pressure breaks the shell.
How to break with your hands?
A person with strong hands will be able to do without additional equipment. Two nuts are placed in the palm and squeezed. But you need to be careful, as it is easy to pierce the skin with a small fragment of the shell.
How to properly split into a butterfly without damaging the kernel?
If you need to chop a small amount of nuts, leaving the kernels whole, then it is best to use a bottle. This is a simple method that requires no preparation. For large volumes, it is more effective to use oven drying. To do this you need:
- Preheat the oven to 200 degrees.
- Place the nuts on a baking sheet and place them in the oven for 10 minutes. Longer drying is not necessary, as the nuts will become too hard.
After cooling, the shell will become pliable. With light blows of a hammer it will crack. The core will be intact.
How to quickly break?
The fastest ways to split are to use a hammer or knife. Such a tool is always at hand in any home. And these devices do not require skill.
How to take it out so that the kernels remain intact?
The easiest way to keep the kernel intact is to use the bottle splitting method. This method allows you to get not only halves, but also preserve the entire nut (from four slices).
How to carefully remove the skin after removing the shell?
The skins of nuts contain a lot of tannin , which is an allergen for some people. It also leaves a bitter taste. Therefore, many people prefer to remove the skin. There are the following ways to do this:
- The container with nuts is filled with boiling water. After 15 minutes, most of the skin will come off. Everything else can be removed with a small knife.
- The kernels are heated in the oven for 10 minutes at a temperature of 200 degrees. After this, they are rubbed with their hands in a towel. The dried skin peels off easily.
Homemade nut cracker
Hello to all DIY lovers!
As you know, nuts are very good for health. They are recommended for regular use by people of all ages. Moreover, it is the whole nuts that are not pre-cracked that are truly useful, which it is advisable to eat immediately after cracking.
Therefore, it is best to buy whole nuts and crack them yourself. But this is where a problem often arises.
While small nuts such as hazelnuts or hazelnuts can still be cracked quite easily, large and strong walnuts can sometimes only be cracked by a healthy and strong man.
This is also facilitated by the fact that most nut crackers are hand-type, that is, they are driven by the muscular force of the hand, which again is not a problem for a physically strong man. But for physically weak people, such as women, children and the elderly, this often presents an insurmountable problem.
What to do in this case. You can, of course, take some heavy object, for example, a hammer and crack nuts with it. But on the one hand, this is not a very clean procedure, since shell fragments fly all over the room, and on the other hand, it won’t take long to get injured if, say, you accidentally hit your finger with a hammer.
Faced with this problem, I decided to make homemade walnut tongs. Moreover, the peculiarity of the design of my tongs is that they are activated not by the hand, but by the entire hand, by pressing on the lever, which makes it easy to crack nuts with such tongs even for physically weak people.
Below is a drawing of these tongs.
From the drawing I think everything is quite clear. However, I want to explain some details in more detail.
So holes No. 1 and No. 2 in the drawing are intended to rearrange the axis of the upper arm depending on the size and hardness of the nuts. The fact is that I noticed that walnuts can be divided into two groups. The first group consists of fairly large nuts with a not very strong shell. Hole No. 1 is intended for them.
The second group is smaller nuts with a very strong shell. Hole No. 2 is intended for them, which allows you to crack fairly strong nuts by reducing the section of the upper lever arm between its axis and the place where the nut is cracked.
In addition, by moving the upper lever to hole No. 2, you can chop smaller nuts, such as hazelnuts.
Materials and tools
For production we will need:
Tricky tongs for chopping seeds and almonds Mingrizhiguang home (steel, 9*5.5 cm)
Price: from 94.88 rub. (check price and discount)
Seller's reliability: excellent!
Delivery within Russia: free!
Tired of ruining your teeth on pistachio shells or seeds? Then try special tongs. They are designed for such small jobs. Just place it in the hole and squeeze the handles. Click and you're done! The tongs look like scissors; they are made of durable steel and measure 9*5.5 cm.
Buy yourself a couple of these things in reserve and enjoy nuts without harming your teeth!
Be sure to order nutcrackers on Aliexpress with free delivery throughout Russia.
It’s a good thing, the seeds click perfectly. Let's see how long it will last.
GAMER
Pine nuts crunch well, but you need to get used to it. I haven't tried other seeds yet.
PloHish
Excellent!
PloHish
View on AliExpress:
Knife
If you don't have the right tools on hand, use a small paring knife. Its tip must be inserted into the hole located in the center of the blunt end of the nut, and then the knife must be turned with force. As a result, the nut will split into two parts, after which carefully remove the contents of the shells.
The disadvantage of this method is the inability to remove intact kernels. In addition, careless movement can lead to injury. Therefore, it is recommended to use a knife only in cases where you need to peel no more than 1-2 nuts.
Homemade nut cracker based on a meat grinder
Most housewives store old, Soviet meat grinders in pantries, replacing them with more modern and functional electrical appliances for grinding meat. And some craftsmen make quite productive and convenient devices for chopping walnuts from old meat grinders. Additionally, the meat grinder is equipped with a conical basket, which allows you to chop nuts of any diameter without preliminary calibration.
When the nut falls into the basket, it takes on the desired position and splits when the handle of the device is rotated.
Video: