Paper gun with bullets
A craft paper gun that shoots bullets is suitable for labor lessons in 4th grade.
To make it, you need to prepare the following materials: thick paper of three colors (for example, yellow, green and pink), a standard set of stationery for creativity (glue gun, tape, scissors, ruler, pencil), a thin elastic band and a spring (can be pulled out of the pen ).
Opportunities for a garage or small workshop
In an ordinary garage, most often there is no opportunity to turn around and organize a full-fledged production of any products or homemade products.
After all, to make a really cool thing, you may need special equipment: for example, a lathe, a drill press, and perhaps even a CNC milling machine.
However, even in a small home workshop or garage, you can create various useful homemade products. These can be devices to make work easier (stands for angle grinders, mini lathes made from electric drills, compact universal work tables, etc.), or some parts and mechanisms.
For example, on the site you can find a detailed visual process of manufacturing various trolleys for transportation, as well as electric hoists, winches and other lifting devices that can make it easier to work with heavy and large parts (mechanisms) or building materials.
Having made all the devices necessary for the work (these are cutting machines, grinding machines, etc.), you can start making specific homemade products: knives or forged elements. In general, even in the garage there is an opportunity to do something useful for yourself.
The procedure for creating a pistol model
Using the prepared materials, follow these steps step by step:
- Using a pencil, twist a tube from a sheet of paper (along its diagonal), secure its shape with tape, and remove the pencil;
- Using the first paper tube, twist another one and pull out the first one. You now have two tubes of different diameters. A larger diameter tube is intended for shooting;
- secure the shape of the second tube with tape, trim the edges;
- similarly, make a couple more tubes and fix their shape with tape;
- from the prepared tubes, make blanks of the following length: for the barrel - 2 tubes 15 cm long each, for the handle - 7 tubes 5 cm long each, for the trigger - 1 tube 8 cm long;
- fold 7 tubes 5 cm long diagonally and glue them one by one to form a handle;
- glue a tube 8 cm long to the top of the handle, leaving a 3 cm protrusion on the right side, forming a trigger;
- Glue two 15 cm long tubes together and secure them on top in the form of a trunk.
Chicks
Making little chicks in a nest is very simple. Everyone has Kinder Surprise capsules on hand. There can be three or five, at your discretion.
Make paws, wings, a scallop and a beak from plasticine. Place the important parts in their places and place the finished chicks in the nest.
The nest can be a small basket of twigs. They can also be placed on a branch.
Assembling the firing structure
To bring the pistol into combat condition, it is necessary to correctly complete the assembly of the structure:
- make a couple of thin yellow tubes;
- bend one of them in the form of a horseshoe and insert one end into the trigger tube, and the other into the tube underneath, cut off the excess. Get the trigger;
- Make a release from the second tube by inserting one edge of it into the handle tube second from the top, and fasten the second edge to the bottom of the barrel;
- make a pink tube, give it the shape of a ribbon and cover the handle with it, leaving an open hole at the back;
- remove the trigger hook from the upper tube of the handle and install the spring in the hole so that it rests against the tube at the back of the handle, and insert the trigger back;
- make another yellow tube, secure the shape with tape and cut it evenly along the edges;
- make a small hook from one edge, hook an elastic band to it and glue;
- insert the prepared tube with an elastic band into the lower barrel and push the elastic band forward, securing it between the tubes;
- make paper bullets of the appropriate diameter, load the gun and shoot.
A detailed master class will help you understand the creation of a pistol in more detail.
Materials for work
What are homemade products made from? To answer this question, you need to carefully examine the places where unused, but once very necessary things are often accumulated: a balcony, an attic or other areas fertile for creativity.
Anything that has been lying around unnecessarily for months can be given another life: a torn jacket, a glass pot, plastic, leftover building mixtures, beads or tiny glass.
Creating crafts for the home from all sorts of things with your own hands is not only exciting, but also profitable for the family budget. Let's look at examples of what can be recycled in a new way.
The most convenient and affordable option is paper and all its derivatives: cardboard, wallpaper or gift wrapping. Just a little tape - and your idea has already been translated into reality.
This is how compact things are often obtained, for example, decor for living rooms, glasses for stationery, notepads or boxes. More dense options include: a Christmas fireplace, doll houses for children, tinsel for the Christmas tree or animal feeders.
Such homemade products do not last long and are small in size.
Cords, whips and even wire are a great frame for lamps, various plant holders, key rings and wall key holders. Their essence is the same: everything hard is for giving shapes and guiding ribs, soft thin threads are for finishing touches.
The use of textiles is rightfully considered a popular method in the handmade industry, and especially in transforming outdated sofas or armchairs. Anything will do: old jeans, worn-out carpets, or even mismatched socks.
From fabric you can make all kinds of covers, seats for chairs, thermoses for teapots or mugs, knitted flowerpots, decorative paintings and much more. All you need is fabric, an interesting idea and a little skill.
Recycling disposable tableware or bags is a noble cause. This is how furniture, toys, curtains and, of course, interior decorations are created.
The new use of pet bottles is not only a beauty in the house, but also a plus for your karma and the environment. Cut pet bottles are so pliable that when heated they take any shape from curls to voluminous balls.
Metal profiles, brick, concrete, plaster and everything that remains unused after renovation can easily be turned into: a flower bed, a rack for garden utensils, flowerpots for outdoor plants, barbecues, benches for the garden and many more interesting objects.
Of course, such items have impressive dimensions - a bed made of water pipes can outshine a cute pot of plastic flowers. But the main thing in our idea is the benefits that crafts made from any material bring.
Rainbow among the clouds
This craft is suitable for labor lessons with schoolchildren in the 3rd grade. It's not difficult to do.
For convenience, prepare in advance a workplace, colored cardboard, scissors, plain cotton wool, glue and a stapler.
Unusual pumpkin
Step-by-step instructions on how to make crafts will be useful to you in creating this unusual figurine from a garden pumpkin.
Step-by-step instructions for creating a craft
Primary schoolchildren will even be able to make the “Rainbow among the Clouds” craft on their own. To do this, follow all steps of the instructions:
- take 7 sheets of cardboard, the colors of which will match the colors of the rainbow;
- make strips of different lengths from the prepared sheets, with red being the longest and purple being the shortest;
- fold the stripes in order corresponding to the arrangement of the colors of the rainbow;
- use a stapler to fasten the paper strips together;
- Roll 6 balls from cotton wool;
- Glue three balls of cotton wool on each edge of the rainbow. Rainbow is ready!
Making a stand for dishes
A beautiful and cozy home is the desire of every housewife. This does not always require a maximum financial investment. You just need to try to make beautiful crafts with your own hands. It’s best to make things useful for the home with the whole family.
A very useful and easy craft for the kitchen is a stand for dishes. The main material for its production is jute.
To make a craft, you need to use the following list of materials:
- jute 1 cm thick (10 m);
- glue gun;
- scissors.
All that needs to be done is to lay the rope around the circumference, lubricating it with glue. When the desired size of the stand is reached, the end of the rope is cut and glued to the base.
The home craft is ready!
Paper craft ideas
There are many different ideas for activities with younger students.
In the photo of crafts that are recommended for use in labor lessons, you can look at some of them and try to reproduce them yourself. For example, crafts “Binoculars” and “Rose”.
Note!
- Plasticine figures: TOP-120 photos of plasticine figures with step-by-step instructions + simple diagrams for children
Crafts for boys - TOP-180 photos of design ideas for crafts for boys. Simple DIY craft plans + step-by-step instructions
- Application from geometric shapes: TOP-110 photo options for applications for children. Schemes for creating types of applications with your own hands
Original pot made of shells
You can also make beautiful crafts from shells at home. One of them will be a flower pot. Let's figure out how to make this unique thing suitable for everyday use.
- Broken shells should be wrapped in a cloth and crushed into small pieces using a hammer. The craft should be done by an adult, not a child.
- The pre-selected stand must be coated with glue, then sprinkled with ready-made shell crumbs.
- Whole shells should be fixed to the outside of the pot with glue.
- After time has passed, when both parts of the craft are dry, you should connect them to each other.
A beautiful flower pot is ready! To strengthen the layer of shells, it is allowed to apply varnish or golden paint to them.
Procedure
Make room to work on a flat surface, place the necessary materials nearby and begin the process:
- cut out two circles from cellophane and stick them onto the prepared hollow cylinders using tape in the form of glass;
- Paint the bottom and top of the cork black, cover the outside of it and the cylinders with green paper with black stripes, as in the picture;
- connect the cylinders in the shape of binoculars, secure briefly with an elastic band, then remove it;
- glue the plug between the cylinders;
- Secure an elastic band or rope to the sides of the cylinders. The “Binoculars” craft is ready!
Flower pots
This garden craft in the form of a plant pot has a beautiful appearance. Options may vary.
So, you can cut a small hole from the side of the bottle and pour soil into it. A living flower is placed in the prepared container. After planting, it is better to hang the pot on the wall.
- Cardboard crafts - 135 photos of useful and beautiful crafts for children and adults
- Unusual crafts: we make cool and original things from scrap materials (120 photos and videos)
- Crafts from stones - 145 photos of examples of stone crafts from minerals and pebbles
The plant in its original form can be left outside or moved into the house. Several pots combined give a very unusual and beautiful effect.
Bookmarks
Those who love to read will love original bookmarks made of colored paper, made by children's hands, as a gift. In addition to bright cardboard, you will need various decorative elements and stationery.
Cut out a strip of cardboard of the required size, decorate it with mosaics, appliqué, beads, wishes, sparkles and other details. The main thing is to put a piece of your soul into your creativity.
DIY funny piggy
This craft can decorate any garden plot with its appearance. To make it you will need plastic bottles of different sizes.
First you need to make the body of the pig. To do this, take a large water bottle and cut off its side. There will be flowers in this place.
Then the pig's ears should be cut out from the cut piece of plastic.
Four 1.5 liter bottles must be used as legs. Their tops are first cut off. The legs are attached to the body of the pig with a wire.
The next step is to paint the piglet pink.
When the paint is dry, you can fill the inside of the animal with soil, and also make small holes on its tummy.
You can grow seedlings or flowers in this craft. All that remains is to place the beautiful pig among the rest of the flower beds in the country house.
Photos of crafts for a labor lesson
Note!
Crafts for the senior group of kindergarten: photos of the best ideas and new products. Instructions on how to make a craft with your own hands- The best crafts for children: instructions on how to make them yourself step by step (60 photo ideas)
- DIY crafts for kindergarten: a review of the best creative ideas for creating beautiful crafts (90 photos)
Wooden office organizer
This model is good because it provides for placing not only pens and paper on the table, but also a mobile phone.
To make it you need wood glue and three rectangular bars 2-3 cm thick, one of which is slightly longer than the others.
Wooden organizer
Tools you will need:
- jigsaw or hacksaw;
- drill;
- bit;
- hammer;
- vice or any load;
- sandpaper;
- pencil with ruler.
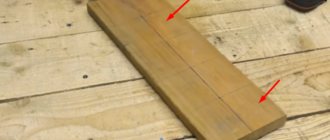
Step 1. On one of the short bars, mark a groove or slot for the phone according to its dimensions.
Marking the slots
Step 2. Using a jigsaw, we cut through the block from the end, hitting the chisel with a hammer and hollowing out the wood between them. We grind the entire workpiece, including the internal surfaces of the slot.
Notching a groove
Step 3. Glue this block with the same one and leave it to dry, holding it in a vice or placing it under a weight.
Gluing
Step 4. Mark the second slot - for paper or notebooks, making a line across the block. We decide on the number and position of holes for writing instruments.
Marking hole positions
Step 5. We saw the glued bars along the transverse line. We select a drill of the required diameter and drill through the holes in accordance with the markings.
Drilling holes
Step 6. Glue the resulting two parts to a long block, aligning them at the ends. There should be a gap between them that will serve as a paper holder.
Connecting elements
Step 7. Decorate the organizer according to your preferences.
Painting in bright colors
Old T-shirt and sheepskin coat
Before you throw away your unwanted T-shirt, you should try making it into a fashionable teen T-shirt.
You can sew a warm vest or a stylish bag from a fur coat.
Touching dolls are made from worn tights.
A coat that has gone out of fashion and become unnecessary will be an excellent material for a dog overall.
How man-made masterpieces are created
Firstly, this is the work of thought, and secondly, if they are not enough, then the Internet opens up, and from there attractive ideas and specific patterns for quilling, origami or kirigami are drawn. Using these methods, unusual paper crafts are formed.
There is a third point to which children are most often inclined: contemplating nature and finding in it clues to simple but amazing creativity. And then a thing that seemed ordinary to someone suddenly takes on beautiful features from the creations of preschoolers.
Of course, it is impossible to do without the participation of adults at this young stage. Including from the prompting of the idea of creativity in the initial stage of children’s interest in needlework, and from specific practical examples of this from the father or mother.
The art of origami has long won a leading place among all kinds of crafts. For all its simplicity, paper products can decorate even an elegant interior.