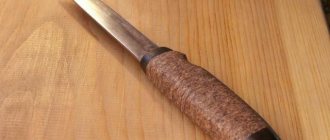
Remembering my childhood, my favorite pastime was playing with a knife. A small folding knife of the “Squirrel” type underwent unimaginable tests. Throwing at all objects, testing them and the knife for strength, brought a lot of fun. Having matured, I realized that for such entertainment I needed a stand for throwing knives.
DIY target for throwing knives.
Types of throwing knives: drawings with dimensions
There are a lot of types of throwing knives, they are mainly divided by weight:
- Ultralight weapons, also called knife darts or arrowheads, cannot fly long distances; when launching them outdoors, it is worth considering the direction and strength of the wind, which can change their trajectory. For this reason, they are often used for home workouts.
- With light throwing knives it is not difficult to master the initial technique. When using heavier bladed weapons, there is a greater load on the wrist during the swing, which can lead to damage to an untrained hand. The length of light weight knives ranges from 16-22 cm, where the blade length is 12 cm.
- Throwing knives of medium and heavy weight categories are used for long-distance throwing. They are more suitable for people with the appropriate equipment.
Models of throwing knives are divided into 2 large types, the names of which speak for themselves:
- sports;
- military.
Flip Knife.
Folding or Flip knife. You can get it very often from many cases. It is quite common among players, its price fluctuates at an average level. Drawings of knives from CS GO are a great opportunity to evaluate its design. Yes, yes, it is not only foldable, but also very foldable!
Drawings of throwing knives
It is important to understand that each knife is designed for a specific use. A butcher, fisherman or hunter will use different tools. Therefore, when choosing a drawing, you should first decide on the ultimate purpose of the application. You also need to pay attention to the size so that the tool is convenient to use. You can borrow some part using one picture you like, or an entire element from a finished drawing. The template will help turn your idea into reality.
The idea of making a throwing knife with your own hands can take a lot of time and effort. Drawings of various models will help you make your choice. It is most convenient to print the finished sketch on a photo with a scale of 1:1.
Gadfly
Throwing knife "Gadfly", drawings of which are also easy to find, are made of Zlatoust steel. An original find in the design is the use of a cord as a handle.
Drawing of the Gadfly knife.
Hit
From the same) there is another throwing knife called “Strike”. Characteristic differences are the increased size and weight, which allow it to be thrown over longer distances.
Knife drawing Strike.
Cobra
Cobra throwing knives are manufactured in the city of Zlatoust. Drawings of knives of various models are publicly available on the Internet, but today only one is officially produced. The developers chose to produce one, but well-designed and balanced knife. Factory produced items are painted red to make the item easier to find.
- Reviews and articles >> Japanese kitchen knives: types and purposes
Cobra knife drawing.
How to use drawings
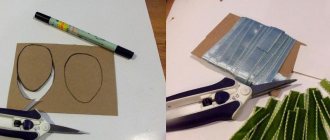
You need to print the sketch onto cardboard or thick paper. The scale of the drawing and the knife should be one to one. If another person will make the workpiece, the requirements should be detailed and the dimensions indicated on the drawing. Cut out a stencil and lean it against a sheet of metal, circle it with a center punch or marker. Make the workpiece with a margin of 1-2 mm and then remove the excess with a file or other tool.
Methods for making a knife handle
According to the method of fastening, handles are divided into:
- Overhead - used if the shank, on the size of which the profile of the entire handle depends, is wide enough. Such a handle has two mirror-matching parts, which are usually secured with through metal rivets. This mounting method is most often used for knives in which the blade has a relatively large length and width. In kitchen knives, the dimensions of the working part can reach 30 cm in length, so the pads best provide a working grip both in length and width.
- Mounted - are used in knives whose blade shank is small in length and width. This handle is most often made of solid wood, comfortable for complex and long-term work, durable, lightweight and resistant to mechanical stress, including impacts.
Preparing steel for a knife
It is worth starting the manufacturing stage only after you have finally decided on the type, shape of the blade and handle. You also need to prepare in advance the materials and tools that you will need during work:
- steel sheet with a thickness of 4 millimeters;
- sandpaper;
- hacksaw for cutting metal;
- special vice;
- cardboard or thick paper;
- scissors;
- a simple pencil and marker;
- file.
A suitable material for making a throwing knife is steel, but it is not always possible to find a sheet of suitable thickness and size at home. If the steel intended for the workpiece has irregularities and is thick, then forging will be required. This process is complex and requires a specialist blacksmith. If you do not have the opportunity to turn to one, it is better to purchase ready-made steel with the necessary characteristics. At home, it is unlikely that you will be able to forge a sheet with the same thickness, without pits, cavities and cracks.
Whichever method you choose, the end result should be a flat steel plate 4 mm thick, possessing the qualities of the future product. We determined the shape at the previous stage, but it’s worth clarifying this point: you can make a throwing knife at home with notches, protrusions, or make holes in them. But experts advise abandoning additional elements and intricate shapes if the product is being made for the first time. The finished blade should fit comfortably in the hand, but not be too large or, conversely, small.
Sport equipment
Sports equipment must be of good quality. The athlete’s results will directly depend on this. In knife throwing, it is also very important to have the right equipment. For competitions, blades produced only by production methods are used.
If you are choosing a throwing knife for yourself, consider the following criteria:
- the weight of the product affects the range of throws and the force of penetration into the target;
- balancing affects the behavior of the blade in flight and the accuracy of the hit;
- size and shape also affect the rotation of the blade;
- The quality of the steel affects the durability of the knife.
Properly selected equipment will help you in learning to throw a knife and speed up this process.
Throwing knives.
Selecting handle material
Even the most carefully thought-out blade shape loses half its effectiveness with an uncomfortable handle. The quality of throwing depends on this part: whether the knife will fly in the intended direction, whether the hand will get tired depends on the handle. The material used to make it must be durable to withstand constant impacts and pleasant to the touch. It should not freeze to the skin during frost and should not absorb moisture.
Throwing knife with a handle made of wood.
The handle of a throwing knife has the following requirements:
- light weight;
- easy to process;
- availability.
The material that meets the specified requirements is wood that has undergone the necessary processing. The blanks are made from dense types of wood: maple, ash or apple.
- Kizlyar Extreme Knives (Russia)
In the blanks, which have already been given the desired shape, small holes are made for fitting onto the shank. Holes in the rectangle are made at the stage of connecting the handle and blade. This is due to the fact that the transverse dimensions of the shank can change during the manufacturing process.
Materials and tools
Popular types of wood such as walnut, cherry, beech, oak and birch are considered the best for making knife handles, both in texture and availability. After processing, such wood has a beautiful and smooth surface that is resistant to moisture and chips and scratches.
For all its positive qualities, wood is a rather capricious material. For work, you should select workpieces whose humidity does not exceed 12-15%. Material with a very low moisture content can crack both during the machining stage and during use of the finished sample.
Impregnation is a very effective means of treating wood. To protect the finished product from moisture and give it a finished look, linseed oil drying oil, natural-based varnish, and highly purified mineral oil are perfect. Impregnation is performed as the last stage of processing, after sanding with fine-grained sandpaper. To achieve the best effect, it is good to have turpentine, wax and rosin on hand.
For the mounting method, two-component epoxy adhesive is used. Epoxy resin mixed with wood chips is the best mixture for attaching the shank. If the overhead method is chosen, the rivets are best made from soft non-ferrous metals. You can also purchase ready-made rivets. For manual processing, the minimum set of tools should include: chisels, vices, rasp, files and needle files. To cut wood, you can use a hacksaw with a metal blade. If you have a power tool at hand, things will go much faster. The ability to handle a chisel can be well complemented with a jigsaw or electric drill, then the result can be achieved with minimal time.
DIY instructions
Basically, the production of any type of knife occurs using similar technologies. Following the subtleties and recommendations will allow you to get a blade no worse than the factory one. But on an industrial production scale, machine labor is used, but in our case everything will have to be done manually.
Standard throwing knives have the following characteristics:
- thickness - 4 mm;
- width - 25 mm;
- tip length - 15 cm;
- handle length - 10 cm.
Taking into account the parameters, we make a drawing and cut out a template from cardboard with a scale of 1:1. We apply this drawing to the already prepared steel plate and trace it along the contour. Then we cut out the steel blank using a hacksaw: you can deviate slightly from the contour - this will delay processing, but will prevent mistakes that often happen due to inexperience.
Steel workpiece processing
As already mentioned, in order to get a quality product, when cutting, it is better to leave a margin of 2-3 mm. You can bring the edges to the intended line after we receive the finished workpiece. To carry out this work, you can use any convenient and familiar method: bars, sandpaper, files. You need to get a blade thickness of 4 mm. It is better to lay this out when selecting or forging a steel sheet.
Steel blank for throwing knife.
Blade sharpening
We move on to this stage only after the workpiece has taken on the desired shape and thickness. A good throwing knife can only be obtained by following the technology. The sharpening process takes place from top to bottom, while the sharpening itself is carried out only to the middle of the narrow edge of the blade. Triggering movements are carried out over the entire area of the abrasive used; work must begin with coarse grains intended for rough sharpening. We work alternately, first with one side, then with the other, doing the same manipulations.
After this stage, we get a knife whose tip is not yet sharp, since the descent was carried out only to the center of the blade. Now, using a thinner abrasive, we shape and refine the cutting edge, gradually reducing its grain. The final stage is polishing.
Product assembly
We have a ready-made steel blade with a bare tang and prepared wooden handles for the handle. All that remains is to connect everything.
The best option for overhead mounting of the handle would be rivets. If the blade does not yet have holes for the handle, then drill them, placing wooden pads on top. Holes are made to the diameter of the rivets. Next, we connect tightly, recessing the heads of the rivets into the body so that they do not interfere.
- Knife “Bear”: review, characteristics, reviews
All that remains is to learn the throwing technique.
I'm posting a few drawings for now. I will add new ones as soon as possible. Write in the comments what models of throwing knives interest you. I'll do it and post it.
Throwing knife designs: "Cobra"
(Chrysostom). The only model in the company's line of throwing knives. There used to be more. The reason is simple: the CEO of the company is a professional knife thrower. He spent several years developing this model. Cobra is well balanced, inexpensive and colored red (easy to find in the grass).
The drawing shows the main dimensions of the Cobra throwing knife. Blade thickness 5.00 mm. Weight 145 gr.
This is what Cobra looks like live
Buy a throwing knife "Cobra"
Throwing knife drawings: “Gadfly”
(Chrysostom). A distinctive feature of the line of knives with the “Rosarms” brand is the handle wrapped with cord, steel EI-107, leather sheath.
The drawing shows the main dimensions of the Gadfly throwing knife. Blade thickness 5.00 mm. Weight 210 gr.
This is what “Gadfly” looks like live
Buy throwing knife "Gadfly"
Throwing Knife Blueprints: "Strike"
Same . The large throwing knife “Udar” (290 mm) is designed for long-distance throwing.
The drawing shows the main dimensions of the Udar throwing knife. Blade thickness 5.00 mm. Weight 272 g.
This is what “Udar” looks like live
Download the drawings of throwing knives in one archive from the link. And if you decide to make your own stand for throwing knives - read and do it!
How to use drawings?
Print it out, stick it on thick cardboard and cut along the outline. Then place it on a metal plate and outline it with a marker. Then everything depends on whether you have a tool. You can cut it out with a hacksaw, and select the rounded parts with a grinder.
You can also select slopes on a throwing knife with a grinder, make them with a file, or use a belt grinder. Don't put on much beauty. If you have already bought polished factory metal in a store, then you know that after several throws the knife becomes covered with scratches and loses its original appearance.
The most important! Remove all the burrs from the blade and do not sharpen it so that bread can be cut - there is no point, and when you throw with a grip on the blade, you may end up without fingers.
PS In the summer we are opening a knife throwing school with step-by-step video lessons. For subscribers of our store - free. You can subscribe here. You will also receive a gift for subscribing there. Good luck!
The entire line of throwing knives from Zlatoust. We recommend reading the article about throwing knives. From it you will learn about the types and shapes of throwing knives, where you can throw knives and how to make a throwing knife yourself.
And here is more information on how to make a knife yourself.
Types of knives
After preparing the material, you will need to decide on the shape and size of the throwing knife. There are several types of them with individual quality characteristics.
Making a wooden knife handle
In order to make your own high-quality cutting tool or change the outdated handle of a knife that has been used in the kitchen for a long time, you can use one of the proposed methods. To do this, let's look at step-by-step instructions on how to make a handle for a knife using the mounted method, as well as the overhead method using rivets. Having done everything correctly, even a beginner in this matter can achieve excellent results.
Horse handle
- Treat the wood with an antiseptic;
- select or cut a workpiece in which the wood has a uniform texture. To give the required shape and beautiful texture, pay attention to the location of the wood fibers.
- For the blade shank, after preliminary marking, make a hole of a size that ensures its tight and complete fit into the workpiece;
- In a small container, mix epoxy resin and hardener (parts ratio 100:13), add sawdust and place the well-mixed mixture into the prepared slot;
- Place the blade shank into the hole, having previously protected it with electrical tape or wrapped it with mounting tape;
- Place the knife blank as tightly as possible into the frame of the vice, ensuring alignment of the wooden and metal parts until the resin dries completely for at least one day;
- If the future handle should have recesses for the fingers, then it is convenient to make their shape using some kind of plastic mass, then transferring the texture to wood. The workpiece, clamped in a vice to the required form, is finished with a file or sandpaper.
- To perform impregnation as efficiently as possible, the knife handle is placed in oil or drying oil heated to 60-70 degrees Celsius, and then left there for a day. When no small air bubbles are visible on the surface of the liquid, the workpiece is removed and dried. In order for the process of stabilizing the top layer to proceed faster, it is better to dry it under the sun's rays;
- Final processing is carried out with sandpaper with the finest grain possible. Then you should cover the handle with rosin, wax and turpentine mixed in a small container, polish the handle with flannel, and remove the protection on the blade.
Overhead handle
- The wood, pre-treated with an antiseptic composition, is sawn to form two parts of the linings, and their surfaces facing the shank of the blade are processed in such a way as to ensure a tight fit to the metal. Tools for wood processing are used similar to those for the above operations.
- To fasten wooden blanks, rods of the appropriate diameter made of soft metal are selected, and the blanks are marked for drilling.
- Align the holes on the blade shank and on the workpieces and drill.
- Prepare the required number of blanks for rivets, the length of each of which should be several millimeters larger than the size of the finished handle at the attachment point.
- Using metal rods, assemble all the knife parts and make a preliminary assessment of the fit of all parts.
- If necessary, process the handle, achieving complete symmetry of the linings.
- Having finished working with the outer surfaces, process the inner sides after disassembly. After this, apply epoxy glue to the parts adjacent to the shank. To ensure that the color of the wooden parts of the handle is the same color at the joint, you can add a little tinting agent in the form of printer ink to the resin composition.
- Connect all parts of the knife blank, first wrap the knife blade with masking or insulating tape.
- Grind off or cut off the parts of the rivets protruding above the handle.
- Fix the handle in a vice, having previously wrapped it in a soft cloth to prevent dents and scratches and leave it to dry for a day.
- We do the impregnation in the same way as for the mounting handle. You can treat the part with drying oil or oil 2-3 times to make the surface as resistant to moisture and various damage as possible.
- Finish with wax, polish or varnish.
DIY throwing knife: pros and cons
Throwing knives, like any other weapon, have their pros and cons, for example, they are ideal for long-range combat, but are significantly inferior to firearms in terms of effectiveness in defeating the enemy.
The advantages of the product include:
- they are easy to hide under clothes and even in a sleeve;
- such a weapon will never jam, which is important in combat conditions;
- it is possible to avoid direct physical contact with the enemy.
Some models of throwing knives can be used not only for throwing, but also for maximum close combat: they stick into the enemy, and they can seriously injure him.
Belt with knife buckle
Homemade weapons of this type also have several “individual” advantages: it is possible to choose the model/shape you like and decorate the handle (individually). In addition, when you make it yourself, a throwing knife becomes several times cheaper, because various parts that have already been in use are used as the main material.
The disadvantages of this type of bladed weapon include:
- “disposable” - after the throw the fighter remains completely unarmed;
- the engagement distance is short, inferior to firearms;
- conducting close combat is extremely inconvenient.
In addition, it will not be possible to throw a bladed weapon correctly and clearly at a target the first time; you will need to master specific knowledge and undergo quite a bit of practice.
Falchion Knife (Falchion).
Not the most popular knife among Counter Strike players. On the site, the falchion is quite cheap, but has an unusual animation when attacking. The photo shows the skin falchion.
How to make a throwing knife
You can make a throwing knife using the following algorithm:
- Transfer the finished sketch of the knife (pattern) to a steel workpiece. It is better if the starting material is stainless steel.
- Clamp the workpiece with the applied contours of the product in a vice. Cut clearly along the marked lines.
- Use a file to shape the blade.
- Polish the surface of the product on both sides with sandpaper.
The algorithm is simple, but in the work you need to take into account some nuances, for example: correct processing of steel, sharpening of the blade, final assembly of the product.
Watch the video on how to make a throwing knife yourself:
Processing of steel workpieces
The steel blank (already cut out contours of the knife) needs to be processed and ground to the required size. To do this, the metal is clamped in a vice so that the wide part of the product is located closer to the master. The process of turning the workpiece begins from the top side, gradually moving towards the opposite.
Accuracy at the workpiece processing stage is not important. Professionals say that it is enough to sharpen the blade to the approximate thickness according to the parameters. All discrepancies will be corrected during further processing. Working with a steel workpiece takes a long time.
Sharpening a dagger
Sharpening of the steel plate of the dagger (after processing) is carried out from top to bottom and strictly to the middle of the narrow part of the product. The file is used to perform trigger movements; the tool should only pass through the ground side of the knife. As soon as one side is processed, immediately move on to the other. If everything was done correctly, then the “output” will be a knife with a non-sharp tip, because sharpening was carried out only to the middle of the blade.
Using an emery block, the sharpened sides are brought to near perfection, alternately working on one and the other side. The tip of the blade needs to be processed not only from the sides, but also from the top/bottom.
Final assembly
If the throwing knife was made, implying the presence of a full-fledged handle, then the final stage will be the assembly of the product. The handle can simply be placed on the shank, secured with rivets.
If the shank turns out to be much longer than the handle, then the excess is simply cut off. After placing the handle on it, it is recommended to install a nut on the pommel to secure all parts of the throwing weapon. This additional “accessory” can be polished.
Karambit.
This knife is even more expensive than the previous one, and it can also be found even more rarely. The only knife with a reverse grip. His animation is also unique. For many CS Go players, it is a real gem in their arsenal. If you are one of them, we advise you to study the karambit drawing, print out the layout and figure out how to draw a karambit. The illustration proves that the karambit knife is not only effective, but also very beautiful. It’s a pleasure to use karambit; it’s a pleasure to draw a design on it! By the way, you can buy wooden karambit in many stores. Drawing attached.
DIY throwing knife at home from other materials
At home, you can make a throwing knife with your own hands from paper and wood, which are more related to toys. They are not considered melee weapons; they are made according to the same principle as full-fledged ones made of metal, but the algorithm has its own nuances.
Made of wood
If you plan to make a knife from wood, then it is better to use apple, maple or ash - hard woods that can be easily processed. A standard template will come in handy, with the help of which a blank is cut out of a board/die. Next, it needs to be processed with sandpaper or a grinding machine so that the thickness of the blade becomes almost standard.
Using fine-grained sandpaper, the final polishing of the product is carried out, the sharpness of the blade is imitated, and the tip of the blade is “extracted.”
Such a knife must be coated with specific liquids: increasing moisture resistance and preventing cracking. The product can be used to instill primary/initial knife throwing skills in a child. At least, with the help of a wooden throwing knife, it is quite possible to “set up” a throw, to bring the work of the body, hand, elbow bend, and so on to automaticity.
From paper
Knives made from paper can please children who love watching films and cartoons about martial arts. At the very least, their games will be varied and safe. A paper knife is a pattern that is best made from thick cardboard. After cutting out the template, it is simply covered with suitable paint and drawn with a marker or felt-tip pen on the “edges” on the surface.
Watch the video on how to make a knife out of paper:
If a child uses the product too actively in games, then a longer service life of the toy can be ensured by gluing several patterns - the knife will be thicker and denser.
Shadow Daggers.
Button knives from CS GO are even rarer than all of the above. One-of-a-kind knives that come in pairs and have an unusual handle. The coloring of Shadow Daggers (if there is a skin, of course) can be quite varied. A template for drawing a butcher knife is attached.
Gadfly
Throwing knife "Gadfly", drawings of which are also easy to find, are made of Zlatoust steel. An original find in the design is the use of a cord as a handle.
Drawing of the Gadfly knife.
Hit
From the same) there is another throwing knife called “Strike”. Characteristic differences are the increased size and weight, which allow it to be thrown over longer distances.
Knife drawing Strike.
Cobra
Cobra throwing knives are manufactured in the city of Zlatoust. Drawings of knives of various models are publicly available on the Internet, but today only one is officially produced. The developers chose to produce one, but well-designed and balanced knife. Factory produced items are painted red to make the item easier to find.
Cobra knife drawing.
How to use drawings
- You need to print the sketch onto cardboard or thick paper.
- The scale of the drawing and the knife should be one to one.
- If another person will make the workpiece, the requirements should be detailed and the dimensions indicated on the drawing.
- Cut out a stencil and lean it against a sheet of metal, circle it with a center punch or marker.
- Make the workpiece with a margin of 1-2 mm and then remove the excess with a file or other tool.
A few more drawings
Preparing steel for a knife
It is worth starting the manufacturing stage only after you have finally decided on the type, shape of the blade and handle. You also need to prepare in advance the materials and tools that you will need during work:
- steel sheet with a thickness of 4 millimeters;
- sandpaper;
- hacksaw for cutting metal;
- special vice;
- cardboard or thick paper;
- scissors;
- a simple pencil and marker;
- file.
A suitable material for making a throwing knife is steel. But it is not always possible to find a sheet of suitable thickness and size at home.
If the steel intended for the workpiece has irregularities and is thick, then forging will be required. This process is complex and requires a specialist blacksmith. If you do not have the opportunity to turn to one, it is better to purchase ready-made steel with the necessary characteristics.
Whichever method you choose, the end result should be a flat steel plate 4 mm thick , which has the qualities of the future product. We determined the shape at the previous stage, but it’s worth clarifying this point: you can make a throwing knife at home with notches, protrusions, or make holes in them.
But experts advise abandoning additional elements and intricate shapes if the product is being made for the first time. The finished blade should fit comfortably in the hand, but not be too large or, conversely, small.
Selecting handle material
Even the most carefully thought-out blade shape loses half its effectiveness with an uncomfortable handle. The quality of throwing depends on this part: whether the knife will fly in the intended direction, whether the hand will get tired depends on the handle.
The material used to make the handle must be durable to withstand constant impacts and pleasant to the touch. It should not freeze to the skin during frost and should not absorb moisture.
Throwing knife with a handle made of wood.
The handle of a throwing knife has the following requirements:
- light weight;
- easy to process;
- availability.
The material that meets the specified requirements is wood that has undergone the necessary processing. The blanks are made from dense types of wood: maple, ash or apple.
In the blanks, which have already been given the desired shape, small holes are made for fitting onto the shank. Holes in the rectangle are made at the stage of connecting the handle and blade.
DIY instructions
Basically, the production of any type of knife occurs using similar technologies. Following the subtleties and recommendations will allow you to get a blade no worse than the factory one. But on an industrial production scale, machine labor is used, but in our case everything will have to be done manually.
Standard throwing knives have the following characteristics:
- thickness - 4 mm;
- width - 25 mm;
- tip length - 15 cm;
- handle length - 10 cm.
Taking into account the parameters, we make a drawing and cut out a template from cardboard with a scale of 1:1. We apply this drawing to the already prepared steel plate and trace it along the contour.
Then we cut out the steel blank using a hacksaw. You can deviate slightly from the contour - this will delay processing, but will prevent mistakes that often happen due to inexperience.
Steel workpiece processing
As already mentioned, in order to get a quality product, when cutting, it is better to leave a margin of 2-3 mm. You can bring the edges to the intended line after we receive the finished workpiece.
To carry out this work, you can use any convenient and familiar method: bars, sandpaper, files. You need to get a blade thickness of 4 mm. It is better to lay this out when selecting or forging a steel sheet.
Steel blank for throwing knife.
We move on to this stage only after the workpiece has taken on the desired shape and thickness. A good throwing knife can only be obtained by following the technology. The sharpening process takes place from top to bottom, while the sharpening itself is carried out only to the middle of the narrow edge of the blade.
Triggering movements are carried out over the entire area of the abrasive used; work must begin with coarse grains intended for rough sharpening. We work alternately, first with one side, then with the other, doing the same manipulations.
After this stage, we get a knife whose tip is not yet sharp, since the descent was carried out only to the center of the blade. Now, using a thinner abrasive, we shape and refine the cutting edge, gradually reducing its grain. The final stage is polishing.
Product assembly
We have a ready-made steel blade with a bare tang and prepared wooden handles for the handle. All that remains is to connect everything.
The best option for overhead mounting of the handle would be rivets:
- If the blade does not yet have holes for the handle, then drill them, placing wooden pads on top.
- Holes are made to the diameter of the rivets.
- Next, we connect tightly, recessing the heads of the rivets into the body so that they do not interfere.
All that remains is to learn the throwing technique.
PreviousNext