It has long been noted that it is the dog’s wool that is superior to sheep’s in many qualities. Those who do not throw away, but process the material obtained by combing their shaggy friend, act very wisely.
The effectiveness of this raw material has long been confirmed by traditional medicine.
In order to spin dog hair at home, you need to learn this skill constantly, acquiring the skill every day.
It’s wonderful when people know how to make things themselves from valuable medicinal yarn, while reaping great health benefits.
Healing qualities of yarn
Since ancient times, people have known how to properly spin dog hair. Everyone is well aware of the healing properties of yarn. It is widely used in the treatment of joint pain and colds. To obtain greater benefits, it is recommended to wear knitted products exclusively on a naked body.
Yarn in contact with the skin has an irritating effect and leads to blood flow to the sore spot. Gradually relief comes. A wide range of therapeutic and preventive effects of yarn on the human body have been noted.
But there are some peculiarities in how to spin dog hair.
How does dog breed affect wool quality?
Selecting wool for spinning requires taking into account certain factors. For example, the down of a Husky dog is hypoallergenic and odorless. It can be used for people suffering from allergies.
I would like to know how to spin dog hair at home and what breeds of long-haired dogs are best to use. For example:
- Collie is a Scottish Sheepdog.
- Sheltie.
- Samoyed dog.
While any dog's hair has been proven to be beneficial, the difference lies in the length of the fiber and its stiffness.
↑ Wheel assembly
To strengthen the hub with spokes in the rim drum, you will have to select grooves in the drum for the spoke tenons (Fig. 7). To do this, place the drum (ring) on the table, place the hub and spokes on it and try to align the hub exactly in the center of the drum. Then we will pass a cord through the hole in the hub and with its help we will try to ensure the same distances of the hole from the edges of the drum. You can also temporarily hammer a small peg into the hole, throw a loop on it, tied at the end of the lace, pull the lace, measure a distance on it equal to the radius of the drum, squeeze the lace in this place with your fingers and draw the lace around the drum. As a result, the fingers will automatically center the hub, provided, of course, that the length of the lace is equal to the radius of the drum, taking into account the thickness of the peg.
Having centered the hub, on the side surface of the drum we outline with a pencil the contours of the dovetail spikes of all eight spokes. We do this carefully and carefully so as not to move the hub from the drum. And be sure(!) to mark at least one tenon and its corresponding groove with the same icons, so as not to lose this “correspondence” in the future.
When choosing grooves, first saw through their “sides” with a saw. Of course, during the work process, we make cuts along the part of the groove being cut, placing the saw inside the groove as close as possible to the pencil line, but in no case going beyond it. Only the exact fulfillment of this requirement will allow the formation of grooves of the required size, in which the tenons will hold tightly, without play. We cut the “bases” of the grooves with a chisel or chisel. The wheel drum with finished grooves is shown in Fig. 7.
How to choose wool for spinning
It is very important to distinguish between the outer coat (long and harsh) and the undercoat (down).
Down is obtained by combing dogs. To obtain high-quality and durable thread, it is spun by hand using a spindle.
It is advisable to use only dog fluff, but you can also use clipped hair. The resulting material should be well combed.
The longer the fibers, the better. It must be taken into account that in the end the yarn will be stiffer and prickly than that made from fluff.
When combing wool, you can immediately put it into different bags to figure out how to spin dog hair and with what tool. Place the soft fluff taken from the withers and back into one bag, and everything else into the other.
↑ Wheel without turning
It is clear that for each cheek of the rim you will need six corresponding jambs (twelve in total). For the drum you will also have to prepare twelve of your own jambs, since the thickness of our drum consists of two layers. The hub (more about it a little later) is made up of eight semicircles.
Having cut out the jambs, they are carefully trimmed with a plane, trying to ensure that the shape of the jambs matches the shape of the template as closely as possible. First, they begin to form the rim drum. To do this, six drum jambs are placed on the workbench so that they form a regular ring, and the remaining six jambs are laid on these jambs, but so that the middle of the upper jambs is opposite the joint of the lower ones (Fig. 4, a). All that remains is to tighten the upper and lower jambs with screws, as shown in Fig. 4, b, screwing in screws from both one and the other side of the drum. To prevent the jambs from cracking when attaching the screws, be sure to drill holes in the jambs for the screws. To do this, a through hole is made in the jamb on the side of the head of each screw, the diameter of which is 0.2. 0.3 mm is less than the diameter of the “body” of the screw, and a hole with a diameter slightly smaller than the internal diameter of the screw thread is drilled in the mating jamb. And one more important detail. When marking the holes for the screws located along the inner contour of the drum, keep in mind that cavities will be selected in the drum for attaching the wheel spokes. And it may happen that the screw ends up exactly in the location of this cavity. Therefore, it is better to assemble a flat model of a cardboard wheel, and determine on it the relative positions of the drum screws and wheel spokes.
Having assembled the rim drum, take a plane and trim the outer part of it (the drum), and file the inner part. At this point we complete the work on the rim and begin making the hub and spokes.
How to prepare material for spinning
How to spin dog hair at home? A difficult question for those who decided to do this for the first time.
The very first thing to do is to sort through and free the available material from debris and tangles. If there is still dirt left that cannot be removed, then it is better to wash it. To do this you need:
- Place the wool in a mesh bag designed for washing woolen items.
- Place in a container with powder; you can use liquid detergent.
- Pour warm water for thirty minutes.
- Remove wool from container.
- Rinse with plenty of water.
- Hang bags to drain water without squeezing.
- Lay the material out to dry for at least two days.
After this treatment, the wool is combed well. Does not smell of dirt. She is good at teasing with combs and carders.
↑ Crank axle
The cranked axle for the wheel is shown in Fig. 8. The middle thickened part of the axle has a square cross-section and is designed for installation in the hub. As can be seen from the figure, on one side of the axis there is a “knee”, which makes the axis “cranked”. Previously, such axles were ordered from blacksmiths. Nowadays, however, you won’t find masters of blacksmithing during the day! But the problem of the traditional “cranked axis” can be solved by a turner and a milling machine. The first will grind the ends of a 20 mm rod to a diameter of 10.12 mm, and the second will give the thickened part of the axle the shape of a rectangle with a square cross-section.
A hole is hollowed out under the “square” in the center of the hub and the “landing” section of the axle, that is, the “square,” is driven into it with an interference fit. When forming the hole, be extremely precise so that the wheel does not “beat” or wobble when rotating. And if you still cannot avoid runout, try to center the axis by driving wedges under the corresponding edges of the “square”. And in order not to act “by eye,” experienced craftsmen prefer to mount the axle not in a finished wheel, but in a wheel without cheeks (Fig. 9). In this case, the lace already mentioned above will help to align the drum: putting the loop of the lace on the axis, we move its other end along the edge of the drum by touch, checking the “uniformity” of the distance from the axis to the edge of the drum, if necessary, resorting to pegs.
How to comb wool
For easy and high-quality spinning, the dog’s undercoat must be combed out on time and well. Thorough brushing should be done no more than twice a week. The accumulated wool must be pulled manually before spinning, or hand combs are used for this.
In small portions, the wool is placed on one comb and combed with the other comb in counter movements until an air lump is formed. It is necessary to repeat this several times, ensuring that the wool becomes uniform. Then remove the soft fluffy lump from your hair. The resulting lumps are collected into one large tow. Tows are made in different sizes, depending on your convenience.
The combing process will go faster if you use a drum carder.
Looking at the resulting air tow, it becomes clear how to spin dog hair.
What spinning methods are used at home?
Depending on the tool used for spinning, you will need to attach a tow.
There are several methods for spinning dog hair:
- Hand spinning without the use of tools.
- Manually using a spindle and a wooden spinning wheel.
- Using a mechanical spinning wheel with a pedal.
- Using an electric spinning wheel.
How to spin dog hair using at least one of these methods?
It's best to start with hand spinning. This method will help you clearly see how the thread is twisted, how many turns you need to make to get even yarn of a certain thickness and strength.
What types of spinning can be used at home?
Once the dog's hair has been combed and the roving is ready for spinning, you can begin to create yarn.
According to the technique of execution, yarn can be divided into three types:
- Thread based.
- Single.
- Twisted.
Warp spinning is used when making yarn from short fibers. For this you can use cotton or silk thread. During spinning, the fluff curls around the warp, and not vice versa. Care must be taken to ensure that the opposite does not happen. If the yarn is too twisted, you can try to fix it. Rewind the resulting thread several times into balls, back and forth.
You can rewind on a spinning wheel in the opposite direction. It is recognized that spinning with a warp is much easier than without using an additional thread.
Spinning dog hair without warp is used when making yarn from hair from long-haired dog breeds. A single thread is made by pulling the fiber from the tow and twisting it. Such a thread need not be twisted.
To twist means to twist two strands into one.
You can mix strands obtained from different dogs, as long as they match in thickness and preferably in softness.
Knitted yarn differs in volume and looks smoother in a knitted fabric.
↑ Hub
Unlike the rim, we assemble the spinning wheel hub not from jambs, but from halves of a circle (Fig. 5). First, we make a cardboard template for these halves (see Fig. 3, a and c), then we draw their contours on a 2.5 cm thick board and cut out the blanks, again with a bow saw or jigsaw. We place two blanks so that they form a complete circle, place two more halves on them, orienting the joints of the halves of the upper and lower “layers” at an angle, for example, 45°, and knock together the parts of both circles with nails 35.40 mm long. Then, using the same pattern (joints at an angle of 45°), we nail the third pair of halves, followed by the fourth. The result is a four-layer hub with a diameter of 16 cm and a thickness of 10 cm. For greater reliability, the hub is additionally tightened with four more bolts, “recessing” the bolt heads and nuts with washers into the sides of the hub. We trim the end part of the hub with a plane and file, after which we proceed to making the spokes.
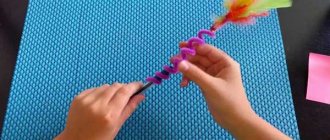
A simple way to spin without a spinning wheel
If you don’t have a spinning wheel at home, but you have dog hair, and you really want to spin it, then the question certainly arises of how to spin dog hair without a spinning wheel. There is a way out, you need to take the tow and attach it to something.
For example, tie a skein of wool to a stick or to the back of a chair and try spinning. To do this, you need to slowly pull out a thin thread of equal thickness from the tow and constantly twist it, otherwise it may break. Once you have obtained the yarn of the required length, thickness and twist, you need to wind it onto a spindle. Then continue in the same order. When the ball has become approximately the size of a fist, the thread should be cut off.
You don't have to tie the tow to the chair.
Before spinning dog hair with a spindle, you need to take a ball of fluff in your left hand. With your right hand, pull the thread out of the ball while twisting it. In this case, the spindle should be on a plate or some kind of bowl with a flat bottom without a recess. The twisting of the strand occurs quickly. If the thread was spun thin, and suddenly a thickening appears, then it needs to be untwisted and straightened.
Next, spin about fifty centimeters and wind the resulting yarn onto a spindle. Tie the thread with a fixing knot at the top of the spindle. In this way, continue to pull and twist the thread until the spinning tow runs out.
When you don’t know how to learn how to spin dog hair with a spindle, you can try using a flat wooden stick or pencil. All other actions are the same. Pull the thread from the tow, twist it and wind it around the middle of a pencil or stick.
↑ Turned wheel
The question immediately arises of where to get such a large lathe that would be able to process a wheel with a diameter of about half a meter. In fact, there are special machines, for example, for processing wheels for railway cars, but the average home-made worker cannot get to them. So you have to somehow get out of the situation yourself. Looking ahead a little, I’ll tell you about my experience in processing a spinning wheel. True, I had access to a universal milling machine and processed a ready-made wheel with spokes and a hub. So, first of all, I removed the “trunk” from the milling machine and put the wheel hub on the spindle of the machine (the spindle is horizontal). I installed a vice on the machine table, and clamped a turning tool in the latter. By moving the table up and down and left and right, that is, changing the position of the cutter, I achieved quite satisfactory machining of the wheel. But then I worked as a mechanic.
However, let's return to our rim. In the old days it was processed (sharpened) as follows. We cut out a solid wooden circle with a diameter slightly smaller than the inner diameter of the rim. The blank for the circle is glued together from boards 15–20 mm thick. The edges of the circle are chamfered, beveling the edges almost to nothing. Place the circle on the axle (made of wood or metal), after which the rim blank is put on the disk and fixed there with the help of wedges and glue (Fig. 3). Now all that remains is to strengthen the pulley on the axle and install the axle in the centers (bearings), connecting the pulley with a belt drive to a pulley of any engine. Decide for yourself how to build such a structure in practice. Maybe use a stationary circular saw mechanism for these purposes?
Rice. 5. Possible profile of the finished rim
You will also need a lathe (already a regular one) to make other parts of both the wheel and the spinning wheel body. For the wheel you will have to machine the hub and spokes. For the hub, select a birch log with a diameter of 18.20 cm and cut a block of wood 9.10 cm long from it. From this block we turn the hub (Fig. 6). In the center of the hub we hollow out a hole with a square cross-section, into which we will then insert the crank axle. Next, mark and drill holes for the spokes on the hub. The diameter of the holes is approximately 1 cm, and the depth is about 2 cm. The number of spokes in the wheel is usually at least eight.
A variant of the knitting needle is shown in Fig. 7. It can be seen that a round spike is provided on one side of the spoke, and a hole is drilled on the other side. This design allows you to easily combine the rim, hub and spokes into a wheel.
The wheel assembly is carried out like this. The rim is placed on the table, four knitting needles are inserted crosswise into the hub and it is fitted to the rim. It is necessary that the center of the hub coincides with the center of the rim. To do this, you have to either deepen the spokes into the holes of the hub, or trim the free ends of the spokes. Having centered the hub with four spokes, install and adjust the remaining spokes, placing their outer ends at the same distance. Now, in principle, you should drill a through radial hole in the rim opposite each spoke of the same diameter as the diameter of the hole in the spoke. I keep it simpler: I drill the appropriate number of holes in the rim for the spokes, placing them at the same distance from each other. This is easier to do and the accuracy is greater.
All that remains is to place the knitting needles opposite the holes in the rim and hammer round wooden dowel pins into the latter with glue, which, of course, should also go deep into the holes in the knitting needles. That's it, the turned wheel is ready!
Spinning on a spinning wheel
The best known version is my grandmother's version of spinning dog hair by hand at home. The spinning wheel is placed on a stable surface, such as a stool or bench.
A hand spinning wheel consists of a vertical part, on which the tow is attached, and a horizontal part (bottom), where the spinner sits.
After you have fixed the fluff on the spinning wheel, you need to pick up the spindle. It is best to attach the fluff to the spinning wheel with an elastic band. Tie a cotton thread to the middle part of the spindle and wind it clockwise. The tow should be on the left side of the hand. They begin to pull the fibers out of the tow with three fingers of the left hand. Connect the cotton thread to the strand and at the same time rotate the spindle clockwise. Thus, the thread and strand were spliced. Secure the twisted strand at the top of the spindle with a locking knot so that the thread does not fall off when rotating. Continue to rotate with your right hand, slowly releasing a small amount of fluff from the tow with your left hand for twisting. At the end of spinning, rewind the thread from the spindle into a ball.
For knitting, double-ply yarn is used. To do this, you need to connect two threads and twist them.
Spinning dog hair by hand is quite difficult and time-consuming. In order to obtain high-quality thread, you need to have spinning experience. Therefore, to help the spinner, a spinning wheel with a wheel was invented, which has survived to this day.
↑ Spokes
Using the resulting markings, we drill holes with a diameter of 1.8 in the hub. 2 cm to a depth of 2 cm, or we drill rectangular holes 2x2 cm to the same depth. (It is clear that the shape and dimensions of the hole in the hub must correspond to the shape and dimensions of the end of the spoke, but it is necessary that the ends of the spokes fit into the holes of the hub with some interference.) Having driven the spokes into the hub (Fig. 6, b), check the equality of the distances between the ends knitting needles that are “free”, and if necessary, establish such equality by working on the spikes of the knitting needles accordingly.
After making sure that the spokes are positioned as they should, we drill a small hole in the center of the hub, which will be needed for the time being to properly install the hub with spokes in the rim drum. Treat this operation very carefully, trying to eliminate even the slightest deviation from the central axis of the hub. Otherwise, the wheel will “beat” when rotating.
Wooden self-spinning wheel helps you spin quickly
A mechanical self-spinning wheel with a foot drive has become a home assistant for women. The spinner no longer turns the spindle, it simply does not exist. Pressing the pedal with your foot sets the spinning wheel in motion.
The tow is attached to a stick or spinning wheel. The cotton thread is attached to the spool of a spinning wheel and passed through the hooks of the bobbin. It must be combined with a strand of tow. Using your left hand, pull out a small strip of wool from the tow and place it on a cotton thread. At the same time, they begin to rotate the spinning wheel by pressing the pedal with their foot. The process of twisting the thread and winding it onto the spool begins. At this moment you need to look to see if the thread is too twisted.
If this happens, you need to manually pull the thread and unwind it in the opposite direction. The speed of the spinning wheel is controlled by a pedal. The more often you press the pedal, the higher the speed of rotation of the wheel.
The thread tension is regulated by belts that are stretched over the wheel housings and the pulley. The spinning process is fast. Spinning dog hair, like any other hair, on a mechanical spinning wheel is not very easy; it requires certain skills.
DIY cardboard toys: “Slides”
You can make this cardboard craft with your child. He will enjoy participating in the creation of an interesting toy, which he will continue to play with pleasure.
- a small cardboard box (can be used for cereal or rice)
- tennis balls (or any small balls of small size and weight)
Crafts from paper and cardboard: “Big slides”
This toy is made according to the same principle as the previous one, only the sizes are larger.
- scissors or stationery knife
- part of a large cardboard box or packaging
- cardboard cylinders (from toilet paper or paper towels)
- PVA glue (you can use “Moment”)
Electric spinning wheels spin well and quickly
The invention of the electric spinning wheel has several advantages. This is compactness and speed. Experts say that working on it requires virtually no skills. The principle of forming a thread from wool is the same for spinning wheels - the strand is pulled out of the tow, twisted and wound into a ball.
Then the finished yarn must be twisted. If the spinning wheel does not have such a function, then you can twist it manually on a spindle.
The photo shows what this device looks like. We spin dog hair on an electric spinning wheel in the same way as in other cases - separating small pieces of combed wool and twisting them.
↑ Wheel bench
To install the wheel on the base, you need to machine the support posts (see Fig. 1). But first, about the base itself, or the bench, for which they select a linden or birch board 5.6 cm thick, 20 cm wide and 50.55 cm long. The board is carefully planed and given the shape of an equilateral trapezoid, in which one base is 10 more than the other 11 cm (see Fig. 8). At the wide end of the board, moving 10 cm from the end, we drill holes with a diameter of 2.5 cm. The distance between the holes on the upper plane is approximately 11.12 cm. Please note that we do not drill the holes for the racks perpendicular to the board, but slightly obliquely, so that on the lower surface of the board the outlet holes (with the same distance between each other) will be located a little further from the wide end (Fig. 9, a) than the input ones. Here, at the wide end of the board, but only on its lower side, we make two blind holes for the legs of the bench. The diameter of the holes is 2.5 cm, the depth is also 2.5 cm. Blind holes are also drilled obliquely, and so that the legs fixed in them stand in a “branch”, that is, they protrude beyond the dimensions of the board both from the end and from the side (see Fig. 4).
At the narrow end of the board, on the lower side, another blind hole is made for the leg, and it is placed in the very corner of the board.
The hole is also drilled obliquely (Fig. 9, b), but so that the leg protrudes only beyond the end of the board. At the narrow end of the board, right in the middle of the board and at a distance of 7 cm from the end, you should hollow out a through rectangular hole (cavity) 7 cm long and 5 cm wide, and in the center of the end of the bench board, drill a through hole with a diameter of 2 cm to the hollowed out cavity. We will insert a threaded rod into this hole, the purpose of which will be discussed later. In Fig. 9, b it can be seen that perpendicular to the hole for the pin in the bench, another hole is made, the edge of which overlaps the hole for the pin, but more on that below. Rice. 8. Preparation of the spinning wheel base
How to wash finished yarn
Tie the rewound yarn in several places and put it in the wash:
- Place the skein in a container with warm water and liquid detergent.
- You need to wash it carefully.
- Rinse in water with hair balm.
- The last thorough rinse is done in a large amount of water with the addition of a few drops of essential oil.
There is no need to wring out the wool. Hang the skein on clean gauze or on a clothesline. As the coat dries, it takes on a wavy appearance. In order for the yarn to straighten well, it must be pulled back with a weight. Gradually, weight can be added to make the thread smoother.
To ensure you have enough hair, collect it every time you brush your dog. You can knit warm clothes for loved ones with your own hands, since this wool is also medicinal. The pleasure from the work and the resulting handmade products will last a long time. The best thing is to leave the pet's fluff and learn the material, how to spin yarn from dog hair.
↑ Step
To operate the crank mechanism of the spinning wheel, that is, to rotate the wheel, you need a footrest (pedal), which is installed between the legs of the spinning wheel (see Fig. 1). This type of footrest consists of a round bolster and two planks (Fig. 13). The length of the roller is determined by the distance between the legs of the spinning wheel, where the footrest will be fixed. With the dimensions we have adopted, the length of the roller is approximately 50.55 cm (it all depends on the position in which the spinning wheel legs are installed). The diameter of the roller is 3.5. 4 cm. Make a roller from fairly hard wood, for example, ash or birch. There are round spikes at the ends of the roller, which are inserted into the corresponding holes in the legs. The pedal itself consists of two boards. The length of the larger plank is about 53 cm, width 4.5 cm, thickness 7 cm.
How the footrest is attached to the legs is clear from Fig. 14. True, there are difficulties here. Firstly, the footrest bolster with this design has to be installed between the front and rear legs during the process of attaching the legs to the bench. Secondly, it is best to assemble a pedal from boards with the legs and bolster already installed, in order to select the dimensions of the pedal boards according to the location. The main thing is that the large board passes close enough to the free back leg without touching it. After marking, the board is cut to a depth of 0.5 cm into the roller. A small board is also cut into a roller (to the same depth) and into a large board (half a tree). Connect the parts of the footrest using glue and screws.
Often the footrest is strengthened in another way. They do not make spikes on the roller, but having installed the roller between the legs, drive a nail through the legs into the ends of the roller, having previously drilled holes of the required diameter in the legs and in the roller.