Slippers are one of those items that no home or apartment can do without. It’s so nice, after a hard day at work and not always comfortable shoes, to come home and change your shoes, giving your feet a rest. You don’t have to buy house slippers; you can make them with your own hands, putting your imagination and soul into this product. In addition, such a product can act as a souvenir or gift for family and friends.
A simple master class on felting slippers for beginners
In order to felt slippers with your own hands, you do not need to be an ace in needlework. It is enough to purchase the necessary tools and materials, as well as study special lessons on felting. There is nothing complicated about this even for novice housewives.
So, we will need:
- Wool of different colors (in this case pink, lilac and white);
- Metal fittings;
- A set of needles for felting;
- Film with pimples;
- Gauze;
- Soap and water solution;
- Scissors.
Before you start felting slippers, you should read the recommendations of experts and watch a master class
Step-by-step instructions for dumping slippers look like this:
- First, a template is cut out from a film with pimples. To do this, you need to circle the sole of your foot and add three centimeters on all sides.
- Next, the resulting workpiece must be laid out on film and begin laying wool on it. In our case, the first one is lilac, which needs to be laid out in two rows. In this case, each layer must be perpendicular to the previous one. The third row will consist of white wool, the fourth - pink. The fifth and sixth are lilac again.
- The wool is laid out so that its edges protrude slightly beyond the template. Then the workpiece is covered with gauze and soaked in a hot solution of soap and water.
- Next, the gauze is removed and the template is turned over. The ends of the wool that stick out need to be wrapped behind the template. The same procedure is done on the other side.
- Then everything is covered with gauze and rubbed with your hands. First, with light and gentle movements (about 5 minutes), and then more intensely.
- After the wool has felted a little, the gauze needs to be removed and work can continue directly on the wool. This needs to be done for about an hour.
- Next, the template is covered with film and rubbed again for about twenty minutes on all sides.
- Then the film is removed and rolled into a roller, which then needs to be rolled for about two to three minutes on each side.
- A small cut is made from the heel side, and the workpiece is pulled out.
- Now the felting of the slipper begins again until shrinkage occurs. After which the product is rinsed in warm water, then in cool water and squeezed out.
- It's time to make the cutouts. The slipper is put on the foot (you can use pads) and begins to take on its shape. To do this, you can stretch the product a little or tap it with your fist.
- Next, we wait for the slippers to dry and we can start decorating.
It is best to wear gloves when working with water to avoid drying out the skin of your hands.
You can decorate slippers in different ways. It all depends on the imagination and desire of the needlewoman.
LiveInternetLiveInternet
Quote from Rezhevlyanka
Read in full In your quotation book or community!
Neps, slabs, beers!
We're making slippers. SOURCE
author: Irina Poluboyarinova
Neps, slacks, beers. What kind of things are these? And these are just lumps of different sizes and densities, rolled from wool and dyed. Used for decorating felt. This is what we will do today when felting slippers. What do we need?
Wool, neps-slabs, silk handkerchiefs, template, bubble wrap, nylon mesh, wooden rolling pin, grinding machine, massager, ruler, scissors, soap solution.
I decided to make size 39 slippers. I took a template from a laminate backing 5 mm thick, 32 cm long, 14 cm wide. I hung 200 grams of wool into 4 identical piles of 50 grams each.
People often ask: how many layers of wool should I put in slippers? There is no exact answer to this question. It is necessary to lay out not layers, but the AMOUNT of wool. And I don’t know how many layers you can do it in... Layer is a very relative concept.
I'm starting the layout. As a rule, I lay out the wool in small “pieces”, overlapping them on top of each other. But if the wool is laid evenly in the roll, you can lay out a whole layer, plucking off the excess wool at the edges. The main thing is to lay out the wool evenly, trying to stay within the boundaries of the template.
This is how fluffy I got. For each template there is a 50 gram pile.
Now we cover it all with a net and wet it. What do we wet with? In this case, in a liter bottle there is a solution of liquid soap in warm water. Approximately 4-5 tablespoons of soap. But I pour, of course, “by eye.”
We pour it into the middle and press the wool with our hands, dispersing the water to the edges. It is necessary to saturate and compact the fur well.
I remove the mesh, cover it with bubble wrap, and turn it over.
And now the slacks-nepses enter the arena!!! I want to put decor inside the sneaker under the heel. Easily!
I take off the templates, pour in the slabs in random order and cover them with a dyed silk handkerchief. So they come with a guarantee. In the photo, the right slipper is covered with a handkerchief.
I cover it with a bubble wrap and rub the VSM in the middle of the sneaker. I park the car and count to seven. Do not rub the edges under any circumstances!!! In general, try not to touch them in any way! Without a VSM, this can be done with your hands through a mesh. Rub for 5-7 minutes until the decor rubs in.
I put the templates in place and wrap the wool on them. The main thing is to wrap the template tightly and not leave any voids at the seams. I “smear” the folds.
This way I laid out the soles. Now I lay out the remaining wool. There's a pile for every slipper. First of all, I “compensate for the layout”: I put the fur where there is less of it, and then I “spread” it evenly according to the template.
All the wool is laid out, covered with a net, wetted and compacted, as before. Let's decorate!
Pour slacks, neps, and birs onto the slippers and cover them with handkerchiefs. Dyed handkerchiefs are sold in dense packs. You need to take it by the edge and carefully separate one or two scarves. They are very thin and delicate.
I cover it with a bubble wrap, press it, and rub the VSM for 7-10 seconds on each area.
I turn it over. I don’t lift the bubble wrap, I take it by the edge and turn the whole sandwich over in one deft movement.
I bend the fur, pulling it onto the template.
Again I cover and rub the VSM for 10 seconds.
I wrap the slipper in a mesh, squeeze out the excess water and begin to thoroughly rub the surface with my hands wearing vinyl gloves. I pay special attention to the side seams. They must be constantly “collected”. Otherwise, the wool will “float away” and become matted behind the template. We will get a rough scar on the seam.
5 minutes each slipper. Although minutes, in this case, are also relative, like layers. Everyone has different hands, effort, intensity. Three until the wool “grabs” on the surface and the decor falls down.
We remove the mesh and try without it. We need to form a “crust”. The fur should not fidget or move under your hands. We are preparing the slippers for a more serious impact.
I work as a massager. She fiddled with it, loosened it, smoothed it all out with her hand, and went over the seams.
I begin a more serious massage. Imagine that you are massaging your beloved husband’s back along the spine. That's about it...
I massage, level with a massager and my hands.
I roll the slipper into a tight roll and roll it. Movements and efforts are like when kneading dough for dumplings.
First from heel to toe, then from toe to heel. Turn over and repeat. Those. roll 4 times, 15-20 times in each direction. Here is the result: one slipper has already undergone this procedure. It became denser, the template inside became a bit cramped.
I make a cross-shaped cut. I measure 9 cm from the heel. I mark this point. I put 8 cm up, 2 cm down. 4 cm left and right. I cut.
I grind the cutouts.
I pull out the templates.
I rub the inside of the slipper with my hands and a massager. Particular attention should be paid to the seams from the inside.
I check the seams for scars. Even if they are not there, I work on them with a massager and my hands.
I put my heel on.
I align the cape on my fist. I put the slipper on one hand and carefully iron it all over.
I knead it like dough. Then I rub it in again, reminding him of the shape of the slipper.
And this is the difference between a slipper that has undergone processing and one that is waiting for its turn. See how much he's shrunk? Now I’m doing the same thing with the second one to the same state.
Well, I’ll start dumping. The goal is to felt until the felt is ready and up to size 39. Shrinkage is a process accompanying shrinkage, and not an end in itself. Therefore, I will not look for easy ways like a washing machine, throwing myself into a bathtub, or boiling water with cold water. We'll go the other way! Let's go! How? Using different methods, using force, patiently and carefully. Let's go!
We roll the slippers onto a rolling pin and roll them 50 times in all directions. We don’t just roll it on the table, we put pressure on the roll, we push it. Periodically add soap and hot water. The slippers should be wet, warm and slippery.
We roll them lengthwise and crosswise so that the shrinkage occurs evenly.
Now in this situation in all directions
You can use this useful rolling tool. We put the slipper inside and roll it vigorously.
An ancient instrument - rubel. Or it is also called “valek”. An ancient pimocat weapon.
Paired with rolling it gives a wonderful result. They are made for each other.
But not every home has such riches. Without them, we roll the slippers in a towel with a rolling pin and without a rolling pin until we reach the desired size. We put it on the last or on the leg.
Rub with soap (any kind). I took the household goods. And we lie hard on the block. We tap on all sides. Place it firmly on the block and fix the shape.
I take it off the pads and rinse it in several waters. The last one is cold. I wring it out in a terry towel and iron it with a rolling pin on the towel.
I put it on the blocks and beat it with a mallet.
I remove it from the pads and put it in a warm place to dry.
There are no canons or dogmas in felting. There are only basic principles. All felters have their own technologies, methods, and developments. That is why the exchange of experience is so interesting and necessary. Technology is changing. Now I'm lying around like this. And tomorrow I’ll come up with something else.. Unfortunately, within the framework of photo-MK it is impossible to reflect all the nuances. But I hope the information will be useful. Ready to answer specific questions and accept constructive criticism
Don't be afraid to try and experiment.
Good luck with your shrinkage and predicted shrinkage!
Yours, Irina Poluboyarinova.
Wet felting wool slippers: a detailed guide
To produce home slippers using the felting technique, the wet method is usually used.
The materials needed for this work look like this:
- Wool;
- Soap and water;
- Oilcloth;
- Film with pimples;
- Paper and pencil;
- Scissors.
To make felted wool slippers look stylish, they can be equipped with laces
Master class on wet felting of slippers:
- It all starts with creating a pattern. To do this, the foot of the person who will wear the slippers is outlined and a couple of centimeters are added on all sides (this can be marked with a dotted line);
- Next, the pattern is transferred to oilcloth and cut out.
- Then the work with wool begins. You need to lay out this material on the resulting workpiece so as to completely cover the template.
- Next, the pattern is transferred to bubble wrap and thoroughly moistened with a soap solution, after which it is covered with the same film. You can start felting.
- You need to felt the slippers for about 2 hours, first with film and then without it.
- After which you can make cutouts for the legs, but a little smaller than necessary, since later the holes will become larger.
- Now the film is removed and the slippers are formed, after which the product needs to be felted for about another hour, and then rinsed under running water.
- If after these procedures any protruding fibers or threads appear, they can be cut off with scissors, and then the slipper can be given the required shape.
Before you start decorating, the slippers must dry thoroughly.
That's all - the slippers are ready. The decor can also be made of wool or embroidered with thread.
What you need to know before you start felting wool
Wool felting is a technique for producing dense felt from a voluminous and light material.
Only natural wool can be felted due to the scaly structure of the fiber.
Before starting work, study thematic articles and watch video tutorials. From them you can learn a lot of useful information, including about techniques, principles of making felted products, materials, which means you will be ready for any difficulties.
Felting wool slippers: master class for a washing machine
There are several ways to felt slippers: dry, wet and in the washing machine. The first two are the main ones, but using some equipment you can significantly facilitate and speed up this process.
If felting will take place in a machine, then you need to buy only natural wool, without containing synthetic fibers.
The slippers themselves can be knitted using circular knitting needles. It should be taken into account that wool, scrolled in the “washing machine”, not only turns into felt, but also shrinks.
To prevent the monotony of wool slippers, when making them, it is worth using material of different colors and decorative elements
The approximate shrinkage is approximately a third of the original wool volume and, as a rule, the length sags more intensely. This must be taken into account when preparing material.
Preparing slippers for processing in a washing machine consists of the following steps:
- An ordinary polyethylene bag is inserted inside the product;
- Next, it is thoroughly spread over the entire inner surface of the slipper;
- The hole is sewn shut to prevent the bag from falling out.
Such precautions are necessary to ensure that the product does not become deformed or tumble inside. Later, the bag is removed and the excess threads are cut off.
The slippers go into the machine along with wool washing powder. The mode you need to select is “cotton”, the temperature is about 90 degrees and “twist” for about 2.5 hours.
You also need to remember:
- The higher the temperature, the more the product will “shrink”;
- The longer you felt the wool, the stronger the resulting felt.
After the slippers are taken out of the machine, you can sew the sole to them and decorate them as your heart desires.
Special technique: felting mules
To make flip-flop slippers, you don’t have to learn anything supernatural. Many of the steps are fairly standard, such as cutting the pattern and preparing the template.
Felted wool slippers without backs are great for use in an apartment
Actually, everything happens as usual until the moment when you need to make cuts and remove the template.
Instructions for felting slippers without backs:
- Before making the cut, you need to step back from the heel a little less than half the length of the product and make a horizontal cut of about four centimeters;
- With a deep fit, the distance from the heel should be approximately one third of the length of the slipper;
- The incision is made not reaching the edges of the pattern, about one and a half centimeters;
- Next, the wool is pulled out and the insole is fixed;
- Then the joint line is stitched with strong threads to match the wool used, special attention should be paid to the barrels (this can be done with a machine, and then with your hands);
- Now the slippers can be felted and wrinkled in all directions, as you please, to the desired size;
- The slippers can be shaped using sliding or regular pads;
- The final stage of this process is rinsing, drying and decorating.
During work, you should try not to forget about processing the barrels, in order to avoid the appearance of unwanted scars.
Felting slippers using applique
Decorating slippers is a very interesting, creative process. All the most difficult things are practically left behind and now you can give free rein to your imagination.
The appliqués on the slippers should stand out against the background color of the wool.
Typically the process looks like this:
- The fur for appliqué is laid out in two rows perpendicular to each other in circles or squares;
- Then it is covered with a net and soaked in water and soap;
- Excess water is removed and the mesh is removed;
- Elements of the future design are cut out from the parts prepared in this way.
To make the decor clearly defined, you can use thin flagella, which should be applied to the edges of the design, and the ends of the wire should be hidden under the pattern.
After creating the desired composition on the slippers, you need to cover it with a mesh and roll it as needed.
Shoes with appliques always look bright, colorful and are liked not only by adults, but also by children. Moreover, you can make not only walking slippers, but also a keychain in the shape of this item. The procedure is almost the same, only little material is required.
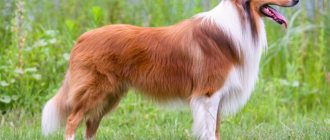
By the way, you can felt slippers from almost any wool, even dog wool. But here it should be borne in mind that such material is quite specific and very difficult to couple and may subsequently look sloppy on the finished product. Therefore, it is still better to make slippers from carded or merino wool. It's more reliable.
How to make felting children's slippers: master class and useful tips
The technology for felting children's slippers is in many ways similar to the standard procedure. The materials and tools needed are the same. The only difference is how much wool you need to take based on the size of the child’s feet. As a rule, about 70 -80 grams is enough.
For a child to like felted slippers, they should be decorated with bright designs.
The procedure for making slippers is as follows:
- A pattern is made, and a template is cut out from it, which is placed under a film with pimples and the wool begins to be laid out;
- The layout begins with the color that will be inside and is laid out along the entire perimeter of the template;
- The rows must be laid perpendicular to each other to avoid severe shrinkage;
- Next, the workpiece is impregnated with a soap solution, covered with a film and processed with a vibratory grinder (VShM);
- Then the template is taken out from under the film and covered with wool again (the existing allowances are pulled over the workpiece), and the procedure with soaking and machine processing is repeated;
- Next, the slippers are turned over, the allowances are tightened again (this needs to be done several times);
- After all the rows have been applied, you can make a small decoration, then carefully cover the product and machine it again;
- Turn over again, tighten the allowances and go through the VSM;
- Next, the process of felting begins - first with your hands, and then using a rolling pin, periodically heating the slippers in warm water;
- You can make cuts: one (for the heel) is cut to the template, and the second - approximately to the middle of the foot;
- Next, the templates are removed, and the cutouts are rubbed in soapy water, slightly stretching their edges;
- Then the seams are leveled, and the shape of the future product is created, after which the slippers are turned inside out and rubbed in;
- Then the slippers are rolled down to the size needed, wetting them in warm water from time to time;
- Finally, the shoes are rubbed with soap and rinsed in warm and cold water;
- All that remains is to wring out the slippers, go over them one last time with a rolling pin, shape them again and set them to dry.
By the way, if you don’t have a vibration grinder, you can replace it with a mesh, but it will take longer.
Comfortable and beautiful slippers for the child are ready.
Dry and wet felting techniques - which is easier for beginners?
There are two types of felting: dry and wet.
In the dry technique, felting is achieved using special needles, which are used to pierce the wool several hundred times. The villi combine to become a single material.
In the wet technique, craftsmen work using soap and water. A wool product soaked in a soap solution is felted due to friction.
According to experts, wet felting is more suitable for experienced needlewomen than for beginners.
In dry felting , figures and various costume jewelry are made, drawings and patterns are applied to felt, felt, or pre-felted work. Craftsmen who want to create canvases or clothing work using wet techniques.