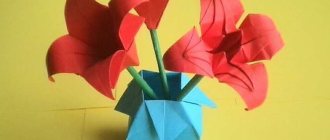
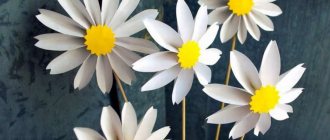
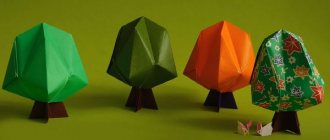
Not all needlewomen know that you can decorate the interior or prepare an inexpensive gift for your family or close friends using ordinary paper napkins. Decorations for the holiday table, New Year's toys, snowflakes for the Christmas tree, origami animals, Christmas decoupage and other decor are just a small part of what can be made from this simple material. Detailed and step-by-step master classes, as well as visual photos presented in this article will help you quickly and correctly make crafts from napkins with your own hands. Your children can also participate in this exciting process, since a common craft activity not only brings the family closer together, but also contributes to the development of the creative abilities of your kids.
Refined spring vase
Crafts made from napkins are not limited to just flowers. From this wonderful material you can make or decorate almost anything, for example, a decorative flower vase. To make an unusual vase, you will need to stock up on the following materials:
- Napkins with elegant plant or animal patterns;
- Can – tin for coffee or juice;
- Acrylic white paint and putty;
- PVA glue;
- Stack;
- Brushes.
detailed instructions
The jar is coated with paint on both sides, and then dried in a well-ventilated area. The top thin layer, where the pattern is located, is carefully peeled off the napkin. Fragments of the picture necessary for the composition are cut off with your fingers
It is not advisable to cut them with scissors, as in this case the edge will be too smooth. The next one-color layer is glued to the outside of the prepared jar, tearing off small pieces according to the papier-mâché principle. Acrylic putty is applied in uneven strokes along the upper cut of the can, masking it. Next, on one side of the future vase, from top to bottom, a trunk and branches are formed using putty using a stack. The adhesive composition is diluted from one and a half parts PVA glue and one part water. Fragments with leaves, birds, butterflies, forest animals are placed on the surface of the jar in accordance with the compositional design and are carefully coated on top with a brush with an adhesive solution. During gluing, it is important to apply movements from the center of the fragment to the edges, carefully but carefully smoothing it, trying not to tear it. Having covered the entire surface of the vase, paint the neck to match the main background. To paint the branches and trunk, use brown paint to fill in all the irregularities. After the trunk has dried, decorative protrusions are highlighted with golden paint using a sponge. To do this, the sponge is lightly pressed onto the desired area of the improvised trunk without indentation. A slight golden effect can be created over the entire surface of the vase.
A DIY vase is a beautiful and affordable accessory that allows you to transform your interior.
To secure the decor, the dried surface is coated with colorless varnish. Bouquets of wild and garden flowers will look great in such a vase.
Rainbow monogram
Once you've redecorated your children's room, as a finishing touch, you can place your child's monogram on the wall, decorated with a rainbow pattern made from paper napkins. For this we will need the following materials:
- Simple pencil;
- Napkins in seven colors of the rainbow;
- Thick cardboard;
- Loop cord;
- Glue - moment or PVA;
- Ruler and scissors;
- Additional decor for decoration - leaves, ladybugs, flowers, butterflies.
Step by step guide
- The first step is to make a sketch of the monogram from the intertwined initial letters of the last name and first name.
- Next, the image is transferred on an enlarged scale using the technique of cells onto an A4 sheet. You can do this part of the work on a computer.
- After carefully cutting out the letters, a monogram template is created, which is traced onto cardboard and cut out.
- On the front side, markings are made from top to bottom into seven equal intervals. It is better to mark the strips at an angle, although a straight, arced or zigzag arrangement is allowed.
- Multi-colored napkins should be cut into squares, the size of which is selected independently, based on the desired size of the resulting balls when rolling.
- First, red balls are made and glued to the top strip, then orange ones to the next strip, and so on until the end, in accordance with the order of the colors in the rainbow. That is, the next one will be yellow, then green, blue, indigo and violet.
- After drying the monogram under a stack of books, all that remains is to glue a loop to it on the reverse side, add decor and hang the decoration on the wall.
A bright and beautiful rainbow monogram made from napkins will be an excellent addition to the interior of a children's room, and the kids themselves will certainly be happy with such a decoration.
Elegant monogram in rainbow colors
Funny figures made from balls of multi-colored napkins
How to make a three-dimensional figure from napkins
Material consumption for the production of volumetric figures:
| Number | Number of colors | Number of napkins for different colors | ||
| Rose/Daisy | Clove/Dandelion | Peony/Chrysanthemum | ||
| 1 | 86 | 172 | 86 | 344 |
| 2 | 85 | 170 | 85 | 340 |
| 3 | 91 | 182 | 91 | 364 |
| 4 | 120 | 240 | 120 | 480 |
| 5 | 93 | 186 | 93 | 372 |
| 6, 9 | 102 | 204 | 102 | 408 |
| 7 | 93 | 186 | 93 | 372 |
| 8 | 124 | 248 | 124 | 496 |
| 109 | 218 | 109 | 436 |
Flowers from napkins
To make a three-dimensional figure made from napkins look more impressive, it is better to use napkins of 2 or 3 matching colors to make flowers.
Step-by-step description of making flowers from napkins:
- fold the napkin into 4 layers;
- fasten the middle with a stapler;
- mark a circle, cut along the contour;
- lift each layer of the napkin and squeeze it, forming petals;
- straighten the flower.
Cardboard frame
To make a cardboard frame for a number, you will need 2 identical rectangular sheets of strong cardboard. The thickness of the lines of the figure is calculated based on the number of flowers placed.
Draw a number on a cardboard sheet and cut it out. Place the cut out figure on the second cardboard sheet, trace along the contour, cut out. For the side parts, cut out several strips of cardboard about 10 cm wide.
Next, you need to tape the strips of cardboard that form the side part to the edges at a 90° angle on the back side of the number blank. The remaining part of the figure is glued with tape in the same way.
Assembling and decorating numbers
The final stage of work is gluing decorative flowers to the frame. To do this, you can use any paper glue, which is applied to the center of the flower from the back side. The flower is applied to the frame and pressed at the base. After the glue has dried, straighten the flowers.
You can choose any design for the craft:
- 2 rows of multi-colored flowers are arranged in parallel;
- the center of the number is highlighted in one color, and the edges - in another;
- completely monochromatic craft;
- alternating colors in a checkerboard pattern;
- highlighting the side zones of the number with a different color;
- smooth transition from one color to another (ombre effect).
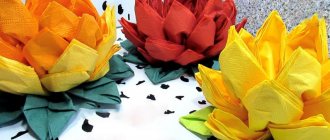
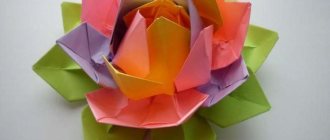
Gorgeous lotus
Execution sequence:
- A multi-layer white or colored napkin is prepared, then the material is completely unfolded.
- The corners are bent towards the center, the napkin is turned over to the other side.
- Actions with corners are repeated identically.
- The center is pressed firmly, and the corners are pulled out very carefully.
- The workpiece is turned over, the corners are also carefully pulled out. As a result, the flower will turn out to be very voluminous and lush.
A gorgeous lotus made from napkins is ready!
How to fold it beautifully?
When working with thin paper napkins, it is important not only to choose the ideal material, but also to learn how to work with it as carefully as possible
Animal figures
Elegant crafts in the form of animals will decorate any table. And if you make them together with your child, you can get not only a beautiful decorative item, but also a pleasant evening with your family.
The Japanese art of origami teaches how to create complex compositions from paper. You can roll the fabric in the form of a dog or crane figurine, or you can make a frog that will even be able to jump. But such crafts are far from the simplest, so you need to start with something easier.
For example, by creating your own origami from napkins in the shape of a swan. This table decoration looks very graceful, but is not as difficult to do as it seems at first glance.
First of all, you need to carefully fold the napkin diagonally and run your hand along the fold line, smoothing it. The edges of the napkin need to be lifted and pulled towards this fold in the same way as they do when folding an airplane. Then you need to turn the craft over and repeat the same thing, only on the other side.
The resulting workpiece is folded across. The corners should touch. Now you need to bend the narrow part upward, making a swan's head out of it. The neck will turn out if you fold the figure lengthwise. The last stage is the formation of the wings, which need to be pulled out and carefully straightened.
Flower and fruit compositions
Flower arrangements look no less beautiful. You can create amazing plants and flowers from paper.
At the same time, creating such a miracle takes much less time than creating an exquisite swan:
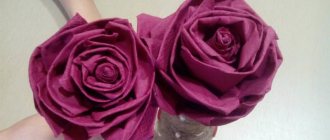
Rose. One of the simplest flowers is a pink bud. It is made from a napkin folded in half. It is then bent into a neat triangle, which is then rolled into a neat roll. This must be repeated several times until the pink bud becomes very small. Then you need to take out small leaves, while trying to act so as not to damage the rose bud.
New Year decorations
The most obvious option for decorating a New Year's table is a Christmas tree made from napkins. To create such a craft, you only need green napkins and a step-by-step explanation.
There are several ways to make a Christmas tree out of paper. For beginners, the simplest of them is suitable.
To create a simple Christmas tree, you first need to fold the square in half twice. The edges need to be carefully folded so that there is some free space between the layers. After this, the napkin must be turned over and its edges folded into the center to again form a neat triangle. The result is a neat Christmas tree, which in itself will serve as an excellent table decoration.
Spectacular Rose
Crafts made from napkins in the shape of roses are very beautiful and unusual. To make them yourself you will need:
- Single-layer napkins;
- Scissors;
- Decorative ribbon or thread;
- Soft wire;
Manufacturing Guide
- One of the napkins needs to be cut into four equal parts. One of them is folded in half and twisted along the short side into a loose cylinder. On one side it is pulled together with a thread. This will be the base of the flower core.
- The remaining squares are cut diagonally. The right corner of the resulting triangle is bent, and the remaining ends need to be wrapped loosely around the core, securing the resulting petal with thread. Their number may vary and is determined during the work.
- To make a bouquet, stems are made. This can be thick copper wire wrapped in a strip of napkin of the desired color. You can attach a piece of paper during the wrapping process.
A beautiful and delicate bouquet of scarlet roses will be a wonderful decoration for a festive table.
Rose is a symbol of love and perfection. This is an excellent decorative item that can become an original decoration for your interior.
Decoration from paper napkins. Making origami from a napkin on the table
This option is simple to implement, but guests like it. The layout starts from the tail of the bird. To do this, you need to choose bright, rich colors of napkins. Plain colors will also work, but the bird will look less impressive. Manufacturing sequence:
- Each napkin has two parallel corners folded. Fold the napkin in half. It turns out to be a trapezoid - one part of the tail. Continue working until the required number of such parts is available;
- make the head and neck. To do this, the napkin must be folded several times, forming a flat tube. The top part of the tube must be bent to form a head;
- All parts are placed in the holder.
This interesting layout method is suitable for any celebration. The bird symbolizes warmth and homeliness. This figure is especially relevant during the celebration of the New Year, the symbol of which is the rooster. Rich colors will also decorate the festive table at a child’s birthday.
A bright napkin holder will attract the attention of little guests and delight the birthday boy
On a note!
Before looking for patterns for folding napkins, you need to determine where they will be placed. This could be a napkin holder, a glass, a plate. Based on this, the addition option will be selected.
Schemes at the plate
Beautifully decorated napkins at the plate will help emphasize the importance of the event. They can be placed in a glass or on a dish
Envelopes for cutlery look solid, and fans and roses add romance. You can surprise your guests with an unusual folding pattern - under a ring. and very elegant. And the scarf on the fork, although simple to make, looks playful and self-sufficient.
Fan and rose in a glass
To make a fan, you need to straighten the napkin and fold it into an accordion. The resulting workpiece is folded in half and placed in a glass. Simple and beautiful.
A flower in a glass looks very elegant. There are several options for making roses. The simplest one includes the following steps:
- unfold the napkin and fold it into a flat tube from the corner;
- the upper corner is folded and the tube is rolled into a bud;
- the “petals” of the resulting flower are slightly bent;
- you can wrap the flower with a green napkin, imitating rose leaves;
- the resulting composition is placed in a glass of a suitable size.
To make your holiday table more colorful, you need to make bright multi-colored roses. Instead of a glass, paper flowers can be placed in a wide, shallow bowl to form a bouquet
In this case, it is important to ensure that the flower buds are tightly twisted and do not fall apart
Three fold patterns for a ring and a scarf for a fork
Rings are a good idea for decorating fabric napkins. In the first two cases, an elegant bow is made. To do this, the napkin is folded to form a strip. The edges are folded towards the middle, slightly overlapping each other. The resulting part is threaded into a ring, which serves as the middle of the bow. The edges are slightly stretched. The elegant bow is ready.
In the second option, a plain satin ribbon is used instead of a ring. They tighten her middle. Instead of rings and ribbon, you can use a durable foil strip. It securely fixes the workpiece, preventing the fabric figure from deforming.
In the third version of the fold - making a classic flower. A rhombus is made from a napkin. The free edges are slightly bent, forming petals. The lower part of the flower is threaded into the ring.
The simplest but most effective solution is a scarf on a fork. To make it, a cloth napkin is folded into a strip. The strip is folded in half. The fork is placed on top of the workpiece, the edges of which are wrapped around the cutlery and threaded through the resulting loop. Lightly tighten. A simple and elegant scarf is ready.
On a note!
There is no need to come up with overly complex options for folding the figures. Especially if it's a children's party. Guests may have difficulty unwrapping the napkin, which will spoil their mood.
Three envelopes for cutlery
Any of the envelope folding patterns allows you to beautifully decorate your holiday table. The difference lies in the level of complexity of manufacturing. Having chosen the most convenient scheme, you can practice in advance by folding the pocket. Having gained experience, you can quickly make an original and practical decoration for the festive table:
Instead of cutlery, you can put cards with wishes, a card with the name of the invited guest, or a spruce branch in beautiful pockets. It is better to fold envelopes from plain napkins. The pattern will be distracting, and the monotony of the material, on the contrary, will help emphasize the elegance and craftsmanship of the envelope.
Corrugated paper peonies step by step
Corrugated paper is an excellent material in many ways, with a little effort you can create flowers and leaves from it that are indistinguishable from the real thing. See how to make magical peonies from corrugated paper with your own hands, aren’t they beautiful? Cut out the petals, fringe and leaves using the template on the website. Decorate the petals with a brush dipped in paint - you can add ombre, simple dots or stripes. Do not use watery paints; they will pull the color out of the crepe paper. The most important part when making realistic crepe paper flower petals is the "cupping". To fold the petals, hold them between the thumbs and index fingers of both hands (thumbs on top)
Very carefully move your fingers together and pull gently to form a bowl shape. Leave the border unstretched so that the petal holds its shape
Make a fabric ball and stick one end of the floral wire into it. Wrap the paper around the ball and wire - it will look like a lollipop. Wrap a small piece of floral tape around the wire to hold it all together.
Next, add the stamens: place them around the center and wrap floral tape around the bottom to secure.
Add crepe paper fringe in the same way: wrap it around the wire just below the center piece, pinch and hold with floral tape.
Next, add the petals by placing the small ends around the wire and securing them with pieces of floral tape as you go.
Finish the job by attaching the leaves: wrap the wire with tape.
As you move from the flower to the end, add leaves by squeezing the small ends around the wire and wrapping tape around them. The corrugated paper peony is ready. Attach to the back of the chair of the guest of honor at a special event.
DIY paper flowers: master class with step-by-step photos
Paper flowers have a number of advantages that you will not find in living plants. Firstly, they do not fade, do not require special care and do not cause allergies. With the help of multi-colored paper flowers, you can advantageously decorate your interior or clothing; voluminous flowers are attached to the wall or on the door, they are placed in large vases and solemnly presented for the holidays. You can find out how to make flowers from sweets with your own hands in one of our previous articles.
But to make your first paper flowers with your own hands, diagrams and templates can be printed on a printer. And then glue the petals together according to the suggested instructions. Do you dream of being given a scarlet flower? Make it yourself! Cut out several templates of different sizes and glue the petals onto a special sponge located in the middle of the flower.
And for this purple flower you will need:
- white piece of paper;
- watercolor paints;
- scissors or stationery knife;
- aluminum wire;
- Cork tree;
- paper tape;
- green electrical tape or floral tape.
- Cut a sheet of paper into even strips, not reaching the edge of the sheet.
- Fold the cut leaf into a flower shape.
- Make paper leaves and roll them as in the photo.
- Connect the flower with the leaves and secure with tape.
- Attach a small piece of cork to a wire and twist it in half.
- Insert the wire into the middle of the flower instead of the stem.
- Wrap the stem with tape and then with electrical tape.
- The delicate purple flower is ready.
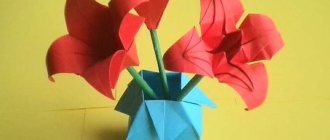
For a special event, for example, on March 8th or May 9th, you can make several origami tulips according to the pattern shown in the photo.
If you have a special stencil, you can make a whole bouquet of scarlet roses and give them to a loved one. Detailed instructions for creating flowers are just in the photo. If there is no stencil, draw the flowers yourself on a sheet of A4 paper yourself.
For other decorative experiments, we offer you a selection of videos for children and adults with detailed instructions on how to make crafts in the form of flowers.
Flower templates for paper cutting
And in this part of our conversation we will present you flower templates for cutting out of paper. Shapes and sizes of flowers for every taste - from the most delicate color of an apple tree to bright blue cornflower and fiery red poppy.
A few more templates will diversify your flower gallery. Large paper flowers for decorating a room with your own hands: templates and diagrams
Paper flowers are a win-win option when decorating any room.
Pay attention to a short but very detailed master class on making voluminous paper flowers. An applique of such a “pink heart” will decorate gift wrapping or a greeting card
Crepe paper flowers are the most beautiful trend this season. These giant paper roses can be formed into a chic bouquet, or you can decorate the hall of a restaurant, cafe or your own apartment with them.
It’s not difficult to make a flower with your own hands from paper, especially if you have instructions and a manufacturing diagram. Beautiful roses can be made from simple paper templates.
Popular flowers such as carnations can be easily made from a regular napkin. These delicate flowers will certainly not wither soon.
Scrapbooking is another popular form of creativity for both children and adults. From special colored paper you need to cut out simple flowers for cute bouquets or decoration.
Easy ideas for scrapbooking - try cutting roses, leaves and petals from special sheets of paper. And then glue everything onto the card along with bows and decorative embellishments.
Making flowers can captivate you so much that you won’t notice how you transfer your hobbies to other materials, for example, fabric. Such cute flowers can make an extraordinary garland or a delicate flower basket.
Unique full size flowers will decorate your holiday.
The workshop for making life-size flowers will greatly diversify your creative life. Purchase a special frame from the store on which a flower of extraordinary beauty will be attached.
Sakura made of paper, like other spring flowers, will give you a gentle and warm mood.
Try making this flower using the origami technique.
Or cut from a template.
flower composition
An interesting flower arrangement can be made from several multi-layer napkins. List of required materials:
- Scissors;
- Stapler;
- The base, which can be used as a foam ball or newspaper crumpled into a ball, wrapped with threads to fix the shape.
- PVA glue.
Do it yourself
- A circle with a diameter of approximately 14 cm is cut out of a napkin. This size may vary depending on the dimensions of the napkin and the size of the flowers being made. To give the flower greater expressiveness, the edges of the circle are outlined with a bright felt-tip pen in a color contrasting with the general background.
- Exactly in the middle, the cut out circle is fastened with a stapler with two staples crosswise.
- Now the top layer separates and rises, folding in a beautiful zigzag. All subsequent layers are laid out in the same way.
- Having made about 16 flowers, you can attach them to the base with glue, placing them over the entire surface of the ball, close to each other.
- Next, you can place green paper leaves between the flowers, this will give the composition a more impressive look.
- All that remains is to put the glued ball in a beautiful flowerpot or vase, making it a full-fledged decorative element of the interior.
Step-by-step instructions for making a flower from a colored paper napkin
Original design of a flower made of colored paper
A wonderful red aster, made with your own hands from a paper napkin, will always remind you of summer
Such a composition can be made not only from paper napkins, but also from other suitable material, such as corrugated paper or colored felt.
Video: how to make original paper flowers with your own hands
Applications and paintings
All children love to create bright colored appliques.
These crafts, made from paper napkins, are very bright and attract attention with their unusual appearance. There are several easy techniques for creating color pictures from napkins: mosaic, trimming, volumetric applique
Application “Bouquet of lilacs”
This craft is made using the mosaic technique. To work on it you will need:
- one napkin each in white, pink and purple;
- green paper;
- colored cardboard;
- scissors;
- glue.
Applications using the mosaic technique are made from a wad of paper. To make them, a napkin must be cut into 3*3 cm squares and rolled into a ball.
Stems and leaves are cut out of green paper.
Three small triangles are drawn on cardboard with a simple pencil, marking the place for the flowers. Glue the stems and leaves into place. Then lilac brushes are formed from paper balls. Using a brush, apply a little glue to the previously drawn triangle and place a lump of napkin on it.
After completing the work, the crafts can be inserted into a frame.
Fluffy pictures
Working with small objects develops a child's fine motor skills and helps teach him perseverance and hard work. Creating beautiful appliques from small pieces of paper can captivate both the baby and his adult environment. This technique is called trimming. To make fluffy pictures from napkins you will need:
- napkins of different colors;
- children's coloring book;
- scissors;
- glue or plasticine;
- toothpick.
Before starting work, several preparatory steps must be completed. Choose a coloring book whose design will correspond to the child’s age. For kids, you can choose a picture depicting a multi-colored butterfly or bird. Using a simple pencil, mark the details of the picture with the same color. For kids, you can draw circles of the appropriate color.
Next you need to prepare the tool for work. It is made from a toothpick; one sharp tip is cut off with scissors.
The material for applique using the trimming technique is paper napkins, cut into squares measuring 1*1 cm. You can attach them to the paper using glue, applying it with a brush to small areas of the picture. For small children it will be more convenient to work with plasticine, which is smeared in a thin layer over the picture and colored leaves are attached to it.
When all the necessary preparations have been made, you can begin to work. Place the blunt end of a toothpick in the center of the paper square. The ends of the paper are carefully pressed against it and the workpiece is transferred to the drawing. To make the craft fluffy and voluminous, the pieces must be placed very close to each other.
In the trimming technique, you can only make the main figure of the picture, and color the shape using paints, felt-tip pens or colored pencils.
Adults can also make appliqués using this original technique, using self-drawn templates or coloring books for adults for bright panels.
Basket with carnations
This craft can be prepared together with a child of primary school age by May 9th. It combines several interesting and original techniques. Master class will tell you step by step how to make simple paintings from napkins with your own hands. To work you will need:
- white and red napkins;
- strips of brown paper;
- colored cardboard;
- markers;
- St. George Ribbon;
- scissors;
- stapler;
- quilling tool;
- glue.
Roll strips of brown quilling paper into round shapes 1 cm in diameter. To make an openwork basket you will need about 50 identical parts.
Carnation buds are made from napkins, which are folded in half twice. The resulting square is fixed in the center using a stapler. Curly scissors cut out a circle. Each layer of the figure is carefully lifted and pressed to the center, without affecting the last 2-3 layers. Thus, you need to make 4 red and 6 white buds. Before forming the flowers, the edges of the three white blanks are outlined with a red felt-tip pen to create a beautiful border.
Assembling the applique begins by forming a basket of brown circles. Before gluing the handle to the basket, glue the tape on one side. Paper carnations are glued in rows: 1 row consists of four red carnations, then three white and red carnations are glued and the white buds are placed in the shape of a triangle. At the end of the work, the St. George ribbon is tied in the shape of a bow.
Plaster vase
Gypsum is a very malleable material. By choosing interesting shapes for pouring from available items, you can create unusual vases. It’s just important to remember that the gypsum solution hardens quickly, so you shouldn’t hesitate while working.
Option 1
This vase is suitable for both dried and fresh flowers, since the inside is a waterproof container. For manufacturing you will need the following materials and tools:
- gypsum;
- water;
- tetra bag or other container (bottle, jar, glass);
- container for gypsum mortar;
- knitted fabric or other fabric;
- scissors;
- stationery knife;
- varnish
Master Class:
- Prepare the knitted fabric. You can use old clothes. You need to cut a piece and soak it in cold water.
- Using a utility knife, cut off the top part with the hole from the tetra bag.
- Make a gypsum solution. To do this, pour 1 kg of gypsum into 450 ml of cold water and wait a minute for it to settle. Stir the mixture thoroughly until smooth. Leave the mixture for 5-8 minutes, then stir again and immediately proceed to the next step. The plaster will not harden within 10 minutes.
- Squeeze the canvas from the water and place it in liquid plaster, soaking it generously.
- Remove the fabric from the solution and wait for the excess liquid to drain. Wrap the outer sides of the tetra bag with wet cloth. Three centimeters should be folded inside the container. Straighten the fabric, smooth out the folds. Leave the workpiece to dry for 1.5 - 2.5 hours.
- After drying, the product must be turned over and a round piece of fabric soaked in gypsum solution must be attached to the bottom. Give time to dry.
- If desired, the finished product can be decorated and varnished.
In order to slow down the setting of the gypsum and give yourself more time to form, you need to add a small amount of plasticizer to the solution water. It can be some kind of detergent or washing gel.
Using plaster and fabric, you can create another version of the vase. To do this, the canvas soaked in gypsum solution must be hung on an inverted jar, bucket or post, previously covered with film. The fabric should hang easily from the stand and not wrap tightly around it.
Option 2
The main material for such vases is plaster, and the tool is a mold for pouring the solution. You can use a special one, which is shown in the photo. But if there is no such device, then a plastic bottle and glass will do. The result will not deteriorate from this.
To make a vase you will need the following materials and tools:
- gypsum;
- water;
- container for gypsum mortar;
- plastic bottle;
- cup;
- cling film;
- PVA glue;
- plastic bag;
- acrylic paints;
- varnish
Master Class:
- Cut off the top of the bottle so that you get a plastic vase of the required height.
- Dilute the plaster with water to the consistency of thick sour cream. Stir the mixture until completely homogeneous and pour into a plastic bottle. Only a third of the container needs to be filled.
- Place a glass wrapped in cling film into the bottle with the solution. This will form a hole for the flowers. Leave the craft until completely dry.
- Carefully remove the bottle and take out the glass from inside. If necessary, sand the surface of the vase with fine-grained sandpaper.
- Make a three-dimensional drawing. To do this, you need to mix gypsum with PVA glue to a thicker consistency than the solution. Place the mixture in a plastic bag and cut a small hole in the corner. Grease the surface reserved for decoration with glue and squeeze voluminous flowers from a bag onto it. To form such decorations, you can use additional tools: a brush, a knife, a toothpick.
- Cover the dried elements with a thin layer of PVA glue. After drying, decorate the vase with acrylic paints.
- Coat the finished product with varnish.
The vase can be used only for dried flowers or as a decorative element. But if you put a glass of a suitable size inside, then fresh flowers can also decorate it.
Do-it-yourself corrugated paper carnations - step-by-step master classes, photos
The tradition of placing carnations on a memorial plaque or giving to veterans has French roots. So, even the troops of Emperor Napoleon considered this flower to be their talisman, giving courage on the battlefield. In our country, the scarlet color of the carnation is associated with freedom, honor, loyalty, as well as blood shed for one’s Fatherland. You can make beautiful carnations from corrugated paper with your own hands according to our master class with step-by-step photos - the finished flowers will decorate a package with a gift, a touching sign of attention in honor of Victory Day on May 9.
- corrugated colored paper
- PVA glue
- scissors
- cotton swabs
- ruler
- simple pencil
Unusual doll
Your child will definitely like this doll made from napkins. It can be used both as a toy and as a decoration for a children's room.
You will need:
- white and yellow paper napkins,
- napkins with a pattern,
- bright ribbon,
- white threads.
Step-by-step master class:
- We twist two thick tubes from white napkins - the torso and arms.
- We make hair: we twist yellow napkins into two loose tubes, place them crosswise on the body, after which we bend the body.
- We separate the head with threads.
- We wrap the tube for the arms with threads perpendicular to the body just below the head.
- We make a dress from a napkin with a pattern and tie it to the doll with a ribbon near the belt.
