how to make a lotus out of paper
Exquisite lotus, one of the most beautiful plants. The ancient Egyptians saw the lotus close at night and then bloom again the next day. That's why they associate this wonderful plant with the sun and rebirth.
If you want to make a lotus flower out of paper with your own hands , here are the 8 best master classes. These step-by-step tutorials range from beginner level to more advanced, including origami lotus flowers , simple and complex colored paper models, crafts for children. No matter what you try first, these tutorials will help you create eye-catching paper lotus flowers that will wow everyone.
Application of paper lotuses
As you already understand, creating a lotus from paper is a very simple task that even children can do.
So involve them in making this beautiful flower. The joint creative work of children and parents brings us incredibly closer together. And for children, this is additional training for hand motor skills. These crafts can be used to decorate both the holiday table and the interior. You can decorate a place for each guest at the festive table with each individual lotus.
Unusual and incredibly beautiful lotus flowers using the origami technique can either be attached to any surface or made into a wonderful bouquet. These lotuses can be used to decorate not only holidays, but also everyday interiors and children’s rooms. You can even make kusudama from origami flowers.
I would like to hope that you will like the work presented in the master classes. After all, flowers are the best decoration both at home and at work. And it doesn’t matter at all whether they are real or paper, the main thing is that they please the eye and lift your spirits.
The history of the flower
In Japan, this flower is a sacred plant. The lotus represents innocence, peace, beauty and the desire to be closer to the sun and spiritual harmony. The flower is also considered a symbol of the growth of the soul. No matter what place, good or bad, a person is, he must always maintain his purity of soul.
The lotus begins its life at the bottom of the pond. It gradually stretches upward, closer to the water, and constantly moves towards the light. As soon as the flower hits the surface of the water, it begins to bloom and turns into an elegant plant.
Pink Savannah Giant
A craft of such a majestic mammal made of paper for children can be timed to coincide with any event. With girls they make a pink animal, and with boys they always make a blue animal.
To make an elephant craft from corrugated colored paper with your own hands, you need to prepare: a sheet of thick cardboard, cardboard rolls from paper napkins, balls of crumpled food foil, a hot glue gun, several sheets of colored corrugated paper.
The basis of the craft is two foil balls. The larger ball will be the body, and the smaller one will be the head of the fairytale elephant. Use hot glue to connect the balls together. Cardboard sleeves will become the legs of the animal, they are cut to the desired size and attached to the body.
Now individual petals are cut out from colored corrugated paper and assembled into a rosette on a wooden toothpick. These roses cover the entire body and head of a fairytale elephant. The ears and soles of the paws are made of cardboard. The craft is ready.
Necessary materials and accessories for work
Creating a lotus from napkins with your own hands is quite simple; it requires a minimum of available materials. Thanks to this, you can decorate the table not only at home, but also in a restaurant or at a picnic.
To create an unusual figure you will need:
- Thick paper or fabric napkins for leaves - 12 pcs.
- Napkins for petals – from 36 to 96 pcs.
- Knife and regular scissors.
- Thick needle.
- Thick thread or silk floss.
In addition to napkins, you will need scissors and other materials and tools.
It’s better to try your hand at creating such original decorations using thick paper napkins. Then you can move on to creating fabric models. It is more convenient to work with starched fabric. Advice. If you take material of different shades, you can create picturesque leaves and a flower. Additionally, you can make stamens from paper napkins of a different color and install them inside.
Additionally, you can make stamens from another material.
Tools and materials Time: 1 hour • Difficulty: 4/10
- double-sided colored paper for a flower measuring 13.5 x 7.5 cm, 8 pieces (choose the color to your liking);
- double-sided colored green paper measuring 13.5 x 7.5 cm, 4 pieces (for leaves);
- thin elastic bands (or wire);
- scissors, ruler;
- pencil.
Despite the apparent complexity, making such a craft is quite easy, and step-by-step instructions with photos and a detailed description fully explain how to make such a flower correctly.
To make a flower, you will need double-sided colored paper that is quite strong and flexible, since the elements of the craft will need to be wrapped, folded and then folded again in opposite directions.
The size of the finished flower varies between 9-10 cm in diameter. If desired, you can reduce or increase the size of the paper blanks accordingly, and then the lotus will turn out to be a different size.
Origami "Chamomile"
The secret of a beautiful origami paper daisy is a large number of petals, which you need to fold separately. Then use the flower as an applique or stick it on a thick base to add volume and assemble a bouquet. Fold the white diamond into a triangle with the base facing up and fold its sides up from the top. Turn the protruding corners to the joint in the opposite direction and turn the part over - this is one petal.
Using the same principle, only using green paper, fold the leaves. Place the square with the angle up and fold its side back and forth so that the fold goes in the middle of the rhombus and the edges coincide. Do the same on the other side - and the leaf is ready!
Origami "Rose"
Not the simplest, but very effective scheme, for which you traditionally need a square sheet of paper. Fold it in half twice and unfold the top layer of the small square into an isosceles triangle. Then turn the parts over and do the same on the other side.
Fold the lower corners at the base of the “book” upward towards the top and straighten each of them into a small square. Fold back the top of the small squares, as in the diagram, to create an impromptu seamless house. Turn the workpiece over and repeat all manipulations on the other side.
Unfold the top of the piece according to the pattern to reveal the petals, turn the square over and fold it into quarters. Take the future flower by the middle and carefully scroll clockwise to form it. Use a toothpick to turn the sharp corners to make the rose round.
Petals
The flower consists of two types of petals: lower and upper.
To make the upper petals, we roll 4 rolls from 60-centimeter strips with a width of 5 mm. To get long paper strips, glue two standard strips together.
We open two of the resulting spirals to a diameter of 27 mm, and 2 to 23 mm. From the first we form a “crescent” shape, slightly rounding the ends, from the second we make “semicircles”.
We assemble the petal according to the diagram as in the photo. 23 mm. We glue the elements together, and then frame them with “crescents”.
We frame the elements glued together with a separate strip of paper of the same width. It will be enough to wrap the petal with this paper tape twice.
One flower will require from 7 to 11 similar petals.
For the lower petals, the assembly pattern will be slightly different. To assemble one such petal, we roll up three spirals from strips 5 mm wide. and 60 cm long.
We open two blanks in a template up to 27 mm. and form them into “crescents”. We align the third roll to 23 mm. and give it the shape of “eyes”.
After this, we assemble all the parts as shown in the diagram.
And we braid it twice around the edge with additional paper tape. You will need 5 - 7 such petals.
Paper lotus using origami technique
How to make an origami lotus, master class
This beautiful flower can decorate any gift. And if you make several lotus flowers and glue them onto cardboard, placing large green leaves nearby, you will get an excellent composition that you can give to your mother or grandmother. You can decorate a holiday table with these flowers.
For a child, making such a flower will not be difficult, and you will only help him a little with this.
Materials:
Take a square piece of paper. Do not use glossy paper, as it will crack at the folds. Regular cheap colored paper is best suited for this craft.
PROGRESS: Step 1. If your paper is single-sided, then place the colored side up. Fold the sheet in half.
Step 2. Unfold, rotate the sheet 90° and fold in half again.
Step 3. Unfold the sheet, turn it over so that the colored side is on the bottom. Fold the corners towards the center.
Step 4. Without turning over to the other side, bend the resulting corners to the center again.
Step 5. Fold each movable triangle in half, first from one corner, and then, unfolding, from the other.
Step 6. You will have a square blank with these outlined lines.
Step 7. Now turn it over to the other side and bend all the corners towards the center.
Step 8. Turn the workpiece over again, bending the corners you just folded. You now have four more new folds in the middle. You will need them a little later, but for now, fold each movable triangle in the middle so that you can grab it with your fingers. Iron the small protruding triangles well so that they look up.
Step 9. Turn the workpiece over to the other side and bend the corners to the center along the folds so that the protruding triangles are at the edges of the workpiece.
Step 10. You should get a figure like this. To prevent it from opening, bend the middle inward and hold it with your fingers.
Step 11. Turn the craft over to the other side.
Step 12. Fold the edges of the paper outward from the center.
Step 13. Fold the piece in half, but do not iron the fold.
Step 14: Use your other hand to gently pull the corner. He'll deal with it easily.
Step 15. Do the same with the opposite corner. To extend the other two corners, fold the craft again, but so that those corners fold in half. And repeat the steps. The back of the lotus should look like this.
Step 16. Turn the flower over to the front side and straighten all the petals.
Step 17. And then make the very edge of the corner of each petal sharp. These are the flowers you should get.
Popular articles Frame for rubber bands
LiveInternetLiveInternet
- Registration
- Entrance
—Categories
- Cooking (2260)
- Baking (230)
- Salads (148)
- Desserts (124)
- Meat (92)
- Fish (72)
- Snacks (57)
- Sauces (33)
- side dishes (32)
- Cooking in a slow cooker! (9)
- Preparations for the winter, preservation. (4)
- Cheeses, cottage cheese, masses (3)
- Drinks (2)
- Sewing (692)
- Bags (33)
- Tilda (16)
- Dresses, sundresses, Skirts (14)
- Curtains, lambrequins (14)
- Shoes, Slippers (12)
- Soft toys (10)
- Pillows! (6)
- Pants, shorts (4)
- Pincushions (3)
- Potholders and everything for the kitchen! (1)
- Health (552)
- Cosmetology (378)
- Manicure (30)
- makeup (23)
- Scrapbooking (236)
- Postcards (98)
- Backgrounds, tags, journaling applications (2)
- Sketch (1)
- Tape fantasies (190)
- useful tips (163)
- Soap making (152)
- Knitting (145)
- Knitting needles (31)
- Hook (26)
- crochet toys (15)
- crochet stoles, shawls, scarves, berets (5)
- sweaters, jackets, crochet sweaters (1)
- booties, slippers, crochet socks (1)
- FELT (144)
- Fomiran (4)
- Kanzashi (144)
- Decoupage (140)
- Handicraft (124)
- Painting (16)
- flowers Plants (106)
- Drinks (102)
- Paper art (102)
- Children's creativity (99)
- Early development (77)
- Children's coloring books (3)
- Ideas (95)
- Interesting (86)
- Soft toys (86)
- Bouquet of sweets (82)
- Corrugated paper flowers (29)
- Ideas (74)
- Interior (22)
- repair (5)
- Pictures (68)
- Jewelry (64)
- Jewelry (24)
- Self-development (62)
- Dolls (55)
- Decor items (53)
- Video Master class (52)
- Sports (51)
- Exercises (45)
- Plastic, polymer clay (51)
- computer (49)
- information (38)
- programs (9)
- viruses (1)
- hairstyles (49)
- Interior (48)
- Holidays! (43)
- New Year (33)
- stencils, templates (36)
- useful information (35)
- Animals (33)
- Beverages. (32)
- Cold porcelain (30)
- Paper weaving! (28)
- Money tree (27)
- Flower tree (16)
- Coffee tree (4)
- Leather (23)
- LEATHER JEWELRY (14)
- Faith! (23)
- parables (22)
- Psychology (21)
- Aphotisms and Quotes (19)
- Drawing! (18)
- Videos (18)
- Clips (4)
- Quilling (18)
- Books and magazines on handicrafts! (17)
- Salt dough modeling (17)
- Travel (17)
- Beading (16)
- Wool felting (15)
- Felt (2)
- Candles (15)
- Embroidery (14)
- papier-mâché (13)
- Jeans) (12)
- Toys (12)
- Carving (11)
- Wedding theme (8)
- Jokes) (8)
- Good mood (5)
- Makeup (6)
- Shibori (2)
- nature (2)
- Wreaths (1)
- Ukraine! (1)
- Emoticons (1)
- Fashion (1)
- dresses (1)
- CANDIES (1)
- Batik (1)
- Music! (1)
- Music (1)
- Woodworking (1)
- Working on the Internet (0)
- Missing people (0)
- Missing children (0)
- help (0)
—Search by diary
—Subscription by e-mail
—Interests
— Regular readers
—Communities
-Statistics
Lotus flower | DIY master class
Flowers can be made from any material: thread, fabric, beads, wood, iron... But the simplest crafts can be made from paper. Sometimes you see a bouquet and don’t understand what it’s made of, but you come closer and look at the paper composition. Today I want to share with you a fairly simple tutorial on making a lotus flower from paper. To work, you will only need a few sheets of double-sided colored paper. The simplest option is two colors: always green and another bright one (purple, pink, blue). So, sheets of paper must be cut into equal rectangles, each size should be 10 cm by 4 cm. For such one flower you need 4 green blanks and 8 colored ones. Take one rectangle and fold it in half lengthwise.
We open and bend two corners inward from one edge.
The same must be done on the opposite side.
Now we bend one long side towards the center.
You also need to do the same with the second half. This is what each piece should look like.
This makes a total of 12 stripes: 4 green, 4 purple and 4 blue.
They need to be nested one inside the other. For example, green to purple, and then blue. Below (in the middle) there is always a green color.
You need to make 4 tabs of 3 blanks each. Place them with their wide sides facing each other. And in the middle you should connect them with a small rubber band.
We bend 8 rays (like a snowflake).
And we begin to gradually turn the edges of the papers outward. It turns out to be a beautiful lotus flower.
sdelaysam-svoimirukami.ru
Assembling napkins
First you will have to prepare the surface for work; all products must be completely dry, since even a drop of water can ruin the craft .
Everything must be clean, and there must be no open windows in the room, otherwise the material will fly apart.
The first element - the base - will be made from a green napkin; it will need to be folded diagonally. Starting from the corner at the top, the middle is outlined, then you need to fold the craft again so that it becomes creased. All side parts are folded towards the crease.
Then the structure needs to be turned over and the protruding parts bent back. After this, the craft must be folded in half.
Next, you need to make 12 parts according to this pattern .
When all 12 elements are made, they are sewn together. The parts are sewn together by piercing all ends, first on one side and then on the other.
After this, the lotus flower from the napkins is pulled together and fixed.
Once the base is created, you can move on to the plant itself. The flower petals will be made according to the same pattern as the base. This will require a lot of time and effort, since ninety-eight parts need to be created.
After creating all the elements, you can proceed to assembling the flower. To do this you will need a small metal spoon. The pink petal is thrown over the green one and deepened with the help of a spoon.
Next, paper petals are inserted in a circle until the end of the row. The new row is done in exactly the same way, with the only difference being that now the pink parts are inserted into the pink ones.
You should have 8 rows of pink parts.
After this, you can complete the middle of the flower. From yellow products you need to twist thin tubes, fold them in half and insert them into the center of the plant. You can make as many of these stamens as you need.
That's all, the figurine is ready and can be used to decorate any table.
These methods of creating a lotus will be a great activity for craft lessons, as children can easily make such a flower for decoration.
DIY corrugated paper daffodil
It becomes a little sad when beautiful flowers fade. This is an unchangeable fact, because these living creatures are short-lived. That’s why it’s so nice to look at artificial flowers, because they will never change, they will never cease to please the eye. In this master class we will show how you can make a daffodil from the most ordinary corrugated paper without much effort with your own hands.
We are studying a master class: do-it-yourself daffodil from corrugated paper
Before you start working, it is advisable to prepare in advance the materials needed to create a flower. They can be purchased at any store in the stationery department.
Necessary materials:
- white and yellow corrugated (creped) paper to create a daffodil bud;
- green corrugated (creped) paper;
- threads or very thin wire;
- a piece of wire to create a daffodil peduncle;
- scissors;
- glue stick.
The necessary materials have been prepared, you can start creating a daffodil with your own hands.
Instructions:
1) Take the stem in your hands and wrap it with green crepe tape.
2) Now we begin to make the stamens. Take yellow crepe paper, bend it in half and fold it 3-4 times. Then, we make cuts along the entire length of the workpiece.
3) Lay out the ribbon and begin to twist the ribbons into threads. It is enough to make 1 piece, and the rest of the shelf can be cut off.
4) Now we take the stem, distribute glue 2-3 cm from its end and wind the resulting ribbon with threads onto the tip of the stem.
5) Thus, the inner part of the flower is obtained.
6) Now let's start creating the daffodil bowl. From yellow crepe paper, cut out a strip 10 cm long and 2 cm wide. Lay it out in front of you so that a depression is formed in the middle. After this, we begin to wind the resulting ribbon onto the inside of the flower.
7) At the same time, you must not forget to make large folds so that the flower turns out voluminous.
After completing the flower, you need to wrap its lower part with thread. After this, open the folds a little and press down the base of the flower a little at the base. This way he will be even more expressive.
10) Give the cut out petals a slightly convex shape, like real tulips.
11) Place the first petal at the base of the bud and secure it with thread. Then we attach two more petals so that all three do not overlap each other, and we also fasten them. This is how the first tier of petals turned out.
12) We make the second and third tiers in the same way as the first.
13) Secure them from below with thread and then with green crepe tape.
14) Stepping back a centimeter from the base, we make a “peduncle knee”.
15) Now take white paper and cut out a petal from it.
16) We twist the resulting petal with our fingers, then straighten it and attach it to the stem using glue. We decorate its lower part with green ribbon.
17) Bend the daffodil petals outward, straightening them.
18) From green paper, cut out three sheets of flat and narrow shape and glue them to the bottom of the stem.
That's it, the corrugated paper daffodil is ready! Now you can make a whole bouquet of flowers in the same way and display it in the room. This way you can demonstrate your enviable needlework skills to all guests, as well as add more warmth and comfort to the atmosphere in the room.
A little surprise made from candies will help add originality to an ordinary homemade flower. For this, it is a good idea to make a daffodil from crepe paper with candy in the center.
Before starting work, you need to buy the materials necessary for color consciousness. They can be purchased at any specialty store or stationery department.
Necessary materials:
- corrugated paper in green, white and yellow;
- candies;
- wooden skewers;
- hot glue;
- scissors;
- tape;
- scotch.
The necessary things to create a flower with a surprise are ready, you can get to work.
Instructions:
1) Take the yellow color and cut out blanks for the core from it, while twisting the end of each element.
2) Then we take white paper in our hands and cut out the petals. After this, we give each of them a natural shape, stretching them a little.
3) From green paper we make leaves for the flower.
4) Now we take wooden skewers in our hands and attach the candies with glue.
5) Then we take a stick with candy and fix the blanks for the core with hot glue, and then glue 6 white petals in a circle.
That's it, a wonderful bouquet of daffodils with sweets is ready! Such a product will not only decorate any home, but will also become an original gift for loved ones.
How to make a paper lotus with your own hands
I suggest making a lotus flower from colored paper using the origami technique for beginners. This craft is based on a module called “door”. The “lotus flower” craft is recommended for children aged 6 years and older. So, let's get started.
For one lotus flower we will need paper in four colors: green, yellow, pink and red. We will also need scissors, strong thread and a ruler.
First, cut the paper into rectangles with sides of 7 and 14 centimeters. We need two red rectangles, six pink and four green. Cut a strip of yellow paper 1-1.5 cm wide along the entire length of the sheet.
Next, the rectangle needs to be folded in half parallel to the long side.
Now you need to bend the side parts of the workpiece from both sides to the middle.
Manufacturing stages:
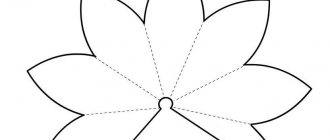
- We create two templates from white paper in the form of two circles of different diameters. Cut it out.
- Draw a small circle in the center of each shape. Next, divide each circle into eight equal parts. Cut out four parts.
- Then we transfer the outline of the templates onto a white sheet of paper. We cut it out and get two circles with slots.
- Take one part of the large circle and fold the top sides together. We get one lotus petal. Fix its volumetric shape with glue.
- Then we do this with other parts of the circle to get a finished craft element.
- We move on to a small part of the circle and create beautiful petals.
- Turn the workpieces over. Glue the small part onto the large one.
- Next, from green paper we create a leaf for the lotus on which it will be placed.
- Attach the lotus to the green leaf.
- Now we will make the middle of the flower. To do this, we use yellow or orange paper. Cut a circle out of it.
- We make slits towards the center.
- We twist the stripes and get the middle of the flower.
- Glue the yellow element to the center of the lotus.
Our colored paper lotus is completely ready. It will decorate your desktop with a summer mood and give you nothing but positive emotions.
For today's master class I was inspired by this beautiful paper lotus made using the origami technique. I saw it on the pages of one website for handmeade master classes and also decided to add it to the collection on our blog. The origami paper lotus craft really looks very elegant, it can be used in any decorative fantasy. To serve a festive table, for example, you can make such a lotus for each guest on a plate and the table will immediately be transformed into a Japanese theme.
At first glance, the lotus flower looks like complex origami, but after watching the video in more detail, I was personally convinced of the opposite. An origami lotus is very, very easy to make - this is just the kind of origami that is suitable for beginners. By the way, this DIY craft is also suitable for children, because it is easy to do and will develop neatness in children. See for yourself - watch how to make an origami lotus flower in the video. But first, prepare for the origami master class: - origami paper of two colors or colored double-sided paper; - scissors; - stationery eraser. And before starting the master class, you need to cut the paper into separate parts of certain sizes: - 8 parts measuring 15x7.5 cm - these are parts for a bud, so we use for them paper of the color that implies a bud; - 4 pieces measuring 5.8 x 2.9 cm - this is paper for the leaves under the bud. Next, watch the video.
This is how you can make a beautiful lotus flower from origami paper with a few movements. This is one of the options for crafting a lotus, and the simplest one, it is made in the likeness of modular origami.
By spending a small amount of time, you can decorate your interior for the holiday with paper flowers. Take and cut sets of parts of different sizes to get buds of different sizes and create a stylish composition of white lotuses. Make your own decorations. Have fun and enjoy your creativity.
Origami “Violet”
Cut out a small pentagon from a sheet of paper and mark all its centers and diagonals, as in the diagram. Assemble a diamond-shaped multi-layered petal so that there is one inner bend on the left and two on the right. On the right, bend the edge about a centimeter through all the layers at once, turn the parts over and do the same on the left.
Firmly grasp the base of the origami flower and turn all the petals down, and then gently twist the same base to give shape. For greater expressiveness, use a thin toothpick to carefully bend all the inner and outer corners of the petals. This way the flower will become more elegant and at the same time more textured!
Origami "Tulip"
Mark a square sheet of paper with folds along the diagonals and central axes and form a triangle out of it. Fold the corners at the base up separately on both sides, and then flip one segment from right to left. Fold the sides of the new small diamond towards the middle and tuck them slightly into each other.
Popular articles Weaving a laundry basket
Unfold the second layer of the small diamond and do the same thing, and then inflate the bud and turn the petals to the sides. For a tulip stem with a leaf, bend the green diamond with its sides towards the center, first from the top and then from the bottom. Tuck the upper sides again and bend the part in half: the thin part is the stem, and the thicker part is turned into a leaf.
Corrugated paper lotus
Olga
Corrugated paper lotus
In order to make a lotus, we need:
1. white, yellow, red corrugated paper;
4. glue stick;
7. paper napkins;
First of all, you need to make the petals. Cut out a rectangle from corrugated paper, 2 centimeters wide and 5 centimeters high. Each strip needs to be folded in half, cut off a small corner at the bottom on one side, and round it off on the other side to make a petal. We stretch each petal in the middle with the thumbs of both hands.
Cut out a circle of cardboard with a diameter of 3 cm.
We begin to attach lotus petals along the edge.
We begin to lay out the second layer of petals, moving closer to the center.
Glue the third layer of petals even closer to the center
From a white paper napkin we will make lotus stamens. We cut out a strip measuring 1.5x10 cm and make a fringe along one edge. We cut the stamens without reaching the end, the smaller they are, the more beautiful they will look.
Then, not tightly, but very loosely twist it into a tube.
Where the edges are not cut, turn them out a little and apply glue to this place. Glue it in the middle of the flower.
This is how you can very simply and quickly make a lotus from corrugated paper of different colors.
Dress made of corrugated paper March 06, 2022 in St. Petersburg State Budgetary Institution “CSRIiDI Kirovsky District”, specialist in social rehabilitation of the day care department Ozherelkova.
Hyacinths made of corrugated paper The approach of spring pleases not only with warm days, but also with the first early flowers that begin to bloom immediately after they fade.
An astronaut made from cardboard and corrugated paper On April 2, 1961, a triumphant human flight into space was made. It was accomplished by Yuri Gagarin. And from that time on, all boys and girls.
Corrugated paper crocuses Corrugated paper crocuses are a real work of art. These beautiful spring flowers are the first to remind us that they are coming.
Quilling ideas from corrugated paper Nowadays, there is a wide variety of materials for creativity with children. They are useful for motor skills and develop imagination.
Master class “Corrugated paper cone” A master class with step-by-step photos on how to make a corrugated paper cone will be useful for educators and additional education teachers.
Master class “Corrugated paper cutting” The technique used to create this work is called paper cutting. Trimming is a very interesting, uncomplicated job.
Craft “Cockerel made of corrugated and colored paper” Hello dear colleagues! Our favorite, long-awaited New Year holiday is approaching! 2017! I decided with my son Zakhar.
Festive hat made of corrugated paper To make a hat we will need: - corrugated paper - glue - scissors - cardboard The diameter of the hat is equal to the diameter of the child's head. Let's get ready.
Christmas trees and corrugated paper Step 1. Cut out triangles from thick cardboard of the required size. I cut it out of an old cardboard box. Step 2. Cut out the corrugated strips.
Crafts flowers from viscose napkins
What can be made from viscose napkins? Flowers, and they will look no worse than paper ones.
Working with such material will be easy even for those who have encountered viscose for the first time. Let's find out how to make a rose from a viscose napkin.
But before work, prepare the necessary supplies:
- Scissors
- Stapler
- Viscose napkins
- Pencil
- Cardboard mugs with a diameter of 7, 6 and 5 cm
- Pins for fastening
Now feel free to begin the creative process.
- Unfold the napkin and place three circles on it at a distance of 2 cm from each other
- Cut 3 strips from the napkin. The width of each strip should be 5 mm larger than each circle on each side
- Fold each strip like an accordion, but so that when folded it looks like a square, on top of which a cardboard circle can easily be folded
- Secure the circles with a viscose accordion using a needle and cut out the circles according to the template
- Now take one of the large circles and fold it into a “seed bag.” Staple in the center
- Next, turn the narrow edge of the part up, and turn the wide part up to the bracket. The narrow edge is the core, and the inverted edge is the petal
- Fold the edges down slightly to form a rose.
- From the remaining circles, form roses of different sizes.
- Ready-made flowers can be glued to cardboard or other surface to create a panel.
WATCH THE VIDEO
Master class “White lotus from colored paper”
An amazingly beautiful flower can be made from plain white paper. Following a detailed master class, even children can cope with this task.
The work will require the following:
- office paper (white and light green);
- scissors,
- ruler,
- a simple pencil;
- thread or a small piece of thin wire.
Progress
- First of all, you should prepare the necessary preparations. To do this, we cut rectangles of equal size from paper with sides of 10 cm and 17.5 cm. You will need 8 white parts for the petals, 4 green parts.
- When all the parts are prepared, we begin the folding process. First, fold each rectangle in half (lengthwise) to mark the center fold line. Then, having unfolded the part, we bend the corners to the middle line (top and bottom).
- In the green parts we bend the side parts to the middle.
- Fold the piece in half so that all the folded corners are on the inside.
- We bend the resulting narrow workpiece in half. You get 4 details of the lower petals.
- The white petals for the bud are folded a little differently. After the upper and lower corners are folded to the middle line, you should turn the part over and fold the side edges inside out.
- Then we fold the white piece in half so that the folds remain on the outside.
- We bend each workpiece in half lengthwise, similarly to the green parts. The result should be 4 green and 8 white future petals.
- Now you should fold the petals into 4 piles. We place a green part at the bottom, and put 2 white ones on top (we make a three-layer workpiece). There should be 4 similar elements.
- We fold them evenly so that the corners completely coincide, and pull them in the middle with thread (wire).
- We straighten the tips evenly and begin to bend the petals.
- We turn out one inner petal as close to the middle as possible (4 pieces).
- We turn out the next 4 petals, stepping back slightly from the original fold line.
- We continue to bend the white petals, forming a lotus bud.
- In the last row we bend the green parts upward, trying to spread them as wide as possible.
- The lily flower is almost ready! To decorate the craft beautifully, you can glue the bud onto a pre-cut sheet of green paper. Such a craft can also be an original souvenir if you put a truffle candy in the middle of the flower.
Folding a three-dimensional two-color lotus
To make a three-dimensional origami lotus, you will have to try a little more. Therefore, it is better for beginners to practice the previous version before starting this one. Because this flower will be made of several parts, and each one is folded in its own way. Instructions with photos and assembly diagram - in a step-by-step MK. Follow it, so as not to make a mistake, every time you start the next flower, until you remember the sequence in detail so that you can do it yourself.
- Cut out 12 rectangles of the same size from paper, 4 of them will be for leaves, so they can be green. Although a plain lotus would be gorgeous!
- According to this scheme - petals:
- And this is the leaves:
- Next, you should combine the elements in threes, nesting them inside each other:
- Fasten them in the middle with thread. The resulting parts should be 4, they all need to be connected together and straightened so that the petals become the same.
- And now the most interesting thing - straightening the petals - they need to be bent and turned out:
- The leaves, on the contrary, need to be bent, as in the photo:
- And this is what the lotus figurine will look like at the end:
Depending on how exactly you bend the petals, the appearance of the flower will depend. - If you hide a candy inside, it will no longer be just an origami lotus, but an original pleasant surprise for anyone!
Bouquet of paper daffodils
Careful viewing of handicraft lessons will allow you to more confidently handle the source material and in the future begin to independently make more complex crafts. Let's look at step-by-step instructions for making daffodil crafts from colored crepe paper with your own hands.
You should prepare multi-colored wavy folded paper, polyvinyl acetate glue in a tube, and thin wooden knitting needles in advance. Artificial flowers do not necessarily have to match natural shades.
Flowers are made in the following sequence:
First you need to make an inflorescence. To do this, take beige crepe paper, roll it into a cylinder with a diameter of fifteen millimeters and press it tightly with a weight to form a multilayer strip. Now small and frequent cuts are made with scissors to create a curled fringe.
The fringed strips are wound tightly onto wooden knitting needles and fixed with glue. The same operation is performed with dark green crepe paper. Using a light shade of green, cut out two quadrangles of arbitrary shape, fix them with glue to a wooden stem and give them a convex-concave shape.
Using this method, several more plants are made from the most fantastic shades, tied with a bright ribbon and a collection of amazingly beautiful flowers is obtained.
Useful recommendations from professionals
Using wavy folded paper, you can create an endless variety of different crafts. However, manufacturing processes must always adhere to certain rules, observing which the finished product will meet the artist’s expectations. Let's briefly consider the most basic rules.
When making an open rosebud, the petals should not be cut exactly the same size. To make the plant look natural, the petals should be cut out to any size and shape to make each flower unique.
When making a plant stem, the corrugated paper of the craft should be pressed tightly against the material of the base of the stem with scrolling. Depending on the degree of pressing of the paper, a new unique plant will be obtained each time.
When assembling a flower arrangement from plants of different shapes, a third of the stem should be left without a finishing layer of paper. This will make the composition design process easier.
Benefits of working with crepe
Corrugated paper is an excellent material for creating original flower buds, figurines, and panels for wall decoration. The structure of the crepe is soft and very pliable, which makes it possible to give finished products a realistic look. In addition, a number of advantages of choosing should be noted:
- Affordable cost per roll.
- Ease of working with crepe.
- There is no need to acquire special knowledge and skills.
- Working with crepe is a good opportunity to develop your creative inclinations.
- Large selection of models for independent work.
You can decorate wedding and banquet halls, school parties, and the interior of your own home with crafts made from corrugated paper. Lush gift bouquets, greeting baskets and sweet presents are prepared from crepe.
Paper lotus flowers using origami technique
Flowers are the most popular theme in origami technique. Let's try to diversify the list of crafts by showing how you can make a voluminous lotus flower.
To assemble the flower you need to prepare 12 rectangles of paper. The most convenient size: length – 8 centimeters, width – 4 centimeters. But you can take any size you need, larger or smaller, the main thing is to maintain the proportions. The most beautiful lotus flowers will be obtained if you take 4 green sheets of paper and 8 white, pink or purple flowers. Then you will get a white, pink or purple lotus on a base of green leaves.
Popular articles Congratulations on March 8th. Texts of congratulations on March 8
Fold a sheet of paper in half lengthwise and open it back. Bend the four corners inward towards the fold. Next, we bend the two sides to the central fold, and bend the product itself in half along the central fold in the opposite direction.
There will be 12 of these blanks and they need to be folded in a certain order. Fold two blanks of the color you chose for your flower into one. And one green one is put into these two. Do the same with the rest, as a result you will get four blocks.
Stack them together and wrap them tightly with thread in the middle. Leave the free ends of the thread long so that you can easily attach the finished flower.
Distribute the future lotus petals evenly in a circle. Turn the workpiece over with the colored (not green) side up and begin to lift the top petals. But you don’t need to lift everything in a row, but through the petal. This means that four out of eight petals will be raised in the first row. In the second row of petals, those that were missed in the first row rise. We repeat the next rows in the same order.
When only the green row remains, we do not lift it up, but simply these leaves should be straightened around the flower.
All the nuances of making origami lotus can be seen in the video.
Step-by-step instructions with photos
Step 1
- Take a sheet of green paper and fold it in half lengthwise.
- Fold all corners of the rectangle towards the line in the middle. Make sure that all bends are neat and symmetrical.
- Fold the right side of the craft towards the middle. Then fold the left side as well.
- Fold the craft in half with all folds facing inward.
- One leaf module is ready! Do the same with the remaining green leaves.
Paper star: learning to make a three-dimensional star with your own hands, photos, templates and diagrams for beginners
Step 2
- To make a flower module, take a cut piece of colored paper and fold it in half lengthwise.
- Fold all corners of the rectangle towards the line in the middle.
- Then fold the sides towards the line in the middle.
- Now fold the craft with all the folds facing out. The module is ready!
- Do the same with the remaining sheets of colored paper.
Step 3
- Take one green module and 2 pink ones (or another color of your choice).
- Place another pink blank in the colored module, and insert a green module into their middle.
- Do the same with the rest of the green and colored blanks.
- Place all the prepared elements in one even row. Hold it down.
- Secure the middle of all modules with a thin rubber band (or wire).
Step 4
- Arrange all the elements in the shape of an 8-pointed snowflake.
- Take one layer of the pink module and pull it towards you. Gently fix it in the center of the craft.
- Then skip one layer and pull out the next pink element. Secure it in the center. Thus, form the first layer of lotus petals, consisting of 4 elements.
- Using the same principle, form the second, third and fourth rows of petals.
Step 5
- When all the colored elements form a flower, form the leaves.
- To do this, simply turn the green modules upwards. Make all movements gently and carefully, otherwise the paper will tear or the flower will turn out to be asymmetrical.
A charming origami paper lotus is ready!
Corrugated paper lotus flower
This master class shows how to quite simply make a lotus flower from corrugated paper, which will be an ideal and impressive addition to a gift. The beauty of a flower will directly depend on the richness and plausibility of the shade of the material used.
To simulate a lotus flower you need to prepare:
- - corrugated paper in three shades - green, coral and yellow;
- - scissors;
- - any glue.
How to make a lotus flower step by step
- Lotus petals can be pink, for example, as shown in the final photo, or soft pink, or cream. You can choose corrugated paper of any available shade and simulate a flower using the given method.
- Cut out a round base for the composition from a piece of cardboard. Also make a blank for the sheet. The lotus leaves have a rounded shape, they are quite large, comparable to the flower itself. Cut out a piece of suitable shape from green paper.
- From coral-colored paper, make oblong blanks for the petals of a beautiful plant. At this stage, it is better to fold the paper in several layers, then cut out several petals of the same size at once. This way you will save time and get identical petals. The shape of the blanks should look like long, sharp marigolds.
- Make enough petals to create a lush bud. First, stretch out the green leaf and all the coral petals with your fingers. This must be done so that they take the desired shape. Stretch them carefully in the center to the sides. The green leaf will become more realistic, and the petals will bend at the desired angle, so the flower will be more voluminous. Glue the green leaf to the round base first. Then glue on the first row of brightly colored lotus head petals.
- Next, glue the second and third rows, the sharp ends of the petals should rise up. Taper the circumference of each layer to cover the center portion.
- Make a center out of a small yellow strip. Fold the strip in half lengthwise. Cut the resulting fringe-shaped piece with scissors.
- Twist the middle into a tassel. You can use a regular pencil for this (wind the fringe onto it). Glue the yellow center to the center of the flower to complete your craft.
A lotus flower made from corrugated paper turns out airy and realistic.
If you have eau de toilette with a suitable scent, you can sprinkle it on your product, then no one will distinguish the flower from the real one. You just need to work with thin paper very carefully, since it quickly becomes limp from liquid glue and can tear if stretched too much. In order not to forget the page address and share with friends, add to your social networks:
Creation of the Gulistan lotus
You can make a beautiful and festive lotus yourself from napkins. To work, you will need huge napkins. In total, you need to take 108 pieces. will help you make a lotus from napkins :
- The first layer will be created from 12 petals arranged in a certain way.
- First, all 12 parts are stitched with threads matching the color of the material. In order for the needle to fit normally and the visual appearance of the flower not to be damaged, you need to create holes with an awl at the base. First, everything is stitched on one side, then the craft is turned over, and everything is stitched on the other side. The base should stand perfectly, without falling or sagging.
- The remaining parts are created according to the same scheme as the base. When everything is done, the craft can be assembled. After completing this step, you should be more careful - if the parts at the base are turned down, then the lotus petals should be facing up!
- The petal can be tucked into the base and compacted firmly with a spoon or knife. Next, you need to assemble the entire first row of the craft. When everything is done, you can move on to row 3. The petals should again be tucked into the previous row with the “boat” facing up.
- Each new row should be closer to the central part. You need to press the leaves very tightly, because if the middle turns out to be weak, the lotus will quickly fall apart when transferred.
- There should be 9 rows in total. The flower itself should be dense and strong so that if you drop it, it should not break.
Many people think about how to make a napkin holder from napkins and how to make a pineapple from paper, everything is done in the same way, you just need to find a detailed master class and get to work. You can also make various crafts using the origami technique using modules. But remember that this is very difficult.
Originally posted 2018-04-18 13:51:59.
The lotus is a large flower that can be found in a pond in summer. Most often it is white, but there are other delicate shades. For example, pink or blue. Such a flower will look beautiful even when it is made of paper.
Modular origami: three-dimensional bud
You can make not only a beautiful craft, but also a functional souvenir in the shape of a lotus flower using the modular origami technique. A three-dimensional 3D figurine can decorate your workplace and serve as a convenient stand for writing instruments. Of course, the process of collecting a flower will take you more than one hour, but the result will not disappoint!
Preparatory stage
Modular origami involves assembling a craft from many similar parts that are prepared in advance. You can assemble the modules for a future craft, following the step-by-step diagram suggested in the photo.
From rectangles cut to the same size, we fold triangular modules using the same algorithm:
- Fold the piece in half (lengthwise).
- Fold again in the middle to mark the center fold line.
- Fold the side of the part towards the middle.
- Bend the edges protruding from the bottom.
- Turn the workpiece over onto the reverse side and bend the corners.
- Fold the piece in half.
- Make all the necessary workpieces in the same way.
To make a lotus flower, you will need to prepare modules of different colors and shades in the following quantities:
- pink (raspberry) – 126 pieces;
- pale pink – 240 pieces;
- yellow (white) – 50 pieces;
- green – 318 pieces.
Lotus Assembly Guide
- Assembly should begin from the bottom green part. We start folding from one module, expanding into 7 parts. Then we gradually reduce the number of modules to one in each working row.
- For the craft, you need to collect 6 identical green pieces and connect them together into one round piece using the remaining modules.
- Let's start assembling the bud. From light pink modules we lay out a part with a width of 5 modules (first we increase, then we reduce the number of parts in each subsequent row). In total, you need to lay out 6 light pink blanks.
- We lay out the light petals in a circle and begin to fill the spaces between them with modules of a dark shade.
- When the piece has a straight bottom edge, fold it, secure the edges and place it on a green base.
- We lay out the core from the yellow modules and insert it inside the bud.
To make the work stronger and more functional, it can be coated with transparent varnish on top. This craft can serve as a box for small items or a stand for pens and pencils.
A lotus made using the modular origami technique will arouse admiration and appreciation of your skill among others!