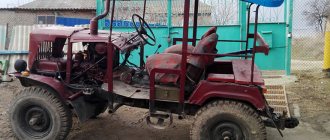
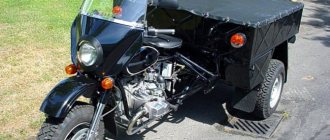
Detailed drawings of the buggy, as well as photos and descriptions of making a homemade double buggy.
Good day! I wanted to have a walking car. The requirements were simple - two places, beautiful, cheap. As they say, “quickly, efficiently, inexpensively, choose two points,” so two years have passed since the start of construction. I built on a one-day-a-week basis and did practically nothing in the summer.
The design and basic solutions were taken from the Australian ST2 car, but the frame was completely designed for domestic units. The car was first drawn in a 3D modeling program and then built according to the drawings. However, the drawings were actively adjusted during construction.
A little about the design of the buggy
The power unit from 2109 (1.5 l) is completely standard, only the CV joints have undergone changes. The rear struts are currently redesigned front struts from 2109, the springs are standard, the spring preload has been increased, the front struts and the rear struts are from 2109, the springs have been cut.
Shock absorber mounts: front - bottom mount standard, top - ShS, rear - bottom ShS from Opel, top silent from 2109.
Steering - cut rack from 2109, internal joints from ODA, external joints from OKI, homemade bipod shortened compared to standard ones, steering knuckles from classics.
The all-round disc brakes are from 2109, at the front through an adapter plate, at the rear in their original places.
Frame made of ST20 pipe, main arches 45x2, muzzle and side 30x2. Suspension tubes are ordinary suture, front 32x3, rear longitudinal 50x4, transverse 32x3. The seats are homemade according to drawings from the site, made of 1.2 mm iron.
ATVs designed on the basis of the Ural motorcycle
At the moment, several decades ago, the popular domestic Urals in Russia have been replaced by much more nimble and economical foreign models. In this regard, many people have their recent best “friend” standing idle and rotting in their garages. But not a single Russian person is able to allow good things to go to waste. Therefore, “Urals” are increasingly used to create a type of transport that is relatively new for Russian people. This motorcycle is unanimously recognized by folk craftsmen as the optimal basis for creating an ATV. Homemade ATVs made from it are an order of magnitude more economical and have greater draft power than their factory-made counterparts.
Photo of the buggy assembly process:
Making the frame.
Front lever.
The rear lever is a fist from 2108 with a welded pipe and amplifier.
Engine installation.
The engine mounts are made of jet rods from a classic VAZ.
Pedal assembly, main brake from 09, without amplifier, main clutch from classics.
Among the advantages, it can be noted that a person with a height of 195 fits freely, there is about 150 mm of space above the head, and the legs are also not cramped.
Now for the shortcomings. Due to the configuration of the front levers, the angle of rotation of the wheels is somewhat limited, sometimes not enough. The wheelbase is too big, which makes it difficult to turn the wheels, but when skidding, it’s quite easy to control.
When installing the engine, special attention must be paid to the operation of the left (short) inner CV joint during the suspension stroke in compression and rebound, because the angle of his work is close to critical. It might make sense to tilt the engine a little to the left, as was done in the B2908.
When attaching the rear struts, you need to make sure that during the compression stroke they do not touch the edge of the wheel rim.
I'm flying and my hair is back: we're testing a buggy with a 164-horsepower engine and weighing 580 kilograms!
It would seem that after the homemade Alex SUV, the ad base on ABW.BY will no longer be able to surprise us with anything special. However, as soon as we went from the automobile section to “Moto,” we immediately came across a very interesting device. What's important is homemade!
“It won’t be enough!” - said the hero of one famous cartoon, and in his desire to get as much as possible, he is similar to the owner of this buggy, Alexander . A turbocharged Opel GT, a cross-country motorcycle, a Condor buggy - he “outgrew” everything, but the thirst for power, extreme sports and speed did not subside. This is how this project came about.
“I bought a Condor 800 buggy a couple of years ago and really liked it at first. The cross-country ability is excellent: we performed such “feints” at RFC Belarus! But gradually the understanding came that after a motocross motorcycle there was not enough “action” - the dynamics were not the same, there was roll in corners... That’s when the idea arose to make my own “Barracuda”, very light and very powerful. I saw my ideal buggy like this: a completely purchased frame with suspensions, an engine from a Honda CBR1100 sports bike with power from 152 to 164 horsepower depending on the version, and “evil” shock absorbers so that you could jump like on a motocross motorcycle. But the main thing is that we needed full reverse gear, and we had to tinker with this!”
Before studying the design solutions of the Mogilev homemade buggies, let’s figure out what a “Barracuda” is. If you enter the phrase “barracuda buggy” into a search engine, the information received will be enough for several days of study. In short: this is more of a common noun, which refers to single-seat rear-wheel drive buggies with a characteristic “sharp” design. “Barracudas” have become popular due to the fact that you can buy both drawings and a finished frame with suspension arms on the Internet. And it looks much cooler than the “vegetable” Chinese buggies.
And then complete amateur performance begins: the owner is free to choose the power unit for the future “projectile”. Someone opts for a regular car internal combustion engine from a front-wheel drive car, and this solves several problems at once: you have a one-piece “engine + gearbox + drive shafts” design, and most importantly, a reverse gear. Minus - “high” gears, designed for driving on ordinary roads, greatly affect cross-country ability in difficult conditions. Roughly speaking, driving “pull” in the mud is problematic; you need some kind of “lowering”, which cannot be achieved without intervention in the gearbox.
The second way is “Barracuda” with a motorcycle engine. There are advantages here: high liter power, a gearbox with sequential shifting, low weight of the internal combustion engine, and, as a result, the buggy itself. By calculating the number of teeth on the rear sprocket (installed instead of the rear cross-axle differential), the homemaker can choose the ideal range of speed and torque so that the buggy does not “sour” even in the mud, and can rush across the field at 100 km/h or more. Ideal?
Almost. There is one very important drawback - there is no reverse gear, and without a “collective farm” in the transmission there is no way to do it. Many do-it-yourselfers make a compromise: reverse gear is provided by an electric motor (the same starter), but this is only suitable for rolling back. But off-road, such a “reverse” will not help you much. A full-fledged reverse gear is needed - and it is precisely its presence that makes Alexander’s buggy unique.
“I didn’t have to rack my brains for a long time about the transmission diagram. My company has an excellent team of homemade jeepers (by the way, this year they took 1st place at Ladoga in their category), and the guys suggested this option: the engine and gearbox are taken from Honda, and then the torque is transferred to the gearbox mechanical winch from GAZ-66. This is a fairly compact and lightweight unit, but at the same time with a large margin of safety. It had to be modified by increasing the shaft and mated to the engine. Through this gearbox with reverse, torque is transmitted to the rear differential from the Audi 200 - it has a factory lock and also has a large safety margin. The result was a very durable, but compact and, most importantly, lightweight transmission, thanks to which the total mass of the buggy reached 580 kilograms. The energy output turned out to be excellent!
Although everything didn’t work out right away: I had to tinker with the frame and suspension even more than with the transmission. I bought the entire frame, along with the suspensions, and was sincerely confident that this would save me money and time. However, it turned out exactly the opposite: almost everything had to be redone, from strengthening the shock absorber mounting points to the suspension arms. If I had known in advance, it would have been easier to weld it ourselves on the slipway according to the drawings; the result would have been a much more durable structure. And more optimal: the stock Barracuda was very wide, about 2200 millimeters along the rear track - and where would I go in the forest with such a Ferrari? I had to reduce both the front and rear tracks. At the same time, a shorter steering rack was installed.
We also tinkered with the shock absorbers. Initially I staged “Grodno” - racing drivers know what they are talking about. However, they turned out to be not quite suitable both in terms of quality and customization capabilities. Therefore, we decided to return to the Spectrum that was originally installed - and the buggy drove completely differently!”
Well, how did you go... Ridiculously “clubfooted” with its front wheels when unloading, Alexander’s buggy touches the ground for about half the time of the trip, and the rest of the time it flies above it. “Vocalizing” furiously (those who wish can watch the video on our Instagram channel), he instantly gains his “hundred” and rushes across the field so that the camera does not have time to focus on him. Gnawing the ground and throwing stones with its 28-inch drive wheels is a common condition that occurs every time he moves his right leg.
“We got a strong reduction, about 1:2, so the maximum speed is about 120, but the traction reserve is such that in high-speed sections I only use 6th gear, it “works” from 60 to 120 kilometers per hour. In the forest you can go to 5th or 4th, and the rest turn out to be lowered, for mud. The cross-country ability, by the way, is excellent - thanks to the good loading of the rear axle and the powerful engine, the Barracuda is practically not inferior to the all-wheel drive Condor...
By the way, I also installed another engine on the Condor, also from a motorcycle. It has become livelier, more interesting, but from the point of view of pleasure behind the wheel, the Barracuda is beyond competition. When you get the hang of it and feel it, you start doing things that sometimes make you scared later on. It is tenacious, sharp, dynamic - in fact, as planned, at the end I got a four-wheeled analogue of a motocross motorcycle with the same dose of adrenaline in its character! Why am I selling? There is already another project in the works, it requires a lot of money, so you need to part with something. It makes no sense to maintain a whole fleet of extreme vehicles. And I’ve already experienced all the possibilities of Barracuda, so it’s time to move on to new horizons!”
Pavel KOZLOVSKY ABW.BY Photo by the author and Pavel SLEPUKHIN
PS In parting, Alexander showed his new project, which is already in its final stages. Sleek frame, huge wheels, V8 - it will be a bomb! However, as promised, we are not publishing photos yet.
Many interesting options can be found in our motorcycle section
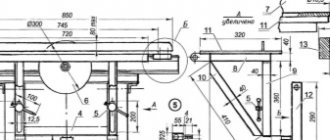
Buggy drawings
Buggy frame drawings.
Drawings of front suspension arms.
Drawings of rear suspension arms.
Places for attaching levers.
Some minor dimensions are not given in the drawings; we select them according to location.
Share on social media networks
Popular homemade products on our website
- DIY buggy from Oka
- Homemade tracked all-terrain vehicle: drawings
- Homemade buggy with your own hands
- Homemade Piranha buggy
- ATV drawings
- DIY potato planter for mini tractor
- Homemade Barracuda buggy (50 photos)
- Homemade buggy from SMZ motorized carriage
- Homemade buggy from Tavria
- DIY ATV
- Homemade buggy
- Homemade buggy: step-by-step construction
- Buggy from VAZ-2109
- Do-it-yourself rolling jack: photos, dimensions
- DIY tracked all-terrain vehicle: photo, video
- DIY buggy: photo and description
ATVs designed on the basis of Oka
For 20 years (from 1988 to 2008) in the vast expanses of our vast homeland, one of the most common cars was the domestic Oka (VAZ-1111, SeAZ-11116). Today, “Oka” is one of the most popular options for vehicles, on the basis of which home-made ATVs are created. In the manufacture of ATVs, the engine, gearbox, wheels and other auxiliary parts of the vehicle are usually used. Direct installation and construction of the ATV based on the Oka car is carried out in accordance with the drawings created by experienced designers. The defining moment when creating an ATV is to formulate the purpose of its use. Based on this, the future owner of the ATV opts for one of the two existing Oka engine options (35 hp and 53 hp).
What is karting
Karting is car racing using mini cars (karts). A kart is a mini sports car of the simplest design without a body with a small-displacement engine. But there are such cars with powerful engines, this will already belong to the class of “superkarts”. Cards of this class are capable of reaching a maximum speed of up to 260 km/h.
Device card
PIONEER class kart
1 - front upper bumper; 2 — gas pedal; 3 — brake pedal; 4 — gear shift lever; 5 — rear bumper; 6 — brake disc; 7 — main brake cylinder; 8 — frame (chassis); L — steering column bearing; B — steering column thrust bearing.
Overall dimensions of the go-kart:
- Length: 1015 mm;
- Front width between wheels: 750 mm;
- Rear width between wheels: 730 mm.
Even small children can take part in karting races. Below is a table of ages and racing units corresponding to power.
| Class | Age of participants | Machine frame | Engine | Rules |
| Micro | 6-8 | Homologated | IAME Parilla 60 (Italy) | The speed is about 60 km/h, competitions are local and throughout Russia. The technology is reliable. There are many participants. |
| Mini | 9-10 | Homologated | IAME Parilla 60 (Italy) | There are many participants, the speed is about 80 km/h, competitions both in Russia and local ones. The technology is reliable. |
| Super Mini | 10-12 | Homologated | IAME Parilla 60 (Italy) | There are many participants, competitions both national and local, the equipment is reliable, the speed is about 100 km/h. |
| Pioneer | 8-11 | Any | Domestic 50 cm³ with gearbox | An outdated class, there are few participants in all-Russian competitions, the equipment is unreliable, speeds are about 60 km/h. |
| Cadet | 10-13 | Any | Domestic 50 cm³ with gearbox | An outdated class, there are few participants in all-Russian competitions, the equipment is unreliable, the speed is about 80 km/h. |
| Mini Rocket | 8-11 | Any | Raket-85 (Sweden) | Outdated class, only local competitions, reliable equipment, speeds about 60 km/h. |
| Rockets | 11-13 | Any | Raket-85 (Sweden) | Outdated class, only local competitions, reliable equipment, speeds of about 80 km/h. |
| EasyKart-50 | 5-8 | Birel E.K. | IAME Parilla 50 EK (Italy) | Mono series, only local competitions, reliable equipment, speeds of about 40 km/h. |
| EasyKart-60 | 8-13 | Birel E.K. | IAME Parilla 60 EK (Italy) | Mono-series, many participants, reliable equipment, speeds of about 80 km/h. |
How to test a homemade product
- Stay off the road.
- Wear personal protective equipment for karting drivers: helmet, knee pads, elbow pads, etc.
- The first couple of kilometers are for testing, running-in, checking the brakes, feeling the dynamics and controllability. You shouldn’t go to competitions right away.
- Do not accelerate your homemade go-kart to full speed. You can gradually increase the speed, feeling how the vehicle behaves when cornering. If you feel that, for example, at a speed of 40 km/h the car has a “crazy” vibration, then you will either have to drive up to that speed, or check the structure, perhaps something is bent.
Attention! The most important rule for any karting driver is to stay off the road. You can only ride on special sites and training grounds.
Pipe selection
To collect the levers you will need to get the pipes. Accordingly, you need to know which pipes to hunt for. At the nearest metal warehouse we find two suitable options: 1. Diameter - 27 mm on the outside, suture, wall - 3 mm 2. Diameter - 32 mm on the outside, suture, wall - 2 mm
Here we leave the range of diameters and wall thicknesses at your discretion to suit your needs. To give you some guidance, we suggest looking at pipes with a diameter of 25 mm or more. The bigger and thicker the stronger (thanks, Cap!).
If you are an expert on pipes, metal grades, alloys and know what ranges of diameters and thicknesses to use in different cases for buggies, please share with readers in the comments. And if you are the happy owner of a buggy you have assembled or purchased, we also suggest that you do not stand aside and boldly share your happiness with others!
But we purchased 10 meters of pipe with a diameter of 27 mm. We cut 2.5 meters and load them into a passenger car. We express our gratitude to the store sellers for providing the packaging paper. If you don’t want the “Salon” scene in the car. Rust. Everywhere” - stock up on paper or polyethylene wrapping before your trip.
Here is a front photo of the delivered pipe:
Design features
The main thing that will need to be changed when creating a buggy from a walk-behind tractor is the operator’s workplace. Mini cars use a seat, which makes long-term work much easier. The frame can be purchased ready-made or made independently in conjunction with the wheelbase.
The simplest option is a support frame without a wheel pair drive, but with full manual control.
Some people make a full-size mini-buggy unit that even includes a steering column.
But this is rather a waste of time and money, which does not provide a real advantage when driving. It is worth considering that buggies are divided into two groups - those intended for tourism and those used for sports and racing purposes. Regardless of this, a limit of approximately 300 kg must be observed.
They try to place the center of gravity as low as possible. The whole buggy concept is aimed at maximizing cross-country ability.
. This feature is also taken into account when choosing a layout, when determining where it is better to install the engine.
The wheelbase should be relatively short. The chassis needs to be strengthened, because its standard level for walk-behind tractors is completely unsuitable.
Plates for lower arm and lugs
For our case, the initial dimensions of each plate of the lower arm: thickness - 6 mm width - 120 mm length - 90 mm
You need two such plates for the front suspension.
Dimensions of the ears for our case: thickness - 4 mm width - 110 mm length - 70 mm
The minimum number of lugs for the front suspension is 20. Another 4 lugs will be of a special design - for shock absorbers.
Additionally, metal drills are needed - 12.5 mm for the ears, 8 mm for the bottom plate. As well as cutting and grinding discs for the grinder.
Accordingly, the tools you will need are: a drill, a small grinder.

