A construction tape measure for an electrician is as essential a tool as a voltage indicator.
Even those professionals who have axle builders and laser rangefinders in their tool kits always have an ordinary tape measure in their pouch. You can’t do without it either when marking electrical wiring routes or when installing socket boxes. However, not everyone is familiar with all the secrets and additional features when using a construction tape measure.
It turns out to have a lot of hidden abilities that will help you replace several tools at once and significantly save time on repairs.
By the way, one of the important tips for those who use cheap Chinese tape measures is the following - if you have just such a copy, then try to take all measurements with one tape measure.
The same size may not match when measured with different tape measures.
One friend measured the distance of walls in a house with a Chinese tool, and in a store he used their tape measure when buying materials. As a result, at home I was very surprised by the result of the purchase.
A movable hook is found on almost every roulette today. And this thing is not at all for conveniently scratching your back.
Beginners generally often think that this is some kind of marriage. What will be the final accuracy if one of the key elements is loose and not securely fastened? Some even manage to rivet it immediately after purchase.
It turns out that a movable hook is a necessity, without which normal work is not possible at all. This is explained by the fact that measurements with a tape measure can be made in two ways:
- from the subject
When you measure distance from an object, the toe acts as a zero point. When measuring with the grip of an object, the grip extends to its thickness. Thus, the zero mark again coincides with the edge of the object.
Therefore, you should not wind up the construction tape with a spectacular click at the end, thereby you will only shorten its service life.
In many more models, the tape measure has a hole at the very beginning at a distance of 2.5 cm.
It was made for a reason, but again to make your work easier alone. When there is nothing to fasten to with a hook or it is inconvenient to use it due to the oblique surface, use a simple awl or nail to firmly secure the tape through the hole and stretch it to any length.
By using such a hole in the tape measure, you will not have to use similar grips as in the photo below.
And all the marking work can be easily done without a partner.
As you can imagine when measuring in corners, it is very difficult for the middle of the tape measure to reach directly into the corner. It is also inconvenient to take precise measurements in a door or window opening.
Therefore, when you need to measure an opening, use the body as an extension of the tape measure.
On the outside of the tape measure itself, the size of the case is indicated, which must be added to the tape readings when measuring.
If this size is not marked on the body, no one is stopping you from measuring it yourself and writing it in any convenient place.
There is another way to make similar measurements using masking tape. Place a piece of tape on the surface and take two measurements in opposite directions.
In this case, it is better to use a pencil to mark ticks rather than simple dashes. They will visually show the mark more accurately. Whereas the line may be drawn crookedly, which will cause an error.
After taking two measurements, you need to add the results and get the exact size.
On many holds, the tape measure has a small hole. This hole is convenient for hooking onto a screw or nail. After this, the hook will not jump off anywhere.
This is especially useful when you are taking measurements alone over long distances. The measurement error will be no more than 1-2mm, since the center of the screw is almost at the zero mark of the tape.
Using this connector in the hook is also very convenient for drawing circles. You don't need to have a compass or protractor with you.
In some models, the hooks are made magnetic.
In addition to their direct purpose, such hooks are convenient for lifting fallen objects without getting off the stepladder.
With a little modification to a cheap tape measure, one tool makes an excellent marking tool. Take the leg of a compass, which is used with simple pencils, and secure it to the outside of the tape measure.
This design can be made removable, or even adapted for a separate tape measure.
This device is very convenient for making various marks or using it as a surface thicknesser.
And when using a screw, circles of the desired diameter are easily drawn.
If you're working with drywall or other surfaces that can be safely scratched, then the tape measure may be worth repurposing for another possibility. Use a file to make notches on the toe.
After which, using this hook, marks are easily made on the surface. In this case, it is no longer even necessary to have a pencil at hand.
The outer part of the tape measure can be easily turned into a mini reminder or writing surface. Take masking tape and stick it on the side of the tape measure.
If you don’t have a paintbrush at hand, you can write directly on the body itself. True, to do this, you first need to go over the surface with sandpaper.
This way you will make it somewhat velvety, after which the inscriptions will be applied much easier.
Of course, you need to write with a pencil, after which all this can be easily erased with an eraser.
With the help of a construction tape, it is very easy to divide any number in half with an accuracy of up to a millimeter, without resorting to a calculator.
Take the size on the tape measure, for example 116cm, and fold the tape in half and align the zero mark with it, where the top hook is.
Exactly at the point of inflection the required result will be - 58cm.
In the same way you can not only divide, but also subtract. For example, the total length of your wall is 2m 11cm, and the junction box is located from the first edge at a distance of 1m 38cm. You need to quickly find out how much is left from this junction box to the other edge of the wall in order to measure the cable channel.
Pull the tape out 2m 11cm and fold it in half.
Then look for the 1m 38cm mark. Just opposite it, on the second half of the tape, the distance you need will be shown - 73 cm.
Using an ordinary tape measure, you can easily divide the work surface or workpiece into the required number of equal parts. This method is suitable primarily for large surfaces - it will not work for pipes or cable ducts.
What do you usually do? Measure the total length or width, then make calculations and divide the distance into the required number of parts. Then again measure these parts on the surface with a ruler or tape measure.
It turns out that all this can be done without a calculator and even without calculations. Take a number on the tape measure that is larger than the width of the workpiece, and at the same time a multiple of the value by which you want to divide the distance.
For example, the width of the board is 17cm, and you need to divide it into four equal parts. Move the tape measure diagonally to the nearest 20cm mark. Then easily divide these 20cm by 4 and mark marks at distances of 5cm, 10cm, 15cm, 20cm.
As a result, you have divided the surface into the required number of parts with just one movement of the tape measure.
They wanted to divide it into 6 parts - nothing complicated. You can move the diagonal up to 30cm and do the same.
You can also use a tape measure to accurately measure the cross section on a round pipe. To do this, press the tape tightly around the perimeter of the pipe, aligning the ends. If you align it exactly, it will not lie at any other than an angle of 90 degrees.
The wider the tape measure, the better. You can do the same trick with a simple piece of paper.
When it is impossible to measure the diameter of a pipe or workpiece from the end, construction tape and geometry will again help. Wrap the tape around the pipe and measure its circumference. After which the result must be divided by Pi = 3.14. This will be the required diameter.
Once again using knowledge of geometry, using a construction tape without squares and other tools, you can check the accuracy of the right angle. As you know from school, the sum of the squares of the legs of a right triangle is equal to the square of the hypotenuse.
Take any surface where there should be a right angle, for example two walls of a room. Use a tape measure to measure 30cm in one direction and 40cm in the other and put marks. If the angle is really right and the builders didn’t screw up, then by connecting these two marks along the hypotenuse, you should get a distance of exactly 50 cm on the tape measure.
Game description
The Twister game consists of a large playing field (mat), which is laid out on the floor, and a roulette.
The size of the mat is 150 x 180 centimeters. It is an oilcloth or sheet on which large circles of green, red, blue and yellow are drawn in four rows.
Roulette is similar to a clock, only the hands do not move themselves, but are rotated by the players. The “dial” is divided into four segments, which are also divided by color.
Roulette information
Miniature puppet theater
After removing the insides of the monitor, it can be turned into a real theater, albeit a puppet one. Place a background on the back panel and cut a hole on top to control the dolls. The obsolete device will become a new playground for children!
♥ ON TOPIC: How to make a clock, mirror or safe from an old HDD.
Roulette repair
The instructions are suitable for both disassembly and assembly. There is no need to think about how to put the tape measure back together; just repeat each step in reverse order.
Instrument diagnostics begins during the disassembly process. In other words, the damage is visible immediately when you open the case. The most common reason is that the tape stops curling.
A spring that has jumped off its mounting point is easy to notice. To resume work, you need to return and secure the small tendril in its place, thereby attaching the mechanism. But it often happens that it turns out to be broken, or breaks right in your hands during repairs. In this case, you need to cut out a replacement part of the same shape, otherwise the functionality of the tape measure cannot be restored.
It is possible to attach the tendril to the spring only when removing it from the grooves of the coil. You need to take it out carefully, since the mechanism may be damaged during removal, or your hands may suffer from the sharp edges of the parts. The tendril is bent on a spring using pliers. But be sure to heat the metal before processing to avoid cracks and breaks. After which the spring can be returned to its place, carefully monitoring any kinks. There shouldn’t be any, otherwise it will easily come out of the grooves of the coil.
A broken spring due to bending will affect the operation of the tape measure. If the fracture occurs at the edge of the mechanism, the tool will still serve for some time. It’s just that the measuring tape will not be completely hidden inside the case, which will not harm the work. But in this case, repairing the device is only possible if there is minor damage. If the spring bursts in the middle, then the tape measure will have to be replaced with a new one.
If the hook breaks, then a new tongue is cut out - from metal or plastic. Its dimensions should be taken into account so as not to cover the measurement scales. You can use any handy material that is suitable for hardness and flexibility. It is fixed in place of the old one using bolts or construction glue.
Another reason is the age of the roulette wheel. In this case, the measuring tape will not roll inward due to corrosion. The canvas is metal, so without proper care it will become rusty. It is almost impossible to clean it. But in case of simple contamination with dust and dirt, the tape can simply be wiped.
The tape measure is assembled with your own hands almost exactly the same way as it was disassembled. It is important to ensure that the spring does not protrude above the edges of the coil. Be sure to attach the tape so that the marks are on the reverse side. This way, the divisions will not wear off with frequent use.
Tips for use
To prevent the tape measure from breaking for a long time, you need to follow a few simple rules.
- The rewinding spring mechanism will last longer if you protect the spring from sudden jerks when using the tape for full ejection.
- After finishing the measurements, wipe the tape from dust and dirt so that the mechanism does not clog.
- The hook-tip has a slight play for accurate measurements. To prevent it from increasing, you should not wind up the tape measure with a click. When it hits the body, the tip becomes loose, which creates an error in the measurement of up to several millimeters, and can also lead to the toe being torn off.
- The plastic case does not withstand impacts on a hard surface, so you should protect the tape measure from falls.
To learn how to repair a measuring tape, watch the video below.
Second life for an old microwave
Do not rush to take old household appliances to a landfill: many of their parts and casings will be useful in the household, only dangerous devices must be disposed of. Let's see what you can do from an old or even broken microwave with your own hands.
Low-power oven
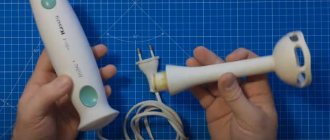
If your microwave or microwave oven with mechanical control is broken and you are not going to repair it, then you can make an ordinary low-power oven out of it. To do this, the electric motor that rotates the platform is dismantled and a heating element or a burner from an electric stove is installed.
Remember that before dismantling, the microwave oven capacitor must be discharged by shorting it to the housing, because it can retain a high voltage charge for a long time.
It remains to consider the issue of installing guides for the baking sheet, installing a regulator for modes and replacing the glass with a more heat-resistant one . The new product will not be able to bake pies: the door and many parts are not designed for prolonged exposure to high temperatures, but it will perform the heating function perfectly, working as an oven in a solo format.
Original bread box
If many parts from an old microwave are broken, then your assistant can no longer be restored, but you can make many homemade products or very original devices from them. For these purposes, a housing from a microwave oven is used. Although it will take up a lot of space in the kitchen, you can repaint it or make modern decoupage - decorate it with an original design or ornament, and then cover everything with colorless varnish. This will reliably preserve the unique, homemade composition and help it fit harmoniously into the interior design of a modern kitchen.
The microwave bread box will be quite spacious, and if the processor module is not broken and is in good condition, then it will be equipped with a clock.
Fan
Such a product will always find application, for example, for cooling eggs in an incubator, which many users did not even realize. But cooling is a very important technique in improving the development of embryos during the incubation process. The quality of hatched chicks is no worse than in a natural way, because cooling occurs in a very similar way, when the hen moves away from the nest to meet her needs. In chickens and turkeys, this process occurs by air, and in waterfowl - combined, due to the evaporation of moisture from the surface of the eggs when the duck or goose returns after water procedures.
It is also possible to install a timer along with the fan - it will successfully turn the device on and off at a certain time.
We use electrical parts
Garage specialists successfully make spotters from a microwave transformer - special devices for body work, the basis of which consists of contact welding, which helps to level out various dents on the car body. The design technology can be found on the Internet, or read our publication on this topic, which contains all the recommendations and a detailed algorithm of actions.
Many farmers use a motor from a turntable together with a gearbox in incubators for turning eggs, but they only need to add a time relay to it, because everything must be done strictly according to the clock.
The control unit can be adapted for a completely different job, although the appearance and markings on the terminals may differ, but the operating principle of all similar units is identical. Contacts can be established using a special device. Any radio amateur, especially beginners, needs to have a soldering iron with adjustable tip temperature. A similar device made by other specialists can be found on the Internet and the circuit can be borrowed and then assembled at home.
For those who are not yet closely familiar with various electronics, a mechanical regulator is suitable, which has a number of advantages: you can regulate the power of the soldering iron using a step-down or isolation transformer. Such a regulator has a wide range of power control, which can be used when melting plastic parts, when heating a pickling solution or a tin bath.
As you can see, you can make a lot of useful household gadgets from a microwave with your own hands; all you need is desire and a little free time. You may also find useful information about repairing a microwave oven yourself.
Comments
The main problem with all roulettes up to $10 is that the numbers are erased sooner or later. Unfortunately, 3D printing can’t fix this.
yes, but everything is fine with Polytech roulette with numbers, it’s several years old. Cost $5. Papa Carlo had a great test on erasing on YouTube. Only a couple of roulettes were really bad in terms of abrasion, the rest were the same plus or minus
The question is how many times she was measured over these 5 years and what they measured her. This winter I started setting up a stove in my house, but it’s still far from finished, but almost all the numbers and divisions have already been erased. And so if you measure the doorway of the car trunk and the entrance doors in the house once a year when re-gluing the wallpaper, and maybe a couple of times, then yes, it will last for 5 years.
Main types of breakdowns
The most common measuring tapes have a mechanical return mechanism - a spring that automatically rewinds the tape. It is this type that most often breaks down compared to a tool with a manual winding method.
The most common reasons why a tape cannot be returned are:
- spring break;
- breakage of the measuring tape at the junction with the spring;
- break or bend of the tape.
In order to find out the exact reason, you need to disassemble the tool:
- Unscrew the bolts that hold the side of the tape measure.
- Remove the backstop.
- Extend the measuring tape to its full length. If it is attached to a spring, remove the latter from the hook.
- Open the coil in which the return mechanism spring is located.
The tape measure does not wind up (does not roll up), what is the reason, how to repair the tape measure?
An ordinary construction tape, the tape does not wind back, how to repair a tape measure.
Without opening the “patient” it is difficult to say. The spring may have burst, the ruler may be too clogged, or there may be no connection between the ruler and the spring.
Well, let's start by disassembling the casing of the measuring tape. On some models, you will first have to remove the rubber cover from the case and under it you will find bolts holding the two halves of the case together. We unscrew them.
Inside you will see a locking button with strips that jam the tape and a reel itself, inside of which there is a return spring, and a measuring tape is wound on the outside. Unwind the measuring tape from the outside of the spool. Wash it from dust, dirt and resins. Check it for fractures and kinks. The measuring tape of a tape measure has a semicircular profile (if you look at its cut from the end) and, unfortunately, if a sharp bend occurs, not a ruler of tape measures of the average price category, no longer restores its profile and the place of the bend will remain and will interfere with the retraction of the tape.
Inspect the spring located inside the coil disk. It is better not to pull it out if it is not damaged - the tendril with which the spring clings to the slot in the central rod of the reel is intact and the “hangers” with which the spring holds the measuring tape are intact. You can rinse the spring directly in the coil by placing it in gasoline. But you can also try to revive a broken spring. Most often the spring breaks near the rod. And this is precisely what prevents the tape from retracting - the spring simply does not work.
If the tendril is broken off, you can make it on a spring with another one of the same geometry. The springs vary in stiffness; for some I just made a new tendril with pliers without heating them, but some need to be heated - they break when cold. Having made the same tendril, insert it into the rod and “charge” the spring. Winding a ruler around the outside of the reel. turn the charged spring several turns so that the ruler hook, located at the zero mark, is pressed against the collar with barely perceptible pressure. Reassemble the tape measure body in reverse order.
It happens that the “hangers” come off or bend.
This often happens when the ruler is pulled sharply and all the way out. After this, the tape simply crawls along the reel, although the spring works normally, but there is no clutch between them. The hangers can be cut with metal scissors. In some tape measures, you can simply solder the spring and the watering can together, making longitudinal grooves with a grinder in one of them for better solder bonding.
Source: www.remotvet.ru
Second life of the microwave
What can you make from an old microwave oven?
If your old mechanically controlled microwave oven has deteriorated, for example, the MOT (Microwave Oven Transformer - microwave oven transformer) or magnetron has burned out, or for some other reason you will not repair this kitchen appliance, you can try to make a regular oven out of the microwave by installing instead of a motor that rotates a tray, a heater (heater) or a burner, for example, from an electric stove.
True, there are still questions about the temperature regime of the device, but you can try. You can even leave the mechanical control unit and additionally install a temperature sensor. True, most likely, you will have to replace the glass with heat-resistant glass and make guides for the baking sheet.
Perhaps the rework will revive the microwave and give you an equally interesting device. Apparently, it won’t be possible to bake pies on it - the door and other parts are not very heat-resistant, but heating food (and the microwave is very often used for this) may be possible.
If the magnetron burns out and an air heating element is also installed, then only the heating element can be used. But in a situation where there is absolutely nothing to restore, all that remains is to use the device in parts.
Microwave body
You can make anything from the case If the processor module is working, then the bread box will have a clock!
Transformer
You can make a resistance welding device from MOT
Fan
Use the fan for its intended purpose, for example to mix air in an incubator, etc.
Plate rotation motor
The tray motor with gearbox can be tamed to turn eggs in the incubator by adding a time relay to it.
Control block
But the control unit may be useful for other work.
Let's use a control unit from an old microwave oven with mechanical control to regulate the temperature of the soldering iron tip.
The appearance and designation of the terminals may differ, but the principle of operation and control should not; you just need to use a measuring device to find out which contact is which.
Microwave diagram
A radio amateur, especially a beginner, needs a soldering iron with adjustable tip temperature.
The usual practice is to assemble a device using a thyristor, according to circuit diagrams common on the Internet.
But for those who are still “you” with electronics, you can use a mechanical regulator.
This option has many advantages - it is suitable for regulating the power of soldering irons connected through a step-down or isolation transformer. The proposed regulator has a wide range of power adjustment, and this can be useful, for example, when used for heating an etching solution or melting plastics, or when feeding a tin bath. Of course, it does not have the functions of a thermostat, its advantages are simplicity and functional completeness!
The mechanical control unit of a microwave oven consists of a low-speed motor and 2 gearboxes, one of which operates as a timer, the other as a power regulator. At the output of the gearboxes, software gears and associated cams are installed, interacting with contact pairs. One pair of contacts is responsible for the time delay, the other for regulating the power in the load.
The cams of the power control gear are designed in such a way that when you turn the power setting knob, the ratio of the time of the closed and open state of the contacts changes. And the timer cams move along the spiral of the program gear, the shape of the spiral is made in such a way that the time scale is stretched at the beginning and compressed at the end, at long time delays.
The timer is usually set to 60 minutes. When the shutter speed ends, a special hammer knocks on the bell and the entire circuit is de-energized. It is convenient, for example, to limit the time spent working with a soldering iron for a minor; inhaling soldering products is not at all useful.
In other words - no electronics! A more detailed description of the device and operation can be found on the Internet.
For general safety, you can install a fuse on the power side, as well as 3 light indicators - the presence of mains voltage, the switched-on state of the soldering iron, and an indicator that voltage is supplied to the soldering iron. The latter allows you to visually evaluate the ratio of the times of the on and off states. Indicators can be neon, for example, bulbs from unusable electric kettles, or LED.
Diagrams for connecting LEDs to the 220 network can be found on the Internet. The drive motor operates almost silently.
The timer allows you to turn on the soldering iron only for a while, without thinking about the fact that it is unproductively consuming electricity, and the bell will notify that the load is de-energized.
Since the power of an amateur radio soldering iron rarely exceeds 100 watts, additional relays do not need to be installed; the contacts are designed to connect an MOT with a power of 600-800 watts. The device can be placed either in a small box made of insulating material or built into an existing laboratory bench.
The pins can be connected according to the diagram either by soldering or using automotive-type connectors. A power wire of the required cross-section and insulation level is installed at the input of the device, and at the output there is a socket of the same type as the soldering iron plug. It is best to use standard network ones. In this case, the device can be used for other purposes - for example, periodically turning on lighting or ventilation.
To connect powerful loads, it is necessary to use relays with unloading contacts. You can install one or two more sockets by connecting them in parallel to the motor circuit, then, for example, the backlight of the mounting table or the exhaust fan will be turned on for the entire time the soldering iron is working.
It is best to leave the original control knobs from the microwave, and if you don’t have them, then choose similar ones from a washing machine or gas or electric stove. They have already been ergonomically designed by the designers, are mechanically strong and electrically insulated.
The device allows you to change the time delay at any time, turn it off completely, or change the value of the input power, as they say, “on the go.”
The device itself has been tested but has not yet been manufactured. Since the manufacture of the housing depends on the available materials and capabilities of the radio amateur, we can only offer a variant of its execution. See picture above.
Common problems
The design of the tool is quite simple, but it can easily break. The most serious failure is associated with a defect in the main function. The measuring tape stops rewinding, making work difficult. You can fix it yourself; for this it is important to know how to disassemble the tape measure. Most often, this problem occurs in devices with mechanical tape return.
In any of these cases there is a possibility of repair. No special knowledge is required on how to make a tape measure.
How to fix
If the tape is disconnected from the spring, the following steps must be taken:
- hook the tape if it just jumped off the spring;
- make a new tongue for the hook on the spring if the old one is broken;
- cut a hole in the tape if the tape is torn in this place.
If the spring breaks, the tape measure can only be repaired if the break occurs at its edge. Also, in this case, there is no guarantee that the return mechanism will return the tape in full.
If the measuring tape is severely bent or broken, it is almost impossible to restore the tape measure - it is better to purchase a new tool.
When working with a measuring tape, many have more than once encountered such a situation when the metal tape “refuses” to wind up into a reverse spiral. If this is your first time encountering such a snag, do not rush to throw away the tape measure - it can still be repaired.
You will need
Instructions
1. The convenience of measuring with a tape measure is that you can always quickly take measurements from some objects. However, over time, the efficiency disappears somewhere, the tape stops independently curling into a spiral and you have to wind it up manually. This is not particularly troublesome if you need to reel in 0.5-1 meter. The problem manifests itself when the tape is released to its full length. If you don’t want to bother with fixing the tape measure, you can throw it away and buy a new one. But why spend extra money when in a few minutes you can return the instrument to its former novelty?
2. First you need to disassemble the tape measure . The sides of the measuring tool can be held on by one or four screws. You need to unscrew these screws, then remove one of their sides. Inside the tape measure, in the very center, you will see an additional metal spiral, which will probably be pulled off. You need to twist it again.
3. To twist the spiral, pull the tape out to its full length, then remove it (this will make it easier for you to wind the spiral again). Later, after you unfasten the tape, correct the position of the spiral so that its surface is perfectly flat (without differences) and twist it. Attach the measuring tape back and rotate the spiral until each tape is gathered into a ball. Make sure that there is no dust left between the layers of tape (the tape measure often has to be repaired under repair conditions). After the tape is assembled, put on the previously removed side of the tape measure and tighten the screws back. Now the tool will work as if you just brought it from the store.
There are methods to beat roulette. Finally, strategies do not provide an unconditional guarantee of winning. And it’s unlikely that you’ll be allowed to win much. However, you may still receive some income. The most important thing is not to get too enthusiastic. Only a cool head and sober calculation will give you the chance to win.
You will need
- -Roulette Assault program.
Instructions
1. To play, choose a casino that allows skipping moves. In this case, you will have the opportunity to test a virtually win-win roulette system. Register on the casino website and deposit a minimum of 300 rubles into your account.
2. Start playing idle. Play this way until the same color, say red, appears five times in a row. Now bet on the opposite color – black. Bet 1 ruble. As soon as red comes up again, bet on black, but double it. Now it will be 2 rubles. And so increase the bet every time the opposite color appears.
3. The chance of one color appearing 12 times is very low. If it lands 10 or 11 times in a row, you have a chance. The game system, of course, leaves room for risk, but reduces it significantly. You can start not with five “idle” moves, but with 10. This will increase the chances of winning up to 100%. The only inconvenience is that it will delay the game for a long time. On the contrary, it is possible to reduce the number of “idle” strokes. The game will go much faster, but the risk will increase several times.
4. You can increase the bet itself. Of course, the winnings in this case will also increase. Just make sure that the minimum and maximum bids are suitable for you.
5. You can also play roulette with the help of special software. Roulette Assault is a strong analyzer program with the possibility of a mechanical game. In theory, the program does the same thing - bets on the opposite color after the same color has fallen out multiple times. Undoubted convenience - you are not required to be at the computer. In addition, the program plays much faster than a person. A significant drawback is the cost of the key, about 50 bucks. A certain setting for a specific casino is also required.
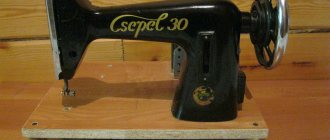
How does roulette work?
A construction tape is a compact measuring device. It consists of a flexible tape with unit markings, a twisting mechanism and a housing that holds the entire structure. The standard length can be from 1-10 meters to 100 m. The longer the tape measure, the larger its body.
The device of a construction tape measure is quite simple. The basis is a flexible tape with marked divisions in different units of measurement. It is made of flexible metal or plastic. The scale has millimeter, centimeter and meter marks. Subsequently, the canvas is painted.
The edge of the tape is marked with a concave sheet with additional metal or magnetic reinforcement. This is a mandatory condition due to which the rigidity of the tape measure is achieved. The concavity also makes it easier to take single measurements: the edge easily clings to any surface, allowing the tape to stretch. The hook is used to fix the tape measure at the reference point from which the measurement begins. Some models have a button that prevents the tape from rewinding, or performs this operation independently.
Each type has pros and cons, but any mechanism fails sooner or later. You can make the necessary repairs yourself by determining the cause of the problem.
What can you make from an old microwave oven?
A microwave oven consists of a fairly large number of parts, which individually can serve for some purpose not related to heating food. Therefore, simply taking the microwave and throwing it away is, to say the least, irrational. What can be made from it will be described below.
Wind generator from a motor
In addition to consuming electricity, it is possible to force the motor to produce it, albeit not on an industrial scale, but it will be enough for lighting using diode bulbs. For this purpose, you will need not only the motor from the microwave. Typically, the main components of a wind turbine are a generator, a charge controller, a battery and an inverter. This list is necessary for use with household appliances that are powered by a stable current and are afraid of its fluctuations. From the entire list above, most likely you will have to buy the battery separately. Everything else can be made independently or taken from used devices.
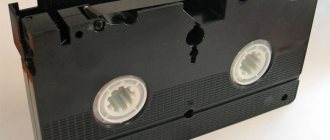
Extension cord with timer
Often, in circuits assembled by radio amateurs, it is necessary to turn on a device for a short period of time, up to tens of minutes. There is no need to invent anything; a ready-made timer of good quality is available in the microwave oven. It rarely fails, and on an old microwave it is most likely to work.
Breadbox
The plastic case can well serve as a bread box. Moreover, decoupage drawings are perfectly transferred to plastic, so you can decorate such a bread box in an original way to your liking. Another plus is the hermetically sealed closure; insects are unlikely to get into such a container.
Fan
The fan on the microwave has three outputs, 220 volts are supplied to the outer contacts. Very good, although with low revs. It makes little noise during operation and is quite suitable for its intended use. If you use a fan with a timer, you can use the resulting device to automatically turn off the ventilation after a certain time.
Aquarium
If you find a rectangular aquarium of a suitable size and equip the backlight in the microwave housing, you will get a very original look, almost like on a TV.
Monitor
To turn an old microwave into a monitor, you will need a projector, the image from which will be reproduced on its surface. The result will be a rather unusual and funny effect - a keyboard and mouse, and an image on the microwave screen. And hide the computer case in the table. It can confuse your friends, especially if your keyboard and mouse are wireless. Another option is to mount a small LCD monitor into the case.
Pet house
Cats love a variety of boxes and drawers. The microwave oven case is no exception; the cat will love it with pleasure, especially if you put something soft in it.
Storage box
There is no need to modify anything - the microwave is already a box. You can, so as not to confuse or interfere, remove the power cord.
Mirror
If you make the surface of the front panel mirrored, the microwave becomes a truly multifunctional device - it both heats food and serves as a mirror. You can have breakfast and look at yourself in the mirror before leaving for work.
Welding machine
Craftsmen make a spot welding machine from a transformer in a microwave. In general, without proper skills in handling electrical equipment, it is better not to carry out such experiments - you can burn the wiring, and in the worst case, you may get an electric shock.
More ideas
As mentioned above, an old microwave oven is a source of useful parts. If the device is still working, you can donate it to people in need or sell it for spare parts. Some people convert the body with a heating element or a burner from an electric stove - it turns out to be an oven. You can dry clothes in a still working oven. You can throw away old equipment at any time, and there is no need to rush into this matter.
Landscape decor from tires, plastic bottles
To decorate the area, you can make crafts for your dacha from trash. Perfect for this purpose:
- Used tires and rims;
- Old buckets and other containers;
- Plastic bottles;
- Scraps and debris of building materials;
- Various textiles.
It is easy to assemble all kinds of figures from the available materials. These can be cute animals or cool stuffed animals.
Beautiful products can be assembled from any seemingly unusable things. It’s enough to dream up and think through your project better.
We can influence manufacturers
It's easier to create new habits if you do it together. Let's ask manufacturers: what happens to their products after they stop supporting them? In any convenient way: on social networks during the worldwide announcement, in the store before purchasing, or personally from Tim Cook on Twitter. What else is worth knowing to ensure a long life for the device.
1. How many years will it be supported?
2. What will stop working in it after this?
3. Is it possible to reflash it and install third-party applications?
4. Is it possible to replace its battery rather than replacing the entire device?
5. Where can I recycle it and is it safe for those who will do it?
We don't know how to prevent global warming, deal with the amount of garbage on earth and other big problems. But we can prepare for the moment when these decisions become clear: learn to extend the life of things, give them to each other and ask questions to manufacturers. The less often we need to buy new devices, the less new garbage awaits us in the future.
Other examples of fortune tellers
When creating and marking up, you can combine these two options or come up with your own. The quantity is limitless.
For example, when designating the four corners, you can use card suits, images of animals, symbols, etc. Simple answers are changed to the names of lovers if the fortune telling is for love. Suitable as a means for drawing lots among participants in competitions and games: just write the names of people or details of their clothing.
- Instead of cardinal directions, the outside “pockets” are painted in primary colors: red, yellow, green, blue. A color can also be written in words or depicted using a figure painted with this color: a circle, a flower, a heart, a blot, etc. Fortune telling occurs in exactly the same way as for the version with the cardinal points, only instead of them you need to guess the color.
- In this version, instead of the 4 cardinal directions or colors, numbers from 1 to 8 are written on the outside, with predictions inside. Fortune telling: name a number from 1 to 10, open the fortune teller in different directions the appropriate number of times, then choose one among the four open numbers, open the fortune teller again the appropriate number of times and again choose one among the four opened numbers (the same ones may open again). Open the answer (prediction) under this number.
- In this version, numbers from 1 to 8 are written inside, and to read the prediction, you need to bend the corner with the desired number (predictions are not visible until the corners are folded back). Fortune telling: you don’t need to choose a color or side of the world; you don’t need to move the fortune teller in different directions either. It is enough to just name the number and look under it for the answer - not as interesting a way of fortune-telling as others.
- There may be not eight, but four predictions.
Rules of the game
The playing field is laid out on flat ground. In addition to the players themselves, there must also be a presenter who will spin the roulette. The number of participants is not limited. Just if there are a lot of people, divide into teams.
- Participants either stand around the playing field or occupy cells.
- The presenter spins the roulette, after which he selects a player and tells him the combination of body and color (for example, right leg and red). This means that the participant must stand on any red circle with his right foot.
- After each move, the presenter spins the roulette and tells the next player the drawn combination.
- If a participant gets a combination that he is already in, he must still make a move.
- The same circle cannot be occupied by two players and body parts.
- If during the game the circles of any color are completely occupied, then the presenter continues to spin the roulette until a free color appears.
- Before a new combination is announced, the player is prohibited from removing his hand or foot from the field.
- If a player falls or touches the playing field with his knee or elbow, he is eliminated from the game.
- Victory goes to the one who was able to stay on the playing field the longest.
Registration of the parties
Toy decoration
Of course, using an ordinary craft is boring and not interesting. Before using it and explaining how to use it, you need to design it.
You can write predictions on the back of the item. You should have four squares. They can be signed with numbers, painted with flowers, or marked with specific categories. The choice depends on the purpose of using the toy.
When the first task is completed, start designing the triangles located inside (there should be eight of them).
Inside a standard toy, the following answer options are usually placed:
- Yes;
- No;
- Maybe;
- Tomorrow.
We select inscriptions according to the age of the players. Start from the situation of using a fortune teller. Perhaps it's a friendly evening, a children's party, or just family fun.
To make the fortune teller beautiful and bright, megamaster.info recommends additionally painting the internal compartments or making a beautiful decor for them.
History of the paper fortune teller
The origami oracle's popularity peaked in the 1990s, but today interest in it is returning.
The exact origin of the model is unknown. British origamists believe that Europe became acquainted with the fortune teller back in the 17th century, but the first descriptions with the diagram appeared only three centuries later. In 1928, the model was mentioned by origamists from Dover - William Murray and Francis J. Rigney in the pages of the book “Fun with Paper Folding”. True, the authors saw in the elegant design a salt shaker or a stand for sweets. They flipped the model over, turning the tops into “feet” and suggested pouring food into each of the finger compartments. But an even more interesting role was assigned to the fortune teller in Asian countries, where she most likely came from. Malaysians used this type of origami to catch so-called body lice, protecting their fingers from bites with paper. During the First World War, the idea was borrowed by British soldiers. They also came up with the name “cootie” for paper traps, a derivative of the Malaysian kutu, which means “louse”.
Only by the middle of the 20th century did the model turn into a fortune teller, known to every schoolchild. It first spread among British and American teenagers, who came up with the basic rules of the game. The presenter was asked questions, and then together with him they looked for the answer from the paper oracle. Over time, the “fortune-telling boom” covered almost the entire globe. It is noteworthy that in English-speaking countries, the fortune teller is still called a cootie catcher, preserving its amazing history for future generations.
Various methods of fortune telling
There are several different methods of fortune telling. They mainly depend on whether numbers are written on the sides or not. Of course, if you really want to, you can come up with your own unique way of telling fortunes, because the main thing is to enjoy the process!
1) So, first we will consider the method of fortune telling without numbers. On the outside of the fortune teller we write down the cardinal directions. And under each corner that is responsible for its side of the world, write 2 answers (at the left and right edges).
Next, the questioner and fortuneteller are selected. After the roles are distributed, one will choose the number and cardinal direction, for example from 1 to 10 (the range can be chosen larger or smaller). After which the fortuneteller alternately bends vertically and horizontally the required number of times. Based on the results of the manipulations, we look at the prediction on the visible side of the selected part of the world.
For example, they thought: “north, 4.” We open the origami fortune teller four times, after which we look at the result on the open side of the “north” sector.
2) This option is quite similar to the first. Color is used instead of cardinal directions. You can either completely color the petal or draw a figure of a certain color (hearts, triangles, circles). Guessing is the same as with the cardinal directions, just the key word is color.
3) Another way is to put numbers from 1 to 8 on the outside. After which the questioner guesses numbers in the range from 1 to 8, the fortune teller is opened alternately in different directions the named number of times. There will be 4 numbers left, among which you need to choose one and open the prediction.
4) You can simplify the previous method. Write 8 numbers on the edges of 8 wishes, then simply bend the corners so that the predictions are not visible. After which all that remains is to select a specific number and read what the origami fortune teller promises you.
DIY microwave spotter! Own version of performance.
Hi all! A lot has been written on this topic, a lot of sensible information and a lot of meager information. This is always the case with information, of what is on the Internet, only 5% is trustworthy... and then you need to check these 5% yourself) Today I will describe my version of making a spotter from a microwave and my own observations.
First of all, what is it for, a spotter?
Just to pull out crumpled metal on body elements where there is no access from the reverse side. Welded, pulled, tore off. So as not to throw a bunch of putty on the elements. This is what it looks like. Here is a video of this master with a capital “W”, they help many achieve perfection in bodywork... I haven’t seen more detailed material.
What guided me when creating such a craft?
Well, firstly, with my own desire to take a break from the boring bustle and create something new) After all, rest is a change of activity. Sometimes, of course, you just want to lie down and do nothing, just restore lost energy... This method of rest leads to the fact that our energy tanks only decrease in volume over time if we simply recover without overloading. After all, the supply of vital energy and energy tanks can be pumped up like the muscles of the body, through extreme changing loads and rest. Therefore, frequent repetitive activity does not make us stronger or smarter, but on the contrary... Linear life is like a line on an artificial life support device...
Therefore, sometimes you want to create something and get a charge of positive energy) Blow your brain or just overload it) So to speak, delve headlong into something new, but so that it would be naturally useful for later life... For example, delve into the study of “black holes” completely I don’t want to, it won’t be useful right now, and it’s completely unnecessary to fill your head with unnecessary thoughts. The flash drive in the head also has a certain resource, because we use only 10 percent of our brain, we need to fill this 10% with the skills we need right now)
By the way, before using this spotter, I used a regular battery)
And you know, it’s enough for simple...and complex repairs. But complex work as a spotter is a utopia... Therefore, if you just get the hang of it. It's not just about the instrument. Yes, the tool, of course, is 10% of success, but everything else is skills, ingenuity, little tricks and the ability to adapt to the master’s situation. Flexibility is the sister of talent))
A huge plus of a battery spotter is that its production requires a minimum of expenses! 2 thick cables, 2 terminals, a retractor from the starter, a car relay, a micro button... and of course a battery, every car has it)
Another big plus is that it does not load the network. The light does not blink, household appliances do not fail due to your fault! Neighbors in your garage or country house won’t bang on your door, screaming!)
Mostly, I have simple dents, so this device was enough for my eyes! Naturally, the battery runs out and this is not convenient during long-term operation. But paired with a charger, a device of this type has become widespread among garage workers! If, for example, you choose between screwing self-tapping screws into a part or welding rings with a semi-automatic machine, then the battery spotter wins many times over!
You can also make equipment for a spotter yourself using available materials. The return hammer is a shock absorber rod and a weight. A lathe turned the load for me. The splitter is made from a sealant gun; the washer gun is made of something I don’t remember, like a gas burner)
But I decided to go further and make a device from the network.
Initially I wanted to make a spotter based on TOR. I found a torus in a landfill and found a body from an old welder!
But it seemed to me like some kind of long-term hemorrhoids that cannot be completed in 2 days) Therefore, I was interested in the topic of making a spotter from a microwave! I'm generally interested in the topic of making something with my own hands)
To understand the process, I watched a lot of videos... and realized that people are just monkeying with each other! Some people succeed at random, others don’t! The only sensible video where you can understand the manufacturing theory is here!
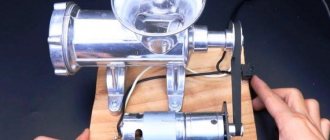
The first thing I started doing was transformers, the basis of the spotter. Namely, get rid of the secondary winding and shunts, as shown in the video! I understood the first fact leading to failure... All modern microwave ovens are made of bullshit! Or rather their transformers!
The windings are made of aluminum. Not only is it impossible to really knock out aluminum, but also the resistance of the primary winding is high, which means, in principle, such a power transformer will not allow you to need 4 of them for a spotter) Therefore, I put one of the transformers aside, because my second one was copper! The microwave was manufactured in 2010. By the way, copper ones are sorted out with a bang!
I had cables; I once bought 20 meters of cable with a good cross-section along with TOP. it cost me 2000 rubles.
I went to the landfill, or rather to the scrap metal collection point. I’m already “my” person at these points, because I collect everything that interests me there) Mostly this is equipment from the USSR, which someone is still getting rid of, and someone is still buying).
I was interested in old microwaves made before 2010 and, if possible, with a grill, powerful ones, with a large iron! Right on the spot I disassembled them and pulled out the transformers! From a copper transformer for 150 rubles, I bought them for 200, aluminum ones generally for the price of chernukha, their price was 50 rubles...
At home I looked and compared! Large transformers with copper windings were needed!
The photo shows the difference in size of the transformer from an ordinary modern microwave and transformers from old appliances with a grill!
At first I had the idea of making a device from 3 trances, but I was afraid for my electrical network in the house! After all, even one working microwave gives a drawdown in voltage, can you imagine what will happen with 3 at once?) So I went to the landfill again and found a good trans from a powerful microwave!) So now the device will be on 2 trances and here is a photo for comparison!
At the same time, I found a step-down transformer to produce 36 volts. More precisely, not 36 but 30 and a few kopecks, but this should be enough...
The device will be controlled from a button, which means a reduced voltage must be supplied to the button. I saw diagrams where people take a 12 volt step-down transformer to power a car relay. The relay in turn powers a 220 volt magnetic starter! Here is a sample diagram.
But you understand what’s the matter, why make it so complicated, use so many contact elements at the same time? I thought it was unnecessary. Therefore, in the same landfill I found 36 volt magnetic starters. The problem with removing an unnecessary contact element (and this is a delay in switching time) is immediately solved.
All the parts are there and I'm starting to assemble!
First, I removed the insulation from the cable. I twisted it as tightly as possible and began to wrap it with PVC and rag tape.
Then I implanted the resulting cable into the trances. I didn’t make 1.5 turns, because that doesn’t mean anything, but 2.5 turns, so that the output would be about 6 volts. This is what the workflow looks like)
The next step was to rebuild the magnetic starter. I also went through these starters in the year 2002 on refrigeration units) It was necessary to grind all the contacts, as well as polish the iron at the point of contact so that the starter would not buzz and work silently. I am adding a description of the starter bulkhead.
I connected everything with wires. When connecting transformers, you can confuse the phase and zero on the primary winding; on the secondary winding the voltage will then be near zero. Therefore, you need to connect correctly. In principle, it makes no difference where to connect the phase and zero to the primary winding of the trance. As well as winding the secondary, clockwise or counterclockwise, it also makes no difference.
The working part is ready!
I took the cables and cut them off 1.5 meters each. With the expectation that if there is not enough voltage, then I will cut the mass cable if something happens. The terminals were made from an ordinary copper water pipe with a diameter of 20.
I connected the cables in a similar way.
I immediately checked the device in action. It doesn’t burn the metal and everything is welded perfectly!
Now we need to give the body a little appearance.
The paint on the body is flying off, so I decided to give it a quick spray of paint. Cleaned off the old paint and painted it.
Then I just assembled everything into the case!
As you can see in the photo, the step-down trans powers a 36-volt magnetic starter.
The device turns on automatically on the side. Cooled by a 220 volt fan.
The ground terminal has an internal welded part, and a brass contact ring is screwed on the outside. The terminals are covered with heat shrink.
The control button is also attached to the cable using heat shrink. Using the button, power is supplied from the step-down transformer to the starter. The button has 36 volts, so it won’t kill you if something happens)
This is what the device looks like from the control side. I tried to simplify the design as much as possible. No extra buttons or lights! Turned it on and it works. The power cable with cross-section 3, multi-core, was made long so as not to use extension cords.
And the final photo of the device with equipment!
As a result, the device performed well, it works fine. Everything welds perfectly. It can even burn holes when you press the button for a long time. It does not sag the network much, since there are only 2 transformers and a sufficient number of turns. Small spotter repairs are quite enough, but large ones... take a lot of time and, accordingly, the margins of these works are not large compared to others... so what the heck!) So I’m glad if my experience is useful to someone!
Let me emphasize once again what affects the good operation and performance of the device!
1. This is a good COPPER transformer. Need a microwave with grill! 2. Good multi-core cables with good conductivity. 3. There is only one contact group in the connection diagram, with load distribution across the contacts. You don’t need a bunch of switches and starters... Thank you all. I hope the article will be useful when you make a similar device!)
Devices began to age faster
If you add up the forecasts for smartphones, headphones, fitness trackers and game consoles, then this year more than 2 billion devices will be released. Each of them has its own life cycle, at the end of which it becomes obsolete. On average, Russians change smartphones every two years, and Americans every three. The shorter the lifespan of a device, the more often you will have to buy new ones and the more devices will become obsolete every year.
The term end of life is used for products - this is the date after which the manufacturer will no longer repair devices or release updates for them. After this, the care of technology finally passes into our hands. It seems that something needs to be done with outdated and broken devices, but so far there are few options.
— Send them to recycling , where people risk their lives to tear the batteries from the case.
— Send them to the compactor , where they may accidentally explode.
- Throw them away , knowing that the plastic case will take another 400 years to decompose.
It would be great if we had one nice answer to the question “What to do with old devices?”, but until we have that answer, we should pay attention to how we treat technology right now.