The dream of many men is to build their own yacht. This opens up amazing opportunities to conquer water spaces.
However, such pleasure is not accessible to a wide range of people. Therefore, it makes sense to consider the possibility of making the most romantic means of transportation yourself.
How to build a yacht with your own hands? This article will be devoted to this topic.
Where to begin
You can make your dream of building your own yacht come true by first studying the technology of building a yacht on your own. It is advisable to create a small mockup at the beginning in order to understand the operating principle and features of the technology. If the result is successful, you can move on to a large-scale project.
The interested person has the opportunity to choose from two options:
- Assembling a vessel from ready-made parts.
- Completely independent construction from purchased materials.
Assembling the constructor
You can find out how to build the Optimist yacht with your own hands below. Now there are many options for prefabricated structures on sale, which are already cut to size. All that remains is to glue and secure the structure in a different way, and the boat of your dreams will be ready for adventure. For ease of assembly, detailed instructions for performing the work are provided.
This kit consists of all the necessary parts to create a yacht, detailed instructions and drawings. They provide all the conditions for the assembly to be carried out correctly in compliance with the specifications of the technological process.
Such “semi-finished products” undergo a pre-sale preparation cycle. To ensure successful assembly, the quality of components is controlled. The model is assembled, the cutting accuracy is assessed, and then it is disassembled again and packaged for shipment to customers.
Knowing how to build a yacht with your own hands, you can successfully assemble it from ready-made components. All that remains is to assemble the vessel yourself and glue the parts. The manufacturer's recommendations in the instructions will help with this. You can compare the process of creating such a yacht with assembling a construction kit, only more complex and voluminous.
Sailing yacht drawings
Sailing yachts have a high level of comfort and convenience. However, if the yacht does not have high seaworthiness, then these features do not matter. A sailing yacht must have a certain load level and maintain the required freeboard height. Failure to comply with these conditions may lead to the sinking of the vessel. When constructing a drawing of sailing yachts, the main parameters are width, length, side height and draft. A yacht helmsman must know these parameters.
The drawing of a sailing yacht is a complex curved surface of the hull, which is depicted in the form of projections. This projection has three planes that are interconnected. The projections depict the stripes of intersection of the skin with the planes. The position of such projections must be carried out in accordance with the rules of shipbuilding. The basic planes are the main plane, the mid-frame plane and the diametrical one. These planes are the beginning of the remaining coordinate planes and serve to correctly calculate the parameters of the yacht.
A more difficult task
We continue to consider the question of how to build a yacht with your own hands. If you are not afraid of difficulties, have a lot of free time and are well versed in drawings, you can start building a ship from scratch.
This task will be more difficult, since the builder will have to cut the materials himself. And such a process requires the presence of certain skills and additional equipment.
If you are new to shipbuilding, this task will be quite complex and difficult to complete. To implement it, you will need to carefully prepare and study a large amount of information on how to build a wooden yacht with your own hands.
So, first study as much specialized literature as possible. Get ready to create a small model right away so as not to risk large volumes of materials, which is quite expensive.
Analyze the features of the process of how to build a yacht with your own hands, photos with step-by-step instructions. Next, take care of the availability of the premises in which the construction work will take place. It should be quite spacious, since the dimensions of the finished vessel are not small.
The better the conditions for construction are organized, the more successfully and quickly the process of creating a yacht will be completed. It is also important to stock up on the necessary tools for the job.
We begin construction
The process of creating a yacht is called boathouse. Whatever the model you choose, you need to start implementing the project after you have carefully studied all the provided documentation and step-by-step instructions on how to build a yacht with your own hands. This is a fairly important stage, because mistakes at this stage can have serious consequences. We recommend purchasing a ready-made set of wooden parts so as not to risk large volumes of natural wood. This will save not only money, but also a lot of time.
Important Notes
Tips on how to build a yacht with your own hands will help you complete this process clearly and efficiently. Start by connecting the frames and the keel. The end result should be a permanent connection.
Next comes the installation of springers on the frames. This ensures fastening of the ship's hull. For this, special moisture-resistant plywood is used.
This assembly will require a traditional position. Consequently, it will be necessary to install the yacht with the keel up, which makes it possible to accurately calculate the dimensions and ensure the creation of ideal contours of the vessel.
The use of moisture-resistant plywood cladding will make it possible to achieve high reliability indicators, which will distinguish the structure of the vessel. Do not forget to take care to use fiberglass to seal the surfaces.
It is necessary to install fiberglass fabric in areas where there is a special moisture-resistant epoxy composition. It must be laid in several rows. When they dry, a layer of uniform waterproof surface is formed.
DIY yacht made of plywood
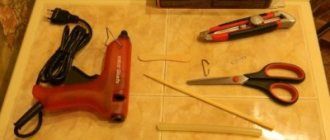
A DIY plywood yacht will allow you to go for a walk on a pond at any convenient time. In order to build a yacht from plywood, the following tools are needed: nails, a hacksaw, a hammer, a screwdriver, an electric drill, a drill. To build a yacht you need seven sheets of plywood. The thickness of the plywood should not be more than 6 millimeters. Experts recommend taking plywood measuring 1.22x2.44 mm. Additional sheets are also needed, about 10 millimeters thick and identical in size.
The main task when building a yacht is the correct choice of plywood. Plywood can be made from various types of wood, but one of the most acceptable options is to use poplar plywood, 7-10 millimeters thick. This indicator does not affect the weight of plywood.
If the plywood is made of birch, then the thickness should be up to 5 millimeters. When building a yacht, it is imperative to take into account the level of water resistance. Plywood contains several layers of wood (2-3). It is for this reason that it provides a high level of strength for the future yacht.
If large plywood sheets are used in the construction of a yacht, the level of labor intensity of the process is reduced. A groove is made on the stringer or scup in the form of combined sheets of plywood. This work process does not require careful adjustment of the edges of the belts. Plywood sheathing involves transverse patterns that serve to outline the body. This construction process involves the use of frames that are located in the structure. This option does not require independent preparation of patterns.
Frames for yacht construction are made in a simple form. For their manufacture, futoxes (a straight part) are used. When building a yacht yourself, it is imperative to pay careful attention to the manufacture of the hull. Assembly of the body is carried out on a workbench and ends on an earthen surface. The keel is placed on the workbench, after which it must be connected to the frames and stems. The connection is made using bolts, screws and nails.
After completing this work process, it is necessary to check whether there are any defects in the form of misalignment. Porous paper or thin cloth impregnated with resin is inserted into each connection. If the body is connected with nails, then you definitely need to pay attention to their length. In order for the nails to be driven in easily, holes must be drilled in advance. The hole should be 1 millimeter less than the thickness of the nail. Boards for the side are placed on both sides of the frame, and the ends are tied with twine to the stem.
Next, boards are bent around the frames, tied and brought to the transom. Unnecessary ends can be cut off. The yacht must also have a mast, which can be made of pine. Before starting to build a yacht, the plywood must be moistened so that it does not crack in the future. You can also steam plywood.
The work is coming to an end
The final stage will be the final finishing of the body. Next, the type of necessary equipment and sailing equipment is installed.
The most important step in following the instructions on how to build a yacht with your own hands is testing the finished vessel and checking the strength of the connection of all elements. This provides the safety measures required for all waterborne modes of transport.
If there are some shortcomings and shortcomings that were noted during the design of the vessel, care must be taken to eliminate them as soon as possible. After all, you are risking your safety on the water.
If you choose the difficult path
Construction of a vessel without blanks and instructions requires an independent search for drawings. It is necessary to accurately carry out the calculations so as not to make a mistake with the amount of wood.
The first stage will be the preparation of project documentation. Compiling it on your own is beyond the power of beginners. You will need to contact employees of specialized organizations or help from Internet resources.
The second stage is the preparation of a spacious room, the creation of a boathouse for construction work.
The slipway is assembled in accordance with the dimensions of the vessel. Creating a slipway consists of laying coniferous timber beams on areas of a flat, prepared surface.
It will be necessary to perform this procedure in two layers with ligation of the structure to form a surface that will be exactly horizontal.
The third stage is timber harvesting. It must be of high quality, as this affects the strength and navigability of the vessel.
Creating a vessel requires the presence of two types of wood: boards made of pine needles without knots and harder wood, for example, oak or ash.
It is necessary to take into account the moisture parameters of the material, which should be within 20%. This will protect the structure from possible deformation.
The fourth stage is the assembly of all structural elements.
It is necessary to assemble and glue frame frames using a special template device. The working area should be located on plywood sheets from 10 to 12 mm thick.
When installing the stem blank, take care to accurately maintain the angle of inclination. It should be clearly oriented towards the horizon line.
All elements are fastened with screws or glue. The next stage is the mandatory chalking of the yacht’s surfaces in order to identify all inconsistencies and eliminate defects. You can sheathe the vessel with sheet plywood.
The rigidity and tightness of the skin is ensured by gluing it with fiberglass.
Next, you need to turn the base of the vessel over and build the deck longitudinally.
This is followed by painting work and testing of the vessel.
Making a yacht model hull at home
The author is a teacher of additional education of the 1st category, an employee of DTDiM (Rostov-on-Don) and OCTTU Master of Sports of the USSR in ship modeling Timko Dmitry Viktorovich
Email: Dimitry < [email protected] > Making the hull of a yacht model at home
04/14/2016;
from KS glue and gauze
To make this yacht model, you need to use about 10 layers of regular gauze. If it is high-density gauze, then 8 layers are enough.
Using a blank to make the hull of a yacht model
In the example for this article, the blank is made of dense foam.
But as a blank, you can also use a purchased plastic model or one made from wood or other available material.
To prevent the body from sticking to the blank, a film is stretched over it, which serves as a separating layer.
This is a thin transparent polyethylene film for wrapping food, the so-called “food grade”, adhesive on one side.
It is easy to stretch and does not even require heat treatment to stick tightly. Small folds under a layer of gauze will disappear and will not be noticeable.
The blank is provided with a grip - a piece of wood or even a metal corner with screws for clamping in a vice, so as not to hold the blank in your hands.
The blank is clamped in a table vise.
In this photo, the boy is ironing the film, trying to remove the wrinkles. In the area of the deck, at the bottom of the blank, the layers of film stick together, since it is a culinary film with one sticky surface. The connection can be secured with tape.
The vice should be covered with plastic film to protect it from contamination with glue.
At this stage, the film is already stretched over the blank. Next, you need to apply 2-3 layers of gauze. They apply gauze, tuck it under the bottom so that it does not move or jump off. The gauze is tied in knots at the bottom. There is no need to fix it with a stapler. Although you can use clothespins.
In the future, you need to smooth it out and tie it from below.
In this way, three layers are made, since each layer is very thin and the first three layers of gauze are deeply saturated with the KS glue that has not yet hardened.
The glue used is the “KS” type.
Glue comes from different manufacturers. As a rule, there is not much difference between them.
To apply glue, use a flat brush - 10-15 mm wide.
KS glue does not need to be diluted, it is ready for use and has the consistency of liquid sour cream.
Applying glue to stretched gauze is done with a brush. Next, you need to “push” the glue - try to ensure that it deeply saturates the gauze.
To avoid the gauze shifting, at the beginning it is necessary to hold the model by the uncoated part and coat it first along the keel, and then along the starboard side and along the left, trying to go evenly - alternating between processing the left and starboard sides.
Please note that gauze, even tied to a blank, can still stretch.
Then you should put on the next layer of gauze, which is also stretched from below.
In the future, this operation must be repeated for several layers of gauze. The number of layers depends on what layer of glue has already been applied.
And so 2-3 layers are applied.
The glue is soaked through new layers of gauze, after which pressing and squeezing with the palms is carried out.
In this photo you can see that those places that are pressed down are darker - glue appears there.
The pressing procedure is done using the palms of the hands.
It is recommended to use disposable gloves, although the glue is non-toxic and can be washed off your hands with a simple stream of water.
And so these operations must be repeated until all 10 layers have been applied. It is very important not just to apply layers of gauze, but to squeeze it so that all layers of gauze stick together.
After this, the body dries on the blank. Theoretically, according to the passport, the glue dries for four days, but in reality, on the second day, after 24 hours, you need to trim the edges of the gauze along the deck.
After this, you can pull the body off the blank. After 24 hours the body is already quite hard, but still elastic. Therefore, we pull it off the blank, take out the release film and put it on the blank again - this time without the film.
This is done so that the body can dry on the blank for a couple more days, in order to protect it from “playing”, from play, from bending. The body will shrink a little and shrink.
Why do we pull out the film? Because the film on the bottom prevents moisture from evaporating. There is no need to make any special holes in the blank. For the passage of air and ensuring the evaporation process, the gap that will be between the body and the blank after removing the film is sufficient.
If you keep the model on the battery, then after 2 days you can continue to work with it.
By this time, the child had already cut out a deck from plywood, which was glued into the hull using the same KS glue.
The next step is to insert the keel
A cut is made in the bottom of the hull for the already cut keel.
The same “KS” glue is used to process the cut in the body and the keel is inserted into the cut.
Before working on the hull, the deck is put in order. Next, finishing work begins, that is, first of all, the deck is cleaned
from traces of glue, covered with iron-on veneer. That is, after gluing the veneer to the deck, you can gradually warm it up with an iron, pressing the iron against the veneer.
The deck is varnished with tinted acrylic varnish and covered with a protective layer of masking tape to prevent the deck from getting dirty when painting the hull.
Then work begins with the body - putty, sanding, putty, sanding, priming, painting. Working with masts, yards, etc.
It is necessary to use water-based putty - for building and façade. We take facade paint - water-based emulsion. Thicken the water emulsion to the consistency of very thick sour cream. And with a regular brush we paint the body - several layers.
Several layers with intermediate drying and sanding.
Just as you polished the deck with varnish, you should polish the hull in the same way.
Rub with a thin layer, not with a brush, but with a piece of material. The suitable material here is a “floor cloth” - that is, a non-woven material. We soak a piece of this material and rub it - apply a very thin layer. The layer dries quickly in 3-5 minutes.
And so we apply the next layer. Then more layers. We apply 3-4 layers in total. This ensures sufficient waterproofness. Acrylic varnish dries quite quickly.
It is better not to use a brush, as this may cause streaks. It is better to rub with a soaked cloth instead.
After this, we polish the body and it is ready for final painting.
It can be done with aerosol cans.
Before lowering the model into the water, pour a little Aquastop impregnation inside so that the water does not damage the body. You can do this with the same acrylic varnish, but in a different color. Pour a little inside and chat so that it penetrates everywhere, into all possible cracks.
And now the hull of the yacht model is ready!
The technology was tested in the “Modelist - Constructor” association of the Palace of Creativity for Children and Youth, Rostov-on-Don.
Let's sum it up
We hope that this article on how to build a yacht with your own hands will help you achieve your desired goal and make your dream of traveling on your own ship come true. To do this, you will need to be patient and take care of the availability of space and tools. It is important to purchase high-quality materials from which the vessel will be made.
But when all the work is left behind, and you board your own yacht, you can get maximum pleasure from realizing your cherished dream.
On this ship you will have many pleasant trips, admire the beauty of the water landscapes, and have a good time with your family or friends. All this is worth the work that awaits a person who decides to make a yacht on his own. Get started - everything will work out!
CATAMARAN
For a long time, a sailing catamaran helped us out
My wife and I have been involved in sailing tourism for many years and have fallen in love with sailing travel. We traveled hundreds of kilometers along the waterways of the Sverdlovsk and Chelyabinsk regions, climbed with our sails even to the Altai Mountains, to Lake Teletskoye (read about it here), from which the Biya River originates, at the confluence with the Katun River, forming the Ob!
By the way, Lake Teletskoye is the second deepest, after Lake Baikal (I haven’t measured it myself, but they say that it is so). On these travels, funny, curious, and sometimes very dangerous adventures happened to us, I will tell you about one of them now.
HOW WE CATCHED CRAWFISH ON LAKE KIRETY
One hot summer, a team of friends and I, in four cars, went for a weekend to the Chelyabinsk region, to Lake Kirety, to go fishing and relax. The name of the lake is translated from Bashkir as changeable, which we soon became convinced of.
The sailing catamaran traveled with us throughout Russia
We arrived at the place, set up camp, set up tents, stocked up on firewood for the fire, assembled the inflatable sailing catamaran “Prostor”, which we always had with us on such trips, and prepared for the evening fishing.
The catamaran was a collapsible duralumin frame onto which five-meter floats were attached, the deck was stretched and a seven-meter mast with a huge sail was installed.
There was still a lot of time before evening and someone suggested that they should wave us over for crayfish. But the fact was that, for some reason, in recent years there were no crayfish on Kiret. But they were found in abundance in Lake Kasli, which was connected to Kirety by a channel.
Let's set sail, the wind has filled the sails, now we'll rush
The channel was six or seven kilometers away from us, the breeze was favorable, and without hesitation, the five of us jumped on a catamaran and rushed to Lake Kasli for crayfish.
And the weather began to change dramatically. The wind grew stronger, the sky was covered with black clouds and a thunderstorm began. But “back then we were young and spouted wonderful nonsense.” We were delighted by the thunderstorm and hurricane winds and flew on a catamaran to the channel in just a few minutes. When we were already approaching the desired place, we noticed that our path was blocked by the wires of a high-voltage line laid over the bay of the lake.
To avoid a tragedy, we had to make a sharp turn at full speed, as a result of which our catamaran flew into a stone ridge at high speed and all five of us ended up on the shore.
Luckily no one was hurt. And although the place we landed on was very rocky, we escaped with light scratches and bruises.
Then we looked at our seven-meter mast and the low-hanging high-voltage wires and realized how lucky we were. Our brave prowess made us quickly forget everything and not even think about what could happen to us, and we went after the crayfish, leaving the catamaran with the sail lowered on the shore. The thunderstorm had almost passed and the five of us, crossing the road, found ourselves on Lake Kasli, collected crayfish, filled the bags prepared for this with them and went back to our camp on a catamaran.
Sails are like wings
But even though the thunderstorm had ended, the wind continued to blow like a hurricane, straight into our foreheads. We had to go on steep tacks and the distance to the camp turned out to be much longer. And if we moved towards Kasly with the wind and flew to the channel in minutes, then the return journey took about two hours. The people in the camp were already worried about us, but we, cheerful, unharmed, returned with the spoils and dispelled their worries.
This is the adventure that happened to us on Lake Kirety!
The crayfish, by the way, were wonderful.