Everyone should know how to light a fire - with such knowledge you will not be lost. A real dude certainly knows how to make fire without matches. This is a skill necessary for survival. It's impossible to predict when you'll need to start a fire and don't have any matches at hand. Maybe your plane will crash in some wild area, like somewhere in Alaska. Or, for example, you go into the forest and lose your backpack in a fight with a bear. After all, you may find yourself in very windy or wet conditions where matches are virtually useless. It doesn't matter if you ever need these skills, but it's still very cool to know how to make fire, no matter what conditions you find yourself in.
Making fire by friction
Making fire by friction is not for the faint of heart. Perhaps this is the most difficult of the “non-match” methods of making fire. There are different ways to make fire by friction, but the most important thing in this matter is what kind of wood to use as a plank and rod. The rod is a stick that needs to be rotated back and forth around its axis to create strong friction between it and the board to produce a spark. If you create enough friction between the rod and the board, you can create smoldering coals and use them to start a fire. Poplar, juniper, aspen, willow, cedar, cypress and walnut are best suited for producing fire in this way. An important point: the wood must be dry.
Hand drill
The hand drill method is the most primitive, simple and at the same time the most difficult.
All you need for this method is wood, strong hands and iron patience. By using this method, you will feel like a real primitive person. So, let's make fire using a hand drill: Collect the tinder into a compact pile, reminiscent of a bird's nest.
The tinder nest will be used to ignite the flame obtained from the spark that we have to get.
This “nest” should be made of a material that catches fire easily, such as dry grass, leaves or bark. Make a small depression in the “nest”. Cut a v-shaped hole in the fire board and make a small indentation next to it. Place the bark under this depression.
Smoldering coals will fall on it, resulting from the friction of the rod on the board - this will give the fire a chance to flare up.
Start rotating the rod.
Place the rod in the groove on the board.
The length of the rod must be at least 60 cm for everything to work properly. Press the rod onto the board and rotate it between your palms, quickly moving them up and down the rod. Continue doing this until there are smoldering coals forming in the hole of the fire board. Fan the fire!
As soon as you see red coals, tap the fire board so that they fall onto the piece of bark located under the hole. Move the bark to your tinder "nest". Carefully and carefully blow on the coals to start the flame.
Fire Plow
Prepare a fire board.
Cut a hole in the board where you will place the rod.
Three!
Take the rod and place the end of it in the recess on the fire board.
Start rubbing the tip of the rod against the walls of the recess in the board, moving it up and down. Start lighting the fire.
Place the tinder “nest” so that the smoldering embers that will arise from friction fall into it. As soon as you catch a coal, gently blow on it and get a small tongue of living flame.
Bow drill
Using a bow to make fire is probably the most effective of the friction methods because it makes it easier to maintain high pressure and rotation speed of the rod.
Strong friction arises, which is necessary to make fire. In addition to the rod and plank, this method will require a weight to hold the rod and a bow. Make a device for weighting.
It is used to press down on the end of the rod that is on top: the rod is driven by the bow and therefore becomes unstable.
You can use a stone or a piece of wood to hold the rod. If you use a piece of wood, it should be harder than the rod. It is very good to use water or oil as a lubricant to make things go better. Make a bow.
It should be the same length as your arm.
Use a flexible, slightly curved wooden rod. The bow string can be made from anything, such as lace, rope, or a strip of rawhide. One condition: it must be a durable material that will not tear. Stretch the string and you are ready to start making fire. Prepare a fire board.
Cut a v-shaped hole and place tinder under the hole.
Wrap the rod with a bowstring.
Place the rod in the loop of the bow string.
One end of the rod should be in the hole that you made in the plank, and the other end should be pressed with a stone or piece of wood. Start moving the bow.
Move the bow back and forth in a horizontal plane, just like when sawing something.
As a matter of fact, you have now assembled a rudimentary mechanical system. The rod should rotate quickly. Keep moving the bow until you get coals. Make the fire burn.
Throw the smoldering coals into the tinder and blow lightly on them. Ready! Now you have started a fire.
Flint and steel
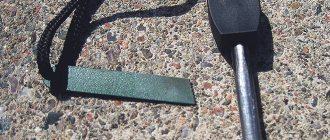
This is the old method. Carrying a good flint and steel with you is always a good idea. Matches can get wet and then be of no use, but in this case you can still rely on your flint and steel. If these things are not at hand, no one forbids you to improvise using quartzite and a steel blade of a pocket knife. You will also need lighting material - usually fabric or moss. They catch sparks well and smolder for a long time without flaring up. If you do not have special material for ignition, then a piece of mushroom or birch bark is quite suitable. Secure the lighting material and stone.
Grasp the stone with your thumb and index finger.
Make sure that the distance from your fingers to the edge of the stone is approximately 5-7 cm. The lighting material should be between your thumb and the flint. Hit!
Take a steel rod or use the handle of a knife.
Strike the steel against the flint several times. Sparks will fly off the steel and land on the lighter material, causing smoldering. Light a fire.
Place lighter material in the tinder nest and blow lightly on it to fan the flame.
Making fire using a lens
Using a lens, starting a fire is easy. Anyone who melted plastic soldiers as a child by playing with a magnifying glass knows how to do this. If you have never done such things, then here are instructions for you
Traditional lenses
All that is required to create fire is a lens necessary to concentrate sunlight on a specific place. A magnifying glass, glasses or binocular lenses will work fine. If you add a little water to the surface of the lens, you can strengthen the beam. Angle the lens towards the sun to focus the beam on the smallest area possible. Place a “nest” of tinder on this spot, and a fire will soon flare up. The only downside to this method is that it only works when there is sun. Therefore, if it happens in the evening or on a cloudy day, the lens will be useless.
In addition to the simple method of starting a fire using a lens, there are three additional methods of starting a fire using lenses that also produce fire.
Balloons and condoms
By filling a balloon or condom with water, you can make a lens out of these simple things that will help you create fire. Fill a condom or balloon with water and tie the end. Give the ball or condom the most spherical shape possible. Do not inflate the condom or balloon too much as this will distort the focus of the sun's ray. Squeeze the balloon into a shape that will focus the beam. Try squeezing the condom in the middle to form two smaller lenses. Condoms and balloons have a shorter focal length than regular lenses, so they need to be placed 2-5cm away from the tinder.
Making fire with ice
Ice and Fire is not just a quote from Pushkin, which you probably remember from your school literature course. You can actually start a fire with a piece of ice. All you need to do for this is to shape a piece of ice into the shape of a lens and then use it for its intended purpose, like any other lens. This method is especially good for tourists in winter. Get clean water. In order for ice to be used to make a lens, it must be transparent. If the ice is cloudy or contains any impurities, then no matter how hard you fight, you will not get fire with it. The best way to get clear ice is to fill a bowl or cup with clear water from a lake, pond, or melted snow and let the water freeze. A piece of ice should be approximately 5 cm thick to serve as a good lens. Use a knife to shape a piece of ice into a lens shape. Remember that the lens is thicker in the middle and narrower near the edges. Once you have a rough shape of the lens, polish it by hand. The warmth of your hands will melt the ice enough to create a nice smooth surface. Start making fire. Position the ice lens at an angle to the sun in the same way as if it were a regular glass lens. Focus a beam of light on a pile of tinder and see how useful it is to remember Alexander Sergeevich’s quote.
Coca-Cola can and chocolate bar
I saw this method in a YouTube video, pretty interesting stuff.
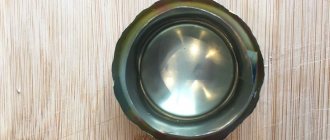
All we need is a can of Coca-Cola, a bar of chocolate and a sunny day. Open the chocolate bar and start rubbing the chocolate itself on the bottom of the jar. This polishing will make the surface of the tin bottom shine like a mirror. If you don't have chocolate with you, toothpaste works the same way. Make fire.
After polishing, you essentially have a parabolic mirror.
The sunlight will reflect off the bottom of the jar and focus on one spot. This is somewhat reminiscent of the principle of operation of mirrors in a telescope. Turn the polished bottom of the jar towards the sun.
This will create a perfectly focused beam of light aimed directly at the tinder. Place the tinder approximately 2-3cm away from the focal point of the sunlight. After a few seconds, a flame should appear. While I can't imagine being somewhere on the edge of the world with a Coke can and a chocolate bar, this method of making fire really works.
Batteries and natural wool
As with the chocolate and the bottle, it is difficult to imagine a situation in which you could find yourself in extreme conditions without matches, but with batteries and a piece of clean wool. But you never know how life will turn out. This method is quite simple and fun, so you can try it at home. Stretch a piece of wool.
It is necessary that the strip of wool is approximately 15 cm long and 1 cm wide. Rub the battery with a piece of wool. Hold the strip of wool in one hand and the battery in the other. Any battery will do, but the optimal power is 9 W. Rub the “contact” side of the battery with wool. The wool will catch fire. Blow lightly on it. Transfer the burning wool to the tinder. The wool will not burn for long, so hurry up!
During a hike, extreme tourism, or in difficult life situations, there is often a need for a fire. But how to make a fire without a lighter and matches - here you will need special skills, plus improvised means that you will definitely find.
To bring together various methods of making fire without resorting to matches and a lighter, so that they are suitable for any difficult situation, regardless of the time of year and weather - this is the goal of this article.
Magnifying glass plus cotton wool
This method of making fire without a lighter or matches will help out on a sunny day, even when everything was mercilessly wet in the rain the day before, regardless of the season. The main condition is shining sun without clouds at the moment.
- Cotton wool can be found in the first aid kit, but it can be replaced with a paper napkin, a wad of toilet paper, or a bunch of dry grass or a piece of birch bark, if you can find one - that is, anything that is useful as tinder.
- A convex type lens with a thickened middle is brought to a flammable medium and the sun ray is focused as closely as possible into one point beam.
- Soon - and this depends on the collecting properties of the convex glass - the substance placed under the lens will light up; in the case of grass and birch bark, it will begin to smoke, so you will have to fan the flame.
If you have a tablet candle or dry alcohol with you, it is better to light a flame under them so that they turn into a stable source of fire from which a fire will subsequently be built.
Effects
Modern artificial fireplaces not only replicate the appearance of natural options, but also have some interesting effects.
The aroma of a burning fireplace
The main task of a false fireplace is to simulate a fire in an apartment. To improve the realism of sensations when in contact with such a structure, it is necessary to provide the room with the aroma of burning wood.
To do this, you will need to purchase any suitable incense or set fire to thin splinters, having previously secured the room from ignition.
Crackling of dry logs
An indispensable attribute of the realism of a simulated fire is the characteristic sound of crackling firewood. This can be achieved by recording the sound of a fire or downloading a ready-made audio file. Having chosen a natural volume level, you need to turn on this sound on your MP3 player and install it in the overall circuit of the fireplace. When the structure is connected to the electrical network, the crackling sound will start automatically.
Real warmth from a cold fire
When installing a simulated fire in a home, most people install a fireplace without heating. However, achieving a realistic fireplace without a thermal effect is problematic. Therefore, you can install an air conditioning system above the fireplace. However, the presence of characteristic noise can worsen the atmosphere of peace.
As an alternative, a silent air heater is suitable, which will not only improve the realism of the simulation, but will also become an additional source of heat.
Used lighter with flint plus cotton wool or paper
It doesn’t matter if a silicon lighter runs out of gas at the most critical moment—a flame can still be produced from it.
- You need to stock up on the same cotton wool, a napkin or a piece of toilet paper, placing them on something that burns longer, for example, on the same tablet candle, on a lump of dry grass or old dried moss.
- First, you need to remove the top metal cap, and, holding the lighter close, scratch it - sparks will fall on the tinder and cause ignition.
Therefore, do not rush to throw away a lighter deprived of gas - it can still help out by starting a fire without matches.
Weather control
Tesla believed that the weather on the planet could be controlled. And fertile farmland can be created in any environment by using certain radio waves that will locally change the Earth's magnetic field.
Tesla received numerous patents for his weather control inventions and allegedly proved that waves could be used to control the weather. Some conspiracy theorists believe that Tesla's papers eventually fell into the wrong hands and are used today to control the weather.
Working battery plus paper and foil
You will probably find packaging paper that is coated with foil on one side, like inside a cigarette pack or on a chewing gum wrapper. All that remains is to find a working cylindrical battery - and a fire without a lighter or matches is guaranteed.
- A thin long strip is cut from a piece of paper foil, capable of reaching from one pole to the other, but with a margin.
- If there is only a short piece, it’s not scary, just step back from the negative pole, which is a flat area, clean the insulating layer on the cylinder with a knife - this will already be the positive pole, and shorting them will give a discharge.
- You will have to experiment with the thickness of the foil, since it either burns out instantly or heats up slowly.
- It makes sense to make the jumper itself a couple of mm thinner than the ends of the tape.
Just place the sagging middle on a flammable medium - and the flame without matches is ready!
In case of a burn, it is strictly prohibited:
- lubricate the burn area with vegetable oil, alcohol-containing preparations, iodine, brilliant green;
- sprinkle with starch;
- apply burn ointment and other medical products to the hot surface of the skin;
- apply fermented milk products to the damaged area;
- pierce or cut through the formed blisters on the skin;
- independently clean the wound from dirt or remnants of clothing;
- wash the burn with water with the addition of soda or citric acid;
- apply a plaster to the burn.
A uniformly concave spoon or ladle plus a cotton or paper roll
The larger the diameter of the object and the depth of the concave bottom, the faster a fire will appear in the sun without the need for matches or a lighter. The tablespoon can be straightened so that the concavity on all sides is approximately the same - this is necessary for maximum concentration of the sun's ray beam at one point.
- A couple of napkins or a piece of toilet paper should be rolled into a tight roll the size of a pencil.
- One end of the roller is cut off evenly and smeared with soot, or ash - this will be like a wick.
- Now all that remains is to direct the concave bottom towards the sun, bring it close to the point where the beam of rays is reflected, and wait for the haze to appear.
Then you will have to inflate the homemade wick and bring it to the tinder in order to start a fire in the absence of matches.
Treatment of first degree burns
In case of a first degree burn, treatment can be easily done at home. As soon as the first emergency aid has been provided, the cooled surface of the skin should be lubricated with a medicine that will prevent the burn from spreading into the deep layers of the skin and will relieve swelling and pain. These are drugs such as:
- Panthenol - well restores burned mucous membranes and skin, has regenerative and metabolic effects on damaged tissues. The ointment perfectly relieves burning sensation and relieves pain.
- Sulfargin - this ointment with silver ions quickly copes with wounds of a wide variety of nature.
- Levomikol - first, lubricate a gauze bandage with the ointment, and then apply it to the burn site. This bandage needs to be changed every 20 hours - the swelling will gradually subside and the pus will be eliminated.
- Olazol is a spray containing an antiseptic and anesthesin. Thanks to this composition, the drug heals burns faster.
In addition to medications, homemade compresses are also suitable for treating minor first-degree burns:
- 100 grams of finely grated potatoes should be mixed with a teaspoon of honey. Make a compress on a bandage or gauze and leave on the burn site for 2-3 hours;
- finely chop the cabbage and mix it with raw egg white, and then brush the resulting mixture onto the burn;
- instead of lotions, you can leave cooled black and green tea on the damaged area;
- cut off a juicy aloe leaf, cut it lengthwise and apply to the burned area for a few minutes;
- freshly picked plantain leaves should be washed with boiling water, cooled and applied to the affected area of the skin;
- Place finely grated carrots on gauze or bandage and apply to the burn. The compress should be changed every 2-3 hours.
Condom filled with water plus coals
This trick for making fire without matches or a lighter has the same principle of a focusing lens, concentrating the rays of the sun into a single point.
- First, fill the straightened condom with a portion of water.
- Next, pull the tip down and press it between your knees.
- Now you need to pour as much water into the product as possible so that the homemade “lens” has a larger diameter - this will create a flame faster.
- The water collected below in the form of a round flask must be secured by tying a condom in a knot on top.
- Then they put a pile of coals and direct a beam of sunlight onto one of them, waiting for a slight smoke.
- They take a heated coal, blow it red hot and, pressing another one to it, continue to blow.
Now the hot coals are returned to the pile and, still fanned, tinder is added - soon the long-awaited flames will appear.
How can you get a burn?
Burns are injuries to the skin and tissues that most often occur due to high temperature: leaning against something hot, spilling boiling water on the skin.
But you can get a burn in other ways. Dangerous:
- Radiation. That's why we get sunburned or suffer from solarium overdose.
- Chemical substances. Therefore, household chemicals need to be put away in a safe place and worked with in protective clothing: gloves, an apron and goggles.
- Friction. Therefore, you need to carefully descend the rope.
- Electricity. This is why electrical injuries are so dangerous: they damage tissue with deep burns.
Block of ice plus wick
On a sunny frosty day, if you don’t have matches and a lighter at hand, and the need for fire arises, you can look for a block of glass-like ice - and a flame, after some effort, is guaranteed.
- The block is cleared of snow and roughness, first with a knife or ax, and then polished by hand.
- The main thing is to achieve the shape of the meniscus, when one of the surfaces is convex, the other can be left flat.
- Now the concentrated sun spot is directed onto the wick until smoke comes out.
All that remains is to light the tinder with a hot wick and make a fire.
Treatment of second degree burns
This stage is already considered a fairly serious injury, so assistance is provided first at a trauma center, and then at home. The doctor carefully treats the wound, performing the following algorithm:
- anesthesia of the affected area;
- treating healthy skin next to the burn with an antiseptic;
- removing dead skin, dirt and clothing;
- carefully removing the contents of burn blisters with a sterilized instrument. The membrane of the bladder remains intact to protect the wound from bacteria and infections;
- applying a bandage with a special bactericidal ointment to the wound.
Frictional force for making fire
The friction method has long been used to produce flames, so it is not a sin to use ancient knowledge in an extreme situation.
- Rubbing a stick on a wooden block, if you make a hole of similar size in the block, will lead to the appearance of smoke, even when everything around is damp from rain.
- If you sprinkle a thin layer of cotton wool with soot or chalk and then roll it into a tight roller, then quickly rolling it between two boards will cause a fire inside.
- If you wrap a flexible wire or a guitar string with handles on the ends of the sticks around the trunk of a log and, placing a wick, begin to rub quickly, the wick will soon ignite.
In principle, any friction between two hard surfaces will lead to strong heating.
Tesla Oscillator
Everything is made of atoms, and in every object the atoms vibrate at their own frequency. When the frequency of vibration of a mechanical system matches the natural frequency of vibration of atoms, the system enters resonance. An example is the Tacoma Channel Bridge, which collapsed due to resonance with relatively weak winds.
Using this concept, Tesla developed a pocket machine that could destroy a building. While experimenting with the oscillator, a strange noise began and lightning began to snake around the machine. Then everything in his laboratory began to fly around the machine. Tesla was forced to smash the car with a hammer before the entire building collapsed. Tesla thought that his machine would be able to transmit mechanical energy anywhere in the world using “telegeodynamics,” and also believed that it had healing properties (if you matched the natural vibration frequency of the human body).
Did you like the article? Then support us, click
:
Source
What can act as tinder and wick
Dry paper for lighting a fire is not always available, but fire is needed. The following means can serve as wick and tinder:
- cotton wool and cotton insulation;
- rags;
- handkerchief;
- cotton pads and tampons;
- toilet paper and napkins;
- small chips and wood shavings;
- old reeds, reeds and cattails;
- rocking old cattails;
- birch bark;
- hay and straw;
- old dry moss.
The main thing is not to get lost and look around, you will definitely find something suitable for lighting a fire.
Some spectacular tricks with fire can be demonstrated using available household tools and using quite simple methods. However, it should always be remembered that extreme caution and adult supervision is always required when working with flammable liquids. You can impress your friends with tricks worthy of a real circus show, or even fool them into thinking you are the real fire lord. For more detailed information, proceed to reading the first step of the article.
WARNING: Use extreme caution. Working with flammable liquids without proper protective equipment is not recommended.
Burns of III and IV degrees
The first rule for third and fourth degree burns is no self-medication! Severe burns must be treated in a hospital. There, the doctor first carries out anti-shock therapy, surgical treatment (if it is necessary to remove dead tissue and perform skin grafting), and then hospital treatment.
What to do for burns from boiling water
- Get rid of clothing that is at the burn site as soon as possible.
- Inspect the affected area and determine the extent of damage.
- For a first or second degree burn, apply ice or make a cold compress, change the compress after a few minutes.
- If the burn is severe, go to the hospital immediately.
What to do for steam burns
- Remove clothing blocking access to the affected area of skin.
- Cool the burned surface.
- If the burn is on your hand, it should be kept elevated.
- If damage is more than 5%, go to the emergency room.
What to do for oil burns
- Cool the damaged area under running cold water.
- Apply a sterile, damp bandage to the burn site.
- If the burn is more than 1% (the palm makes up 1% of the whole body), call a doctor.
What to do for chemical burns
- Call an ambulance.
- Remove clothing from the affected area.
- Cool the burn area under running ice water.
- If the burn is caused by sulfuric acid, it must first be removed from the surface of the skin with a dry cloth.
- And if the burn is caused by quicklime, cold water will have the opposite effect! In this case, you need to remove the reagent from the affected area with a dry cloth, and then lubricate the burn with oil or greasy ointment.
source
Steps
Using a gas lighter
- Take precautions.
If you are going to perform this trick, you should take proper precautions to avoid setting your house on fire and causing burns. To perform this trick, go outside, find a piece of free space without dense vegetation around or other flammable objects. If you need to quickly put out a fire, you should have a bucket of water on hand, and you should also have an adult supervise you while you perform the trick.
- If you use gloves for protection, you should use old leather gloves or coated gardening gloves that will fit snugly on your hands and have a fairly durable surface on the palms. While bulky gloves made from heat-resistant fabric provide excellent protection against burns, the cloth glove trick usually doesn't work and can actually be more dangerous. Bulky, heat-resistant gloves often extinguish flames, but regular fabric gloves can absorb liquefied gas, increasing the likelihood of the gloves catching fire and causing burns.
- Make a fist with your hand, leaving a gap between your little finger and your palm.
Make a fist, leaving enough space inside it so that you can easily insert the end of the lighter there. Your fingers should be clenched relatively tightly so that the gas does not leak between them when you begin to fill your fist with it. The top hole of the fist, where the index finger touches the palm, should be clamped with the thumb.
- Try to imagine that you are holding water in your fist and trying to prevent it from spilling. The trick is essentially filling your fist with gas and igniting it as you open your hand.
Insert the end of the lighter with the chair into your hand to a sufficient depth so that you can fill the cavity created by your fist with gas. It is not enough to simply bring the lighter to the bottom edge of your palm; you need to insert the lighter inside.
Press and hold the gas button for 5 seconds.
To start performing the trick, you should press the gas button. Do not create a spark by turning the wheel, but simply press the button.
- Various performers of this trick hold the button longer or shorter, depending on the intensity of the gas supplied by the lighter, as well as the size of the fireball you want to create. To be especially careful, it is better to stick to a time of five seconds; this is quite enough to accumulate the required amount of gas, giving a relatively short flash of the fireball.
Once you get used to using the lighter during the trick, you can optionally try creating a larger fireball by holding the gas button for ten seconds or a little longer. However, you should start small. This trick is dangerous, you should not try to jump above your own head.
After the five second countdown, you need to act quickly so that the gas does not have time to dissipate. Move the lighter about 30 centimeters away from your fist, and then light it by sparking and turning on the gas again.
- Never strike a spark while the lighter is in your fist filled with gas. This is extremely dangerous.
Quickly bring the lit lighter to your fist, simultaneously opening your palm and moving away all your fingers one by one, starting with the little finger. Act quickly. The gas will ignite and burn quickly. From the outside it will look as if you can “control” the flame by generating fireballs with your palm.
- To achieve coherence in your actions, you will need some practice. You need to fan your fingers away from the lighter, opening your little finger first, then your ring finger, and so on. If you open all your fingers at once, the gas may not ignite, and if you do not open your fist, you can burn yourself. Under no circumstances should you leave your fist clenched.
Using flammable hand sanitizer
- Be extra careful.
This method describes a very common party trick that is popular on YouTube, but should only be used with extreme caution and should only be performed under adult supervision. If you don't act quickly and safely, it's easy to harm yourself.
- Purchase a flammable hand sanitizer.
This type of trick involves setting a small amount of disinfectant on fire and quickly interacting with the fire, followed by immediate extinguishing. To perform the trick, you'll want to choose a suitable alcohol-based sanitizer: look for "ethyl" or "isopropyl" alcohol.
- It is very likely that some disinfectant liquids will contain many ingredients, others will have one or two, however, the presence of one of the above two alcohols in the product will make it flammable, depending on the presence of other components. Nowadays, there are more and more alcohol-free disinfectants that will not do the trick. Be sure to read the ingredients on the label, otherwise the trick may not work.
The idea of the trick is to spread a small amount of disinfectant in a thin layer over the surface and set it on fire, then
very
quickly run your finger over the burning surface and immediately extinguish it. It is very important to use gloves for this trick, and you should also have a bucket of water on hand to put out the fire if necessary.
- Find a suitable heat-resistant surface to work on. To perform this trick, you should position yourself outside, preferably on a concrete surface away from any flammable objects. The flatter the area, the better. Clear the area of all flammable objects: branches, turf, paper. You need to make sure that nothing other than the disinfectant will catch fire.
Squeeze out a small amount of disinfectant and spread it evenly onto the concrete using your fingers. Wipe the disinfectant off your fingers to prevent them from burning prematurely. Before the alcohol evaporates, take a lighter and light the oiled surface on fire. It should light up with a barely noticeable bluish flame.
- It is better to perform the trick at night so that the glow of the flame is more noticeable. However, the lighting should be sufficient so that you can understand what exactly you are doing. You can try the trick in the evening, when there is moderate natural light and the flame is already quite noticeable.
Under no circumstances
should you put hand sanitizer on your hands or set fire to it on your hands. The trick works because of the speed at which you perform it, not because the sanitizer burns safely. Such actions will be extremely dangerous and you will receive severe burns. Do not do that.
If you do this quickly, you may pick up some of the burning disinfectant with your finger, giving the fleeting impression of your fingers being on fire. After completing this step, you won't have much time to admire the spectacle, as you will get burned if you let your fingers burn for more than 1-2 seconds.
- You should feel hot or a strange combination of hot and cold. Hand sanitizer typically creates a cooling sensation that can be confused with heat. Either way, you won't have enough time to really feel anything. You just run your finger across the surface, look at it for a second and extinguish the flame.
Surely every person has seen how in the movies or the circus people hold flames on their hands, or even juggle or throw them. And if they can be created using computer graphics, then in the circus it looks like a real miracle. In fact, this phenomenon has a completely scientific explanation and is called “cold fire” by chemists. If you wish, you can surprise guests at the holiday with a spectacle by making it yourself.
Burning hand
You've probably seen burning people in films. Of course, such stunts are performed by professional stuntmen under the supervision of a large group of people with fire extinguishers. However, you can perform the experiment with a burning hand yourself if you know the basic theory of combustion.
A little theory
Flame is a phenomenon caused by the glow of a hot gaseous medium in which physical and chemical transformations of reagents occur, leading to glow, heat release and self-heating. The flame can be divided into 3 sections: a section with high temperature, medium and low. A low temperature area (dark zone, 300-350 degrees) occurs for two reasons:
1. Lack of oxidizing agent (oxygen) 2. Endothermic (i.e. with heat absorption) process of evaporation of a flammable liquid.
The area of average temperature (luminous zone, 350-900 degrees) is the area where the coloring of the flame actually occurs.
High temperature area (900-1500 degrees) - here the final combustion of the decomposition products of the flammable substance occurs.
Laboratory work
For effect, you can set your own hand on fire. In order to avoid getting burns, it is necessary to choose a liquid with a high evaporation rate. Acetone (CH3COCH3, a volatile, colorless liquid with a characteristic odor) is well suited as such a liquid. In addition, in order to reduce the temperature of the lower flame zone directly adjacent to the hand, it is necessary to wet the hand well with water (as it evaporates, it will also actively remove heat).
The hotter areas of the flame will be further away from the hand and therefore less likely to cause harm.
We carry out the experiment in the following sequence: 1. We make sure that fire safety rules are observed. 2. Wet your hand generously with water. 3. Pour a small amount of acetone over your hand (a volume equal to a bottle cap), so that the acetone flows down your fingers from your elbow. 4. Shake off excess acetone and set it on fire. 5. At the first signs of heating, extinguish the flame with a sharp wave of the hand. 6. Make sure that there are no burns on the surface of the hand.
Attention! This experience is presented for informational purposes only and only to confirm the theory. Don't try to replicate it yourself!!
One of the main dangers when working with acetone is its flammability. Air mixtures containing from 2.5% to 12.8% (by volume) are explosive. This must be taken into account, since acetone evaporates quickly, and the resulting cloud can spread to the point of ignition (heating or spark) far from the place of work with it.
source
Let's define it in terms
By non-burning flame, chemistry means a chain reaction of oxidation in which a glow is observed. So if you strictly follow the terminology, cold is not. It is used to create very spectacular special effects and some types of fireworks. A number of esters and acids, both organic and inorganic, are capable of producing a cold flame. The most commonly used is the ethyl derivative of boric acid.
Often, cold fire also means a visual “trick” in which the combustion process as such is absent. It is usually used not for tricks, but for design purposes.
Electrification of the whole world
Tesla believed that it was possible to illuminate the entire world by reducing the need for electricity. He wanted to use the principle of rarefied gas luminescence, which states that certain gas particles emit a glow when they are excited by energy. The inventor planned to “shoot” a strong beam of ultraviolet energy into the upper part of our atmosphere. This would cause particles in the atmosphere to glow throughout the Earth, similar to the northern lights. Tesla believed that by using his method, accidents such as the Titanic could be prevented. But the inventor’s ideas were not supported.
The most effective way to make a cold fire at home
If we consider the most famous option for creating a flame that does not burn, then it will require quite accessible ingredients. Take a spoonful of alcohol (medical or chemically pure, used for analysis). It is mixed with an equal volume of boric acid powder. It, like alcohol, can be bought at any pharmacy. A drop of concentrated strong acid - hydrochloric or sulfuric - is dropped into the solution. For the uninformed: this one is filled into batteries, so getting it out is also not a problem. The vessel with the workpiece heats up. The fastest and safest way to do this is in a primitive water bath. When the mixture becomes noticeably warm, but not yet hot, you can begin to perform the trick.
If you have never made cold fire before, you should not set it on fire directly on your palm - if you do not have the skill, you will get injured. It is better to roll it up, soak it in the composition and only then set it on fire. The match (lighter) should not touch the ball of thread.
X-ray gun
Many scientists, including Tesla, worked on the problem of X-ray radiation. Using Roentgen's original designs, Tesla continued his experiments with X-rays. During this time, Tesla became very close friends with Mark Twain, who often visited Tesla salons after the inventor cured him of constipation. Twain and Tesla often experimented with the X-ray gun that Tesla invented, trying to pierce a sheet of paper with a beam of X-ray radiation. But they failed to do this.
Caution is paramount!
The fire remains cold only as long as the ether formed by the reagents burns. When it runs out, ethyl alcohol will take over directly - but its combustion temperature is quite high. In addition, do not forget that the acid involved in creating the flame is a dangerous substance. So you should take precautions:
- Do not increase the dose of acid under any circumstances. Firstly, an explosive mixture may result. Secondly, you can get a chemical burn by placing the ball on your palm.
- Make sure that there is no hair or edge of clothing near the ball being lit. An inexperienced magician may not catch the moment of ignition of alcohol, and the mentioned things are easily flammable.
- Keep a small, non-flammable container nearby to cover and extinguish the cold fire when it gets hot. Or perform a magic trick over the kitchen sink to quickly throw it down.
After a certain amount of training, when you learn to control temperature changes to such an extent that you do not get burned, you can light a non-burning flame directly on the palm of your hand.
First aid for burns
A burn occurs as a result of exposure to high temperatures and immediately turns into an open wound, accessible to any microbes. Therefore, the first and most important thing to do is to free the damaged area from clothing and immediately cool the burned area. Ice from the refrigerator, snow, very cold water or any frozen product will do. Thanks to the cold, the pain subsides for a while, as unwanted inflammatory processes in the affected tissues are stopped. After providing first aid, you must carefully examine the burn and assess the location of the skin lesion - further actions depend on the degree of the burn.
A safer option
You can make a cold fire in another way, although it will look less impressive, since the flame from it has a familiar color, not greenish. Take a small piece of cotton fabric, roll it into a ball and wrap it (or better yet, stitch it) with thread so that it does not unravel. Low-temperature fuel, for example, isopropanol, is poured into a shallow bowl. You can take the so-called one, but here you need to be careful: these liquids have different combustion temperatures, and you can run into quite noticeable ones. The fabric ball is dipped in fuel, wrung out and set on fire. The lump will warm your hand, but if you roll it over your palm and between your fingers, you will only feel a pleasant warmth. And if you lubricate the place where the ball is placed with cream, you can keep it in one place. The only safety measure is not to touch the top of the flame - this is a guaranteed burn.
Short flame
There are other methods for making cold fire with your own hands, mostly based on the dexterity of a magician and small tricks. The easiest two options are:
- Mix alcohol or acetone with water to such a concentration that the liquid burns but does not burst into flames. Hands are lubricated with a special fire-resistant gel (sold in stores specializing in props and practical jokes). Fuel is poured into the boat from the palm and set on fire. Strictly speaking, this is not a cold fire, since the combustion temperature is standard, and it is maintained painlessly only due to the gel. But it looks impressive and convincing.
- Thin fabric is soaked in vodka, and the vapors are ignited when the material is spread out on the palm. The handkerchief catches fire, but due to the low concentration of alcohol, it goes out before burns are formed. An additional guarantee of safety is to keep your palm as straight as possible.
Simulated flame
It remains to consider the cold fireplace fire. At home, not having the opportunity to lay out a real fireplace, many romantics do just that. A fan is placed in a box (you can even use cardboard) so that the air flow from it is directed upward. LEDs and optical filters of red, blue and yellow are placed in the corners. There are mirrors on the sides inside. Triangles are cut from fabric and glued to the box. The system is plugged into the sockets - and a cold flame creates comfort in the room.
Have you ever seen how they allegedly pour gasoline into the palm of your hand, light it, it burns, but the person does not receive any harm from the fire? Why don't burns appear on the skin? After all, fire is a high-temperature plasma! What's the matter?
Effects
Modern artificial fireplaces not only replicate the appearance of natural options, but also have some interesting effects.
The aroma of a burning fireplace
The main task of a false fireplace is to simulate a fire in an apartment. To improve the realism of sensations when in contact with such a structure, it is necessary to provide the room with the aroma of burning wood.
To do this, you will need to purchase any suitable incense or set fire to thin splinters, having previously secured the room from ignition.
Crackling of dry logs
An indispensable attribute of the realism of a simulated fire is the characteristic sound of crackling firewood. This can be achieved by recording the sound of a fire or downloading a ready-made audio file. Having chosen a natural volume level, you need to turn on this sound on your MP3 player and install it in the overall circuit of the fireplace. When the structure is connected to the electrical network, the crackling sound will start automatically.
Real warmth from a cold fire
When installing a simulated fire in a home, most people install a fireplace without heating. However, achieving a realistic fireplace without a thermal effect is problematic. Therefore, you can install an air conditioning system above the fireplace. However, the presence of characteristic noise can worsen the atmosphere of peace.
As an alternative, a silent air heater is suitable, which will not only improve the realism of the simulation, but will also become an additional source of heat.
Spectacular focus
The example with fire in the palm is, of course, impressive. People who have nervous nerves should not watch this trick. Or immediately tune in to the fact that this is just a spectacular trick. Even if it’s not entirely clear, it smacks of fantasy. Let's break the focus down into its component parts. First, the visual part. What do we usually see?
The magician rolls up his shirt sleeve to his elbow and shows us his palm from all sides. By this he convinces the audience that he has nothing in his palm. Then he takes a glass half filled with a transparent liquid, and by shaking it from side to side he convinces us that this is indeed some kind of flammable liquid, since it was said about the flame that he will light in the palm of his hand. Of course, we associate liquid with gasoline or some other transparent liquid flammable substance.
Next, the magician squeezes his palm a little and pours liquid from the glass into it, puts the empty glass back on the table, takes a lighter, spins the wheel on it and sets fire to the liquid in his palm. It flares up with a voluminous, smoky orange flame. For greater effect, turn off the light. We see how a magician in the dark makes beautiful passes with his palm with a flame, then instantly clenches his palm into a fist and the flame goes out. The lights flash and the magician bows to the applause of the audience.
Now let's look at the second part of the trick - the chemical one. The magician poured ordinary water from a glass into his palm! But it won't catch fire! However, we did not notice that a small cotton ball soaked in a mixture of carbon tetrachloride and cyclohexane in equal proportions, grabbed from the table along with a lighter, fell into our palm. Having poured water into his palm, the magician quietly drained it, and the cotton ball began to evaporate a certain substance, releasing a flammable gas. The magician sets it on fire. The gas burns for several seconds without causing any harm to the palm. Clenching his palm into a fist, the magician sharply limits the access of air to the flame - the fire goes out. He only moistened the skin with water on his palm. Otherwise, a mixture of carbon tetrachloride and cyclohexane would have penetrated into it and there would have been a rather severe burn. The peculiarity is that the combustion did not occur on the skin of the palm itself, but at some distance from it. And since, according to the laws of physics, heat tends upward, a layer of cold air appeared between the palm and the flame.
Burn degrees
There are 4 degrees of burn, here they are:
- I degree is a mild and safe degree, in which only the upper layer of the dermis remains burned. There is noticeable redness and slight swelling on the skin;
- II degree - in addition to swelling and redness, blisters with cloudy contents appear on the affected area, and severe pain is observed. With proper treatment and emergency care, no traces of burns or scars remain;
- III degree - in this case, not only the surface of the skin remains damaged, but also deeper tissues; the burn can affect the muscles and damage them. Blisters with a cloudy liquid inside form on the burned area. Treating a third degree burn is difficult because there is a high risk of infection. Under no circumstances should treatment be carried out at home.
- IV degree is the most serious and dangerous degree of burn. High temperatures at this stage can damage the bone; skin and muscles may be absent. The most dangerous and difficult areas are the neck, face, inner arms and thighs. Patients tolerate burn injuries to their feet, back and arms (up to the elbow) more easily.
Another way to repeat this trick
It should be noted that the mixture of carbon tetrachloride and cyclohexane is toxic. For this reason, the focus is placed in a very large, well-ventilated room. For example, in the circus arena during pauses between performances, when there is forced ventilation using powerful mechanisms.
A trick using ethyl ester of boric acid is less dangerous. But its vapors burn not with a yellow, but with a greenish flame, which is not so impressive. To prepare ethyl ester of boric acid in a strictly defined proportion, dry boric acid itself, ethyl alcohol, concentrated hydrochloric or sulfuric acid are used. The mixture releases ether vapors that are not visible. The resulting aerosol burns. This fire does not burn the skin at all. But if after some time (a matter of seconds!) you do not block the access of air to the mixture, the ethyl alcohol itself will begin to burn, which will result in a guaranteed skin burn.
As you can see, tricks with cold fire are very effective in the dark, but require excellent reaction. When demonstrating them, there is always an assistant with a wet towel next to the magician - in case the magician does not have time to quickly put out the flame and gets burned.
Communities › DIY › Blog › Imitation of Fire for a False Fireplace. On Arduino. With Your Own Hands.
Hello everyone, we all love the New Year and I think everyone wants comfort and warmth in their apartments, and especially on these long winter Christmas evenings. Our valiant utility services provide us with warmth, but no one except ourselves will create comfort and a festive atmosphere for us. In addition to traditional New Year's paraphernalia, such as a Christmas tree, garlands, and gifts, false fireplaces are also becoming quite popular. And this one is natural, because what could be more comfortable than a real hearth, a fireplace. Of course, not many people can afford a good fake fireplace, and only a select few can afford a real one, but if you have the desire and at least a little imagination, you can make a fake fireplace yourself from available materials, at least from the same cardboard. So we wanted to add a little coziness to our apartment and make a fireplace. But the frame of the fireplace itself is not difficult to assemble; the situation with the hearth itself is much more interesting; you want it to resemble a real fire. I want to talk about this fireplace, or rather not about the entire fireplace since it consists of many components - coals, firewood, etc. - but about the effect of the flame. The best effect of a living flame is obtained by illuminating the water vapor with a yellow halogen, but I didn’t want to bother that much and, especially for a cardboard fireplace, this is not the best option. I made it from what I had, which was an Arduino nano and a strip of addressable LEDs.
