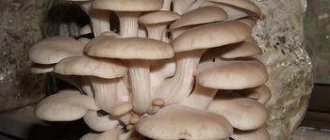
A house made of rounded logs is a more progressive analogue of the traditional Russian log house - the hut, which our ancestors built. Although building a house from chopped logs has still not lost its relevance.
Paying tribute to traditions, modern technologies make it possible to obtain a building material - a rounded log that has the same diameter along its entire length, with clearly defined parameters for longitudinal grooves and seats (bowls).
Visually, the modern log house has also undergone changes and began to look much smoother and neater. The operational characteristics of the log itself have also changed. As a result of processing, it has become more stable, resistant to torsion, and most importantly, rounded logs, unlike chopped logs, have no curvature. Stable geometry increases the speed of house assembly and its quality.
Construction of houses from rounded logs - step-by-step instructions, assembly stages
Advantages and disadvantages of houses made of rounded logs
Both advantages and disadvantages can be identified, most of which are subjective or depend on the source material or the quality of processing.
Advantages of houses made of rounded logs
- Predominantly natural materials are used. Usually the finishing is chosen to match the house made from natural materials;
- excellent natural ventilation, due to which there are no prerequisites for the appearance of condensation, dampness, development of cracks and mold;
- there is a unique spirit of natural wood, which has a positive effect on human health; Material prepared for the website www.moydomik.net
- warm in winter and cool in summer. Due to the tight fit of the logs and the low thermal conductivity of the wood itself, a house built from large-diameter logs does not need additional insulation and air conditioning;
- attractive facade, exterior and interior.
In addition, a log house is a strong, reliable, stable structure, the construction of which takes from 5 to 30 days, depending on the project. At the same time, building a house from a log is considered one of the economically feasible projects in private construction, with an optimal combination of price, quality and construction time.
Disadvantages of houses made of rounded logs
Disadvantages need to be considered, first of all, in order to take measures to eliminate them and avoid possible mistakes.
- shrinkage. The main disadvantage of a house made of rounded logs. Note that wooden construction is always associated with shrinkage of buildings, this is due to the characteristics of the wood itself. But, a six-month break in work for the most active shrinkage, the choice of dry material, the use of jacks, strengthening the junctions of logs, etc. nuances will reduce the shrinkage of the log. The optimal figure is 8-10%;
- flammability. Wood burns - that's a fact. But it is not a flammable material, and the likelihood of spontaneous combustion (for example, from electrical wiring) is no higher than in other houses. But it is easier to extinguish a wooden house, and the smoke released during the combustion process is not as toxic as that of the insulation materials used to insulate stone houses;
- cracking. The appearance of cracks is also a natural process for wood. Their occurrence can be minimized by purchasing dry logs and putting the house into operation correctly, in particular the correct mode of heat supply when cold weather sets in;
- care. A wooden house constantly needs maintenance. From time to time it is necessary to caulk the cracks and cover the log to protect it from external factors. But, any private home needs care. Taking care of your own home can hardly be considered a serious drawback.
Where to start?
Wooden house project
The first thing you need to do is a project for the future house. Here you have two options: do it yourself or seek the help of specialists. If your design knowledge is not very deep, it is better not to try experiments. Mistakes in design can cost you dearly, and even worse, such a home may be uninhabitable. What to do in this case?
Many ready-made room designs can be found on the World Wide Web. Some of them can be obtained for free, while others are only available for money. If you are not sure of the reliability of such sources, you can turn to specialized companies that will think through the design of your home down to the smallest detail.
Next you need to choose what kind of wood the house will be built from. These are mainly the following species: pine, spruce, larch, cedar, aspen, oak and ash. Often, coniferous wood is used for such purposes, since their trunks are quite smooth, and the wood itself is easy to process. Moreover, pine and spruce can be purchased at an affordable price. And thanks to the resin with which the wood is impregnated, moisture resistance and a pleasant smell are ensured.
It is better to purchase logs in winter, since then the moisture resistance indicators are the highest.
After this, you need to order wood cutting according to the finished project from a company that provides such services. After discussing all the issues, the factory will produce a whole set of logs for your house, floor beams, rafters and joists. To make sure that everything is done as it should, the house is assembled for the first time at the factory. After inspection, it is disassembled and delivered to you.
Now your participation is needed. You inspect a set of wood for quality and prepare a place in which you will store the material for subsequent work.
To prevent the tree from getting wet when it rains, the storage area should be equipped with a canopy.
At this point, all preparatory work is completed, you can move on to the next stage.
When is the best time to build a house from rounded logs?
You can choose to start construction based on your own capabilities. Any time, with the exception of autumn, allows construction work to be carried out. However, the most preferred time of year to start assembling a log house is the end of winter. This is due to the following factors:
- winter forest is considered the best for building houses;
- in the winter season there is no precipitation, and it is easier to protect a log from snow than from rain;
- since the house is being built quickly, the developer has spring for the gradual drying of the wood, and summer for the most active phase of shrinkage, and in the fall it will be possible to install a permanent roof.
Project of a house made of rounded logs
Any construction must begin with the development of a project, and the design of a residential building made of rounded logs needs approval from various authorities.
What is needed to design a log house:
- order the development of an individual project, develop the project yourself using computer programs, download a standard project and modify it taking into account the characteristics of the location and operating conditions (you will need to conduct geodetic research);
- calculate the parameters of the future house: total square footage, usable area, number of living rooms, their purpose, take into account the special requirements of residents (for example, pensioners or people with disabilities), take into account all wishes, because the house is being built for the whole family and will be used by several generations ;
- think over the rafter system and choose roofing material. It must be heavy enough to create pressure on the walls and prevent gaps from appearing between the logs;
- will take care of protecting the south side of the house. As you know, it is this material that is most susceptible to rapid shrinkage due to direct sunlight. Therefore, most designs contain a veranda or covered terrace along the south side of the log house;
- make a log sheet - a document that will allow you to order a house kit from rounded logs for self-assembly or will simplify the adjustment of logs when using moldings.
# Installation of plastic windows in the frame of the attic floor
All the work that we planned to do this year has almost been completed. It remains to install PVC windows on the second floor. They did this: they screwed two boards on the outside and installed the frame in the opening (the boards were used to prevent the frame from falling out). Since the window openings are ideal in all planes, there were no problems with installation. We drilled the frame from the inside on four sides and secured it with dowels. The sash was hung in its place and foamed. We will install the platbands next year.
In the photo: a disassembled plastic window (the sash has been removed from the frame). / September 2022
In the photo: installing a plastic window into a frame. / September 2022 In the photo: a plastic window frame installed in the window opening (not yet secured). View from inside the house. / September 2022 In the photo: a plastic window frame installed in the window opening (not yet secured). View from outside the house. / September 2022
In the photo: a plastic window frame installed in the window opening (not yet secured). View from outside the house. / September 2022 In the photo: a plastic window frame installed in a window opening, secured to a dowel. View from outside the house. / September 2022 In the photo: a plastic window frame installed in a window opening, secured to a dowel. View from outside the house. / September 2022 In the photo: a plastic window frame installed in a window opening, secured to a dowel. Inside view. / September 2022 In the photo: a plastic window installed in the opening. Inside view. / September 2022
In the photo: a plastic window installed in the opening. Inside view. / September 2021 In the photo: a plastic window installed in the opening. Inside view. / September 2022 In the photo: a plastic window installed in the opening. Outside view. / September 2022 In the photo: a plastic window installed in the opening. Inside view. / September 2021 In the photo: a plastic window installed in the opening. Inside view. / September 2022
In the photo: a plastic window installed in the opening. Inside view. / September 2021 In the photo: a plastic window installed in the opening. Outside view. / September 2022 In the photo: a plastic window installed in the opening. Outside view. / September 2022
Which log is best to build a house from?
A log house will only be able to reveal all its features when it is made of high-quality building material.
How to choose a rounded log? To make the right choice, you need to know the technical characteristics and parameters of the log:
- log diameter For the construction of a residential building for year-round use, only logs with a large diameter are suitable - from 240 to 260 mm or more. Thin logs can also be used if the house is located in a region with a mild climate or additional insulation is expected.
The actual value of the thermal resistance of the walls is calculated using the formula:
After calculation, the resulting value is compared with the standard value for a specific region of residence (reference data).
For example, for Moscow and the Moscow region R = 3.0 (m²*°C)/W.
It should be noted that according to SNiP II-3-79, the value of the thermal conductivity coefficient (λ) depends on the humidity in the region.
Excerpts from SNiP II-3-79 in order of increasing thermal conductivity coefficient of building materials for the dry humidity zone (A) and the normal and wet zone (B)
- logging period . Logs harvested in winter are drier, because... In winter, the process of sap flow in the trunk slows down greatly. And the drier the log, the fewer cracks there will be on the constructed walls. The best forest in Karelia, Arkhangelsk and Angarsk regions.
- breed _ Rounded logs are made from coniferous wood - pine or spruce. However, for the lower crown you should choose denser wood, for example, larch;
- log color . The shade must be uniform, corresponding to the breed, without blue;
- extraneous inclusions . The presence of knots, resin pockets, mechanical damage or biological activity in a quality log is not allowed;
- cracks _ Allowed, but their depth cannot exceed a third of the diameter;
- geometry _ The log should be smooth, not twisted, with neatly cut longitudinal grooves and bowls;
- surface quality . The surface should be flat and smooth. The presence of burrs and roughness indicates poor sharpening of the cutting tool and will require grinding the wall after installation;
- compensation cut . Not every manufacturer makes cuts. However, its presence makes it possible to reduce internal stress in the barrel and reduce the likelihood of cracks;
- profile . There are two types of profiles - lunar and Finnish. The first is more traditional, allowing for quick installation. The second one has shoulders (shoulders) - protrusions on the ridge that protect the junction of the logs from the appearance of cracks during the shrinkage process. In addition, the thermal groove with this profile is larger, which leads to an increase in the number of crowns when building a wall, but makes it warmer, because The width of the wall at the junction becomes larger. For example, a log with a diameter of 220 mm. with a lunar profile, has a thermal groove 110 mm thick, and with a Finnish profile - 140 mm;
- the ratio of the diameter of the core and the total log . It should make up 75% of the cut;
- degree of processing of the log . Antiseptic treatment of logs is a must;
- storage conditions . The logs are stored in stacks, without packaging, in a place with good ventilation, protected from moisture and direct sunlight.
Technology of building a house from rounded logs
Step-by-step instructions for assembling a log house with your own hands or for understanding the construction process when involving private craftsmen or a contractor (turnkey construction). All stages of construction with explanations and photos.
Video instructions for installing frame houses
These are three videos of excellent carpenter Larry Hohn. Each of them lasts more than an hour. The technology for building a frame house on a finished foundation is described in great detail.
According to these instructions, self-construction is possible without any questions: all stages of building a frame house and small details are commented on and explained, down to what nails, what length, how many pieces in what increments, should be hammered into each node. The main problems that may arise and methods for correcting them are demonstrated. If you decide to build a frame house with your own hands, take the time to watch the movie. Much will become clearer to you.
The first part is the lower trim and the floor.
The second part of the video is the design and assembly of frame walls.
The third part is building the roof of a frame house.
If you still doubt whether to build a frame house, it’s probably because you’ve heard that this is a bad technology, that it doesn’t work for us. There is such an opinion. But it is based on the fact that Canadian and American frame houses are built from dry wood, with moisture. no more than 20-22%. In our conditions, wood is brought from the sawmill with almost natural humidity, and this is up to 60%. That’s why the houses twist and turn, they become cold.
But if you are planning to build a house with your own hands, what will stop you from using dry wood? Kiln drying is expensive, the difference per cubic meter is very significant - almost twice. But by stacking the wood on the site in ventilated piles, it can be dried to the same 20-22% within a year. You decide for yourself whether or not to impregnate it with bioprotection before drying. Dry wood does not rot or be damaged by fungi, but it is advisable to impregnate it with bioprotection against insects.
An example of this opinion is in the video. With an explanation of why the technology is bad...
Foundation for a house made of rounded logs
The strength and stability of the house, as well as the uniformity of shrinkage, are determined at the stage of laying the foundation.
The cost of the foundation for the construction of stone houses is up to a third of the construction budget. Wooden houses are much lighter, and therefore the requirements for the foundation are more flexible.
For a house made of rounded logs, it is better to pour a strip foundation or install a columnar (pile) foundation. The type and depth of installation depends on the characteristics of the soil: type, freezing depth, groundwater level, relief.
The recommended height of the foundation (basement) is 40-50 cm from the ground (to protect the logs of the lower crown from snow and splashes of rainwater). For the same purpose, a visor (low tide) is made along the upper edge of the base to reflect splashes.
Before starting work, the foundation must be checked with a level, because laying logs requires a perfectly flat surface.
After the walls are built, the foundation will be covered with tide to protect it from water.
Foundation waterproofing
Due to the fact that wood and concrete have different thermal conductivity, the wood of the lower crown needs protection from moisture and condensation. To do this, the foundation must be insulated. As a waterproofing material, roofing material is used, laid in two layers, and glass insulation (in one layer). The material should lie flat on the surface of the foundation and protrude beyond its edges by 30-50 mm.
Loghouse installation technology
Waterproofing is laid on the horizontal surface of the poured foundation.
Roofing material is suitable as a material. For laying, the foundation is lubricated when heated and roofing felt sheets are placed on top. After drying, another layer is made; boards with a thickness of at least 5 centimeters are placed on the waterproofing layer, and a layer of tow or jute is laid on top of the boards.
This will enhance the thermal insulation properties, because up to 40% of the heat escapes through the floor and foundation!; A log house is installed on the insulation layer. As a rule, production logs are numbered. This wall kit is easy to assemble according to the attached diagram; Lay the crowns strictly level, row by row, and fasten them with dowels.
Make sure that the logs lie flat!; A layer of insulation, also in the form of tow or jute, is placed on each laid crown. The insulation is attached using a construction stapler; In addition to bandaging at the corners, the logs are connected every meter of length using spikes. Additional fastening will make the structure stable.
Laying the crowns of a house made of rounded logs
The crown is one row (belt) of logs laid along the perimeter of the building. The assembled and fastened crowns form the walls of the house.
When building a house from rounded logs, different types of crowns are used:
- the frame crown is the first row of logs that are laid on the foundation (also called the lower, first, mortgage);
- bottom trim - the second (lag) crown, which allows you to form a subfloor in a house from rounded logs, as well as an interfloor ceiling;
- ordinary crowns - the remaining rows (wall);
- window - are shortened logs (short logs) from which window openings are made;
- window sills - logs laid from the bottom crown to the window;
- over-window - logs laid on top of window crowns. The first crown above the window is the closing crown.
- the top trim is the basis for constructing the roof truss system.
Regardless of the type of crown, each log must be coated with an antiseptic before laying. This will protect it from all sides, incl. at the junction. The treated log will be protected primarily from biological activity and will prevent rotting.
The first crown of the house (flat or bottom)
To lay the first row, denser logs are used, usually from larch. Hardwoods are more difficult to process, so they are less common on sale. But, aspen and oak are perfect. Before you begin laying, you need to make a longitudinal cut on the log. Unlike the grooves that are on every log, the cut is needed to ensure that the log rests on the foundation with the maximum area. This will distribute the load evenly and make the log house more stable.
Advice. Some users recommend making a backing crown from laminated veneer lumber, as the material that is most resistant to deformation, or a backing board.
The logs of the embedded crown are treated with antiseptics in 2-3 layers.
After laying the first crown, the diagonal of the laying is checked; the discrepancy should not exceed 5 mm.
Beams and halves of logs (cut in half) for the frame crown and wood processing
Laying timber under a frame crown made of rounded logs
The first (flat) crown made of rounded logs
Note. The foundation log is not attached to the foundation.
The second crown (lag) is the lower trim
The floor in the house is made of rounded logs and is formed directly during the process of laying the crowns. Logs can be installed in the first crown, but insertion reduces their strength. Therefore, according to new technologies, logs are installed in the second crown on support beams.
Bottom frame of a house made of rounded logs Laying the second crown of a house made of rounded logs (device of the bottom frame)
How to embed floor beams (joists) in a log house:
- the beam is fixed with a pin made of reinforcement, which is inserted into a pre-drilled hole or using a metal support for beams (joist holder);
- the beam is impregnated with antiseptic and fire retardants;
- places for installing beams are outlined;
- a groove is cut inside the log (using a chainsaw). The depth of the groove is selected so that the support beam fits firmly into the log;
- installed in a prepared place;
- After the erection of the ordinary walls, logs will be laid on the beam in increments of 600-700 mm.
Technology of inserting floor beams into logs
How to cut a groove in a log with a chainsaw for a beam Shallow cutting of a floor joist into a log
Deep cutting of floor beams into a log
Method of installing floor joists on a support beam
Floor joists rest on a beam attached to the foundation
Installation of floor beams in a log house Fastening unit for floor beams in a log house Installation of a floor along joists in a log house Fitting floor joists with chipboard for subsequent insulation
Ordinary Viennese
Ordinary crowns are laid in the same way as the first, with mandatory checking of horizontal, vertical and diagonal lines. Rolled insulation, usually jute fabric, is placed between the crowns.
Note. The vertical check is carried out from the inside of the wall.
The figure shows how to lay a rounded log correctly.
Laying the ordinary crowns of a house made of rounded logs Construction of the walls of a house made of rounded logs Construction of the internal walls of a house made of logs Installation of shortened logs (short logs)
Types of material
At the initial stage of construction, it is necessary to select building materials and the type of structure itself, taking into account the purpose of the house and specific operational factors. The reliability and durability of the structure depends on the correct choice.
Types of wood and its service life
Classification of logs for construction is carried out according to the method of their preparation. The following main types are distinguished:
- Barked or chopped log. It is prepared with minimal processing. With the help of an ax, only knots and irregularities are removed, which practically does not violate the natural protective properties of the wood. As a result, the logs have a maximum service life, but a rather unsightly appearance, forcing you to think about additional finishing.
- Shaped log. It is prepared more carefully. First, a thin layer of wood is removed by scraping, which makes it possible to level the surface and more tightly fit the elements of the log house. After laying, the logs are sanded to improve their appearance. Even after complete processing, the log retains its main bast, which provides protective functions due to its resin content. As a result, this type of material has a long service life and can be used even without special impregnation.
- Planed log. Even deeper processing is provided by an electric planer. In this way, fairly even logs are produced that fit tightly to each other in the log house. An attractive appearance is created that does not require external finishing. However, along with part of the removed bast, durability also decreases, and to increase it, impregnation with an antiseptic is used.
- Rounded log. A special rounding machine is used for its production. During processing, the same diameter along the entire length and the correct round shape are ensured. At the same time, the bast, protective layer is almost completely removed. Rounded elements simplify construction and improve the appearance of the log house, but only impregnation with a special composition can slow down the rotting process. Such logs have a minimum service life.
A separate category consists of monitor-type logs. A regular carriage is made by sawing off a cylindrical part on one side. The double or Norwegian carriage stands out. In these logs, the cylindrical part is cut from two opposite sides. As a result, one or both walls of the log house acquire a flat surface.
It should be borne in mind that a log house gives quite noticeable shrinkage: 5-10%.
Most shrinkage usually occurs during the first year. You can either wait for shrinkage and only then begin finishing, or use special shrinkage compensators.
Should I use pine, spruce, cedar or other species?
When building a house from a log, the question arises, what kind of wood is best to build from? The following tree species are used for this:
- Pine. This is the most popular material for log houses. Pine logs have increased strength, and high resin content protects against rotting. The best characteristics are found in “ore” pine, which grows in elevated areas with sandy soil. Wood growing in the northern regions is especially valued. Disadvantage: tendency to turn blue when exposed to moisture. Impregnation allows you to effectively combat this disadvantage. The popularity of pine is explained by the optimal combination of low cost, availability and sufficient durability.
- Spruce. It is somewhat inferior to pine in terms of durability, but is quite suitable for building houses. In addition, increased thermal insulation properties are noted.
- Fir. Its resin content is lower than previous rocks, which explains its increased hygroscopicity and lower resistance to decay. Fir is also inferior in strength parameters, which limits its use.
- Larch. It is considered the best representative of coniferous species in terms of moisture resistance and strength characteristics. Its service life significantly exceeds the durability of pine and spruce. Disadvantages: increased cost and processing complexity due to increased density. In a log house, larch is most suitable for making the basement part of the house, which is most susceptible to moisture.
- Cedar. It has good moisture resistance and is easy to process, but is inferior in strength to pine. In addition, cedar has an increased cost, and therefore is used much less frequently.
- Oak. This is the only hardwood that is highly durable and resistant to rot. It not only competes with larch, but surpasses it in a number of parameters. Taking into account the high cost, oak is used mainly for the most critical structural elements, incl. the lower crowns of the log house.
In general, log cabins are most often made from softwood trees. In addition to their increased performance characteristics, such trees are distinguished by straighter and longer trunks. Deciduous species (except oak) are noticeably inferior in resistance to decay and strength parameters.
Should I make a wooden frame from a large or regular diameter?
The diameter of the log for a log house plays an important role. As it increases, the thermal insulation parameters of the wall increase. The use of large diameter elements has the following advantages:
- reduced thermal conductivity, which allows you to keep warm in winter and cool in summer;
- increasing the mechanical strength of house walls;
- speeding up the production of a log house by reducing the number of crowns;
- reducing the number of connections, joints, as well as increasing the width of the groove, which significantly reduces the risk of the formation of “cold bridges”;
- increasing the service life of the most loaded lower crowns;
- fewer defects along the length;
- solid appearance.
At the same time, there are significant disadvantages to huge logs:
- increase in material cost;
- problems with transporting and lifting each element due to the heavy weight;
- increased risk of purchasing “overripe” material with reduced characteristics (i.e. wood over 100 years old);
- difficulties in selecting logs of the same size.
The presence of both pros and cons of thick logs makes it necessary to choose the optimal option. It is carried out taking into account the width of the inter-crown groove, which is from half to 2/3 of the diameter of the log. GOST requires the following compliance:
- at an air temperature of minus 20°C, the width of the groove should be at least 12 cm;
- for a temperature of minus 30°C – at least 13 cm;
- at minus 40°C – at least 16 cm.
Based on practical considerations, experts make the following recommendations:
- It is not recommended to use a log with a diameter of less than 18 cm in a log house.
- A log with a diameter of 18-22 cm is suitable only for buildings for household purposes.
- A log with a diameter of 23-28 cm is considered the most common option for country houses with permanent residence. However, in such a house the issue of heating plays an important role.
- Ideal option: a log with a diameter of 29-40 cm. A log of this thickness is ideal for winter, provides high strength and retains heat well even in northern regions.
Logs more than 40 cm thick give the house solidity, turning it into a fortress, but do not give a noticeable effect. Such material unreasonably increases the cost of construction. In addition, there is a high probability of using “overripe” wood.
Building options: cold and warm, for year-round use
When choosing a house design, it is important to consider its purpose. There are 2 main types of buildings:
- Cold house. This category includes outbuildings of various types and country houses (only in the warm season). They provide the necessary mechanical strength of the log house and tightness, but the requirements for heat conservation are minimal. Often the main criterion is the cost of materials. Taking this into account, the log house is assembled from logs with a diameter of no more than 25 cm. For outbuildings, there is no point in using logs larger than 20-22 cm in size. During construction, chopped elements can be used.
- House for year-round, permanent residence. To avoid problems in winter in a private house, it is necessary to take into account all the main criteria during its construction, with special attention being paid to thermal insulation. It is important to remember that insufficient wall thickness can increase energy costs by 30-40% due to the operation of heating devices. Increased demands are placed on window and door openings, roofing and flooring. All joints are sealed and insulated as much as possible.
In both options, one should not thoughtlessly reduce the service life of buildings. To do this, the type of wood for the log house is carefully selected, a reliable foundation is built, and special attention is paid to the basement of the walls.
Design
When designing, you should highlight the basic requirements for construction. In addition to the above criteria, the following indicators stand out:
- Total area of the house. To determine the dimensions of the log house, it is important to immediately determine the number and purpose of the internal premises. This will help you choose the best option for their layout.
- Number of storeys. Most often, log houses have a one-story design, incl. with an attic or attic space. However, if desired, you can build a two-story log house or more. The strength properties of logs make this possible.
There are standard designs for multi-story log cabins.
To design a house, it is necessary to correctly assess the climatic conditions, it is especially important to take into account the minimum temperatures, wind load, flood situation and the amount of precipitation. When calculating the foundation, you need to know the characteristics of the soil, the location of groundwater and the terrain.
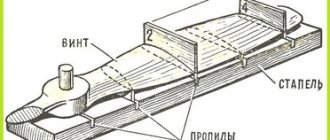
Methods for joining logs in a log house
Regardless of how the type of crown is laid, special attention is paid to the formation of longitudinal, corner and T-shaped connections.
For chopped logs, three “bowl” cutting technologies are used: Russian, Canadian and Norwegian log cutting, as well as “paw” cutting. For rounded logs, the formation of planting bowls is typical using Russian technology:
Longitudinal connection of logs (lengthwise)
To lengthen a log, a dovetail joint is used, since it allows you to create the most durable and reliable joint connection.
Dovetail joining of logs (trapezoidal tongue-and-groove joint)
Longitudinal connection of logs to studs End connection of logs to staples
End joining of logs on brackets
Splicing logs along the length - tongue and groove on brackets
Type of tenon joint of logs along the length
Corner connection of logs
Planting bowls are usually made in a factory way to form a “bowl” joint in half a tree.
When building a house from rounded logs, three types of angular connections with the remainder are used:
Corner notch “in the oblo” from logs and a carriage with the remainder (half a tree, a rolled bowl, a fat tail)
Cutting “into the bowl” or “into the cloud”
In this case, the connection has a residue, looks beautiful, but increases wood consumption.
The technology for installing rounded logs using this method has three varieties:
- with an oval comb . There is an oval ridge in the recess of the bowl;
- half a tree . A seat is cut out in half the diameter of the upper and lower logs;
- in the fat tail . In the recess of the bowl of one log there is a special recess, and in the bowl of the other log there is an additional protrusion.
Types of cutting corners from logs “in a clap”, connection with a ledge
Cutting "in a hurry"
This fastening method is distinguished by cutting out a bowl in the lower part of the log; as a result, the upper log seems to slam down the lower crown, which is why it is called clap.
Cutting a corner from logs “in okhryap”, corner knot with remainder
Cutting "in the okhryap"
When cutting corners using the “sharp” method, the log has additional notches in the seats.
Much less often they use the residue-free connection method - “in the paw” . In turn, it has three options: a simple (straight) paw, a paw with a cut, and an oblique paw with a cut.
Corner cut of a log - straight paw with a notch
Corner felling of logs - oblique paw (dovetail) without residue Joining logs in the corners without residue - oblique paw with notch
T-joint of logs
Connection (cutting) of internal walls into load-bearing ones - dovetail and into a bowl. This is done using a dovetail connection (residue-free method) or “into a half-tree bowl” (connection with a remainder).
Preparing for work
All that is available is a site unprepared for construction; there is no gas, water or electricity supply. There are 20 tons of sand, approximately 10 tons of gravel and within 3 cubic meters of boards. At the preparatory stage, a temporary work shed is built to store materials and working tools. The temporary structure is made of wood and covered with metal.
Dowel for logs
To give rigidity to the wall, the logs are fastened together using dowels - wooden fasteners. Often dowels are cut from the remains of a log, but it is more correct to use special fasteners for this that meet the following parameters:
- made of hardwood (for example, birch). This type of dowel is more durable compared to coniferous ones;
- the diameter of the dowel (usually 25 mm) exceeds the diameter of the hole by 2-3 mm;
- has a square shape (ensures uniform shrinkage);
- humidity corresponds to the moisture content of the log.
Note. Metal dowels or dowels made of corrugated fittings are not suitable for installation. Iron dowels tend to rust, and on corrugated reinforcement the log will hang during the shrinkage process and there will be cracks.
Layout of dowels in a log wall
How to install dowels correctly:
- Once the log is in place, it is temporarily fixed with nails. In this way, the displacement of the log during the drilling of a hole for the dowel is prevented;
- drill a hole for the dowel. Moreover, the diameter of the drill is 3-5 mm less than the diameter of the dowel;
- a hole is drilled through 2-3 logs;
- the dowel is driven into the hole using a mallet. It must enter with force. To simplify the installation of the dowel, it can be sharpened from below;
- The first dowel is installed at a distance of at least 200 mm. from the edge of the log;
- all dowels are recessed into the wood to a depth of 2-3 mm. Protruding fasteners will cause logs to hang; Material for the site www.moydomik.net
- The step for installing dowels in a log is 1-1.5 m.p. In piers, the installation step varies and depends on its length. There should be at least two dowels per log;
- installation is performed in a staggered manner. To avoid confusion and install fasteners correctly, craftsmen advise marking the installation locations of the dowels with a pencil on the inside of the wall;
- installation displacement occurs on every fourth log;
- after fixing the log with a dowel, the safety nails are removed;
- After some of the logs are fastened with dowels, they are pushed down with a mallet so that they accurately occupy the seats. This helps reduce the amount of shrinkage.
How to drill holes for dowels in a log
Hole for a dowel in a log Birch dowel for a log Metal dowel for a log
Features of modern industrial models
The main feature of machine models produced by well-known manufacturers today is the use of a laser pointer to control the movement of the carriage. This point determines high processing accuracy and the ability to carry out the entire process without reinstalling the workpiece. Thus, a CNC-controlled carriage with a set of tools moves along guides and performs various types of operations.
Log rounding machine
As practice shows, you can make a model with your own hands that will have manual control and the ability to process workpieces up to 7 meters long.
Vertical column supports
Installation of vertical elements (pillars, columns, racks) in a wooden house is carried out using special devices (shrinkage compensators) - screw jacks.
- the log is cut to length minus 80-100 mm. By this amount, a house made of rounded logs will shrink, and the jack can be lowered;
- a bowl is cut out at the bottom of the support;
- a jack is installed on top, which will compensate for the shrinkage of the house;
- Vertical installation is checked;
- the remaining vertical elements are installed along the same line;
- The jack is height adjustable.
Making a grillage
The formwork is made from high-quality laminated plywood and OSB material - 9 mm. Next, the structure is poured with a mixer, and the material is dispersed over the surface of the formwork. The last procedure is simple, but when the formwork is squeezed out by the earth, we must strengthen the structure. The construction of the basement structure is underway, for which bricks are being imported. The bricks are sorted to eliminate defects, reducing their quantity to a minimum.
Insulation of a house made of rounded logs
Thermal insulation can be divided into three stages:
1 – interventional insulation
How to lay inter-crown insulation for a log. Laying rolled thermal insulation material between the crowns of a log wall. The insulation sheet is laid in one layer and secured with a stapler for reliability. The width of the blade is 10-20 less than the width of the longitudinal groove. The amount of overlap is 50-70 mm. A meter before the end of the log (corner or opening), the insulation is laid in two layers. This is due to the fact that the log dries more intensively in the opening. The insulation in the bowls is also laid in two layers;
2 – first caulk
Performed one year after the construction of the house. During this time, the most intense shrinkage occurs;
3 – subsequent caulking
Performed as necessary during the operation of the building.
When performing caulking, you should remember:
- Only the outer walls are caulked;
- the bowls will definitely be caulked;
- a large amount of insulation can cause the crown to rise, causing the need to raise the crowns of other walls.
Step-by-step construction instructions with photos
There are several different technologies for frame house construction, but the classic method of construction is Canadian. It is also called the platform method, since first the floor of the frame house is assembled, and then the skeleton of the walls is assembled on it, like on a platform. We'll tell you how to build a house using this method. It won’t be difficult to figure out the rest: only the sequence of actions is different.
Step 1: Foundation for a frame house
Choosing a foundation is a separate complex and voluminous topic. The geological picture on the site, the height of the groundwater, the weight of the building and the seasonality of living in it, the region in which construction takes place, snow and wind loads are taken into account. But in general, foundations for frames are most often piled, piled-grillage or strip foundations.
In our country, the palm in do-it-yourself frame house construction belongs to the pile-grillage foundation. It is quickly built, requires small material investments, is correctly calculated and built, and is reliable. Combining the advantages of both pile and strip, it evenly transfers the load to all supports.
More reliable when constructing a pile or pile-grillage foundation are TISE piles. Due to the widened heel, they have a greater load-bearing capacity and better resist heaving forces.
Construction of a pile-grillage foundation with TISE piles
You can drill holes for piles using a hand drill or a motorized one. As formwork, use roofing material rolled into pipes of the required diameter (at least three layers must be rolled), secured with tape. Other options are asbestos-cement or PVC pipes of suitable diameter. Three or four reinforcement rods are installed inside the piles, connected to each other in the form of a triangle or square. The reinforcement rods are cut so that at least 0.7-0.8 meters protrude above the surface of the pile. Everything is filled with concrete of a grade no lower than M25 (read about concrete grades here).
After pouring the piles, the tape formwork (grillage) is installed, and the reinforcement is laid and tied into it. Longitudinal rods are connected to bent reinforcement outlets from the piles. At this stage, holes are left in the tape for supplying communications and ventilation (insert sections of plastic pipes across the tape).
The strapping beam will subsequently be attached to the foundation strip. To install it, studs are fixed in the tape. They are installed in increments of 1-2 meters. From each corner, 30 cm are retreated in both directions. Here, studs are required, the rest depending on the dimensions of the house, but at least every 2 meters. Please note that it is the studs that connect the frame of the house to the foundation. That’s why it’s better to deliver more often. And one more thing: no matter how short the wall is, there must be at least two studs.
When everything is ready, the concrete is poured.
Filled grillage. The foundation for a frame house with your own hands is ready
After pouring the concrete, so that it does not dry out, but gains strength, it is better to cover it with polyethylene (look at the photo). If the temperature after pouring the foundation remains within +20°C, construction can continue after about 3-5 days. During this time, under such conditions, concrete will gain more than 50% of its strength. You can work with it freely. When the temperature drops, the period increases significantly. So at +17°C you need to wait about 10 days.
Step 2: Bottom Rail and Floor
To prevent the wood of the frame from drawing moisture from the concrete, cut-off waterproofing of the foundation is necessary. The safest way to do this is with bitumen mastic. And it’s better - in two layers. You can also use roll waterproofing. Roofing felt is cheaper, but it breaks over time. Waterproofing or other similar modern material is more reliable.
You can coat the grillage once with mastic, and roll out waterproofing on top. Another option for cut-off waterproofing under a frame house is two layers of waterproofing coated with mastic: the closer the groundwater is, the more thorough the waterproofing should be.
The first layer is liquid waterproofing. While it is not dry, you can glue a layer of rolled waterproofing on it.
Then the beds are laid - boards measuring 150 * 50 mm. They must be dry, impregnated with bioprotective and fire-retardant compounds. The edge of the bed is aligned with the outer edge of the foundation. In the necessary places, holes are drilled for the studs (the diameter of the hole is 2-3 mm larger than the diameter of the stud). Then the second board is laid. It is placed so as to cover the joint of the first row. It turns out to be a castle.
The second board is laid so that the joints overlap
In general, you can lay one beam of 100-150 cm, but its price is much higher than two boards, which together give the same thickness, and properly fastened two boards have a greater load-bearing capacity, although their installation takes more time. To make them work as a single beam, they are knocked down with nails in 20 cm increments in a checkerboard pattern.
We install the harness and logs
Next, a strapping board is attached to the bed. Its dimensions are also 150-50 mm, but it is placed on the edge. Aligned along the outer edge of the foundation, nailed with long nails (9 cm) to the beam every 40 cm.
Installation of the piping: according to the instructions, the assembly of the frame house continues with the installation of the piping to which. the floor joists will rest
The next stage is installation and installation of the logs. These are the same 150*50 mm boards placed on edge. They are attached with two oblique nails (9 cm) at the end to the trim board, two nails on the right and left to the bed. So each lag is on both sides.
Example of installing floor joists
The photo shows that the first joist is installed close to the second - this way the load is better transferred to the foundation. It is installed along the second edge of the bed. The installation step is 40-60 cm. It depends on the length of the span and the cross-section of the lumber used: the longer the length, the smaller the step.
Layed and secured floor joists
If the logs are long and there is a cross beam, as in the photo above, to prevent the logs from “moving away,” jumpers are placed above the cross beam. Their length is equal to the step of installing the logs minus the double thickness of the board: if the step of the log is 55 cm, the thickness of the board is 5 cm, then the jumper will be 45 cm long.
Insulation and flooring
After the base for the flooring has been installed, it is time to insulate the floor. It can be done in different ways, with different materials. We will show you an economical option - with polystyrene foam boards with a density of 15 kg/m3 (more is possible, less is not possible). It is, of course, not environmentally friendly, but it is the only one that is not afraid of moisture and can be installed without a subfloor. The estimated thickness of the insulation is 150 mm, two layers are laid: one 10 cm, the second 5 cm. The seams of the second layer should not coincide with the seams of the first (they shift).
To begin with, a 50*50 mm cranial block is packed along the lower edge of the log. It will hold the foam.
At the bottom you get a frame made of a cranial block, which will prevent the polystyrene foam from falling out
The foam is cut with a regular hacksaw. The blade can be used on wood - it cuts faster, but you get a torn edge, or on metal - it goes slower, but the edge is smoother. The cut slabs are laid in two layers, the seams overlap. Then they seal the perimeter with sealant to ensure waterproofing.
Laying foam
Next, lay the subfloor from boards, level it and lay plywood on top (preferably FSF 5-6 mm). To prevent the rough flooring of boards from warping, lay the boards alternating the direction of the wave. If you look at the cross section of the board, the annual rings go in a semicircle. So, you need the arc to look up and down (see photo).
How to lay plank flooring correctly
You can do without plank flooring. Then the thickness of the plywood should be at least 15 mm. Consider what is more profitable in your region and choose.
In any case, the sheets should be laid in a spaced pattern - the seams should not match (as in brickwork). Also, do not forget to leave a gap of 3-5 mm between the sheets of plywood to compensate for changes in size when humidity changes.
The second stage of building a frame house has been completed: the floor has been laid
The plywood is attached with self-tapping screws 35 mm long (preferably white ones - less waste) around the perimeter in increments of 12 cm, inside in a checkerboard pattern in increments of 40 cm.
An example of using frame technology to build a wooden shed is described here.
Step 3: Frame Walls
There are two ways: the wall frame is assembled (all or part, depending on the size) on the floor, then raised, positioned and secured. Sometimes with this method, OSB, gypsum fiber board, or plywood are attached directly to the floor on the outside of the frame: the rigidity is greater. This technology is called frame-panel or “platform”. Factories generally operate according to this principle: they build ready-made panels according to the design in the workshop, bring them to the site and only install them there. But frame-panel house construction is possible with your own hands.
One of the options for assembling a frame wall, names of elements
The second method: everything is assembled gradually, locally. The beam of the bottom frame is nailed, the corner posts are set, then the intermediate posts, the top frame, etc. This is the technology called “frame house construction” or “balloon”.
Assembling the wall frame with your own hands can be done gradually (balloon technology) or in block-boards (platform technology)
Which one is more convenient? It depends on how many people work and whether it is possible, at least periodically, to attract help. Working on the floor is faster and more convenient than jumping up/down a stepladder countless times. But if the section is assembled large, then it will be difficult even for two people to lift it. The solution is either to call help or to break the wall frame into small segments.
Installation step and cross-section of racks
Corner posts should be 150*150 mm or 100*100 mm, depending on the load and the required width of the insulation. For a one-story frame house, 100 mm is enough, for a two-story frame house - at least 150 mm. The intermediate posts are the same in depth as the corner posts, and their thickness is at least 50 mm.
The installation step of the racks is selected taking into account the load, but in reality it is more often selected based on the width of the insulation. If you will be insulating with mineral wool in rolls or mats, first find out the actual width of the material. The gap between the posts should be 2-3 cm less than the width of the insulation. Then there will be almost no waste, no gaps and cracks through which heat will escape. The density of installation of insulation in frames is the main point, because only it will serve as protection from the cold. The slightest violation will lead to the fact that the house will be cold. Therefore, the selection of insulation and its installation must be treated with full attention.
An option for gradually assembling the frame of a house: corner posts are placed and secured, the top frame is immediately mounted on them, then the vertical posts are installed at a selected step
Fastening the racks is possible in several ways: with wooden dowels, with a notch or on corners. The cut into the board of the bottom trim should be no more than 50% of its depth. The corners are attached on both sides. Fastening with dowels is an old technology, but difficult to implement: long dowels are planed, a hole is drilled obliquely through the stand and beam of the lower trim, a wooden tenon is driven into it, the excess of which is cut off. It works well if the wood used is dry. If not, drying out and loss of fastening rigidity is possible. Installation on reinforced corners is much easier.
According to Canadian technology, the beams to which windows and doors are attached are made double. There is more load here, therefore the support must be more powerful.
Reinforced counters near windows and doors are a must. This is the only way a frame house built with your own hands will be reliable
Read how to make a gazebo out of wood (also using frame technology) here.
Bevels or braces
If the outer cladding is planned to be made of high-strength slab material - OSB, gypsum fiber board, gypsum fiber board, plywood - temporary slopes are installed from the inside of the room. They are needed to level and maintain geometry until the outer skin is attached. The strength of this material is sufficient to create the required structural rigidity.
If the cladding is planned to be made up of linings, etc. installation of permanent jibs is required. Moreover, the best option is not those that are placed on several racks, but four small pieces for each: two on top and two on the bottom (as in the photo below).
Such braces will give sufficient rigidity to the walls of a frame house.
Please note that in the photo above the racks are prefabricated: two boards are nailed together along the entire length in a checkerboard pattern. Such racks have even greater load-bearing capacity than solid ones and cost less. This is a real way to reduce construction costs without losing quality. But construction time increases: you have to hammer in a lot of nails.
Corners of a frame house
The most questions arise when constructing corners. If you place a beam in a corner, then there seem to be no difficulties, except that the corner turns out to be cold. In regions with short and mild winters this is not a problem, but in central Russia it requires some kind of solution.
Even with this option, the corner will be colder
There are several ways to make the corner of a frame house warm. All of them are shown in the diagrams, so it’s clearer.
When building a one-story frame house, you can do this
For a residential second floor, corners are made in one of these ways
After assembling the frame, it is most often sheathed on the outside with OSB, plywood or other similar material.
The construction of the woodshed is described in this article.
Step 4: Covering
The floor beams rest on the beam of the upper frame. There are several mounting methods:
- on supporting steel brackets;
- on the corners;
- with insert;
Notching - the depth of the cut should not exceed 50% of the thickness of the top frame timber. It is hammered in from above with two nails, which must go into the harness at least 10 cm. Corners are the usual method. You can use reinforced, but not necessarily perforated staples - the shape may vary
Fastening the ceiling beam using metal brackets
The dimensions of the beams and the pitch of their installation depend on what will be on top. If there is a second residential floor or attic, the cross-section is taken larger, the step is made smaller: so that the floor does not sag. If only the roof and attic on top are assumed to be non-residential, these are completely different calculations and dimensions.
In this one-story frame house, the floor beams also support the rafters. Therefore, they are extended 30 cm beyond the perimeter of the walls
If a second floor is being built, the ceiling is sheathed with the subfloor of the second floor. This will make it easier to work on creating the second floor of a frame house. Its assembly is no different from the construction of the first one. The only reason is that all the lumber has to be hauled to the second floor.
Step 5: Rafter system and roofing material
When developing a house project using frame technology, the most popular are a gable or mansard roof. Their device is no different. All the same principles and calculations. The only limitation concerns the weight of the roofing: it must be a light material, the load from which wooden beams and ceilings can withstand.
This is what the frame looks like before the sheathing. If the walls are not sheathed, slight vibrations are felt when working on the rafter system. The outer cladding makes the frame much stiffer. A gable roof with a raised tie was chosen. For ease of fastening the rafter legs, a 50 * 50 mm block was nailed along the edge of the floor beams. There was a groove made in the rafters for it. During installation, they were first simply rested against the block, then fastened. To fix the rafters in a given position before the sheathing was filled, temporary jibs were used
Another relatively inexpensive technology for building a house from aerated concrete is described here.
Step 6: Insulation
A frame house can be insulated with any of the materials available on the market with the appropriate characteristics. All of them are imperfect, but all problems have standard solutions.
The most popular insulation for frame walls is basalt wool. It is available in the form of rolls or mats of different densities. It is more convenient to install mats in walls: they are denser and hold themselves well due to the pushing force. To do this, as mentioned above, their dimensions should be 2-3 cm larger than the distance between the frame posts. The mats, of course, are additionally fixed with special fasteners, but it is more convenient to work with than with a soft roll.
The most common type of frame wall insulation
Mineral wool has high thermal insulation characteristics and good sound insulation. But there is also a serious drawback: it is afraid of getting wet and it must be protected on all sides not only from moisture (rain), but also from the penetration of steam. Therefore, from the side of the room it is covered with a layer of vapor barrier membrane, which prevents vapors from penetrating inside.
On the street side, the thermal insulation made of mineral wool is covered with another membrane, but of a different type with different characteristics: a hydro-wind-protective vapor-permeable membrane. It is not blown through, it does not allow moisture in liquid or gaseous states to pass through from the street side, and vapors can escape from the insulation: the vapor permeability is one-sided. After installing the insulation, only finishing work remains. Actually, that's it, construction is over.
This is what a basalt mat looks like installed between the posts
Now you know how to build a frame house. The detail of some processes is far from complete, but you have a general assembly sequence.
Video “Turnkey frame construction in 2 months.”
Perhaps another video from a professional carpenter who has been building frame houses for decades will help you (see below).
Interfloor ceilings in a house made of rounded logs
As a rule, houses made of rounded logs are one-story, but there are projects of two-story houses or houses with attics. In any case, during the construction process it becomes necessary to create a ceiling between floors or between a floor and an attic or basement.
The ceiling is formed similarly to the lag crown of the wall. Those. a support beam is cut into the log, onto which the logs are laid, on which, in turn, the boards of the subfloor of the upper floor or attic will be laid.
For support beams, rounded logs are used, but often preference is given to laminated veneer lumber.
The choice of beam cross-section, which is determined by the span width and the distance between the beams, is of great importance for the strength of the structure. To calculate, you can use the table:
Note. The log or timber can be replaced with paired boards of suitable width.
When installing interfloor ceilings, the insert is made so that only 10% of the groove falls on the lower log, and the rest on the upper log.
Sewerage preparation
Two drainage pipes are drained from the septic tank. Appropriate holes are drilled into the brick, having a depth of within 3 centimeters, after which the corresponding rods are inserted into them. In the dug trench under the right and left branches of the geothermal type circuit, it is planned to install a water well, as well as a collector. Water pipes, of which there will be three, are laid in trenches.
We reuse the formwork at the stage of constructing the beams; the second span is installed 50 centimeters narrower than the first, which makes it easy to use no more than four sets of beam formwork. When it is necessary to create permanent formwork, an inch board is used. A septic tank, a geothermal circuit, and a water well have already been added to the foundation.
A pit with a width of three meters and a similar depth is constructed as a septic tank. The depth is chosen in reserve, the bottom is filled with sand, leveling is carried out, and sewer pipes are laid. The length of the pipe is 20 meters; in case of cleaning it, inspection pipes are inserted in the central part so that a technological hole is provided for cleaning. The slope of the pipe is 2.5 centimeters per meter, the entire length is 0.5 meters, the end will be above the established ground level exit.
The pipe is wrapped in geofabric, which is secured with Mylar twine. The drainage pipes are filled in the reverse order with gravel and sand. The septic tank was chosen to be a three-chamber one, although it actually consists of one, but additionally equipped with special partitions. An asbestos cement board is used for the partitions; the liquid outlet is regulated by a check valve. The volume of the septic tank is 7 cubic meters, which is enough for 11 people.
Roof of a log house
A house made of rounded logs involves the construction of a massive roof, which will accelerate its shrinkage and create additional pressure on the logs of the walls. A massive roof requires the installation of a reliable roof truss system.
Features of installing a rafter system on a log house:
- install the rafter leg not on the top log, but place it inside the log. This will avoid blowing through the joint;
- When installing the rafter legs on the top log, which serves as a mauerlat, use sliding fasteners. Similarly, using sliding fasteners, install the ridge girder. This compensates for shrinkage;
- the installation pitch of the rafter legs is 600-700 mm;
- further installation is carried out in accordance with the requirements of the roofing material;
- The under-roof space must be insulated.
Roof construction technology
After assembling the box at home, it must be protected from exposure to precipitation. To do this, you must immediately build a roof over it.
To do this, you will need 150*50 mm boards, from which the rafter system is constructed. A roof slope of 30 degrees is optimal. The rafters are installed at a distance of 60-100 mm from each other and are attached in the lower part to the wall using long nails or metal corners, and in the upper part to the ridge beam. Roofing waterproofing is laid on top of the rafters, a counter batten is nailed to provide a ventilated gap, and a wooden sheathing is installed.
Roofing material is laid on the sheathing. In the case of flexible bitumen shingles, a continuous base is made of plywood. The price of a soft roof is higher than a metal one, but in certain cases (complex hip roofs) its use will be preferable and more expedient.
A log house with a roof installed will have a beautiful finished look.
Installation of a warm circuit
It is recommended to install window and door blocks after shrinking the house made of rounded logs. During installation it is necessary to use casing bars. The bars are placed in a vertical groove measuring 50x50 mm, which is cut at the ends of the logs facing the openings. The purpose of the block is to prevent the log from torsion and to compensate for the displacement of the block during the shrinkage process.
The window or door frame is attached only to the casing, but not to the end of the log. Galvanized nails or self-tapping screws are used as fastening elements. The length of the hardware should not exceed the thickness of the box and casing. A technological gap is left above the box, the size of which is 100-120 mm. (depends on the expected amount of shrinkage, which is determined by the moisture content of the log). The gap is filled with elastic heat-insulating material.
A step-by-step diagram for constructing a frame and casing with your own hands How to make a frame for windows and doors in a house made of rounded logs Groove and casing for windows and doors in a house made of logs
Construction of a house from rounded logs takes from 5 days to a couple of months, depending on the complexity of the project, the experience of the workers and weather conditions for construction. A team of professionals can handle it in a short time, but assembling it yourself will take much more time.
However, regardless of the speed of construction, finishing work can begin only after the house shrinks, i.e. about a year after finishing assembling the box at home.
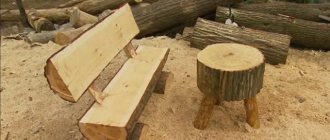
Note. From the remains of rounded logs you can make sub furniture, benches or decor to decorate the site.
# Installation of corrugated sheeting on the sheathing
After the rafters and sheathing were ready, we began to cover the roof with corrugated sheeting.
In the photo: installation of a corrugated roof on a log house (view from the street). / July 2021 In the photo: installation of a corrugated roof on a log house (view from the street). / July 2022
In the photo: installation of a corrugated roof on a log house (view from the street). / July 2021 In the photo: installation of a corrugated roof on a log house (view from the street). / July 2022 In the photo: installation of a corrugated roofing on a log house (side view). / July 2022
In the photo: installation of a corrugated roof on a log house (view from the street). / July 2021
Shrinkage of a house made of rounded logs
How to control the shrinkage of a log frame:
- wait a year for primary shrinkage to occur;
- use jacks to adjust vertical elements;
- arrange gaps over non-shrinkable elements of the house: door and window openings;
- remember that walls can not only shrink, but also gain moisture and, therefore, swell;
- take into account that internal walls (piers) shrink faster than external ones, because they are more protected from external influences;
- warm up the house slowly, because in case of rapid heating, the internal walls will shrink quickly, and the external ones will lag behind in this process;
- remember that southern walls dry out faster, which means they shrink faster;
- control the process of shrinkage of the log house and caulk the cracks in time.
Pros and cons of installation
There are several undeniable advantages of this solution :
- low thermal conductivity;
- availability of building material;
- environmental friendliness;
- natural appearance;
- simple house designs;
- strength and hardness of the material;
- low weight of the structure, which allows you to choose a light foundation.
But there are also several disadvantages. For example, wood is subject to rot, insect attack and shrinkage. Before moving into a house, you need to wait time for it to settle. To protect wood from external negative factors, it is important to inspect the surface and care for the material during operation.
Read more about the advantages and disadvantages in the article at the link.
Finishing a house made of rounded logs
Finishing work includes: grinding, installation of drip lining, installation of communications, external and internal finishing.
1 Sanding
The constructed wall must be sanded until the surface is smooth. The process of rounding involves obtaining a high-quality surface of the log, but during the installation process roughness may appear that is better to remove.
Grinding a rounded log with a grinder
2 Low tide
You can protect the lower crown log using galvanized steel, plastic, copper, concrete, etc. The ebb is installed in such a way that there are no gaps between it and the wood. If there are gaps, they are filled with sealant. The ebb is installed at an angle relative to the wall surface and fixed with hardware.
Ebb for the foundation of a wooden house
3 Communications
Wiring and other communications can be installed only after the house has settled. In this case, it is unacceptable to install wiring into the ends of the log, because it can be deformed during the process of torsion of the log, which will lead to a short circuit. Installation of communications is carried out in accordance with fire safety requirements.
To install electrical wiring, users recommend using special pads rather than cutting holes in the log, and thus not reducing its thermal insulation and load-bearing properties.
4 Exterior finish
Includes sanding logs, caulking cracks, finishing openings, etc. work.
5 Interior decoration
Includes all work that is carried out indoors. This could be finishing the walls with clapboard or plasterboard, installing a finished floor, installing a staircase to the second floor, etc.
Laying the foundation for the future home
Types of foundation for a wooden house
It's no secret that the basis for any building is the foundation. It is thanks to him that the entire building will stand reliably for many years. What exactly your foundation will be depends on the number of storeys of the house and its size. Since wood is a relatively light material, there is no need to deepen the foundation by 2 m and make it massive. This is one of the advantages of wood over brick. The structure of the foundation can be varied, but the main thing to remember is that it must be done in accordance with all standards of reliability and strength. To make a foundation, you can use several options suitable for a wooden house:
- strip shallow foundation;
- pile foundation;
- slab foundation.
Basically, a strip foundation is chosen for foundation construction.
But pile foundations are also often used. And if the soil on the site is wet and loose, then they resort to making a slab foundation. To choose the right foundation, you first need to analyze the soil. Strip foundation for a wooden house
For example, you chose a strip foundation. Thanks to its design, it is quite reliable, as it follows all the contours of the building: load-bearing walls and piers between them. To do all the work, you need:
- Mark the area according to the house design, transfer it from paper to the ground. To do this, you need to drive stakes into the corners of the building and in places where there will be walls, and stretch a rope between them. This way you will give yourself a guideline for further work.
- Dig a trench based on the intended landmark.
- Make formwork for pouring concrete. It can be either made of plywood or simple boards. The main thing is to do everything without cracks, holes and securely fasten it so that the weight of the concrete does not knock it down.
- In the trench you should make a cushion of small crushed stone, stones or sand. Recommended cushion height 50 mm. It must be compacted well.
- If the load on the foundation is large, then you can make a frame from reinforcement.
- Directly pour the foundation with concrete. It is important that the pouring occurs quickly and in several layers throughout the entire foundation. If you only do certain vertical sections or pour concrete partially, there is a chance that the concrete may crack in those areas.
- Remove air from concrete using a deep vibrator.
- Level the surface and leave to dry for a month.
Caring for a log house
In order for the house to maintain its original appearance for a long time, you should take care of it on a regular basis, in particular:
- promptly coat the log walls of the house with antiseptics. The frequency of application is determined by the product manufacturer's recommendation;
- cover log walls with fire retardants;
- apply stain or lighten walls. Under the influence of ultraviolet radiation, walls darken, and not always evenly. The use of various protective compounds can slow down the process, but the process cannot be stopped. Therefore, after time, it will be necessary to cover the walls with a darker composition;
- paint the walls with glazing translucent paints, which, on the one hand, allow you to see the structure of the wood, and on the other, create additional protection;
- as a last resort, cover the outside of the house with siding or clapboard. But, this is only if it is not possible to restore the wood.
Thanks to proper installation and maintenance, a house made of rounded logs will function fully for a long period and stand out among other buildings.