How to lift a beam alone, without a hoist and a crane
When building houses and commercial buildings, you often have to do the work alone, for one reason or another.
Yes, unfortunately, many works are carried out in order to save money, and gone are the days when houses and households were raised by the whole family. Therefore, the question arises, how to cope with some difficult installation work alone? Yes, you can lift a heavy beam alone, using the simplest tools. To do this, take two guide rails, logs, thick boards of suitable cross-section, which are installed from the bottom up, from the location of the beam to the place where it is laid. Along the edges of the beam being lifted, strong ropes, slings or cables are attached, which on one side are attached to strong elements at the top to the wall of the building or to the ends of the guide logs.
And the other ends of the ropes are wound and secured to the ends of the beam being lifted. A handle in the form of a gate, about 120 cm long, is attached to one of the ends. After this, you begin to twist the installed gate with the log to the right and it, fixed on the ropes, rises along the guides, winding the rope on both sides. Of course, it is easier to rotate a heavy log than to lift it completely. After it is lifted, all that remains is to free it from the ropes and lay it at the installation site.
There is a simpler option, using the same guides, but without ropes. Stops are attached to the guides at a certain pitch. For square logs, these can be nails or screws, for round ones, screwed pieces of bars. They are needed to prevent the log from rolling away. The log is lifted one by one and fixed on the stops, one space at a time, first on one side, then on the other. Thus, you lift half the weight of the beam and gradually raise its top.
In the first and second options, at the top of the rise you will need a ladder or scaffolding if the building is high.
Calculation of the chain hoist
Before manufacturing a chain hoist, it is necessary to calculate the main technical characteristics of the load-lifting structure. Calculations are required for drawing up drawings and are made according to the parameters of the working premises and the weight of the load.
To determine the loads affecting the block system during operation, it is necessary to calculate the parameters acting on individual blocks:
The equation used to find the moments of force is as follows: SM * R = SC*R + l*SC*R + N* g*d/2, where:
The efficiency of the pulley is determined by the following formula: η = SC/SM. This parameter is influenced by the quality of the blocks and the complexity of the circuit. There are the following efficiency levels of the block system:
When calculating, it is also recommended to determine the efficiency of the remaining bypass rollers, depending on the design features of the lifting mechanism.
Devices for lifting logs, beams, and other heavy objects
Once upon a time, the working option for building my house was timber. And calculating the savings, I worked on various options, including how to assemble a wooden house alone. Of course, this is not very convenient, but the budget was very limited. I abandoned the “kidney” technology, so I thought about a lifting device and looked for suitable solutions around and on the Internet.
One person can lift logs weighing 100-150 kg using simple tools. And if there are forest trees on the site and a crane is not suitable, it is difficult to do without such devices.
I saved some photographs in my construction folder, but unfortunately there was no information left about the sources. I want to share them here, maybe you will find them useful and relevant, or just give you the right idea. You can make them yourself - from corrugated pipe, boards, a block or even a bicycle wheel, and preferably some kind of motor to reduce manual labor..
For example, this log house was assembled entirely by a man alone. At the same time, he did not move the crane, he stood in one place all the time.
Drawings of another device, light and mobile:
And here is their embodiment in matter :)
The same thing, but when, in addition to “putting it on” on the wall, there is also the opportunity to install it on a plane:
An original solution made from improvised means, along which the log “rides” to the top like on a bicycle :)
Stocking - studying the most popular schemes
This technological operation is intended to change the distance between blocks, as well as to change the position of these blocks. The need for reeving is determined by changing the height or speed of lifting objects by installing a specific pattern for passing the rope along the blocks and rollers of the mechanism.
The scheme used largely depends on the type of lifting device. Reeving for winches is carried out only for the purpose of changing the length of the boom reach. It is performed by changing the relative position of the guide blocks. Very often, this operation is carried out in cargo cranes, where it is required to prevent such an effect as curvilinear movement of weights.
Refilling the chain hoist
Reserves, depending on the schemes used, are divided into the following categories:
- One-time. This type has found application in jib-type lifting cranes, where the hook must be suspended on a single rope rope. After this, it is necessary to sequentially carry out static blocks. In the final stage, the hook is wound onto the drum. As practice shows, this type of reeving is the most ineffective.
- Double. This type is used in cranes that are equipped with a beam and luffing jib. In this case, it is necessary to install fixed blocks on the boom head, while the other end of the rope is attached to the cargo winch.
- Quadruple. It is in demand among pulley hoists, which are used to lift objects of enormous mass. Usually one of the reeving schemes that were described earlier is used, with the only difference being that they are used separately for each hook suspension block.
Tools for builders
Simple devices at a construction site
Any construction site cannot do without effective and simple devices to facilitate labor and increase the speed and quality of the object being built. Today in this article I will talk about some of them, the simplest and most effective.
The easiest way to climb along guides, two ropes and fixed guides are enough for it.
How rope affects work efficiency
You can avoid pinching and twisting of the rope if you use additional devices, for example, mounting plates, which allow you to space the rollers relative to each other. We categorically do not recommend using stretchable ropes in pulley hoists, since in comparison with conventional static products they seriously lose in efficiency. When assembling a block for lifting loads, specialists use both load and separate ropes, which are attached to the object independently of the lifting device.
There is some advantage to using separate ropes. The idea is that a separate rope provides the ability to pre-assemble or pre-assemble the entire structure. In addition, the passage of knots can be significantly facilitated, since the entire length of the rope is used. The only drawback is the inability to secure the load automatically. Cargo ropes can boast of just this feature, so if there is a need to automatically secure a load, use a cargo rope.
The reverse motion is of great importance. This effect is inevitable, since at the moment of removal, as well as when intercepting the rope or stopping to rest, the load certainly moves in the opposite direction. How much the load goes back depends on the quality of the blocks used, as well as the entire device as a whole. This phenomenon can be prevented by purchasing special rollers that allow the rope to pass only in one direction.
Let's talk a little about how to properly attach a cargo rope to a lifting mechanism. Not always, even the most prudent master has a rope of the required length, which is required to attach the dynamic part of the block. Therefore, several methods of attaching the mechanism have been developed:
- Using grasping knots. These knots are tied in five turns from cords, the cross-section of which does not exceed 8 mm. The use of such nodes is the most effective and, accordingly, widespread. According to experts, the units are very durable and reliable. Only a load over 13 kN can cause such a unit to slip. The important thing is that even when sliding, the knot does not deform the rope in any way, leaving it safe and sound.
- Application of general purpose clamps. These devices can be used even in difficult climatic conditions, for example, on wet or icy ropes. A load of 7 kN can cause the clamp to slip, which leads to damage to the rope, although not very severe.
- Personal clips. They are used only for small jobs, since a load over 4 kN leads to the clamp slipping and subsequent rope breakage.
The most interesting and useful devices for construction
When building any object, be it a house or something else that requires lifting heavy objects to a height, you need to go in two ways.
The first and easiest way is to hire people to lift heavy materials such as mortar, concrete or something similar.
Second, make a lifting mechanism capable of lifting heavy loads.
This device can replace at least three people and it is made of an aluminum ladder and an electric hoist.
Such a lift is capable of lifting three buckets of concrete and can be used alone. It’s not difficult to make a welded frame on bearings, and anyone with a little knowledge of electric welding can easily attach an electric hoist to the top of a ladder.
If you attach the electric hoist as shown in the photo to a well-reinforced beam, then you will get a very convenient device that can easily replace a crane.
This simple device will speed up your work on grinding grooves when building from round timber. Using the same principle, you can make other devices for carpentry work.
With the help of such a simple device, you can not only break walls with virtually no noise, but also press metal parts during installation and hold together floor boards during installation.
A very convenient device, especially in the manufacture of fencing and other work involving a large amount of work with bent wire and fittings.
I also have experience working with almost the same device when making fences, and I liked that the speed of work increases significantly.
Making such a device for cleaning walls from paint will not take much time; for this you need a welding machine, an old drill, and by welding a metal plate to the drill, you can increase the speed of cleaning the walls using a hammer drill.
Using an attachment that you can buy in a store today and a construction vacuum cleaner, you can remove paint from the wall with virtually no dust.
Lever hoist – advantageous physics of load capacity
This type of hoist is necessary for working with small loads, the weight of which is no more than 5 tons, and it can be raised to a height equal to the height of a person. It all depends on the design solution. Raising, lowering and moving is carried out using a lever built into the body. The hoist is controlled by an operator located near the device. Such models are good for tensioning cables and lifting loads. Since they are not suitable for a large volume of work, utility services find use for them.
They are necessary when you need to tension cables or install pipes at the bottom of trenches, as well as for installing hatches. With their help, foresters pull out stumps, and industrialists place heavy equipment in workshops. Often their purpose is to lift a load in order to work with it, like this. This can be various repair work, for example, in car repair shops. To make working with lever hoists easier, they are additionally equipped with special trolleys.
How to make useful mechanisms and tools for construction with your own hands
It doesn’t matter whether you’re building your dream home or renovating an old country house, you can’t do without reliable tools and construction equipment. Almost any device today can be bought in a store, but purchases are not always pleasing with quality and even less often with prices. Our forum members know how to reduce the burden on the family budget and offer recipes for proven mechanisms and tools for construction, made with their own hands.
Homemade folding stand
A very original idea for a folding stand for hand tools. Everyone is in their place. It doesn't take up much space. The design is based on furniture guides. The clamp holds the stand in the upper position. Neodymium magnets prevent instruments from falling out of their stocks. A great idea for DIYers who love to do everything with their own hands.
Truck...from the old four
Bring sand, crushed stone, boards, transport a concrete mixer and an old refrigerator... The need to deliver materials and tools during construction arises constantly. FORUMHOUSE member g8o8r8
found a way to save on freight transportation: he converted his old four into a truck!
Budget auto tuning cost the craftsman 3.5 thousand rubles - this was the cost of materials: an iron square, corners, galvanized steel for the loading body. Loading body g8o8r8
made it high to protect it from rainwater: to close the gaps between it and the car body, metal canopies were welded around the perimeter.
The rear side of the body is lifted with a 12-volt electric winch. This is convenient when unloading bulk materials and loading boards, stones, furniture, etc. into the body.
g8o8r8 (FORUMHOUSE Member):
At our metal collection point, they give five thousand rubles for any car. This inspired the idea of using my decommissioned four-wheeler for household needs: bringing earth, peat, stones, sand to the dacha. And if you install a subframe, weld a blade, install chains, you’ll see that you’ll be able to throw snow in the winter.
Main characteristics
Main technical parameters of lifting equipment:
Jib crane - dimensions
- classification according to GOST 25546 - 2K, according to ISO 4301/1 - A2;
- execution – U, HL, UHL;
- placement according to standard 15150 – 1, 2, 3, 4;
- device rotation drive and control – manual;
- hoist control – manual, electric remote control;
- control position – from the floor;
- electrical wire – cable connection;
- load mass during testing – 1.25 for static testing, 1.1 for dynamic testing.
The last paragraph indicates a portion of the rated load capacity indicated in the passport.
Construction materials lift
Another useful homemade product that will make life at a construction site much easier is a building materials lift. For example, like the one from FORUMHOUSE member Ali-bastr
Having started pouring monolithic walls, the forum member got tired of manually lifting heavy buckets of concrete and made a simple but ingenious design.
The basis of the lift was a metal staircase. To securely fix the ladder on the wall, in a 15×15 Ali-bastre
I drilled holes and put a washer on the back side of the pipe, securing it with a cotter pin. The trolley on which building materials are placed moves up and down on bearings No. 304 using an electric winch. It is located almost parallel, at a slight angle to the stairs, due to which the movement occurs smoothly.
Ali-bastr (FORUMHOUSE member):
It’s not for nothing that they say: laziness is the engine of progress. My lift lifts six buckets of concrete easily!
Hand trowel for concrete
No less important than homemade machines for the home workshop are devices for construction and repair.
Anyone who has ever dealt with concrete work knows how difficult it is to smooth a freshly laid mixture to perfection. If in small areas you can get by with the rule, then when pouring the area in front of the house or parking lot, you cannot do it with an ordinary tool. A concrete trowel comes to the rescue, which, due to its long handle (from 3 to 12 m), allows you to smooth concrete over a larger area without stepping on the surface being leveled.
The principle of operation of such a device, somewhat reminiscent of a mop, is simple. There is a working profile (also called a “wing”), attached to a long handle. When moving away from you at the ironer, due to the gearbox, the edge opposite to the user rises. That is, due to the angle of inclination of the “wing”, the trowel glides along the concrete and does not collect it in front of itself. When moving towards you, on the contrary, the side facing the worker is lifted up, and the trowel smoothes the concrete again.
Despite the simplicity of the device, its price cannot be called humane. This is what prompted ronik55
share the experience of his father, who made a concrete trowel, spending only 500 rubles.
ronik55 (FORUMHOUSE user):
I know from personal experience how difficult it is to smooth concrete perfectly. I didn’t want to go and buy it for 10 thousand rubles. As a result, my father made a cheap device for smoothing concrete, practically from garbage - all sorts of unnecessary things.
The following photos clearly demonstrate how this ironer works. We take a metal profile (the dimensions depend on the area being smoothed), weld transverse stiffeners to it, on which, in turn, hinge joints made of pipes are fixed.
The most important element, due to which the angle of elevation of the “wing” changes, is a rotating gearbox with a chain.
When the handle was rotated, the chain was wound around the pipe, and one edge of the smoother was raised.
Having carried the iron to the end point, we rotate the handle in the opposite direction. The chain is wound again, and the edge of the smoother is raised, facing the user.
We pull the ironing iron towards ourselves and repeat all the steps until we finish the job.
ronik55 (FORUMHOUSE user):
Due to the “pipe-in-pipe” connection and fixation with a cotter pin, you can increase the length of the handle at your discretion. This design is easy to assemble yourself.
See how to make a diamond drilling installation with your own hands (follow the link and you will find a drawing).
Planer for aerated concrete
Aerated concrete is one of the most popular modern materials for the construction of stone houses. The large format of the blocks and the installation technology, which can be easily mastered, allow even novice builders to erect buildings quickly.
But despite all its advantages, aerated concrete has a significant disadvantage - the blocks do not match in size and the need to adjust them to each other. You can use a shop tool for these purposes. But our forum members suggest making a plane for aerated concrete with your own hands. For this you will need: a board 5 cm thick, 3 wood files, universal glue, a door handle.
worodew (FORUMHOUSE Member):
Cut the files in half. We cut grooves in the board to half the thickness of the blade, lubricate the grooves with glue and insert the files. Screw the handle on and you're done.
Homemade bow saw
A bow saw is a convenient tool for cutting tree trunks and lumber. The design of the saw is simple; making a hand tool with your own hands is not difficult. To do this you need to prepare tools and materials:
Tools
- drill;
- hacksaw;
- chisel;
- hammer;
- knife.
Materials
- cord;
- wooden slats 20 x 40 mm;
- cotter pins – 2 pcs.;
- stalk ø 10 mm;
- saw blade;
- stain;
- wood varnish.
Step-by-step instructions for making a bow saw
- The lath is cut into three parts (two vertical side strips and a middle horizontal strip).
- Grooves are made in the side handles using a chisel.
- At the ends of the centerpiece, protrusions for grooves are cut out with a chisel.
- The centerpiece is connected to the side handles.
- Through holes are drilled at the joints. Wooden cotter pins are driven into them.
- Cotter pins form hinge joints. This is necessary for the mobility of the lower ends of the side slats when the canvas is tensioned.
- Cuts are made at the lower ends of the sidewalls - parallel to the middle.
- Short bolts are inserted into the holes of the saw blade and tightened with nuts.
- The blade is inserted into the cuts so that the bolts are on the outside of the structure.
- Circular grooves are cut out at the upper ends of the handles.
- Loops are made at the ends of the double cord, which are placed on the grooves.
- A handle is inserted between the strings of the cord, the long end of which rests on the mullion.
- The saw string is twisted using a handle, achieving the desired degree of tension on the saw blade.
- The wood is covered with stain and two layers of varnish.
- After the varnish has dried, the saw is ready for use.
Mobile foam cutting machine
And for those who insulate their house with polystyrene foam, another homemade product from the forum will come in handy - a machine for cutting polystyrene foam, which allows you to cut pieces of the required size simply and quickly, without bothering with a hacksaw and a ruler.
Our forum user Oleg Lvovich
To make a mobile machine, I used a 25x25 mm wooden strip 1.3 meters long, nichrome wire with a cross-section of 1 mm, a spring, two 20x4 mm steel strips, a 220/36V transformer and a 15-20 meter wire.
On FORUMHOUSE, a forum member shares a diagram of a homemade machine:
Unlike stationary cutting machines, this device can be freely moved around scaffolding and cut foam directly on site. At the same time, the sheet can be expanded not only in length, but also in thickness - for this, two profiles are additionally attached to the EPS with nails. According to a forum member, the cost of a mobile machine is 800-1000 rubles, and even with intensive use it will faithfully serve for several construction seasons in a row.
Other examples of machines for cutting foam plastic, including stationary ones, are in this topic.
Where is it used?
Initially, hoists were used in production and warehouse facilities. Later they found wide application in auto repair shops and loading and unloading areas.
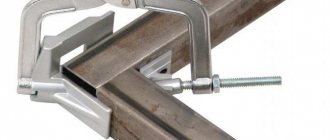
We recommend: Quick-release corner clamp for welding
Over time, hoists have not lost their relevance - on the contrary, they have become even more in demand.
They are widely used in garages and home workshops, as well as on construction sites.
Among the main advantages of a manual hoist, it is worth noting its compact size, light weight and good load capacity.
Comfortable grinder
Have you noticed that holding a small grinder by the top handle is convenient, but a large one is not? The big one always tries to escape from your hands when biting into metal. Having such a sad experience, some are generally afraid to use a large grinder. So that the grinder always remains in your hands, forum member chichic
designed a homemade handle for the instrument with a natural grip.
сhichic (FORUMHOUSE Member):
A powerful grinder can break out a cutting disc stuck in the metal, but it always remains in your hands. Proven by ten years of experience and cutting metal up to 14mm.
Skidding gripper "Gorynych-650" - 67,000 rubles.
| Parameter | Meaning |
| Grip force, tn | 8 |
| Log diameter, min/max cm | 7, 65 |
| Lifting height, cm | 100 |
| Weight, kg | 300 |
| Jaw sheet thickness, mm | 16 |
| Thickness of the reinforcing pad on the outer jaw, mm | 12 |
| Rotary device sheet thickness, mm | 30 |
| Bracket pipe wall thickness, mm | 6 |
| Distance between jaws in open position, mm | 1700 |
DIY cyclone vacuum cleaner
Dust and small debris during construction or major repairs are a real problem, which is difficult and ineffective to combat with a broom and rag. To make the cleaning process easier without spending money on expensive equipment, FORUMHOUSE member zalman3000
I quickly assembled a cyclone for a vacuum cleaner from scrap materials.
Zalman3000 (FORUMHOUSE Member):
I needed: a 20 liter plastic barrel, a 45 degree 40 mm angle, a 90 degree 32 mm angle, an oil filter from Moskvich (it fits tightly at the 32nd angle).
The simple design is attached to the vacuum cleaner, and waste is collected directly into a capacious plastic container.
Cheap homemade grinder
The most budget version of the grinder, created by the Samodelkins. Plastic bottles are used as rollers. They are mounted on bearings. The belt on the rollers is adjusted using thumbwheels. The tension is adjusted with a bolt. The structure is driven by a drill. You can slightly improve Samodelkin’s design by replacing plastic bottles with polypropylene tubes.
Safety of the timber skidding grip
The Gorynych grabber , like the wood splitters, is designed for long-term and trouble-free operation, for professional
use. The components and assemblies are designed for “very severe” operating conditions.
- A hydraulic lock is installed to prevent spontaneous release of the gripper.
- Grease fittings are installed in all moving joints.
- The pins and bushings are hardened and heat-treated.
- There is a hook on the rotating device, its purpose is to quickly engage with the checker to pull out a tree trunk from places where it is impossible to reach.
- Protection of high pressure hoses.