My house is full of shoes. There is so much of it that you could write poems about it... For several years I have been thinking about how to make a shoe rack myself from cardboard tubes. It's time to bring it to life.
There are descriptions of similar DIY shoe racks online, so I decided to make my own based on them. The project is quite quick and if you have a basic set of tools, you can easily repeat it.
Master Class
Below you will find instructions for making a shoe rack with your own hands from wood.
Preparation of the drawing
First of all, you need to decide on the dimensions and design. The tiered design depends on the number of people expected to use it. It is also worth considering how many shoes a person owns.
The width of the shoe shelf is selected based on the available free space in the hallway or the dimensions of the rest of the furniture. As for the design solution of the shoe rack, it is important that it matches the design style of the vestibule.
Preparation of material
The type of tree does not matter. The recommended thickness of the boards is 1.5 - 2 cm. After the issue with the material has been resolved, you need to use a saw or jigsaw to cut out the shelf parts in accordance with the prepared drawing. Then you need to carefully sand all the workpieces.
Painting elements
Before starting paint and varnish work, you should make sure that the planned artistic finishing is completed. The chosen color should be in harmony with the overall style of the corridor. Therefore, it is best to use the same paint as for the hanger. An alternative could be stain. Varnishing is also acceptable.
Preliminary preparation for installation
Before you start assembling the structure, you need to make all the necessary holes at the connection points of the parts.
Assembling the shelf
First, load-bearing elements are installed. Then the shelves of the first tier are installed. After they are aligned, they move on to assembling the last floor of the shoe rack. The finished product is placed in the planned corner of the hallway.
It is quite possible to make a shoe rack yourself at home. Moreover, it will not take much time and require a minimum amount of expenses.
Detailing
Shoe cabinet parts
Details chipboard 16 mm, color: dark wenge:
- 1100*250 – roof/bottom, 2 pcs.
- 668*250 – sidewalls and internal stand, 3 pcs.
- 526*250 – internal horizontal shelves, 2 pcs.
Details chipboard 16 mm, color: light wenge:
- 311*518 – facades, 4 pcs.
Details chipboard 10 mm, color: light wenge:
- 510*140 – internal partitions for shoe boots – 4 pcs.
- 510*135 - internal partitions for shoe boots - 4 pcs.
- 510*85 - internal partitions for shoe boots - 4 pcs.
Fibreboard part 3 mm, color: white:
- 696*1096 – back wall – 1 pc.
Accessories for shoe racks
- Shoes - 4 sets. These are plastic sandwiches for the sidewalls, each set contains two pieces, size: 192*287*85*16;
- Handles – 4 pcs;
- Thrust bearings – 6 pcs.;
- Self-tapping screws;
- Confirmations
- Double-sided tape (for mounting facades).
Necessary tool
- Screwdriver;
- Screwdriver, tape measure, square;
- Confirmation bat;
- Screw bit;
- Drill for confirmations;
- Awl.
Pipe connection methods
To make any structure from pipes, you need to know how to fasten parts. Sometimes polypropylene pipes are fixed to each other using a welding machine (if you don’t have one in your arsenal, you can try renting one). But not everyone can handle such a device, so you have to look for other ways to connect PVC pipes.
Table 2. Options for connecting plastic pipes
| Variant, illustration | A comment |
Using a seal | This method involves connecting one end of the pipe to the other through an extension and a rubber seal. Despite the fact that formally the structure remains collapsible, it is undesirable to move the pipes after assembly because the connection is too rigid. Sometimes rubber seals are additionally coated with sealant to make the joint monolithic. |
With glue | This is the most popular way of connecting parts of a product to each other. For such purposes, only strong glue is used. It is best to use silicone sealants, as they give the structure some flexibility, and the pipes will not crack at the joints if moved awkwardly or dropped. |
Interesting ideas and photos
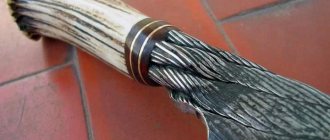
Tree hangers
This can be a neatly sanded tree trunk or branch, or a folded wooden structure. The main thing is that there is one support and branches from it - the handles of the hanger. An original and useful addition to the hallway.
Designer hangers
The number of elements and design may vary, but what all these floor hangers have in common is that they can be quickly folded and disassembled just as quickly (if you didn’t use glue). Sometimes more expensive and noble materials are used, such as copper, sometimes wood or PVC, in any case the result is beautiful and extraordinary.
Popular ideas
After getting acquainted with the types of shoe racks, you can move on to studying those options for homemade shoe stands that are most popular among the population.
Wooden cabinet
The advantage of a wooden cabinet is its ease of manufacture. The structure consists of 4 boards connected with furniture screws and thin planks fixed to the facade. It is recommended to paint or varnish the finished product.
Pallet stand
The versatility of pallets has made them a favorite material among craftsmen. They are also suitable for creating shoe stands. To make such furniture, you need:
- disassemble a couple of pallets;
- file the planks to the required parameters, sand them;
- collect several “mini-pallets” at the rate of one product per pair of shoes;
- treat the made boxes with an antiseptic, coat them with varnish or acrylic paint;
- stack “mini-pallets” on top of each other.
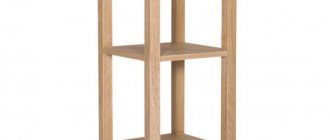
Model "Staircase"
This model of shoe rack looks like a ladder, hence the name. Its advantages:
- compactness;
- originality.
To make such a stand, it is equally acceptable to use a factory-made ladder and a homemade one. When making it, it is important to monitor the slope of the steps, otherwise the shoes may stain the wall.
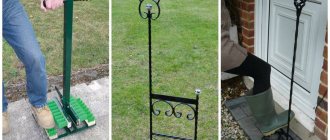
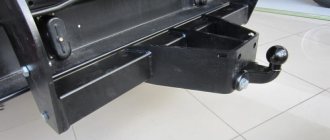
Shoe rack made of profile pipe
The metal model is labor-intensive to create. Only a person who has welding skills can make a shoe rack from a profile pipe with his own hands. Despite this, this product has many advantages:
- small dimensions;
- aesthetics;
- durability;
- good ventilation;
- ergonomics;
- resistance to mechanical stress.
PVC pipe shelf
To create a PVC stand, you need to stock up on PVC pipes. The required diameter is 300 mm, the optimal length is considered to be 250 cm. The prepared material should be cut into ten pieces 250 and 300 mm long, respectively.
The next step should be to wallpaper each section. After this, you need to create the base of the shelf from 4 blanks, and glue the required number of pipes on top (their number depends on the desired capacity of the structure). When the glue has dried, the shelf can be used.
Model "Closet"
For some, the idea of creating such a shoe rack on their own may raise doubts, since this is a very labor-intensive task. In reality, everything is not so gloomy. First you should check the availability of the necessary materials and tools. You will need to buy chipboard, fittings and fasteners. You also need to check whether the farm has:
- screwdriver;
- screwdriver;
- bit set;
- awl and drills;
- corners.
The manufacturing process consists of a number of steps:
- Frame assembly.
- Installation of internal parts.
- Rear wall installation.
- Securing the opening mechanism.
- Installation of shoe boots.
- Installation of facades and remaining fittings.
Cardboard stand
To create a shoe rack out of cardboard, you need a box of a suitable size. It is cut into two parts, having previously sealed the bottom. Using another box, strengthen all the walls. Next, the shelves are cut out and secured to the body. The finished product is decorated with decorative paper or film.
Dryer installation
Once the entire structure is assembled, it must be installed and attached to the wall. This is done using special devices, using horizontal tubes that act as support elements for vertical shelves.
After fixing the main structure, you should connect it to the heating system and run water through it. At this stage, you should make sure that there are no places in the dryer through which water leaks. If everything is fine, you can start using this miracle shelf for its intended purpose, and as soon as cold weather sets in with rain, it will be able to heat and dry your shoes.
Multi-level pipe hanger
In addition to simple options for creating hangers, there are also larger models. In this case, we are talking about a product that will accommodate the entire wardrobe of the average person.
During the manufacturing process you will need the following:
- plastic pipes with a diameter of 2.5 centimeters and length: 100 centimeters - 4 pieces, 65 centimeters - 2 pieces, 48 centimeters - 4 pieces, 20 centimeters - 6 pieces, 5 centimeters - 8 pieces;
- connecting crosspieces – 10 pieces;
- corners for tapping - 6 pieces;
- plastic panel for shelf;
- spray paint.
Manufacturing process: step-by-step instructions
Step one: you need to mark the length of the pipes and cut them with a pipe cutter or saw. Next, all the parts should be sorted to make it easier to assemble the structure.
For convenience, you can place sheets with written dimensions next to the pipes.
Step two: assembly should start from the bottom, similar to the previous options. It is necessary to attach crosspieces to the pipes, and rotating angles on them, until the base of the frame is formed.
Hanger with compartments for shoes
Step three: next you need to install the crosspieces on the longitudinal pipes, and then attach the transverse part to them, which will be the first level of the hanger. Then the longitudinal pipes are again installed on the crosspieces, and then the upper transverse one.
The hanger is quite durable
Step four: then you should install a plastic panel down, which will serve as a shelf for shoes and other items.
The panel can be cut to your size at a hardware store
Step five: at the end the structure can be painted, but this step, as in previous cases, is not mandatory.
When spray painting a hanger, be sure to wear gloves.
Over time, the paint may fade a little and lose its original appearance. Therefore, it is recommended to periodically touch up the hanger using aerosol paint. This way the product will always look neat.