Buying a knife made of high-quality steel is, of course, not a problem. If there is not enough assortment of regular or branded blades, you can find a specialist who works on an individual order.
However, you can go another way - make a knife yourself. You most likely won’t be able to forge the perfect blade the first time, but who knows...
A homemade knife made from cable is a worthwhile undertaking; the result can be a high-quality blade with a visible pattern on the blade, formed by mixing layers of metal during the process of forging it.
Material selection
In our time, only true connoisseurs of this craft engage in blade making. However, even a novice blacksmith and anyone can try to forge a homemade knife.
The easiest way to do this is from a piece of thick reinforcement, an old file or a piece of a car spring. It will be a little more difficult to unforge the drill or bearing race. You can get an interesting result from a spun chain from a chainsaw or car engine.
Another material that, after forging, can become a high-quality blade is cable. Its cores are made of carbon steel, capable of holding an edge well after hardening. If you manage to preserve the braided pattern after forging, you can get a very original blade, vaguely reminiscent of wild Damascus steel.
What do you need to know to figure out how to make a knife from rope? Two important nuances: first, whether the properties of the high-carbon material will be preserved during processing; the second is whether a visible pattern will appear on the blade, gracefully turning into a sharpened edge.
Forming the cutting edge
Before you begin shaping the cutting edge, it is necessary to carry out preparatory work. It consists of applying markings on the edge of the workpiece. The markings are placed exactly in the center and serve as a guide for making a symmetrical descent.
To do this, paint over the edge that will be cutting with a marker and, using a drill equal in thickness to the workpiece, scratch the markings. The drill has a conical sharpening. Therefore, if you place the drill and the workpiece on the same plane, the tip of the drill will be exactly in the middle.
Edge cutting device
Then, using a coarse file, you can begin shaping the cutting edge. If you do not have the proper skills to create a smooth edge, you can use a simple device. It consists of a base, an angle and a guide with a platform for sandpaper. 180-grit sandpaper is glued onto the platform with the guide. Several holes must be pre-drilled vertically one above the other in the corner. The knife is fixed flat on the base and the guide is inserted into the hole at a height so that the angle between the plane of the base and the platform with sandpaper is the same as that chosen for forming the slopes. A universal angle is from 22 to 30 degrees.
Having made an even descent to the middle of the thickness of the workpiece, turn the knife over, then make the same descent on the reverse side. Using such a simple device, you can easily form an even blade.
Damascus steel
Previously, sharp, flexible and reliable blades with a patterned pattern on the blade were called damask blades (according to one version, from the province of Fulad in Persia, where they were made). Such characteristics and visible effects were achieved using various methods.
Steel could be smelted in a crucible by metallurgical casting, experimenting with the composition of the material. Another option is to “weld” steel strips of different hardnesses in a forge and then forge the resulting workpiece. Blades forged by blacksmiths using a special technique began to be called Damascus.
They differ precisely in the manufacturing method and technology, and not in the characteristics and degree of expression of the pattern. Having unforged a knife from a cable, you can try to create a blade with your own hands that vaguely resembles such material. And although the pattern on the blade is not an end in itself, it is still a distinctive feature of Damascus steel.
Blacksmithing tools and materials
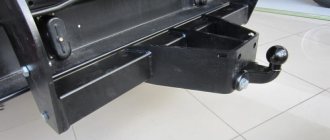
To forge a knife from a cable with your own hands, you need to master the craft of a blacksmith at least at a minimum level. To do this, you will need a pair of hammers: one massive (up to 2 kg), the other lighter (up to 0.5 kg) for fine work, pliers, an anvil and a homemade furnace (forge crucible) with forced air supply.
The manufacturing process cannot be done without a grinder, a sharpening machine, or electric welding. You will need a vice and an adjustable wrench. The fuel for the crucible can be charcoal from rocks that produce great heat, because the workpiece will have to be heated to a temperature of over 1200 ° C.
For better “welding”, you can use borax as a flux. It removes scale and prevents carbon from burning out of the material. It is also necessary to prepare the oil for hardening and ensure safety precautions.
Being able to use someone's blacksmith shop or business forge with a mechanical hammer will make the task much easier.
What tools are needed to forge a knife with your own hands?
To forge a blade, you will need to have a special blacksmith tool, but you can also use amateur tools:
- Hammer 4 kg.
- Hammer up to 1 kg.
- Vise.
- Machine for point.
- Stove.
- Anvil.
- Welding machine.
- Bulgarian.
- Blacksmith's tongs or ordinary pliers.
- Adjustable wrench.
Forging tools: hammer, vice, adjustable wrench, blacksmith's tongs, chisel, tamper.
You should know some nuances regarding the stove. You will need to reach a temperature of approximately 1000-1200°C, which cannot be done in an ordinary oven. In this regard, it will be necessary to improve the stove. The structure is made of metal with thick walls, after which a pipe is attached into which air from the vacuum cleaner will be supplied. Coal is suitable as fuel.
Before making a knife you will need to make a sketch. A knife is a simple object that consists of a blade and a handle, but these elements have many components. In Fig. 1 you can see a sketch of the structure with all its components. Existing types of profiles can be seen in Fig. 2. Once the appropriate profile has been selected, you can proceed to creating a sketch. Professionals do not always use drawings, but beginners will need them.
Preparatory operations
To make a knife from a cable, first of all you need to sketch it out on paper. Then you will have to find a suitable material. It is necessary to check it and at least remotely determine the carbon composition in it.
It depends on this whether the future blade will be hardened, whether it will hold an edge, and whether it will be possible to carry out forge “welding.” The test is carried out for sparks from a grindstone. A moderately dense orange sheaf of them will mean that welding is possible; the steel contains about 1% carbon, which is enough for hardening.
Next you need to cut a piece of cable to the required length. At this stage, the method of manufacturing the handle is determined. It can be made from a single piece of cable without forging. The knife will look original, but have decent weight.
Another option is to electric weld a reinforcement rod to a section of cable. It is convenient to hold on to such a handle when heating the workpiece in the crucible and processing it with hammers. You can then make a handle on it or, by riveting it, install decorative overlays.
Before starting work, the cable is tightened with steel wire clamps in several places. This is done so that during the heating process the thin wires do not unravel.
Shank drilling
The handle on the shank can be secured with rivets or glue. The most reliable option for attaching the handle is to use rivets. To install them, you need to make holes in the shank. The holes are marked on the shank so that they are located approximately in the middle of the future handle. To prevent the drill from slipping at the initial stage of drilling, the holes are cored.
Due to the fact that the circular saw is made of alloy tool steel, drilling it will not be so easy. Ordinary metal drills will not last long here.
Drilling should be done with cobalt drills or a ceramic drill with a pobedite tip.
During the drilling process, it is important to add oil to the drilling area and not allow the drill to overheat. Drilling through hardened steel is quite a difficult task.
Therefore, it is possible to produce holes in the shank using an electrochemical method. To do this, attach a wire to the workpiece, then completely cover the shank with bitumen mastic or plasticine. In areas of future holes, the protective layer is scratched down to bare metal. Next, a saturated solution of table salt is prepared, into which the blade shank with a wire and an unnecessary metal plate, also with a wire, are dipped. Both wires connect to the battery or car charger. A “plus” is applied to the future knife from a circular saw, and a “minus” is applied to the plate. The etching process is accompanied by the release of gas. In 30–50 minutes the holes will be ready
Drilling through hardened steel is quite a difficult task. Therefore, it is possible to produce holes in the shank using an electrochemical method. To do this, attach a wire to the workpiece, then completely cover the shank with bitumen mastic or plasticine. In areas of future holes, the protective layer is scratched down to bare metal. Next, a saturated solution of table salt is prepared, into which the blade shank with a wire and an unnecessary metal plate, also with a wire, are dipped. Both wires connect to the battery or car charger. A “plus” is applied to the future knife from a circular saw, and a “minus” is applied to the plate. The etching process is accompanied by the release of gas. In 30–50 minutes the holes will be ready.
How to forge a knife from a cable?
The workpiece is placed in the lit crucible and allowed to heat up to 800 °C. At this stage, the cable strands are released (annealing), the material becomes pliable. Additionally, oil and dirt burns out.
After cooling, the workpiece is clamped in a vice and one of the ends of the cable is welded using electric welding. Using an adjustable wrench, it is “tightened” as we weave to maximum density. The other edge is scalded while simultaneously fastening a piece of reinforcement for ease of work.
The wire clamps are removed, the workpiece is heated to 1200 °C, and generously sprinkled with borax. This is necessary for better penetration. After reheating, forge “welding” is performed. Using a heavy hammer, the cable is broken flat and periodically sprinkled with borax.
The workpiece is constantly heating up. The more often this is done, the more intensively the forging occurs, the better the material is “welded.” After rough processing, they move on to forging the blade, the future cutting edge, and the shank. At this stage, a smaller hammer is used more, giving the workpiece an outline reminiscent of a sketch of the future blade.
Complexities of technology
It is necessary to constantly monitor the temperature of the workpiece, not allowing it to cool. Working with a heavy hammer, especially without proper practice and experience, can easily damage the curls of the cable in places where a distinct weave pattern should remain. Unwanted hits with the edge or corner of a sledgehammer on a heated workpiece leave deep dents that cannot always be ground off.
During operation, the process of carbon burning out of the metal is inevitable. There are craftsmen who forge a knife from a cable on dense wood placed on the plane of an anvil. When it comes into contact with heated metal, it smolders, and the oxygen in the air at the point of contact is burned, which reduces the degree of carbon burnout from the material. In addition, by unforging the cable on a tree, you ensure that the workpiece cools more slowly, so you can do a larger amount of work in one cycle.
Making knives at home
Making a homemade sheath at home includes the following steps:
- making a pattern from paper (you need to put a blade wrapped in tape on it, add 1.5 cm from each edge and circle);
- creating a pattern from leather or thick fabric (the pattern is traced 2 times in a mirror image);
- cutting out from the material 2 side inserts 1.5 cm wide and a T-shaped part, which will then become a clasp;
- processing the edges of the cross element with wax, grinding on a felt wheel of the machine;
- sewing a T-shaped part and one of the main patterns with nylon thread;
- gluing the inserts of this part of the sheath;
- fixing the second half of the pattern with glue;
- turning the edges of the workpiece on a grinding machine;
- stitching glued parts;
- polishing the surface of the sheath, applying cream if it is leather;
- making holes at the ends of the fastener to secure the button parts.
Watch the video about how the knife is made:
Special approach
Forging a knife from a cable is also possible using another technology. There are craftsmen who, before forge “welding,” pack an annealed and compacted cable blank of the required length into a piece of stainless steel pipe. Its diameter is selected in such a way that the cable fits into it very tightly, with some effort.
Both ends of such a case are welded by electric welding, fusing the ends of the cable with the pipe. The workpiece is heated to a temperature of 1200-1300 °C and in this form is unforged. The alloyed stainless steel of the pipe with the cable is not welded, but serves only as a protective cover against uneven forging. In addition, the hot cable does not come into contact with air oxygen and the carbon in it burns out minimally during forging.
If you use a hydraulic press, you can significantly facilitate forge welding. After heating to 1300 °C, the case with the cable inside is placed under load and left until it cools. If you use dies, you can immediately form thickenings under the neck for the transition from the blade to the handle and the butt of the shank. During the next heating, the shape of the blade is finalized by hammering through the case.
After cooling, the pipe is cut off with sandpaper from the end where the tip will be. The case is carefully opened using a chisel. Further processing of the workpiece occurs on an emery wheel. The excess areas are pre-cut and the blade beveled without final sharpening.
Manufacturing of rivets
The adhesive attachment of the handle to the shank is not reliable. To avoid breaking the handle, the wooden plates must be fastened with rivets. The rivets are made of metal that is not subject to corrosion. These can be alloys of non-ferrous metals or stainless steel. You can also use a copper or brass tube as rivets.
Making rivets for a knife
A blank for the future riveting is sawn off from a rod of suitable length. It should be 2–3 millimeters longer than the thickness of the handle. Holding the rivet in a vice, use a hammer to flare one end. It should look like a mushroom at one end of the rod. Next, the rivet, pre-lubricated with epoxy glue, is inserted into the holes in the handle and also flared on the other side of the handle. To flare a rivet made from a tube, it is best to use a ball from a bearing.
Heat treatment
Blade hardening is just as important as the choice of steel. According to technology, a knife made from a cable after forging has tension, it must be removed. To do this, the workpiece is heated to 800 °C and allowed to cool.
Hardening is carried out by heating the blade to 1200 °C. It is lowered point down into heated oil and held motionless. The blade must then be released. It is cleaned of carbon deposits, heated to 200 °C and dipped into oil again.
Some craftsmen harden knives through oil (lower for two seconds) and then place them in salted water.
Etching and finishing work
After heat treatment, the cable knife is polished, and the final finishing of the blade blade and the shank for attaching the handle are made. To develop the design, the workpiece is dipped into a solution (5%) of ferric chloride and left for etching. Treatment time depends on the desired effect and can be up to one hour.
If before this you stick a stencil on the blade with the manufacturer’s logo (initials or any design) cut out on it, as a result it will be imprinted on the steel and will indicate the authorship of the blade. After this, fine grinding is done with fine-grained sandpaper and the blade is polished.
Before this operation or after, the selected type of handle is installed. These can be overlays made of valuable wood with an interesting texture, stacked washers of various materials in any sequence, or, for example, a piece of deer antler.
It may not be possible to make such an original and skillfully made rope knife (photo above) the first time, but if you want to master the craft of blade making, you should strive for this result.
Cutting and primary processing of the workpiece
The fastest way to saw a workpiece is with a grinder with a thin metal cutting disc. If it is not possible to use a grinder, you can use a hand hacksaw for metal
It is important to correctly install the file into the hacksaw. The saw teeth should be directed forward and the hacksaw should cut while moving away from you
Cutting and preparing the workpiece
First, the approximate shape of the knife is cut out using straight cuts. Then the bends are cut out. The easiest way to cut them is with several oblique cuts converging at one point.
It is important to leave an allowance of 2-3 millimeters to the drawn outline. This is due to the fact that when using a grinder, the metal at the cutting site overheats
By grinding off 2–3 mm using a file and sandpaper, you can remove the overheated edge of the metal.