11.03.2020
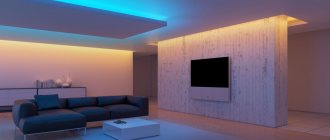
To create an unusual and stylish interior, it is not at all necessary to buy new furniture or make repairs. It is enough to correctly place accents and add decor. For example, you can organize the illumination of shelves with LED strip. It's not as difficult as it seems at first glance. We will tell you more about how to do this correctly in the article.
Choosing a strip to illuminate the shelves
The selection of LED strip for installing decorative shelf lighting depends on two factors:
- on the material from which the shelves are made: glass, wood or chipboard;
- depends on what backlight format is required.
In the latter case, there are also 2 options:
- when the light source is hidden and only its radiation is visible;
- and when the light source is an accent in the interior, following the example of a floor lamp.
To backlight shelves with LED strip, you will need a radiation source with higher luminosity so that it can create reflected light. Here it is worth using strips with at least 60 diodes per linear meter (similar to backlighting curtains with LED strip).
If, on the contrary, the light source is not intended to be hidden, then use a tape in which the number of LED crystals does not exceed 60 per linear meter and the size is 35x28. The best option is with 30 diodes per fm. Otherwise, the light radiation will be dazzling.
If you plan to illuminate glass shelves with LED strips yourself, you should not abuse excessive radiation, since glass itself increases the brightness of the light.
If matte opaque materials were used for the shelves, then the most effective will be the background lighting, which will require more powerful tapes.
What you should pay attention to if you plan to illuminate the shelves with LED strip:
- Select a strip with the required number of diodes per linear meter to ensure a comfortable luminous flux.
- Decide on the backlight color: SMD – monochrome;
- RGB – three-color modification.
- IP 33 – suitable for installation in rooms without open sources of moisture.
Glass processing methods
Numerous types of processing of this material allow us to significantly expand the scope of glass applications. First of all, it's cutting.
The main key to the success of such an operation as cutting glass is the glazier's table, which should not have any deflections or bumps. Otherwise, the glass may simply burst or crack. Glass cutting can be done with a roller or diamond glass cutter, the main thing is that the tool used is not worn out.
The main sign of correct cutting is the characteristic hissing-crunching sound. The glass cutter in operation should not creak, squeak, or bounce on the glass. The cutting line must be drawn in one motion, without stopping or going back. If you run a glass cutter twice along the same line, the resulting edge will crumble and chip.
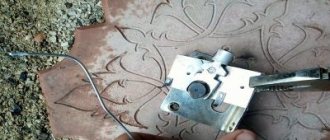
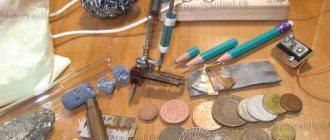
Glass cutter
After making the cut line, the glass is tapped on the back side with a special hammer or the handle of the glass cutter itself, and then broken off with light pressure. To remove small fragments of glass remaining on the fault line, use the slots located on the handle of the glass cutter. After the element required in size is cut, its edges should be processed. This will give the edge a rounded and secure appearance. At home, this can be done with an emery block, periodically wetting the glass with water. The direction of movement of the block should go along the edge of the glass. In this case there will be no chips.
To drill holes in glass you will need a cylindrical glass crown with diamond coating, drills and a plastic bottle of water. To avoid overheating of the glass during drilling, it is watered. If the glass is thick, drill it only halfway, then turn it over and drill through the part.
The surface of glass or mirror can be either glossy or matte. To frost glass, use a special paste (for example, “GlassMat”). By the way, by applying it through a stencil, you can get a design or ornament on the workpiece. Glass processed in this way has a lower surface roughness than mechanically processed glass and a peculiar “silky” surface.
If necessary, ordinary glass can be covered with film for tinting car windows. This way you will get tinted glass, which will cost you much less than buying ready-made glass with a factory coating.
What you need to install shelf lighting with LED strip
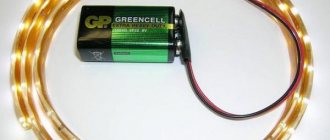
- LED Strip Light. Use standard kits: to organize the lighting of any shelf, a 5-meter coil will be enough for you.
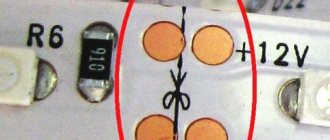
Important! It should be remembered that cutting the LED strip can only be done in specially marked areas. If you cut it somewhere else, then such a link will need to be cut off and discarded due to the danger of an electrical spark.
- Connecting single-core copper wires.
- Soldering iron.
- Silicone, which will need to be used to treat all exposed areas of wires and soldering areas.
- Power unit. To fix it on a plane, use double-sided tape. And so that it does not come off after a while, the surface should also be degreased beforehand.
IMPORTANT! According to the instructions, a chain of interconnected sections of LED strip must be connected to a power supply with a power consumption that is 25% more than the power for which the strip itself is designed. For example, a 5-meter SMD 3528 LED strip has a power consumption of 4.8 W per 1 linear meter. Therefore, the total power consumption will be 24 W. This means that to power you will need a power supply with a power of 30 W.
Before starting installation, it is better to draw up a diagram for installing sections of LED strips. At the same time, remove the shelf and degrease the mounting area with solvent. An alternative method is alcohol-containing liquids, such as vodka.
Modern tapes have an adhesive base and do not require additional use of glue. However, in order for it not to come off after some time, the base surface must be clean, free of grease.
To install shelf lighting, the LED strip will have to be cut into several sections. The fact is that technical restrictions are imposed on its deformation: it cannot be bent with a radius of less than 2 cm.
ATTENTION! When installing shelf lighting with LED strip, the total length of all connected sections should not exceed the standard length of the strip. It is forbidden to attach additional sections to the chain by lengthening it! It is recommended to shorten the standard tape, especially if you install the lighting yourself.
Hanging a shelf on a tile
To attach the shelf to the tile, it is better to use a drill or hammer drill, dowels and self-tapping screws. The reason for choosing this type of tool is the fragility of the tiles.
The first stage - selecting a surface, marking holes and checking with a level - is the same for all types of surfaces. The second stage is the actual moment of drilling. But it is he who conceals his own nuances. For the effectiveness of this process, it is worth drilling the tile itself at low power, and then changing the drill to a smaller one and working fully.
You should not forget about the fastidiousness of tiles. Any wrong action can result in a crack in it. You should be very careful and follow the recommendations.
If you still need to drill the tile, mark the location of the hole on the masking tape
Features of glass shelf lighting
Do-it-yourself illumination of glass shelves with LED strip is an activity that requires accuracy and preliminary work.
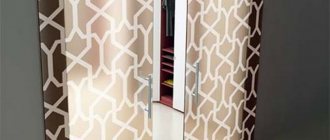
- First you need to decide on the concept. Answer yourself the question: what exactly should glow? The edge of a glass shelf, the surface or the space behind the shelves. In this case, it is better to seek help from professional designers.
It is very impressive to decorate glass shelves from the end, and on the back edge. In this case, the light from the diodes penetrates the glass array and the entire front end glows.
- Do-it-yourself illumination of glass shelves with LED strip should be done slowly. It is important to understand that a crookedly installed luminous strip will create the wrong lighting effects.
- When installing glass shelves, the power supply must be located outside the shelves. For it, you first need to select a suitable location and lay out a route for the passage of single-core wires from the block to the first section of the luminous strip.
Rules for working with material
First of all, it should be noted that you should work with glass very carefully, thinking through every movement.
First you need to take a glass cutter. Before cutting the material, you need to practice a little so that you don’t make a mistake at the right time.
Next, you need to decide on the dimensions of the future structure and create markings. This is easy to do with a regular marker.
Next, you may need a belt sander. It is necessary for edge processing.
Instructions for installing LED strip lighting for glass shelves with your own hands
- Determine the location where the power supply will be located. It must be hidden from view.
- Route the wires to the shelves. If necessary, arrange the wiring using a plastic box.
- Clean and degrease the surface on which sections of the LED strip will be glued.
- Cut the tape into pieces according to the diagram prepared in advance.
- Connect the individual sections together by soldering them with single-core copper wires.
- Treat all exposed wires and solder joints with silicone.
- Place the pieces of luminous tape on the places prepared for it.
Installation of LED strip shelf lighting is completed - plug in the power supply.
Making shelves with traces of extraterrestrial civilization glowing in the dark
Do you like fantasy and want to bring it into your home? Then you've come to just the right place! For lovers of fascinating alien gizmos, we will tell you how to easily and simply make shelves for your home with your own hands, with traces of an extraterrestrial civilization glowing in the dark. Your stylish shelves will look as if an alien just crawled across them and left behind glowing goo that will catch the eye and give the shelf a mysterious look.
“Alien” shelves will be made from this cracked piece of chestnut board
The first step is to seal the through gaps with tape, preferably with aluminum tape.
It is necessary to install the shelf level so that it does not turn out crooked
It's time for mixing
This will be a blue glow in the dark epoxy resin.
While the resin has settled to release all the bubbles from it, you can conduct a glow test
Next, the resin is carefully poured into large cracks
Using aluminum tape you can also make glowing edges of the shelf, as shown above
It will look absolutely amazing
- As far as the resin penetrates the wood, this photo was taken from the other side of the board
- It's time to oil the shelves. The master applied about 8 thin layers of boiled linseed oil
- Then I carefully sawed the board into smaller pieces to make not one large one, but three smaller ones. Everything is ready to install
- I installed brackets, which had to be painted soft gray, since they were sold exclusively in white in the store
- In the very corner, the shelf will be supported by these walnut blocks, attached to the wall flush with the brackets
- All is ready. This is what the shelf looks like in daylight
- And this is what she looks like when the sun starts to set
- This is the favorite part of the creator of the “alien” shelves, since in this place the shelf glows both from above and from below
- beauty
Nothing complicated, but so many impressions. Aliens are among us!
Source: https://4tololo.ru/content/6471
Summary
LED strip is so popular that it is used almost everywhere due to its advantages:
- It produces enough light to be an excellent additional light source, or even the main one.
- Looks great.
- LEDs are durable and economical in terms of energy consumption.
- You can do it yourself by lighting the shelves with LED strip.
As a result, such simple lighting will change the design of any room.
What forms are there?
Design templates have a huge selection of different variations. The following types of flower stands are often found in shape:
- Ladder. The multi-stage model will create a cascading effect in your floral corner.
- A-shaped floor models. This variation, in addition to the cascading body, has a double-sided position, which favorably emphasizes the visual image of a flower gallery.
- Rack. The simplest form of the options for floor or wall shelves. Here you can find the most unusual types of products: corner, straight, without crossbars.
- Retractable stand. The model is complex in execution, but convenient in practical use.
- The swing is paused. We have already mentioned this option: horizontal strips are laid on suspended supports.
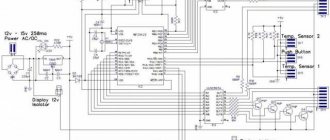
Three main types of profiles
From a design point of view, the LED profile is an aluminum guide containing a screen. Diffusers are available in transparent or matte finishes. The profile design must cope with the following difficult tasks:
- effectively remove heat, thereby positively influencing the shelf life of the LED strip;
- protect the light source and accompanying wiring from mechanical influences;
- distribute the light flux equally (this becomes possible thanks to the diffuser);
- be a housing thanks to which LED elements can be easily mounted and dismantled on a wall, ceiling, furniture, etc.
The most common material from which profiles are made is aluminum. For an aluminum profile, installation is the simplest, since the metal is not only light, but also quite durable, although it has malleable properties when assembling the profile.
Aluminum LED profiles come in a wide variety of shapes and types:
- aluminum box for LED lighting;
- flexible aluminum profile;
- overlay profile used for LED strip.
Metal profiles are made not only from aluminum, there is also a brass profile and copper structures. Also, plastic is used to make profiles; polycarbonate profiles are widely used. The LED profile, which is made from this material, is often either overhead or corner.
The aluminum profile for the LED strip is a flexible, lightweight and elastic design with very high thermal conductivity parameters. The aluminum profile for LED lighting will not darken and will cope with the task perfectly.
Overlay profile
The overlay profile for the LED strip is made in the “U” shape, has the widest applications, and is attached to the bases with screws (more often, self-tapping screws are used). The depth of the profile strip corresponds to the width of the existing LED strip. When installing the overlay profile, the diffusers are inserted into the groove, snapping tightly along the entire strip. Most often, this type of structure is made of metal. The overlay aluminum profile for LED strips is quite expensive, but is very resistant to oxidation, easy to clean and looks extremely aesthetically pleasing.
Corner profile
Profiles for LED strips, including those used for ceiling lighting (the joint between the wall and the ceiling is used to attach such corner strips), have a wide variety of shapes, but corner profiles are most often used.
The corner aluminum profile for the LED strip is designed in such a way that the profile panels are located at an angle of 90 degrees to each other. Along the edges of the slats there is a groove for diffusers. Inside the profile, at an angle of 45 degrees, there is a small shelf designed for gluing the LED strip to the wall. Thus, during operation of the tape, the light does not come out in all directions, but at an angle of 45 degrees, which creates uniform lighting throughout the room. A large number of LED lamps (especially models created for stretch ceilings) and lamps are produced specifically on the bases of corner profiles. They are great for lighting a retail space or display case. Such lamps do not take up space, do not blind potential clients, and do not create clear, contour shadows.
Embedded profile
Built-in (also called mortise) profiles are designed to install LED strips in special niches. It, like the invoice, has a “U” shape - like, it has an edge along its entire length. The LEDs are placed on the shelf of the product itself, while it is hidden and has a diffuser on it. The light comes from the panel at an angle of 90 degrees, the tape is attached to the base of the profile using screws or strong industrial adhesive. To make the profile look aesthetically pleasing, special caps are placed on its edges. Built-in profiles are widely used in kitchen furniture, wardrobes and other places where it is customary to save every millimeter.