- 1 What are camping stoves for? 1.1 Video - Camping stove. Detailed review
- 6.1 Video – Making a camp stove
When relaxing in nature, sooner or later you will need a fire - to heat canned food, cook porridge or boil tea. Of course, you can light an open fire, but sometimes the lack of forest or rain does not allow this. A camp stove, made with your own hands and delivered with the same hands, comes to the rescue! We will talk about how to make such a structure in today’s article.
What are camping stoves for?
A camp stove is an effective “substitute” for a fire. But, unlike the same fire, it requires very little fuel. It can be:
- dry branches;
- tree bark, chips, cones;
- reed;
- coals left over from an old fire.
Note! The ratio of heat generated to fuel loaded in a camp stove is several times higher than in a campfire. In other words, with the same volume of fuel, the amount of heat is not the same.
It turns out that, having the same amount of firewood, you can cook dinner on the stove, but, alas, you won’t be able to do this on a fire. Thanks to domestic craftsmen, today there are many different modifications of camping structures. Conventionally, they are all divided into single- and double-walled. You can them:
- build at a resting place, using available materials;
- make ahead using an old pan, tin cans, sheet metal, etc.
At the same time, the camp stove itself should consume minimal amounts of fuel, be small-sized, light, convenient, and also heat the dishes, not the surrounding air.
Video - Camping stove. Detailed review
Is it possible to make a tent heater yourself?
Portable heaters are not cheap, so many tourists and fishermen prefer to make devices for warmth and lighting themselves. On the Internet you can find many options for making such structures. Most of them do not require any expensive materials or tools, and some are even made from improvised materials.
With a minimum of financial costs and effort, the result will be an economical stove, which will be enough to heat a small tent, light and prepare hot food or drinks.
Using inexpensive and accessible materials, you can make a tent heater with your own hands
Design features and its advantages
As we found out, a camp stove is an extremely useful device, which is difficult to do without when fishing or just relaxing outside the city. If we talk about standard stoves with grates, they require large volumes of firewood due to good draft. In short, the fuel burns out quickly.
But in structures without a bottom, where firewood lies directly on the ground, combustion slows down, the coals smolder for a long time, and after loading a new portion, flare-up occurs instantly. But the draft in this case is poor, and heat is practically not accumulated.
In hiking designs with stands, traction is maximum. If the dish you plan to cook should be cooked over low heat, then the stove should simply be placed on the ground, thereby blocking the grate. In this case, the supply of oxygen deteriorates, combustion slows down, and the time, accordingly, is extended. But regardless of the design, all stoves of this type have significant advantages, including:
- efficiency;
- versatility and independence from weather conditions;
- efficiency;
- compactness;
- long burning without smoke formation;
- ease of use and transportation;
- power adjustment;
- safety;
- performance.
We also add that due to the fact that the wood burns from the inside, the stove body does not heat up much. You can even hold it in your hands for a while, since wood effectively insulates heat. But, of course, you always need to be careful when working with open fire!
Spark extinguishing
Any tent has a hole for a hot smoke pipe (chimney). In addition, the area around the stove is always protected with a fireproof mat in case of hot coals flying out. Some tent manufacturers recommend rolling back the tent base and placing the product directly on the ground.
Not only hot carbon dioxide, but also sparks rise from the stove through the chimney pipe. If the pipe is short, they can get onto the roof of the tent and cause a fire. To prevent this from happening, the chimney pipe is made long so that it is at least 2–2.5 m long. While the spark flies along this path, it will have time to go out. Consequently, the chimney acts as a spark arrestor.
Safety precautions also mean that all objects that can catch fire should be kept away from the operating stove. Another danger is carbon monoxide. It must go strictly into the chimney. And the tent itself should be designed so that clean air regularly enters it.
Video: Rules for heating a tent with a stove
Option #1. Miniature stove made from a tin can
The most primitive single-wall option is a DIY camp stove made from a tin can. In the process of creating it, you will need an ordinary tin can or an iron mug, but always of a minimum size (about the size of a tall glass). In the future, you will have to perform such actions.
Step 1. First, make a couple of holes in the bottom of the mug or jar to create draft (they will serve as sources for supplying air to the body). It is important that these holes coincide with the internal air flow channel. There is another option - to make one large hole in the bottom, but in this case the coals may fall out.
Step 2. Then fill the jar with small (about the thickness of a finger) wooden blocks so that they do not extend beyond the edges of the jar. The stacking of firewood should be strictly vertical (something like an “Indian candle”).
Step 3. After this, remove the block from the body, which is located in the center - this will provide a channel for the passage of air.
Step 4. Place paper or dry grass into the formed channel and set it on fire.
Step 5. This design, the volume of which will be approximately 500 ml, will burn for about 25 minutes, which is more than enough to whip up something. The area will not be filled with smoke!
Step 6. Of course, if many people take part in the hike, then the jar should be larger - at least by one or two liters. But in this case, to obtain stable combustion, thicker firewood must be used, and in larger quantities.
The flame “produced” using this design will burn for about 60 minutes. This is enough to properly boil potatoes and fry shish kebab on smoldering coals. This is just one of the manufacturing options. Now let's move on to the next one.
Making holes in the bottom of a large jar
First, draw a line along the bottom edge of the can. This line is needed to mark the points for the ventilation holes. In this case, a special dye is used for marking, but nothing will happen if you do it with a simple marker.
We drill holes along the line we marked. Their number and size are of great importance for the operation of the stove. If there are too few of them, there will be no traction, if there are too many, then the wood will burn out very quickly. Therefore, it is better not to overdo it here in order to be able to drill more holes after testing.
Option #2. Making a stove from pots
If you plan to make a two-layer oven, you can use stainless steel pans, which are also called tanks with lids (they are quite cheap). This design is perfect for a hike, as it is budget-friendly and easy to implement. The costs for it are practically zero, it will effectively replace a fire, and the fuel for its operation can be found in any forest.
From a constructive point of view, a two-layer oven is two pans of different sizes inserted into each other. An opening of approximately ? height in order to load fuel. But at the bottom there are parallel grate slots with rotating bridges or ordinary holes.
A stand is placed on this grate. Then the stand is loaded with firewood, and a second smaller container is placed on top of all this - it will be heated by the flame. The second pan will be surrounded by fire and the heated walls of a larger container, due to which fuel consumption is minimized and the heat generated is saved.
Note! The bow for the pot must be made in the form of a separate removable element.
The described design of a camping stove is extremely simple, and therefore is compact and portable. You can easily pick it up along with the burning wood and move it to another place (if, for example, it starts to rain and the fire needs to be moved under a canopy).
Can a candle heater be used to boil water and cook food?
The considered options for candle heaters can be used not only for heating, but also for cooking. Boiling water with this device is quite simple, using a small pot, metal mug or kettle. You can also prepare a simple dish, such as scrambled eggs or porridge. Boiling a large volume of water, for example, for washing or washing, of course, will be impossible, but it will be possible to solve minimal comfort issues.
You can easily prepare a simple dish using a DIY candle heater
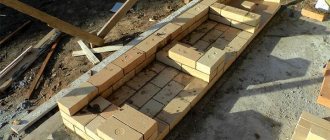
Option #3. DIY folding camp stove
A very effective design, the manufacture of which, however, requires more time and effort, as well as preliminary preparation. First you need to acquire the following consumables and equipment:
- roulette;
- Bulgarian;
- electric drill, as well as a set of drills for it;
- file;
- pliers;
- bicycle spokes;
- piano hinges;
- sheet of metal 1 millimeter thick.
We also note that in order to make a folding stove, you can use:
- iron sheets from the body of an old gas stove or refrigerator;
- side walls from an old computer system unit (these options can replace sheet steel).
Note! When starting to create a folding camp stove, be sure to familiarize yourself with its sketch, and also create templates for the planned structural elements based on it.
During the work, you will need to perform the following algorithm of actions.
Step 1. First, mark all structural elements on sheet metal using prepared templates, then cut out these elements using a grinder.
Step 2. Make holes in the piece that will be used to arrange the bottom.
Step 3: Next, file the edges of the holes to remove any burrs.
Step 4. Connect the side walls of the structure together using piano hinges with rivets. As a result, you should get a kind of box.
Step 5. Along the entire perimeter of the bottom, as well as on the lower edges of the side walls, special “ears” bent in one direction must be provided in advance.
Step 6. An element is placed under the formed box, which will serve as the bottom, while the “ears” of the two elements will align on each side and form a tube. Pins made from knitting needles must be inserted into this tube. This little trick allows you to make the stove more stable in its operating state. In addition, if necessary, the structure can be easily disassembled for transportation or storage.
Step 7. On the grate, make additional protrusions installed in the holes that are cut on the sides.
Step 8. There will also be another hole in the sidewall through which fuel will be loaded.
Step 9. The cutouts made in the top of the box not only increase traction, but they can also be used to place skewers.
Making an auxiliary device
This wooden block is not part of the stove, but serves to make it. With its help, it will be more convenient for you to drill holes and perform other operations. Insert the block into the jar and draw two lines with a marker approximately at the level of the lid.
The distance between the lines should be approximately 7–8 millimeters.
Carefully cut out a rectangular notch. The top edge of the can should fit freely into this recess.
Let's position the wooden block in such a way that it provides reliable support for the can. The upper edge should fit comfortably into the notch we made.
Option number 4. Construction of several tin cans
First you need to prepare three canning jars (two smaller and one larger). After that, take these tools:
- metal scissors;
- asbestos;
- marker.
Follow these steps:
Step 1. Make blanks. Take a large jar, step back about 20 centimeters from the bottom, place a smaller jar there and circle it with a marker. An even circle should form.
Step 2. Cut a hole in this circle, make sure that the jar fits into it, but with difficulty.
Step 3. Make a similar hole in a smaller jar. Place the smaller one in the larger one.
Step 4. Make parallel cuts of approximately 2-3 centimeters on one side of the jar.
Step 5. Take the lid from a large jar and make a hole in it for a small one. Sand the cuts.
Step 6. On the wall of the jar, make vertical slits of approximately 1.5-2 centimeters.
Step 7. Fill the voids between the cans with asbestos, then close the lid and bend the metal.
Step 8. Take a piece of tin and make a shelf for firewood from it, secure it.
Step 9. Now just attach a handle to make it convenient to carry the structure. That’s it, your DIY camp stove is ready! You can paint it.
We carry out tests
The main part of the wood stove consists of two tin cans inserted into one another. We load the middle jar with flammable material, which can be wood chips, branches, or cones. It is best to use dry branches on trees, because branches lying on the ground may be damp to one degree or another.
Set it on fire and wait for it to burn. At first, this may cause some difficulties, but after several training sessions it will be possible with one match.
When a confident, intense burning has begun, we place a burner on top, which we made from a small jar.
And then we place a kettle or pan on top.
If you watched the manufacturing process to the end and did not understand anything or it seemed too complicated to you, then check out another option. The video below demonstrates how to make such a stove without any tools other than a regular knife. It turns out, maybe not so neatly, but no less practical.
And we invite all our readers who have already used similar stoves in the field to share their impressions and advice with us.
How to choose?
There are several factors to consider when purchasing such a stove.
- Weight. The differences in weight are huge, as is clear from the information above. In general, there are two large groups: backpack portable stoves and those that require a car for transportation. If you plan to transport equipment, then weight is not so important; it is better to focus on the characteristics and price.
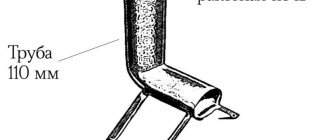
- Pipe diameter. The diameter of this part of the structure can vary significantly. If there is already a chimney built into the tent, then you will have to select a stove according to size. The diameter is usually equivalent to the combustion power - the larger, the higher the indicator.
- Accessories. Some brands provide a long list of accessories for their stoves, but the cost of such models is much higher.
For example
The simplest flaming wood chipper can be built from ORDNING cutlery dryers sold in IKEA, trade article 300.118.32, pos. 1 and 2 in Fig. The advantage of this workpiece is the material, quite thick food grade stainless steel, so the “IKEA” wood chipper will last a long time. However, it is only suitable for a morning mug of tea or soup from a bag, so the blank needs to be supplemented with a burner made of bolts (item 4): the diameter of the ORDNING is 130 mm, which is a bit too much for a traveling mug.
Wood chip stove from cutlery dryer
Already with soup on the IKEA wood chipper, problems arise: one load even of pine or birch chips is not enough, so you have to cut out a window for additional loading, pos. 3. It is inconvenient to put small chips into it, especially in the cold with numb hands. The Ikea wood chipper is not very stable, and a clumsy beginner will almost certainly topple it when adding fuel.
Finally, you can only run the IKEA wood chipper outdoors, but then you need legs. No matter how you make them (positions 5 and 6), in the backpack they cling to something and tear something. In general, an IKEA wood chipper will be useful if you take it in the trunk on a fishing trip or at the dacha for quickly heating small portions of food.
Video: example of making wood chips from an IKEA dryer
Principle of operation
It doesn’t matter whether the stove was made independently according to its original drawing or purchased at a specialized retail outlet, you need to know the basic laws of heat engineering according to which any heating structure works.
The combustion process consists of heating the fuel, when moisture evaporates and some flammable substances are released, direct ignition and burning of the fuel. The efficiency of a heating device implies the level of its heat exchange with the surrounding space, that is, radiated heat and the intensity of convection.
The first factor depends on the degree of heating of the furnace, the area of the heat exchanger and the material used to make the device. The second depends on the shape of the furnace and the direction of hot air flows.
The best stoves for a tent for winter fishing (TOP rating)
Below are the products you should pay attention to when choosing a stove for your tent. The TOP 7 included:
Tramp TRG-036 1.3 kW
This small, portable stove heats small spaces easily. The design is made of good metal materials. Above the infrared emitter there is a convenient grill for heating food. The stove runs on gas, which is enough for about 3-4 hours of operation. A good solution for a small tent.
- Length, mm “290”.
- Width, mm "231".
- Height, mm “247”.
- Weight, kg "2.34".
- Power, kW “1.3”.
Price in Russia from 2500 rubles.
ADVANTAGES:
- high build quality
- light weight
- heats small rooms well
- all declared functions work
- warranty period 1 year
FLAWS:
- not detected
Tramp TRG-036 1.3 kW
Turbo stove-wood chipper “Ogonyok”
High power wood stove. The heat from the stove can boil water and warm the air in the tent in a short time. The high power of the device is achieved due to the built-in electric air blower, powered by batteries. The stove is easy to install, and due to constant inflation, it can heat well using wet wood.
- Supercharger power supply “AA batteries, 2 pcs.”
- Length, mm “120”.
- Width, mm "110"
- Weight, kg "0.6".
Price in Russia from 2000 rubles.
ADVANTAGES:
- three operating modes
- works stably at low temperatures
- Any available material is suitable as fuel
- One set of batteries lasts more than 50 hours
- On the stand you can place dishes not only with a diameter larger than the diameter of the stove itself, but also with a smaller diameter, for example, a tin can
FLAWS:
- not detected
Turbo stove Wood chipper
Small tourist stove with screen
A good wood-burning stove that looks like a small “potbelly stove”. The stove is made of high-quality metal, which allows it to withstand high temperature loads. Its cubic shape allows it to transfer heat well in all directions. Also on its upper part, it is convenient to use for heating water and food.
- Length, mm “230”.
- Width, mm “230”.
- Depth, mm “500”.
- Weight, kg "4.5".
Price in Russia from 1500 rubles.
ADVANTAGES:
- low weight and volume
- the best choice for hiking fishing trips
- safe and easy to use
- suitable for heating a 2-3 person winter tent
- very convenient for cooking, as well as hot and cold smoked dishes
FLAWS:
- not detected
Shore Economy Small with removable screens
Camping stove Savotta Stove with heaters
A fairly large and heavy stove for large tents. It has a lot of weight due to the high-quality steel from which it is made. Suitable for heating rooms that can accommodate up to 10 people. The stove has a high percentage of heat transfer and can be used to heat a bathhouse. Due to the adjustable power of the flame, you can quickly heat up the tent without spending a lot of firewood, and due to the compartment in which you can put stones, you can turn the tent into a camp sauna. A good travel solution that is suitable for a long hike.
- Length, mm “300”.
- Width, mm “280”.
- Depth, mm “450”.
- Weight, kg "18.5".
Has a compartment for dumping ash. Price in Russia from 28,000 rubles.
ADVANTAGES:
- The furnace body is made of steel 3 mm thick.
- long-term operation and high heat dissipation
- the volumetric combustion chamber allows the use of large firewood
- The legs design is removable, convenient for transportation and carrying.
- stable combustion even with minimal air access
FLAWS:
- not detected
Camping stove Savotta Stove with heaters
Mobile oven NMK Tourist
Small mobile wood-heating stove. It is easy to install, and due to high-quality steel walls, the tent quickly heats up. Suitable for both a small tent and a tent for 5-10 people. The stove performs well in extreme cold and, due to its elongated design, allows you to place several pots on it for cooking.
- Width, mm “280”.
- Depth, mm “450”.
- Height, mm “470”.
- Weight, kg "18.5".
Price in Russia from 14,000 rubles.
ADVANTAGES:
- made entirely of stainless steel
- compact, the legs fold easily and the oven takes up very little space
- the surface of the oven can be used as a hob on which you can cook food and heat water
- when using a special heater (purchased separately) and stones, it functions as a sauna stove
- Great for 5-10 person tent
FLAWS:
- not detected
Mobile oven NMK Tourist
Poshekhonka, Large, with screen
Lightweight and reliable portable stove, perfect for heating a small tent. Due to its light weight, the stove is suitable for hiking and does not take up much space in the tent. According to the manufacturer, the stainless steel from which the stove is made will allow it to last longer. It has 2 removable screens, due to which the heating area is adjusted.
- Length, mm “340”.
- Width, mm “230”.
- Depth, mm “330”.
- Height, mm “480”.
- Weight, kg “3.5”.
Price in Russia from 9500 rubles.
ADVANTAGES:
- small dimensions
- weight 6.5 kg, great for hiking and fishing trips
- the stove body is used as a heating surface for cooking food or boiling water
- can be used as a smokehouse
- bag-case included
FLAWS:
- steel thickness 0.5 mm.
Poshekhonka Small with screen
Gas stove TOURIST MINI AFRICA 1.2 kW
A compact gas heater will allow you to quickly warm up in a small tent. Has extremely mixed reviews from customers. Its main advantage is its size and fuel consumption. On one cylinder it is capable of heating a two-person tent for up to 6 hours. Can quickly boil small volumes of water.
- Length, mm “300”.
- Width, mm “130”.
- Height, mm “260”.
- Weight, kg "1.5".
Price in Russia from 3500 rubles.
ADVANTAGES:
- compactness
- neat assembly
- economical fuel consumption
- Stable burner operation even at minimum
- quickly heats up a small room
FLAWS:
- according to reviews, it doesn’t always light up the first time
Gas stove TOURIST MINI AFRICA 1.2 kW