20.01.2022
Traditionally, after the New Year celebration, kindergartens and schools hold a festival of snow figures. During the New Year holidays or at the beginning of the third quarter in schools, children, together with their parents, sculpt various figures from snow and ice in the form of their favorite fairy tale and cartoon characters in the schoolyard or kindergarten. After the festival, a competition is held between classes and groups for the best figure.
The winter festival of snow sculptures is a good tradition that unites children and adults, allowing them to express themselves creatively and take a walk in the fresh air.
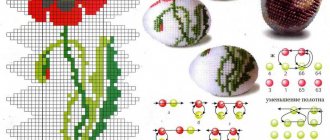
Turtle
Making a stand for dishes
A beautiful and cozy home is the desire of every housewife. This does not always require a maximum financial investment. You just need to try to make beautiful crafts with your own hands. It’s best to make things useful for the home with the whole family.
A very useful and easy craft for the kitchen is a stand for dishes. The main material for its production is jute.
To make a craft, you need to use the following list of materials:
- jute 1 cm thick (10 m);
- glue gun;
- scissors.
All that needs to be done is to lay the rope around the circumference, lubricating it with glue. When the desired size of the stand is reached, the end of the rope is cut and glued to the base.
The home craft is ready!
Fom-floristry
Are you interested in handicrafts? This is an amazing new direction. The works are created from foamiran (foam rubber). The material is partly similar to suede, but when heated it takes on any shape. Thanks to foamiran, stunning flower arrangements, brooches, toys, and so on are created.
It is worth noting that this material is not afraid even of moisture.
The most interesting thing is that the needlework process is quite simple. You just need to cut out the desired shape, iron it and build the desired composition. Get to work and decorate your home!
Name day gift
On your birthday you always want to receive an unusual gift made by yourself. One of the brightest ideas for such surprises is preparing a piece of cake with sweet wishes.
By making beautiful paper crafts with your own hands, you can convey all the warmth and love to a loved one.
For homemade creativity you will need the following list of tools:
- ruler;
- scissors;
- pencil;
- thick paper (cardboard);
- glue;
- decorative elements (ribbons, beads, flowers, etc.).
All that remains is to find out how to make a beautiful craft.
Craft technology
So, the work is carried out in the following sequence.
- Draw an image of the cake according to the template on a sheet of cardboard, then cut it out.
- Bend the cardboard along the marked lines using a ruler.
- Make a cut at the back of the cake to allow it to be closed later.
- Glue the desired parts of the cake using PVA glue.
- Decorate the craft with a variety of decorative particles: beads, ribbons, flowers.
You can insert an envelope with wishes or money into the inside of a piece of cake.
Craft mug: 135 photos and video master class on how to make beautiful crafts with your own hands- Crafts from spoons - 125 photos and videos, tips and tricks with step-by-step instructions on how to make crafts
Crafts from cotton pads - 125 photos of beautiful crafts, features and videos of new cotton crafts
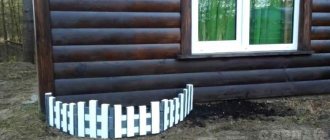
Crafts for the garden
What gardeners don’t do to decorate their plots. Many of them like the beautiful design of flower beds. For this, ordinary plastic bottles are often used, although there should be a lot of them. Moreover, all bottles must be the same size.
To keep the containers strong, sand should be poured into them. You can use ready-made bottles to fence a flower bed and then paint them in the desired color. If the containers are dark in color, they do not need to be painted.
A beautiful fence made from plastic containers is ready!
Why blog?
When a person does something cool—bakes cakes, hitchhikes, or reads a lot—he will most likely be told, “Get yourself a blog.” But as long as there is no internal motivation, it is unlikely that you will be able to become a blogger. Here are a few ideas to encourage you.
Make money on a blog
When you create a blog to make money, you are actually starting an online business. You think over a plan, invest money in the platform, content creation and promotion, and use different monetization tools.
By publishing useful and SEO optimized articles, you attract search visitors and convert them into subscribers. You can make money on a blog in different ways: place ads, write paid reviews, make money through affiliate programs. We will write about these and other ways to monetize a blog below.
Test approaches and techniques useful for work
A blog is a personal platform for testing ideas. For example, it will be useful for a marketer or editor to try different formats for articles and illustrations, use new SEO promotion tools, customize WordPress, and so on.
Build a personal brand
You can be a great specialist, but known only within your company. A blog helps you become known to a large circle of people. By publishing expert articles, reviews, and collections of tools, a specialist demonstrates his knowledge and skills. In the future, the blog will become a public resume for employers or a portfolio for customers.
Unload thoughts and structure knowledge
When you dive deep into a topic, there is too much information. A blog helps to structure knowledge and come to an interesting conclusion or solution. Or just free your head for new ideas.
Blog as a hobby and outlet
Some people develop a blog for work, but for others, on the contrary, it’s an opportunity to switch from work to what they love. You can write about crafts, travel, books, children or gym activities.
Do you know the movie "Julie and Julia"? The main character worked as an operator in a call center during the day, and in the evenings she cooked and wrote on a blog. This is a biographical story - Julie became famous by publishing a book based on the blog. And then they made a movie based on the book.
Poster for the movie "Julie and Julia"
Flower pots
This garden craft in the form of a plant pot has a beautiful appearance. Options may vary.
So, you can cut a small hole from the side of the bottle and pour soil into it. A living flower is placed in the prepared container. After planting, it is better to hang the pot on the wall.
- Cardboard crafts - 135 photos of useful and beautiful crafts for children and adults
- Unusual crafts: we make cool and original things from scrap materials (120 photos and videos)
- Crafts from stones - 145 photos of examples of stone crafts from minerals and pebbles
The plant in its original form can be left outside or moved into the house. Several pots combined give a very unusual and beautiful effect.
Where can you blog for free?
There is no need to pay for hosting and domain for a blog. There are many platforms where you can start blogging for free by investing only your time.
Free blogging platforms:
- Medium is an international platform for creativity and self-realization. Popular among writers, journalists, bloggers.
- Tumblr is a microblogging service. Many authors publish anonymously. The peculiarity of the site is its tolerant attitude towards sexual content. The posting of erotic and pornographic materials is officially permitted here.
- Yandex.Zen is the Yandex publishing platform. Allows authors to publish content in different formats: articles, posts, narratives, videos.
- Telegram is a messenger in which you can create your own channel and publish notes. There is no content ranking algorithm here, as in other social networks: a notification about a new publication appears in the chat list.
- WordPress is a blog service where you can create a blog on WordPress hosting. You can create a blog for free, but monetization through advertising is prohibited in this case. WordPress can display its ads on your blog.
- Postach is a blogging platform from the creators of Evernote. You can choose several topics for your blog, add links to social media accounts, and built-in comments from the Disqus commenting system.
- Social networks - Facebook, Instagram, VKontakte.
The disadvantages of blogs on free hosting are that you depend on the platform - the blog can be blocked or deleted, you cannot radically change the design or install your own advertising banners.
DIY funny piggy
This craft can decorate any garden plot with its appearance. To make it you will need plastic bottles of different sizes.
First you need to make the body of the pig. To do this, take a large water bottle and cut off its side. There will be flowers in this place.
Then the pig's ears should be cut out from the cut piece of plastic.
Four 1.5 liter bottles must be used as legs. Their tops are first cut off. The legs are attached to the body of the pig with a wire.
The next step is to paint the piglet pink.
When the paint is dry, you can fill the inside of the animal with soil, and also make small holes on its tummy.
You can grow seedlings or flowers in this craft. All that remains is to place the beautiful pig among the rest of the flower beds in the country house.
Plasticine airplane for children 5-6 years old in step-by-step instructions
Plasticine is very convenient for crafts. Let's invite the kids to make fast planes out of plasticine for February 23rd. Such gifts are suitable for both very young children 2-3 years old and older ones. Step-by-step instructions will help you quickly make the components for the flying objects, and once you connect them, try with all your might to hold them together. In practice, such airplanes quickly pick up speed and fly high in children's hands.
How to make a military plane from plasticine
Give your children a special delight from modeling from such an interesting and practical material. For a military aircraft, simple plasticine will do. But it is quite hard, so you will have to first knead it in your hands for further comfortable work.
There is also soft or airy plasticine that can be used in crafts for younger children. But domestically produced plasticine makes the figures stronger and more durable. Therefore, we will make a military aircraft from it.
In order to obtain military coloring and smooth transitions at the borders of colors, you need to roll up thin flagella of blue, green and yellow. Then wrap it around the finished part, knead and roll until the desired effect is obtained.
We sculpt the fuselage, wings, propellers and cockpit separately. Afterwards we simply connect the parts together.
By analogy, you can make a fighter like this:
Or a military plane with shells
But children in kindergarten make such crafts.
You can make a plasticine applique as a gift.
Or make the fuselage from a pine cone or an Activia bottle.
If the kids really like helicopters, then offer to make such an aircraft from light plasticine as a gift for dad
And the latest model of an excellent aircraft.
How to make a tank from plasticine
Sculpting a tank from plasticine is very interesting and entertaining. And how much pride increases when the powerful Soviet T-34 tank appears in your hands. What about the guys when they can make such serious equipment themselves? Now we'll look at a few things that will make the tracks and wheels look like the real thing.
First of all, knead the plasticine well so that it becomes softer and more flexible. If you want to achieve a protective color, then we use the same technique as with the plane above. Knead light brown and dark green colors and lightly mix with the main color until we achieve a smooth transition.
First of all, we form the body of the tank. We will proceed from its size with other details so that the proportions are respected. We also immediately make the tank’s turret, slightly narrowing at the front.
Next, we roll 4 small balls, which will later take the place of the running wheels, and ten large ones.
The next step is to flatten all the balls to make wheels 0.5 millimeters thick. In order to make supporting knitting needles and screws from the side, you can either use the edge of a plasticine knife to make cuts from the center or push it with the tip, applying the knife sideways. In the photo you will see different options.
Let's make a caterpillar belt. To do this, we roll out a long strip of black plasticine and make notches at equal distances to simulate the fastening of the track parts. Now we distribute the wheels: two small ones at the edges and five large ones in the middle. Our tank must be powerful and passable! We go around them with a caterpillar belt and repeat all the same steps for the second chassis.
Next we connect it to the body. You can simply press it, but if there are doubts that the structure will withstand further pressure from hands, then insert toothpicks or matches into the body on the sides and fasten the wheels to the protruding tip.
We will make protective tank wings from thin strips to prevent dirt from getting into the tracks. And of course the gun. A simple wooden skewer is suitable for this. Cut it to the required length and coat the entire surface with plasticine. Then we install it in its place and our tank is ready for battle.
Here is another master class in pictures on how to make a tank from plasticine. We make the wheels in the same way as in the first option. Also the caterpillar belt.
We use a cast assembly with an elevation. This will be our KV series tank. His tower is high. We make protective equipment from a contrasting color.
Original pot made of shells
You can also make beautiful crafts from shells at home. One of them will be a flower pot. Let's figure out how to make this unique thing suitable for everyday use.
- Broken shells should be wrapped in a cloth and crushed into small pieces using a hammer. The craft should be done by an adult, not a child.
- The pre-selected stand must be coated with glue, then sprinkled with ready-made shell crumbs.
- Whole shells should be fixed to the outside of the pot with glue.
- After time has passed, when both parts of the craft are dry, you should connect them to each other.
A beautiful flower pot is ready! To strengthen the layer of shells, it is allowed to apply varnish or golden paint to them.
Candle
We cut off the neck of the bottle; we will need its bottom. Carefully insert the wick and cover it with wax. Place the bottle in a water bath and heat it until all the wax has melted. Add dye and mix. You need to wait a little until the wax cools down and carefully remove the candle by cutting off the bottle. The candle is ready.
Craft for Christmas
A homemade star would be a great Christmas gift. Orthodox people are familiar with the fact that it was the star that guided the Magi along the right path to find the Savior. Therefore, if children are going to carol, they will definitely need these stars.
To work, you need to have on hand a small stick, felt fabric, sequins, threads and needles, scissors, glue and a brush, cotton wool.
The process of making a star for Christmas
First of all, you should cut two stars of the same size from fabric material. Using glue and decorative elements, you can decorate the outside of the star. We also decorate the stick with glitter using glue.
Give the craft time to dry.
At the tip of the skewer you need to attach a piece of cotton wool the size of a star to the glue. To make the star look three-dimensional, you need to make two blanks and fasten them together. Ready!
In the photo of beautiful crafts you can choose the option you like. Make your loved ones happy - give them an original, attractive present.
Photos of beautiful crafts
Tell your friends