Types of puppet theaters and materials
Any parent can create their own home theater. You can also involve a child in this matter. Surely in this case the process will be more fun, and the baby will be busy.
For work, something that many people will definitely have at home is suitable. Even some waste materials will come in handy, so don’t rush to scrap them.
It could be:
- Disposable plastic tableware,
- Felt,
- Boxes of different shapes and sizes,
- Colored paper/cardboard,
- Rolls of paper towels, foil or toilet paper
What types of dolls are there?
- Stationary
- On hand
- Finger
Shoe box decor
Shoe boxes can be decorated in several ways - painted with acrylic paints, covered with cotton fabric or paper using PVA glue, self-adhesive film, paper wallpaper, old magazines or geographical maps. After processing, the boxes become very durable.
You can use small paper fans, buttons, beads or rivets as decoration. You can create different styles of boxes during the pasting process. And such items will not need to be hidden from prying eyes; on the contrary, they will serve as additional decor for the interior of your home.
An excellent material for creating such boxes and decorating them will be the pieces and sections of wallpaper left over from the renovation; in addition, you will need double-sided tape or PVA glue.
Fabric is also suitable - for example, a piece from a damaged dress, old jeans, a skirt that has become too small. Using natural material you can turn any item into an exclusive piece.
You can also decorate the box using a regular rope or braid; just apply glue and stick it on. It can be either straight stripes or various zigzags and convolutions.
Ways to decorate a shoe box
If the idea is to make a shoebox a simple and useful item in the house, then the idea is to wrap and cover the entire box with fabric or colored paper and give it a new look.
A shoebox can become a unique decorative object, such as a briefcase, and no one will suspect what it is made of.
Briefcase - do it yourself
Using metal appliques, you can turn a shoebox into a jewelry case or even a briefcase!
It is enough to use old straps, thick braid, buttons, buckles or snaps for decoration and turn the box into a suitcase.
Original gift
Shoe boxes are ideal for gift packaging. It is enough to show a little imagination and this item itself will turn into an excellent gift.
Just cover the box with fabric, add bows or artificial flowers, and the beautiful organizer is ready for use.
Organizer for small items and handicrafts
If you're into crafts, shoe boxes are a great way to store all your essentials.
And by making a hole in it, you can store chargers, which will always be in one place.
Placing shoe boxes in the interior
Decorated shoe boxes do not need to be hidden; they will fit perfectly into the interior and serve as an additional decoration.
You can store decorated shoe boxes on shelves, shelves or racks.
You can also make small shelves from shoe boxes for various pleasant little things.
Paper
Paper is one of the simplest and most accessible materials for creating crafts on the theme of puppet theater.
Old computer disks are good helpers
In a very original way, you can use old CDs to model stands. To work, take one old disk, a balloon stick, a piece of soft wire, a ball of twine, Moment glue and PVA.
First, a wire ring is made on the shelf. Then this stand is inserted into the hole of the disk. Then glue is applied to the disk in a circle and wrapped with twine all the way to the ring. They get something similar to a lamp stand. Such an original little thing will delight little housewives.
First way
You will need:
- Paper or cardboard,
- Cereal box/desired size,
- Plastic straws,
- Wooden sticks,
- Glue,
- Scissors,
- Paints,
- Pencils.
Progress:
- On thick paper, depict the characters of the chosen fairy tale or story.
- After they are cut out, glue tubes or sticks on the inside.
- The box will act as a stage, so you will need to cut out the "screen" or one of the larger sides.
- A slot is also made in the lower part. Prepared figures of heroes on sticks should be inserted there.
Such a theater is either installed on a stand or hung around the neck thanks to a ribbon attached to the box.
Zayushkin's hut
To create a finger game of the fairy tale “Zayushkina’s Hut” you need to make a house, a hare, a fox, a bear, a wolf, a rooster and a dog. The most suitable house would be a three-dimensional toy with windows and balconies where you can place dolls while playing a fairy tale.
To make a hare, fox, bear, wolf, you can find a description with patterns in the fairy tale “Teremok”. Take the dog template from the fairy tale “Turnip”.
Rooster
To make a rooster you will need:
- multi-colored pieces of felt fabric;
- eyes or beads;
- make a paper pattern in parts and use it to cut out the constituent parts of the rooster from felt.
Rooster assembly:
- Head (glue on the eyes, sew 2 parts of the head along the side parts, not forgetting about the comb, beak and earring).
- Fill with padding polyester.
- Sew or glue the wings to the body on both sides.
- Sew 2 parts of the body, inserting the tail feathers. Do not sew up the hole at the bottom.
- Connect the head and torso.
To make a three-dimensional house, find the description at the beginning of the article. The tale is ready.
The game will comprehensively develop in children:
- creative and acting abilities;
- emotional experiences;
- positive motivation for communication and learning;
- lexicon;
- intonation, imagination;
- kindness and responsiveness.
It is not so important which of the presented fairy tales will be chosen to create a felt finger theater with your own hands. And the proposed patterns and templates will significantly reduce the time of sewing the game, which, if desired, can be turned into a universal encyclopedia of Russian folk tales.
Author: Polovnikova Lyubov
Article design: Natalie Podolskaya
Second way
As a base for the characters' bodies, either homemade paper tubes or ready-made paper towels or toilet paper are used.
Depending on whether the doll will fit on your hand or on your finger, the size itself is selected. The scene is also made out of the box, as in the previous version.
This craft can be made for kindergarten or for some event.
Three piglets
This DIY felt finger theater (patterns will help you make original characters) is represented by two animals: a pig and a wolf.
To increase interest in the game, it is better to use three different piglet patterns and sew a voluminous hut house and a flat scene in the form of a forest with a path and trees.
Piglet 1
To sew your first pig you will need:
- 2 shades of pink felt;
- ready-made eyes, ribbon or lace for the tail;
- Using the template, make a paper pattern of all components;
- transfer it to the fabric, outline and cut out all the parts.
Connecting the parts of 1 pig:
- Sew a snout and ears onto the front part, embroider nostrils, and glue on eyes.
- Sew hooves onto the upper and lower limbs.
- Fold the 2 parts of the body and sew them together, inserting the hooves. Don't forget to leave a hole at the bottom between your legs for your finger.
- Sew the head from two parts and stuff it with synthetic padding, then attach it to the body.
- Form a tail from ribbon or lace and sew on the back.
Piglet 2
To sew the second pig you need:
- the other 2 shades of pink felt;
- eyes and pink lace;
- Similarly, we prepare the pattern and felt parts.
Assembling the parts of the second pig:
- Sew a patch to the head, form nostrils, embroider a smile and make eyes.
- Sew 2 parts of the head and stuff with filler.
- Sew all the hooves onto one part of the body.
- Sew the body parts together, leaving an opening at the bottom.
Piglet 3
To make the third little pig, instructions from the fairy tale “Masha and the Bear” are suitable.
Wolf
The wolf is sewn according to algorithm.
House and stage
These parts of the decoration can be sewn using the examples and descriptions at the beginning of the article.
Felt finger puppets
Here we will talk about felt crafts for elementary school on the theme of theater. This dense material will allow you to create many detailed and at the same time simple dolls. They are usually the right size for a finger theater.
To make them you will need:
- Felt in several colors
- Threads, needle,
- Scissors,
- Glue,
- Paper and cardboard.
Preparation of materials
Before starting work, you need to assemble a “utility box”, it will include all the necessary tools and materials that you cannot do without, namely:
- multi-colored soft felt 1 - 2 mm thick (country of production does not matter);
- a simple pencil and pen (professionals prefer self-disappearing fabric markers, in this case colored and white);
- 2-3 crayons with thin edges (since the details will be small);
- 2 types of sharp scissors (with blunt and sharp ends for ease of cutting patterns);
- pins or needles (the thinner the better);
- glue (as an option, “Moment Crystal”; ordinary second glue is not suitable, since it impregnates the felt and leaves marks), or a glue gun (if available);
- hole punch (for cutting out small circles);
- ready-made eyes for fairy tale characters (they are sold in handicraft stores) or beads;
- multi-colored cotton threads for hand and machine sewing;
- multi-colored satin ribbons 5 mm thick;
- thick cardboard measuring 20 cm by 30 cm (more is possible), you will need 2 sheets;
- padding polyester for stuffing the house (sold in Fabric stores).
Felt and working with it implies knowledge of the characteristics of this type of fabric , which will greatly simplify the process of sewing finger theater with your own hands and creating a pattern, namely:
- there are many types of felt (to create small parts it is more convenient to work with soft synthetic felt 1 mm thick);
- You can buy felt fabric in handicraft stores or on the Internet (both in sheets and by the meter). For fairy tale characters you will need many different colors, so it is better to purchase plain felt in sheets;
- felt does not fray or crumble when trimmed, which allows you to avoid processing the edges of the products;
- it is wear-resistant (however, with intensive use, pills form on some types of fabric);
- felt toys are very light due to the porous structure of the material;
- the fabric is very plastic and does not break when bent (hard felt can form creases when bent, so it is used for working with large parts).
Option with puppets
- To do this, you need to prepare a sketch in advance. There should be several elements: a large main part, hair, clothes, handles, and for animals - a muzzle.
- The next stage is transferring the pattern onto felt. Colors can be chosen to suit your taste or the child's wishes. So in photos of various theater-themed crafts you can often see pink bunnies or multi-colored cats.
- Next, once all the parts are cut out, it is better to carry out a test assembly. Thanks to this, it will be possible to correct possible errors or remove inaccuracies in a timely manner.
- The final assembly of the character should begin with the main part, adding other elements to it. You can fasten them either by sewing or using a glue gun.
Smeshariki
A DIY felt finger theater (patterns with step-by-step descriptions are included) for “Smeshariki” will attract the attention of fans of the animated series. The game set consists of heroes and a scene.
You will need 9 characters (teenage children (Krosh, Hedgehog, Nyusha, Barashik), adults (Losyash, Pin), and elderly (Kar Karych, Sovunya, Kopatych)). All patterns are quickly made, since they are based on a circle (recommended diameter is 5 cm).
Patterns with templates:
Making Smeshariki:
- create a paper pattern using the template;
- attach it to felt fabric, trace and cut out all the details of the toy;
- connect the parts and sew one by one, starting from the front part;
- Don't forget to leave holes for your fingers.
The stage for playing an animated series can be the technology described at the beginning of the article - a spread in the form of a book with scenery (forest type).
Decoration and background
- Prepare in advance a diagram according to which the scene will be created in the future.
- The cut out elements are sewn onto the front side of a thick sheet of A4 felt.
- The next step is to sew together 2 sheets: a blank with decor and a felt backdrop.
- Cardboard is inserted between two fabric sheets for compaction. It should protrude a few centimeters. This strip is folded to form a stand.
Masha and the Bear
This DIY felt finger theater (patterns are included) includes several funny characters (the girl Masha, a bear, a pig, a rabbit, a bear and 2 wolves).
Since the cartoon takes place in a bear's hut and in a vegetable garden, it would be interesting to create a scene in the form of a double-page book (as described at the beginning of the article), making a hut on one page, and on the second - scenery in the form of a vegetable garden with trees and vegetables, as well as Wolves Ambulance.
Examples of decorations (they can be movable or Velcro):
- Ambulance of two wolves from the cartoon (pattern);
- Trees, vegetables in beds, fence.
It will be very interesting for children to play if, instead of a stage, you sew a voluminous vegetable garden and a house (which move and create more opportunities for imagination), as in this photo.
Step-by-step description of sewing heroes
You can start with sewing the characters of a fairy tale, as well as with the scenery or stage.
Masha
To sew the heroine of a fairy tale - Masha, you will need:
- felt in pink, flesh, light yellow colors;
- eyes and beads, pink ribbons;
- prepare a pattern from a template on paper;
- transfer to felt, trace and cut out all the details.
Assembly of Masha:
- Sew a hairstyle onto the front part, glue on eyes, embroider a smile.
- Sew the 2nd piece of hair to the second part of the head and sew the head, stuffing it with padding polyester.
- They put 2 dresses on the body so that the body remained inside. Secure with pins and sew, leaving a hole in the hem of the dress for your finger.
- Sew the head and dress.
- Tie ribbons to the waistband of the dress and to the hairstyle.
Bear
How to sew a bear is described in detail in the fairy tale “Teremok”.
Ursa
The bear's girlfriend is sewn similarly to the bear, only with the addition of a 2-piece dress (yellow with decoration at the discretion of the master), which is sewn on top of the finished base.
The pattern is attached.
Pig
To sew a funny cartoon pig you will need:
- Pink felt in 2 shades (the patch should be darker);
- Transfer the paper pattern to the fabric, cut out 2 parts of a pig and 1 part of a snout.
Pig parts connection:
- Sew on the patch, embroider the nostrils and glue on the eyes.
- Fold the two parts of the body and sew, leaving a hole between the legs.
Rabbit and wolves
How to sew a hare and a wolf is told in the fairy tale “Teremok”. The second wolf can be made a little darker or lighter in color.
Bear House
To make a bear’s dwelling, you can take as a basis the hut described in the fairy tale “Ryaba Hen”, or the recommendations for sewing a stage or house at the beginning of the article.
Shadow play
One of the famous and interesting types of puppet theater. The main focus is on the silhouettes of the dolls, so the main challenge is to make the characters recognizable through their outlines.
A short master class on creating crafts related to shadow theater will help you organize an exciting performance at home.
For what purposes can the layout be used?
Master class for teachers “studying the techniques of Gzhel painting. plate painting in Gzhel style
A DIY stage mockup out of the box can be used in many different ways. Most often, this product is used at home for a puppet theater. It is very interesting for children to watch their favorite characters on a real theatrical stage.
A DIY theater stage model out of a box is a wonderful craft for a kindergarten or school. If everything is done beautifully and correctly, the product can also be useful for the educational process.
This type of craft is also suitable for independent play. Girls will especially enjoy the stage, as here you can perform entire performances by playing with dolls. It will also be very interesting for little ones to change the scenery of the theater stage.
A stage can be an interesting design element for a children's room. You can add functionality to the stage if you place figurines or figures in it, like on a shelf.
Source
Stage 1. Scene
Materials:
- Medium size box
- Ruler,
- Scissors,
- Pencil,
- Paper,
- Glue or stapler
- You need to get a large rectangle from the box. One of the main sides should be without folds. The outline of the screen is drawn on it, with an indentation of five centimeters from the edges. The resulting rectangle is cut out.
- The size of the paper sheet should be larger than the resulting hole. The screen is glued on the back side. Additionally, it is secured with a stapler for strength.
What parts does the stand consist of?
Many dolls cannot stand upright without support because they have a small support area or an inadequate center of gravity. Special removable stands give stability to such products. Both store-bought and home-made models consist of a disk-shaped or square base and a vertical stand fixed on it. The upper part of this rack can be in the form of a ring or a small rectangle. Their diameter should be slightly larger than the width of the product’s hips. The height of the stand should be close to half the height of the pupa.
Those who want to learn how to make a stand for dolls should remember the aesthetic design of the support. The composition should look coherent so that the appearance of the doll does not deteriorate. Tasteful details will enhance the expressiveness of the outfit and its decor. You need to carefully consider the diameter of the stand so that it does not fall when tilted. For large toys, the base should be massive.
Stage 2. Heroes
Necessary:
- Pencil,
- Cardboard,
- Scissors,
- Glue or stapler,
- Straws,
- Tubes or wooden sticks
1. The silhouettes of the characters are transferred to cardboard and then cut out along the contour. They must be recognizable, with characteristic features or shapes. The scenery is created in the same way.
2. The cut out elements are attached to sticks with glue or a stapler.
Wooden support
Wooden accessories for dolls have their advantages. Wood emits a special aura and warmth that can complement the toy. The wooden support has an expensive and presentable appearance. They can be decorated using decoupage. This stand can be made to individual measurements. If the preparation is done manually, the result will be an environmentally friendly product.
To make a wooden stand, take a flat block of the required size. The top and sides of the workpiece are carefully processed to level and polish the wood. They step back a little from the edge of the block and drill a hole through. A wooden stand will be inserted into it. After this, the workpiece is painted and varnished several times.
The stand is made from a wooden plank. A narrow ring made of wire or elastic plastic is screwed to it. To place this ring in the rack, a small groove is cut into it. Secure the ring with small nails. All that remains is to assemble all the details into one whole. To do this, lubricate the lower end of the stand with glue and insert it into the hole in the base.
Non-standard theater
In addition to standard and popular children's crafts, you can arrange your own performance using non-standard materials.
An original solution would be disposable utensils made of plastic or wood, in particular spoons. Selected characters are pasted or drawn on them, and decorated as desired. By the way, it is better to use acrylic paints for painting.
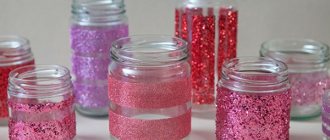
Yogurt jars, as well as plastic bottles of interesting and unusual shapes. They, like dishes, can be painted or covered with colored paper. In addition, you can make mini-scenes with decorations from bottles and arrange small stories there.
Manufacturing technologies
In terms of its performance characteristics, sheet cardboard does not meet the strength requirements that exist for furniture manufacturing materials.
Corrugated cardboard
To improve these parameters, cardboard must be prepared; this is a rather long-term and labor-intensive process. Currently, several technologies are used that make it possible to obtain relatively durable products.
| Name | Brief description of features |
Layer-by-layer gluing | This technology was first used by architect Frank Gehry in the 70s of the last century. Some items from his collection are still produced today, with consumers paying up to $400 for each item. A large number of patterns of the object are cut out of cardboard, all of them are glued together. In this case, to increase strength, the layers are mixed perpendicularly in different directions. For the ends, you can use harder materials (plywood, thin boards, etc.), gluing is done with PVA or hot glue. The presence of both wavy and smooth surfaces on objects makes them look like furniture from distant Africa. Such products can be an elegant accent for luxurious interiors. |
Prefabricated furniture | The furniture is assembled from a numerous set of parts, each of which is a stiffener and can withstand significant loads. The connection is made according to the type of grooves, and the strongest five-layer cardboard is selected. If there is no industrial one, then you need to make it yourself from several single-layer sheets, glued in different directions. The overall design has relatively good strength indicators, but each individual element can quickly become damaged - this is an important drawback of furniture made using this technology. |
Frame, covered with paper | Furniture takes on a familiar look; external surfaces can be covered not only with paper, but also with special self-adhesive films imitating natural wood or stone. Due to this, the appearance of the product is significantly improved, but an additional danger appears - the risk of mechanical damage. If the consumer sees that the furniture is made of cardboard, then on a subconscious level he treats it with care. But when surfaces successfully imitate stone or wood, then quite often critical loads are applied to them. As a result, the item is completely damaged. |
| Origami | Sheets of cardboard are folded using the origami method. In this way, several individual objects are obtained, which are then assembled into one structure, reminiscent of a piece of furniture. It is impossible to bend corrugated cardboard along a line; to do this, you need to cut one side of it with a sharp knife. |
| Straight and curved elements | In terms of complexity, it falls into the medium category; the peculiarity is that one object has rectilinear surfaces connected to each other by sheets at angles or with a slight bend. This technology allows you to create more original forms, which expands the scope of their use. |
| Modular | Furniture is made from a large number of individual load-bearing segments, interconnected according to a special scheme. The design is complex from a technical point of view; special computer programs are used for design. Hexagonal modules in furniture became very popular in the 60s of the last century, they were symbols of the hippie movement. |
We will look at making cardboard furniture using two methods.
DIY scene
To fully understand how to make a full-fledged theater-themed craft, all that remains is to create a stage. It is an important part of the production because it is where the action takes place.
- The simplest and fastest option is a plain fabric used to cover the doorway. A horizontal cut is made in the center for the dolls.
- The next simple way to build a home stage is to place two chairs with their backs facing each other and cover them with fabric.
Previously, the option of using cardboard boxes was considered. It is time consuming and requires more effort, but the results are definitely worth it.
- A frame is formed from several boxes by laying them out like bricks.
- There should be a window in the center, which will be curtained with fabric.
- For the background, all the folding parts and 2 walls of one of the boxes are cut off. A rectangle is cut out at its bottom.
- The walls are fixed in a certain way, in an angular position. This is done specifically for stability.
- Small cylinders are fixed at the folds. They will not allow the structure to develop during the presentation process.
- When the base is ready, it's time to add decorations.
Screen
For more serious presentations, you can buy a ready-made screen or make it yourself.
Video for dads who can make their own from wood, plywood or laminate:
The simplest screen for a puppet theater can be made from a large cardboard box from household appliances:
Video:
But Parsley is both a toy and a screen - “2-in-1”. The doll is hidden in a conical base made of a plastic cup using a stick on which it is placed. And it also pops out, which kids really like.
Homemade Parsley, a fair one, who can wave his fists and hide in his glass. Since it was sewn a relatively long time ago, there are no photographs of the production process. But there are no big difficulties either; it can be explained in words.
Two sticks are taken as the basis, the long one is the axis, and the short one is the shoulders. They are tied with a cross, it is advisable to file them slightly at the joint so that they hold tighter. Then a piece of cotton wool or rags is wrapped in a square of white cloth, put on a stick, and tied to create a head. Two opposite ends go to the arms, two are tied under the shoulders. A shirt is cut out of colored fabric, sewn together, and put on the doll. You need to put something in your fists for weight (small pebbles or nuts). Sew hair onto the head and paint the face.
For a barrel, you can take a plastic glass, make a hole in the bottom into which to insert a stick with Parsley. Cover the glass with fabric, tie it at the bottom, and sew a shirt on top. Decorate with braid. Now Parsley can turn around, waving his arms, hide and jump out for the amusement of the children.
But according to the Waldorf method, fairy tales are told without any screens, using ordinary toys and dolls on a toy stage:
Well, the simplest puppet theater is a shadow theater. Surely many people have been able to show a dog or an ostrich since childhood, but here are other options:
As they say, it couldn’t be more convenient
And if you try a little and make figures out of paper and a screen out of a box, you will get the same wonderful shadow theater:
Another video - paper puppet theater:
As we have new master classes on this topic, we will add their announcements here.
Send your photos if you also have your own puppet theater at home!
In order not to forget the page address and share with friends, add to your social networks:
Photos of crafts on the theme of theater
The simplest support option
There are several options for the simplest frame models. The first is a wire stand. The base is made in the form of a ring and a stand with a hook is attached to it.
The next option is just a base with a stick. The doll is attached to it using a pocket on the back.
For dolls in dresses, a simple option with a holder is suitable. Under clothing, such a product is not visible at all. The frame of the stand is made of wire. Plastic tubes or cambrics are put on the ends. The base can be a wooden cube. Everything is simple - brilliant!
Stands for Monster High dolls
Monster High dolls have gained great popularity. While children simply have fun with them, adults use them as collection exhibits. To make the cute dolls look nice on the furniture, you should build a simple support for them. How to make a stand for Monster High dolls? All of the above methods of making products are definitely suitable for these cuties.
Before execution, it is important not only to look at samples and master classes, but also to use your imagination. Using available tools, you can make a stand in the form of a seat. In this case, the doll simply sits on it like a bike saddle.
For “Monster” dolls, it wouldn’t hurt to make an option from a plastic bottle cap. Perform this product according to the following instructions:
- Using a hot knife, cut out the bottom of the lid.
- Another small piece is cut out on the wall of the resulting ring.
- An old computer disk is used for the base.
- The ring from the lid is glued to this disk.
- The doll is inserted with its feet into the ring.
For cute monsters, special multi-colored plastic stands with specific symbols are sold. But, with care and patience, you can create the perfect complete composition for the doll yourself. You may need some lace, fabrics, paints, ribbons, decoupage napkins, felt scraps and other decorative elements. Try it, dare, make your little ones happy!