These small architectural forms have a unique, recognizable design, introducing oriental notes into the layout of the site.
You will learn about what Japanese garden lanterns are, their design features, pros and cons, from this article.
Appearance of a garden lamp from Japan
The traditional Japanese garden lamp is called a Toro, which translates to a basket or tower containing light.
They have Chinese roots. They were originally used to illuminate paths leading to a Buddhist temple . Later, the Japanese began to place them in the garden, in a corner for the tea ceremony.
All Japanese garden lanterns can be divided into two groups: hanging (tsuri-doro), pedestal (dai-doro or tagi-gata).
Pendant lamps are small in size, square, round or multi-angled in shape. Their walls have patterned slits through which light passes.
Pedestal or “platform lanterns” are more varied in shape and purpose. They come in several types .
- Tachi-gata or lantern is a keeper. A stone lamp on a high stand - a column, 1 to 2.5 m high. It has a simple square shape, often without additional decorative elements.
- Yamodoro. A squat, wide lamp made of rough, untreated flat stones, as if not by man, but by nature itself. It has no decorative elements.
- Oki-gata. A small lantern, up to 40 cm high. It does not have a pedestal. Its shape should resemble the hieroglyph “happiness”. Is a talisman of the garden.
- Oribe. A lantern is a pillar with a figure of a man at the base of the support.
- Ikekomi-Gata. A square lantern that stands directly on the ground or on a small stand.
- Yukimi or snow observation lantern. The body rests on 1 (curved shape, similar to a bent branch), 3 or 4 legs. The lid is wide - round, square or hexagonal. It reliably protects the candle flame inside the lamp from precipitation. The windows in the body of these lanterns are covered with frosted glass, which gives an interesting optical effect of light refraction.
- Pagoda. Multi-tiered lantern with an odd number of levels. Each next tier is smaller than the bottom one.
In ancient times (in traditional Japanese gardens to this day), a candle was placed inside the lantern as a light source.
Work progress
The most important stage in creating a lantern is casting (sculpting) the parts.
"Legs"
I mentally divide my lantern into three parts: the “legs” of the lantern, the middle part – the “house” and the roof. I'll start with the feet. Realizing that I simply couldn’t cast the “legs” and couldn’t find matching shapes, I decided that I would sculpt them. Since the legs will carry all the load, they must be very strong and stable. I decided that I would reinforce them with iron rods, which I (yay!) found on the farm. I prepare a solution very thick, like plasticine, mix it with my hands, add to the concrete 1:2 just a little water and a little liquid soap (I use it for washing dishes), and a little PVA construction glue.
I prepare the shape for the “legs” from a large flower pot. I lay it out with film from the bag and roughly divide it into 4 parts. I start sculpting the legs from the lower central part of the pot to ¼ of the bottom and then up, gradually narrowing the leg at the edge of the pot. I put a layer of about 5 cm at once. I also sculpt three more legs. Next, I lay out the iron rods, having previously bent them in a semicircle, from the leg to the center, and lightly press them into the concrete.
Leg sculpting
Next, I lay out the top layer of concrete over all the legs, and, covering the reinforcement, form the bottom and “feet” of the legs. I knead everything properly, giving the legs the desired shape. When everything is laid out, I compact it all with a saucepan of a suitable shape, having previously greased it with oil. All! Now this beauty needs to stand for 48 hours.
Purposes of using flashlights
Japanese garden lamps do not produce bright light. They play the role of unobtrusive illumination of paths, water surfaces, and beautiful plants. Due to its characteristic shape and considerable size, the lamp becomes a full-fledged element of the landscape composition.
Where is it appropriate to place a Japanese lantern:
- at forks and turns of garden paths;
- at the roots of large trees;
- in the rock garden;
- near buildings and gazebos (pendant lamps);
- on the shore of a reservoir, on a bridge;
- near the benches in the recreation area.
This small architectural form is most harmonious when surrounded by plants traditionally used in the Japanese garden: maple and cherry, bamboo and cereals, conifers, spirea, azalea and peonies.
The final
I am preparing a place to install the lantern. It should be near the water, on a high bank, so that the reflection of the lantern can be seen. The area under the lantern must be very level and reliable, since the entire lantern has a decent weight.
First I install the legs, they are very heavy, I lay out a little thin cement mortar on top and install the house, having first passed the wire from the light bulb into the hole. I screw in the light bulb.
And lastly, I cover everything with a roof. The roof should be removable so that it is convenient to change the light bulb if necessary. OK it's all over Now. Yes, you still need to connect the plug to the wire... A little more effort... Well, you can turn on the flashlight!
And... Oh miracle! You've done it!
Lantern reflected in the pond
Even though my lantern is just a naive, unsightly imitation of a real Japanese lantern, it was made with my own hands and, as it seems to me, it still greatly decorated the shore of my pond. And the twinkling light in the twilight attracts him, and he can dream about a Japanese garden!
Thanks to everyone who had the patience to finish reading my story!
Source
Varieties
Stone pedestal lanterns are the most popular among gardeners around the world. They fit perfectly with traditional plants of the Japanese garden and fully convey the mood of the Land of the Rising Sun.
By material
Authentic Toros are made from three types of material:
- stone (originally the lantern was hollowed out from a single piece of granite, sandstone or other natural material; modern craftsmen use a concrete mixture);
- wood;
- bronze (a malleable metal with a noble shade allows you to create a particularly intricate pattern on the walls of the lamp).
Stone lanterns, even small ones, weigh more than 10 kg, so they are never suspended.
On sale you can find inexpensive imitations of Japanese garden lanterns made of plastic. When done well, they differ little in appearance from the original ones.
Shape
Garden Japanese lamps can be :
- spherical shape;
- cubic;
- in the shape of a pagoda;
- in the form of a polygon with 6 or 8 corners.
A characteristic feature of the Japanese lantern body is the presence of a wide figured roof.
Lamp type
Modern technologies make it possible to integrate various types of electric lamps into traditional Japanese lanterns :
- ordinary incandescent light bulbs;
- halogen;
- LEDs.
The last option is the most practical, since the LED has a long service life and low energy consumption.
Sometimes Thoreau is left without a light element at all, leaving only a decorative function for it.
By installation method and fastening
Pendant Toros are always attached to the ring on the lantern cover and never to the side bracket . Other lamps can be placed on a high pedestal or placed directly on the ground.
By type of power supply
Landscape lamps can be saturated with energy :
- from the electrical network;
- from disposable batteries;
- batteries;
- from solar energy.
If the lamp is installed under the canopy of trees or in the thick of vegetation, then solar panels are not chosen as a power source. The light-catching panel should be in direct sunlight.
Control method
Electric garden lights can be turned on manually or using a remote control. Solar-powered lanterns light up automatically as soon as evening comes.
By method of application
Toro lamps are an integral part of the Japanese garden, playing strictly defined roles, depending on the design.
According to the rules of the Japanese garden, the lantern was assigned certain functions:
Tachi-gata illuminated the place where important guests were received, the main road on the site, and the central entrance to the house;- Yukimi was placed near a pond so that the light coming from it would be beautifully reflected from the water surface;
- Yamodoro is placed in a shady corner, in the midst of plants;
- Oki-gata looks harmonious in a small flowerbed, near a pebble bank, or in a mini garden;
- Oribe is always close to the bowl for ablution (tsukubai);
- Ikegomi is placed in open areas of the garden so that the sun's ray freely penetrates through the window on the lamp body and falls on the ground;
- The pagoda is placed at the highest point of the site so that its top is higher than the largest Toro.
Very often Thoreau is placed in a quiet corner of the garden, where there is a small stream or fountain, a comfortable bench and table. It’s so nice to drink a cup of aromatic tea here, listening to the rustling of leaves, the murmur of water and watching the play of light coming from the lantern.
In Japanese garden culture, special attention is paid to the harmonious combination of man-made elements and living plants. The lamps organically fit into the existing landscape, giving them a touch of antiquity: populating the lid with moss, making small chips on the body.
Rock garden
The Japanese garden is the only type of garden that can consist entirely of stones. Yes, yes, no flowers at all. Only stones - ancient boulders overgrown with moss, angular cobblestones and small shiny pebbles.
In Japanese tradition, stones have very multifaceted meanings, ranging from longevity to the infinity of time and connection with ancestors. We do not encourage you to try to build a stone kingdom on your 6 acres, but dry streams of stones will be very appropriate and will even help you zone the space.
Installation and use
It is almost impossible for a European gardener without special training to comply with all the canons of the correct layout of a Japanese garden, and this is not necessary.
The main thing is to fit the lamp harmoniously into the existing landscape.
For stone Toros that have an impressive weight, it is necessary to prepare a foundation . This can be a cushion of crushed stone with the addition of sand or a full concrete base. The greater the mass of the product, the more reliable the foundation should be. The recommended depth of the pillow is at least 15 cm.
Lanterns that operate from the mains must be installed in compliance with all safety rules. The wires must be reliably isolated from the external damp environment and placed in places where they cannot be damaged when mowing the grass.
Caring for a Japanese garden lamp comes down to replacing the light bulbs in the housing. Stone lamps should not be washed; the sooner they acquire an aged appearance, the better. It is recommended to wipe metal cases with a cloth to remove dust.
It is better to put ceramic and plaster products indoors for the winter. Sudden temperature changes can cause deep cracks in the housing.
Bugs and difficulties
If you buy a high-quality lamp and install it correctly, there will be no problems with operation.
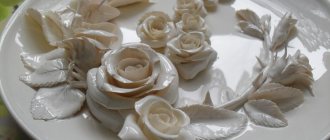
Master class Craft product Modeling Japanese lantern made of cement MK Gypsum cement
Here it is not painted yet. painting is the worst thing for me)))
Each part of the lantern is made separately, according to its shape. I first picked up all the shapes, stacked them on top of each other, changed some things, removed some, and then started sculpting. First the base-legs. I took a mold, covered it with film (I love this texture with veins, but if someone doesn’t like it, you can do it without film, just first grease the mold with oil) I take cement 1:1 with sand and add water to make a thick mass like dough and I start laying out the bottom first, and then moving up the legs. and left it to dry for a day.
For the next element, I took a plate, also covered it with film and simply filled the plate with cement and leveled it.
I had to tinker with this element. I also first covered the bottom and made walls in a circle, then pressed three bottle caps into the walls, like a window))
And let it dry. but not completely. After about 6 hours, I carefully took out the mold, the cement was still soft, but it held its shape and did not spread, and carefully took out the lids, helping with a knife. and left it to dry.
And the roof of the lantern, first the bag and then filled the mold with cement, lifting it a little in the right places. I rolled it into a ball and placed it in the center and also left it to dry.
A day passed and I began to get all the parts of the lantern. this is the basis.
Another reason))) is that it’s from a plate.
house with windows))) I couldn’t remember the Japanese names))
stacked on top of each other. It was possible to make a hole in the center of each part and, during assembly, stretch a wire with a light bulb, then the lamp would burn. but I have a pond on the side of the house, the electricity is strained, that’s why it’s like that.
And once again the flashlight is painted. If you liked my flashlight, come visit me again, I still have a lot of cement work and MK on it.
Source
Can I do it myself?
Japanese stone lamps for the garden can be purchased in gardening and online stores, where they are delivered from China. Original handmade products are incredibly expensive and rarely reach the European market. You can save a little and place Toro on your site by making a lamp with your own hands.
Suitable materials
Dai-doro is made from materials that are easy to process at home:
- sandstone;
- gas silicate block;
- cement or gypsum mixture;
- sculpture plaster;
- clay.
Some craftsmen make Japanese lanterns from copper sheets, imitating bronze hanging tsuri-doros.
Manufacturing process
All Japanese lanterns have a common structure :
- stand (flat stone);
- support;
- camera with lamp;
- roof.
Often such sculptures are made of concrete - an affordable and easy-to-use material. Unnecessary plastic buckets, flower pots, and flat pans are used as forms into which the solution is poured.
Finished products are painted with white or gray paint. Bright colors for painting lanterns are unacceptable .
How to make Yukimi-gata from cement mortar with your own hands is shown in detail in the video:
A simpler version of Toro can be made using natural stone. Flagstone is ideal for this, but flat pebbles can also be used. The process looks like this step by step:
- At the selected location, a flat stone of suitable size is placed on the ground. This will be the foundation.
- On it, closer to the corners, towers of smaller cobblestones are laid out. The pebbles are fastened together with cement or clay mortar. There is no need to strive to make the turrets even; a certain carelessness gives the structure a natural look.
- A flat stone is carefully placed on top of the built turrets. This will be the roof.
- A candle or LED light bulb is placed inside the chamber. The power cord is hidden in the grass.
Manufacturing instructions
Japanese lanterns can be purchased ready-made or made yourself. To make lanterns with your own hands, the best material is foam concrete. Such blocks are much easier to process than brick and other materials.
Lanterns are made (cut) not monolithic, but consisting of several parts: dome, roof, base, spire. The finished parts are glued together using facade putty, which practically does not differ in color from foam concrete, and therefore the joints in the finished product are practically invisible (it is not advisable to use concrete).
The main tools for work are a hacksaw, files and sandpaper. If there is no experience in carrying out this kind of work, then at the initial stage it is advisable to make drawings.
It takes experienced specialists from 10 to 14 days to make one flashlight.
When the product is ready, it is coated with acrylic paint. The color choice is chosen so that the lantern fits perfectly into the garden design.
Japanese lanterns are not only products that act as lighting devices, they also serve as decoration for any garden, local area and summer cottage. Their main task is to create additional comfort, a calm and sincere atmosphere.
Source
Japanese garden in an apartment
If you don’t have a summer cottage, then you can make a corner of this eastern country in your home. A miniature Japanese garden will decorate it and become a place where you can sit, relax, and think about the sublime. To create it you will need very affordable items, these are:
- large glass dish;
- small bonsai tree;
- red and white river sand;
- pebbles of different sizes;
- candles;
- lantern-candlestick;
- artificial or natural moss.
Wash the pebbles and dry.
Place them along the edge of the dish, filling about half the arc of the circle. Place a small bonsai tree on the other side. If you don't have one, you can put in another green plant. Sprinkle white river sand around it in the center of the composition, place a little red sand on the other side of the plant, at the edge of the dish. Rake some sand from the pot with the tree and place a lantern here, which will symbolize the Japanese gazebo. On the other side, opposite, put some larger stones and place pieces of moss next to them. From here to the gazebo, lay out the path with dark pebbles. Place three larger pebbles near the flashlight and cover the joint with moss. Place a candle inside the gazebo and place 3 more around the edge of the dish. As you can see, the sand is formed by ridges, in this case it symbolizes the sea. In Japan it is believed that water attracts money. Therefore, decorate the sand with such waves.
This is how easy it is to create a Japanese tabletop garden. You can move it to any room of the house and admire the wonderful creation. If you don't have such a glass dish, but have a tray, then you can create a corner of Japan at home using it. You can replace the tray with an unnecessary drawer by first painting its edges. You will make the base from boards and the bottom from a sheet of plywood. To make a tabletop garden of this type, you will need:
- tray or box;
- small rake;
- small pebbles of different sizes;
- sand;
- gravel;
- babies of small plants.
Pour sand into the container, level it with a rake, and use it to make waves.
If you have a small Buddha figurine, place it in the designated area. If you want, you can lay small pebbles in the shape of a river, or put up a round bridge from wooden sticks, which you can make with your own hands. Using branches, you will also make a fence, separating the area where the pagoda will be located from another area. Lay out a path from dark stones, place small children of miniature plants in wooden or other containers with soil. You already know that sand in Japanese design symbolizes water, which attracts money. But the stones denote constancy and serenity. The stones are laid out in groups asymmetrically. Place a small candle in the center or on the edge of the composition, looking at the flame of which you can relax and think about the beautiful. If you like to craft from wood, then make a small house, gazebo, or bridge from this material. Such a home garden also looks calm and peaceful.
These easy-to-make products will help you decorate your room in Japanese style.
If you want to see the process of creating a flashlight, then we suggest watching the video.
The second story shows how to make the Japanese tabletop garden you just read about.
Tsukubai
This mysterious word hides the traditional bowl for washing hands and face before the tea ceremony.
Tsukubai is made from solid untreated stones. Decoration with hieroglyphs or symbols characteristic of Japanese spiritual culture is acceptable. Outwardly, tsukubai resembles a small well. There should be a bamboo ladle next to the bowl.
Of course, Japan has its own strict rules for the construction and location of gazebos. In the dacha version of the Japanese garden, you can neglect them and install a gazebo so that it does not obscure the plantings and fits organically into the overall picture of the site.
I'll need
- sand - 2 buckets
- cement M-500 - 1 bucket
- water
- PVA construction glue
- some liquid soap
- P/E film is soft, but quite durable
- files
- abrasive sandpaper
- cement mixer
- bulb
- Light bulb socket with wire (from an old lamp)
- prefabricated fork
- acrylic paints (white, black and brown)
And, of course, patience and the desire to achieve results! So, friends, I'm getting started!
Traditional
You are probably familiar with the traditional version of this needlework since childhood. To make the usual paper lanterns you will need colored paper, silicate stationery glue and scissors.
Step-by-step instructions consist of the following steps:
- Prepare two sheets of colored paper, and one should be 10-15 mm smaller than the second in width. This is necessary to create a double wall. If you want to make a regular flashlight, you can take a sheet of any size (based on the size of the flashlight you need).
- Bend a large piece of paper in half and cut from the middle to the sides, not cutting 10 mm to the edges. In this case, the width of the sheets should be the same - no more than 10 mm. It is better to draw long and even lines in advance using a pencil and ruler.
- Open the sheet and roll it lengthwise into a tube. Also roll the small sheet into a tube, glue it and insert it into a larger square. Tape the top and bottom.
- To hang your finished ornament, carefully pierce the top and thread a wire loop through it. You can also stick a pen made of 1 cm thick paper.
You can put an electric candle inside a finished paper lantern and use it as a lampshade in a bedroom or children's room. This will create a pleasant New Year's atmosphere. If, instead of ordinary white paper, you take multi-colored or decorated paper, decorate the finished product with ribbons, glitter, figures, stars, etc., in which case it will look much more impressive.
Eastern dragon in apartment design
You will be surprised when you find out what it is made of. If you are intrigued, then quickly discover this mystery for yourself. For this craft we used:
- disposable plastic cups;
- old unnecessary magazine;
- threads of yarn;
- adhesive plaster;
- corrugated paper;
- scotch;
- glue.
To make limiters, cut a strip from a magazine, roll it into a tube, and secure this shape with tape.
Using adhesive tape, you need to secure this blank in the center of the cup. Make a hole in the bottom of the glass with an awl or scissors, place a cardboard stopper here, insert it into a workpiece designed in the same way, and pass a thread through them. Using the same principle, assemble the remaining cups. This Japanese dragon consists of 13 pieces. Place them all on a flat surface, stick strips of corrugated paper on top.
To securely connect the paper and cups, fasten them with a stapler. Instead of magazine stoppers, you can use toilet paper rolls by cutting them in half crosswise.
On a piece of paper, draw a dragon's head and color it. You will need to make two such parts, then use a stapler and glue to secure the cup shapes on one side. When the glue is completely dry, tie several threads to the dragon's body so that it hangs in a wave rather than straight. Plastic bottles also make beautiful Japanese dragons. To do this, take:
- two two-liter plastic bottles;
- wire;
- two plastic spoons;
- toilet paper;
- scotch;
- tights;
- padding polyester;
- foam;
- PVA glue;
- a needle;
- threads;
- scissors.
Take the first bottle and cut off its neck.
Starting from the bottom, towards the shoulders, make a long longitudinal cut, but one half should be slightly smaller than the other. At the low end, closer to the shoulders, you need to cut a little more in both directions so that the dragon’s mouth, which you are creating at this stage, is well open. To fix this position, use tape. Do not cut the tape, make a kind of pigtail out of it by twisting it. Attach turns of wire on top of it, and use it to make a blank for the eyes on the top of the head. Then use the same paper to create the complete wings.
Now we need to give them strength. Pour water into a bottle and moisten the workpiece using a spray bottle. Where the paper is adjacent to the wire frame of the wings, you need to cover it with PVA. Place the wings in a warm place to dry.
When the blanks are completely dry and become stronger, apply silver paint and just a little gold paint to them to achieve this shade.
Attach the wings to the body of the Japanese dragon using adhesive tape. Attach another two-liter bottle to the structure, decorate it with turns of wire to create a frame for the legs and tail. Using a thread and a needle, make stretch marks on the face to create lips, dragon eyes, make ears more regular, and triangular thickenings on the spine.
To make it easier for you to form the face and figure of the dragon, look at the diagram, which shows how and how to make the drawstrings.
Such a mystical animal will become an interesting accessory that will allow you to create a Japanese room design.
Japanese style in the interior
Take note of some principles that will allow you to turn your apartment into a multifunctional home. The room can be turned into a bedroom and a study at the same time. Using a light ceiling, the room is divided into two zones. The table can be made on the basis of the window sill or according to its principle, let it be located along the window, become narrow so as not to take up much space.
If this is not a window sill, but a table, then arrange drawers below to put all the necessary office supplies and documents in them. In another area there is room for a spacious bed.
Using light ceilings, you can divide the living room into two zones. Someone will watch TV and not disturb the person reading in a cozy chair.
Wooden doors that close like a “compartment” will allow you to create two or more from one room. An excellent solution for those who bought an inexpensive studio apartment.
By hanging a Japanese-style curtain, you can separate the kitchen and dining areas, or use a light overlap to separate the living room from the cooking area. Even if someone does not have a bed, you can beat this circumstance by telling those who are interested in this circumstance that in general there is Japanese design in the apartment. Place a low table nearby, next to which you can sit on small cushions. For a Japanese interior to truly become one, you need to take care of small details that will allow you to achieve a similar effect. Hang a fan that you make yourself over your bed. It can be big or small.
Multilayer
If a simple model does not suit you, you can make it in a more complex variation. It has a non-trivial shape and requires great care in manufacturing. To work, you will need the following materials and tools: a beautiful stand made of strong and dense wire, cardboard of various shades, double-sided tape and stationery scissors. Instead of cardboard, you can take wallpaper that was left after the renovation.
Manufacturing instructions:
- Cut out up to 15 semicircles with a diameter of 10 cm. It is very important to make them identical in size and cut evenly. Please note that the more templates you cut and glue together, the fluffier the final product will be.
- Next, bend each circle in half inward with the printed side.
- Connect the round blanks into a single product.
- Next, glue the core of the lantern and connect the last two sides to fix the structure. To hang the finished decoration, use a thick needle to make holes in the top and thread a loop through it.