Is it difficult to build a motor home on the basis of a regular car trailer? What materials can this trailer-house-dacha be built from? What are its minimum dimensions? What interior layout will allow you to make the most efficient use of the interior space? Let's try to find answers to this list of questions.
Under construction.
Types of mobile homes
Mobile homes
are conventionally divided into classes that describe the category of spaciousness, internal content and comfort:
- class A - looks like a bus and is closest to usual housing;
- class B - this includes a trailer that is fully equipped inside, the sleeping place is located directly in the trailer itself;
- class C - small-sized, designed for movement on the basis of an SUV or a passenger car, while the car cabin is transformed into a sleeping place.
The most budget-friendly option currently available is a tent trailer, which can be disassembled at the campsite directly around the trailer.
But, if furnished trailer houses are not available to many, then a self-made cottage on wheels is more than a realistic option.
DIY transformable house
A folding transformable house on the wheels of a passenger car will be a panel house design, in which one of the walls along the side can be folded back or removed. In this case, such a house becomes like a large gazebo. Interior amenities include a table, sofas or bed, gas stove and fixed water supply.
Whichever trailer-home option is chosen, a DIY mobile home on wheels will not only make owners proud of their work, but will also provide new opportunities to spend weekends with the family. After all, in order to get into nature, it is not necessary to have your own plot of land. You can easily travel and stay in the most attractive countryside locations.
How to make a mobile home with your own hands
The most compact, simple and budget option
is a design on a single-axle trailer. Considering the weight restrictions for light trailers in the Russian Federation up to 750 kg, it is necessary to choose a durable and lightweight material.
Pine is good for this purpose:
- The frame is made of paving stones.
- The walls are sheathed with plywood, the optimal thickness of the sheets is recommended to be 1 centimeter.
- Plywood sheets are also used for furniture - tables, beds and shelves.
- The exterior finish will be galvanized steel sheets installed in overlapping patterns.
As an option, you can use another building material for the front cladding, the main thing is that it has sufficient strength and flexibility.
A layer of mineral wool, mineral board or other insulating material must be placed between the outer cladding and the frame to maintain the microclimate inside, especially in hot weather when, due to the metal cladding, the structure can heat up inside above 50-60 degrees Celsius.
Do-it-yourself dacha trailer - installation of a mobile house
The structure is installed using self-tapping screws; weak points, such as outer corners, are strengthened with a metal corner.
Material protection includes:
- antiseptic strengthening impregnation for wood material;
- sealing seams with silicone compound of the outer skin;
- painting the front side.
The dimensions of the trailer may vary, but the optimal size is 2.3-2.4 x 1.5-1.6 m.
Building a house on wheels
The construction of a caravan takes place in two ways - on the trailer itself, for this its sides must be dismantled, or on a special stand, with subsequent installation on the trailer.
Windows are taken into account at the design stage and can be of different configurations - from sliding to tilting.
Ventilation is ensured by installing a mosquito net. Additionally, you can consider installing a hatch in the ceiling.
A more thorough solution would be a trailer-house on wheels with a base of a two-axle trailer. The principle and method of manufacturing such a structure are similar to the construction of a trailer on one axle. Of course, more material will be required, so the costs will increase proportionally.
The original design of houses capable of moving was developed at the dawn of the last century. Due to its functionality, the idea of equipping housing on wheels has migrated to domestic spaces.
Engine
As noted above, the main driving force of homemade mini-trucks is motors from mopeds (Soviet magazines recommended using the IZH-56 engine), and low-power boxer engines. The advantage of the latter is the ability to lower the center of gravity and low vibrations, which becomes important when it comes to a heavy body mounted on a passenger chassis. Engines from standard power plants (UD-4, UD-2, etc.) are popular. It is sometimes easier to get diesel and gasoline engines from stations than to recover scrap, but power units from passenger cars are also found in homemade designs.
It is difficult to imagine that a homemade truck will require good dynamics and acceleration. Torque is critical when choosing, but some high-speed engines can be used in conjunction with a reduction gearbox. At low speeds, four-stroke diesel engines demonstrate a good N˙m value. And in the diagrams you can often see ZAZ power units, but what is more important is that they can also often be found on actually working equipment. The durability of these engines, equipped with a good, by the standards of our reality, atmospheric cooling system, is worthy of special mention.
Tractor engines from T-16, T-25, etc. have proven themselves quite well. Motors like the D-21A1 can be easily adapted for domestic needs: power - 25 hp, maximum rpm - 1800. However, the standard starter from these engines may not work Russian cold weather, so the original starter is often replaced with a starter from the T-40. Additionally, the motor can be improved by adding a cardboard filter to it, and given its dimensions, it is better to place it behind the cabin. Engines from the T-16 can be connected to the GAZ-51 gearbox using the original clutch, although in this case you will need to use a sheet metal adapter with holes for the mount and shaft.
Connection of the GAZ-53 rear axle with the Mazda 2.0 l engine.
In the regions of the far north, the simplest design of motorized sleds has proven itself well, which is an engine from a Druzhba-5 saw or similar (Scheme 1, Scheme 2, Scheme 3), connected to a tracked chassis. The principle of use is to make the saw rotate not the chain, but the tracks. In this case, the motor itself is located in front, on skis attached to a bicycle fork, and the driver, along with the load, is located above the tracks. Power 4 hp enough to accelerate an 80-kilogram sled through the snow to 60 km/h.
Furniture
Despite the fact that at present it will not be a problem to purchase ready-made furniture for a motorhome, according to reviews, it is not able to satisfy all the requests of car owners, especially those who create a motorhome on wheels according to their own drawings. Therefore, the best option is either to manufacture it yourself or to order it individually from a furniture manufacturer.
In most cases, it is more optimal for a motorhome to make your own furniture. Since for a small motorhome, for example, based on a standard gazelle or UAZ, not much furniture will be required, and it is not particularly complex, you can save money at this stage of the work. For the proper level of comfort in a motorhome, as a rule, the following furniture structures are made:
- dining table; to save space in a small motorhome, it is better to use a folding version;
- kitchen table with sink and work surface;
- open shelves or drawers located under the ceiling of the motorhome;
- If you have a toilet in a motorhome, you will need to make a partition with a door.
When a KamAZ or a bus is taken as a base for a motorhome, the amount of furniture listed above increases. When making a motorhome on wheels with your own hands, to facilitate the task of determining the type and quantity of furniture, you can use special computer programs, or draw a detailed plan for the future layout of the motorhome on paper, where you can clearly indicate not only the type of furniture, but also its location.
You can see how the most expensive mobile home can be decorated in the photo - you can clearly see how sophisticated and comfortable the interior decoration can be.
When building a mobile home with your own hands, you should pay attention to the quality of materials. Thus, for furniture it is advisable to use moisture-resistant materials that are resistant to household chemicals, since cleaning in any type of motorhome - a bus, trailer or gazelle - will have to be done quite often
offers a service for converting minibuses and minivans into motorhomes
. You yourself choose the van and chassis that best meet your requirements for the weight, dimensions and speed characteristics of the motorhome.
The conversion of minibuses into motorhomes is carried out by specialists in Moscow who have undergone training at enterprises and specialized tuning centers in Germany. To build a camper, equipment and accessories used in the mass production of motorhomes are used.
The base for a motor home can be:
| Peugeot Boxer | |
| Citroen Jumper | |
| Fiat Ducato | |
| Mercedes Sprinter | |
| Your van | Any other van that has been examined by a service center |
Set of works for converting a van into a motorhome:
- Insulation of the van body (thermal insulation)
- Inserting glass and hatches into the body of a minibus
- Manufacturing furniture for a motorhome from lightweight furniture board laminated with veneer
- Interior decoration of minibus walls with lightweight plywood covered with leather
- Laying electrical wiring, installing lighting and electrical equipment inside the minivan
- Installation of gas equipment and heating systems for motorhomes (Truma, Alde)
- Installation of a toilet block and shower cabin of a motorhome
- Formation of the kitchen area of the motorhome and installation of a refrigerator, sink, gas stove, hood, oven, microwave oven
- Installation of any additional equipment at the client's choice: air conditioning, audio and video equipment, satellite TV, navigator, solar panels, awnings and other equipment for the motor home
Two options
As already mentioned, you can insulate a van using a special plate. Since the frame is quite dense, and the dimensions of the body of the same Gazelle are standard, there is no need to cut the insulation. To prevent so-called cold bridges, the seams between the plates should be filled with sealant. Laminated plywood, various types of plastic or stainless steel can be used as a material for internal cladding. The selection and use of them largely depends on what is to be carried in this homemade insulated van.
Work on the second option is much simpler. But the prices for materials are slightly higher. So, polyurethane foam will be used as an insulating element. It can be bought in any stores. The inside of the van should be evenly coated with this material. That's all. Anything will do for cladding on top.
Car mini dry toilet, how does it work?
The basis of a mechanical dry toilet is two containers:
- The upper part is a toilet seat and a tank filled with water to be drained through a special hole;
- The lower part is a reservoir filled with waste.
Draining water in portable car toilets is carried out according to the principle of conventional stationary models - by pressing the valve. The tightness of the device is ensured by a damper, which is controlled mechanically; it is an improvised “curtain”, after opening which, the entire contents of the toilet bowl fall into the lower tank.
The general operating principle of automobile mini-dry toilets is as follows:
- Waste washed away with water ends up in the lower receiving container;
- Once in a tank with chemicals intended for processing, they are transformed into a different product that does not form gases and does not have an unpleasant odor;
- After filling the container, it is disconnected from the upper bowl and emptied using a special drain valve. After emptying, the bowl is washed, refilled with chemical filler and connected to the upper part.
Homemade mini trucks / Trucks and new technologies / cargolink.ru
What are homemade trucks and why are such works of art collected today? We can safely assume that homemade trucks are a way of self-expression, a kind of hobby. This tradition has its roots in the depths of Russian culture. After all, only the Slavs are able to translate unusual creative ideas into reality and serve as the founders of all useful and funny technical revolutions. Most often, such masterpieces are created from old, completely ownerless equipment. Parts can be taken from mopeds, old cars, motorcycles, and even from units that are absolutely not intended for driving.
Modern man, to a greater extent, creates such unusual transport structures not for beauty, but most often only for the benefit of his own household. Time-tested, homemade trucks are the best “helpers” in everyday life, especially when it comes to the agricultural industry. Such homemade devices are used to transport equipment, crops, building materials for various purposes and much more. A homemade truck can transport anything, but the weight and dimensions of possible cargo will depend on the carrying capacity of the vehicle itself.
The design of such homemade devices is quite simple. Most often, the body part is taken from old cars. The engine can be removed from any motorcycle, and the base of such a vehicle consists of a welded tubular frame.
In such a homemade unit, everything looks like a standard modern car. There is a brake, gas and clutch pedal, a gear shift knob and even a handbrake. Sometimes craftsmen manage to attach a speedometer and headlight dimmer to the interior of such a car.
The wheelbase in such a miracle of technology can be different. Most often, experimenters combine wheels of different diameters and profiles. There are homemade mini trucks with parts from a motorcycle and even a cart. The body is usually made of wood. If it is not possible to remove the body part from a tractor or other agricultural equipment, then you can work with a chisel.
Of course, in one article it is unlikely to be possible to talk about all the tricks of modern homemade automobile construction. But it’s still worth paying attention to several interesting exhibits.
Homemade mini truck from Canada
This miracle of technology was assembled exclusively from parts thrown into a landfill. The creation process dragged on for two years. The owner of this “brainchild” purchased only a channel for money in order to weld the frame. Such a work of art is not devoid of creativity. It is worth noting the longitudinal arrangement of the engine, as well as the gearbox from the old Volkswagen Golf. The cabin is located above the engine, the frame is welded from metal corners and pipes, everything is covered with thin sheets of metal on top. The truck doors open backwards. The dump body in an American car operates using a hydraulic system and can transport up to 1 ton of cargo. The machine is small in size and quite maneuverable, ideal for uneven roads.
Australian truck
At an exhibition in Australia, among classic tractors, combines and seeders, an unusual miracle vehicle was discovered. An event to demonstrate local agricultural machinery is held every year, but such a non-standard exhibit is presented here for the first time. The oversized bright blue truck looks like a real talented work of art.
Visually, one can only guess from what parts such a phenomenon is constructed. There are more than ten different toggle switches, sensors and levers in the cockpit. Everything is created in bright colors and extraordinary execution. The steering wheel is believed to have been taken from a Mack Model R truck, and its size adds to the mini-truck's gravitas. Being next to such a car, you begin to understand that sometimes you really want to become an airplane pilot and on Earth feel like a fearless conqueror of the skies.
Organizing a mobile home business
You can organize your own business in the construction of motorhomes. There are four options for developing such a business.
Option #1. Production of houses for sale for summer holidays or living in the country. This will not require serious material costs, since the houses will be of a simplified design - for example, without insulation.
Option #2. Rent out mobile homes. This is a relatively new business, and everything new can be very expensive. The number of motorhomes in this case increases as the customer base grows.
Option #3. Make mobile eateries or shops.
Option number 4 is also the most interesting. It consists of creating a car park and its further use as a hotel. The main thing here is to divide the trailers into budget, premium and middle class.
For a more detailed introduction to construction technology, watch the thematic video.
Video - DIY mobile home
There are many new products on the automotive market today. This also includes a motorhome based on a GAZelle for long-term travel on hard surfaces and accommodation for a family of 4 people. Everything inside the cabin is designed simply and reliably; support systems can be installed.
Appearance of a camper based on GAZelle
A motorhome based on a GAZelle 4x4 in the form of a residential unit is equipped with many components.
Appearance of a gazelle motorhome
The advantages of a camper make it versatile and convenient for travel:
- small overhangs at the rear;
- a canopy covering the cabin protects from the sun (a sleeping place can be placed in the canopy);
- on the right is a conveniently opening door, entrance glass, window for the sleeping area;
- on the left is a pair of large glasses.
On the starboard side there is a decent-sized hood covering the luggage compartment. You can place gas cylinders, water containers, and a septic tank in it.
What's hidden from view
The interior contents of the motorhome are comfortable:
- steep steps lead to a kitchen area with a sink, gas stove and drawers for storing household utensils;
- further there is a small corridor, on the sides of which there is a bunk bed, a small toilet and a shower room;
- You can sit on wide soft chairs at a folding table;
- there is a two-tier sofa for sleeping;
- The heating system maintains a comfortable room temperature even at -25ᵒ.
Rodzilla
Rodzilla is manufactured using Western technologies in Russia and is suitable for the climate and roads of the country. There are 3 configurations of residential modules:
- family F-POD;
- basic Rekless;
- maximum MAX-POD.
Traveling on wheels is a special lifestyle that is not suitable for everyone. But those who dare to take such a step must be in good conditions; they can be provided by motorhomes based on Gazelle.
Gas and electricity
IMPORTANT! Gas supply hoses and electrical wiring must only be installed by qualified personnel! If installed incorrectly, they can pose a serious hazard. Make a motorhome yourself, but don't put other people at risk
Propane
in the camper can be used for cooking, heating, and also connecting a refrigerator. You can do without it, using an electric stove and refrigerator, as well as an independent Webasto heater.
The gas cylinder must be stored in a separate place with holes in the bottom. Why does there have to be holes at the bottom? Because propane is heavier than air, it will always go down.
You could even make a valve to connect the gas stove to the outside of the car so you can cook outside the van in the future.
Again, build the camper properly for your own safety!
Electricity
necessary to start all devices designed for 12V. The system consists of a battery, charger/converter, control panel and many wires.
Don't forget about the external connector for charging the motorhome battery from a regular electrical outlet (110V or 220V). You can also use it at home by charging the battery during winter storage.
In order to determine how much battery capacity you need, you will have to perform simple calculations. Let's say you will use the following:
- Halogen lamps: 2×20W 2 hours a day = 80 Wh
- Refrigerator: 45W 12 hours a day = 540 Wh
The total power consumption is 620 Wh per day.
Now divide 620Wh by 12V and you get 52Ah. This is your daily power consumption. As a rule, a 100Ah battery will last about two days of battery life.
Make calculations taking into account the energy consumers you use. This will help you get the average daily electricity consumption figures.
Gas and electricity are very important issues to consider when building a campervan. If you plan to use the motorhome for traveling far from civilization, autonomy should be maximum. Take your time, think through everything carefully and calculate it.
Technical characteristics of the motorhome - gazelle
| Chassis type | GAZ-27057-288 |
| Off-road performance | All-wheel drive suspension |
| Heating | Natural gas |
| Clean water tank | 100 liters |
| Technical water tank | 50 liters |
| Electricity | 12 volt battery, generator, ability to connect to an external network |
| Light | LEDs |
| TV | No |
| Air conditioner | No |
| Number of people | 2-4 |
| Spare wheel | No |
| Top rack | No |
| Price | From 1.8 million rubles |
Construction
So let's get started. How to build a cottage from a trailer with your own hands?
Floor, bottom trim
- The sides are completely dismantled. All that remains of the trailer is a flat area. If the horizontal base is sufficiently rigid, floor joists and trim can be attached directly to it; It is better to weld a thin flexible sheet with a frame made of corrugated pipe with a cross-section of 50x25 mm.
- Then the lower frame made of timber, laid around the perimeter, is bolted to the base; the side bars are connected by lags in increments of 20 cm (for 12 mm plywood).
As an option, the entire structure can be assembled on a stand and only then pulled to the base of the trailer.
- The logs are attached to the frame with a galvanized angle; The block must be soaked twice with hot drying oil.
- Insulation is laid between the joists; then the floor is covered with plywood, which is attached with self-tapping screws.
Frame
The instructions for assembling the frame are no different from the construction of the lower frame: the block is connected with corners using self-tapping screws. Before or after assembly, the wood is impregnated with drying oil. Do not be afraid that the frame will not be rigid enough: the sheathing will give the structure strength.
Sheathing, insulation
The finished frame begins to be sheathed from the inside. The plywood is attached with self-tapping screws 32 millimeters long in increments of approximately 25 cm. Self-tapping screws are only galvanized: in damp weather, black steel will inevitably decorate the walls with untidy rusty streaks.
Three nuances:
- The holes for the screws are pre-drilled and countersunk so that the caps do not catch on clothing. An alternative is to use self-tapping screws with semi-countersunk heads.
- The inside of the plywood must be sanded before varnishing and after applying the first layer. Any moisture will raise the lint on the top layer of veneer, which will make the surface rough. The amount of work will be quite large, so it is better to use a grinder - even the simplest, vibrating one. If there is no electricity where you are building, there is always a way out: renting a diesel generator for a summer house costs from 1,000 rubles per day.
- The outer side and ends of plywood also need protective impregnation. And in this case, the cheapest and most practical option is two layers of hot drying oil. The insulation is fixed in the grooves formed by the frame and the inner lining, after which it is sheathed on the outside with plywood coated on both sides.
The door is assembled similarly to the walls and hung on galvanized hinges; a regular door lock or a pair of bolts is used as a lock - inside and outside.
The last stage is galvanized exterior finishing. It is fixed with self-tapping screws 25 mm long in 10 cm increments along all frame bars; then the corners are closed with a corner. Don't forget about the sealant: it will protect the corners and joints from water leakage.
The photo shows the trim ready for painting.
Window
If you want your tiny home to have skylights, no problem.
- The opening is provided at the stage of frame construction. It is surrounded by a bar with a cross-section of the same 50x50 mm.
- An alloy corner is used as an external glazing bead, screwed flush with the outer cladding with self-tapping screws. The seat under the corner is pre-coated with sealant.
- A piece of plexiglass cut to the size of the opening is placed on the sealant and fixed from the inside with a bead made from the same duralumin corner.
Homemade truck from a creator from Ryazan
The vehicle was created by the author over several years. In the cargo structure created with his own hands, its author tried to make maximum use of ready-made components and assemblies of an industrial standard. To be more precise, the frame and suspension elements for the homemade car were borrowed from the GAZ-51 truck.
Homemade truck, created in Ryazan (photo from gredx.ru)
A craftsman installed a diesel engine on a homemade truck. He took it from the T-16 tractor, whose power is 16 horsepower.
The cardan on the car is shortened due to the fact that the frame also needed to be made smaller in size. This also applies to the rear axle of the truck. The axle shafts also had to be shortened. But the front axle received from the donor car was not reduced. It is installed on a new custom truck as is.
Interestingly, the roof, fenders of the homemade truck and the hood were made by hand. The bumper and fenders, as well as the lining, were donated to the homemade all-terrain vehicle by a ZIL-130 truck. The windshield and seats were borrowed from the GAZ-52, and the dashboard from the GAZ-51.
As a result, the miracle master from Ryazan got an excellent homemade four-wheeled friend, which he uses to go about his business, to work, and also for rides with friends and his family. A craftsman from the Perm region with a homemade mini truck
The homemade car was assembled from spare parts that were borrowed by the craftsman from various cars. Some items were purchased at a metal receptacle.
Homemade truck, created in the Perm region (photo from the site avto-samodelki.ru)
So, a homemade truck consists of:
An excellent homemade mini-truck has become a household assistant; I am especially proud of the fact that it was made with my own hands.
It is worth noting that the fuel consumption in the car is relatively low, but the maximum speed of the truck is only 50 km/h. The vehicle's carrying capacity is about a ton. A master with golden hands dreams of installing a hay mower on a homemade truck in order to improve his invention.
Goals
A small country dacha is probably the most common hobby in the post-Soviet space over the past half century. The area of cities is growing every year, and areas are naturally moving away from the center of populated areas. Distances are sometimes measured in tens of kilometers; The most comfortable way to overcome them is to drive your own car.
At the same time, not all summer residents are ready to turn a small plot into a place of permanent residence. The maximum that an average city family can decide to do is spend the night on their property once a week. Building a permanent house for the sake of this overnight stay is a dubious idea; sleeping in a car is very uncomfortable...
For summer residents who have basic skills in working with power tools, homemade summer cottage trailers are often the solution.
We have to study one of these structures, getting acquainted with the materials used and design solutions.
Water supply works
The RV must have a cold running water supply. To do this, place two cans of water under the sink. A submersible pump supplies water to the tap.
If you need warm water, an additional sink or shower, the system will be more complex. You can install large water tanks in other places, for example, under the van. You will need hoses to connect the entire system.
When you make a motorhome yourself, you are limited only by your imagination.
Don't forget about wastewater. You can install a suitable reservoir under the car or run a hose through the floor to drain the water into a portable tank or regular bucket.
Remember that used water smells terrible in summer and freezes in winter. Therefore, you need to get rid of it as soon as possible, so a bucket can be the ideal solution.
What about the toilet? You can install one of the convenient portable toilets.
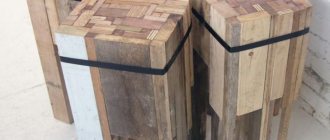
Mobile home made from an old trailer
Our trailer-trailer costs about 500,000 rubles. The amount is impressive, so if you have the opportunity to purchase an old car trailer, you can build a small motorhome with your own hands. For this you will need:
- trailer (necessarily with a strong chassis);
- wooden elements (slats, bars, carriage planks);
- plywood;
- metal profile (for roofing);
- fittings made in the same style;
- a set of appropriate tools.
Manufacturing technology
Such a motorhome will be a trailer with a rear part. By the way, it is better to make the bed the entire width of the structure - this way it will connect the side walls and thereby increase rigidity. The bay window will be manufactured later and equipped with a custom block. The door is installed of the Dutch type - it will consist of two halves.
Stage 1. The trailer is disassembled, the chassis is thoroughly cleaned and coated with anti-corrosion paint. A frame is constructed from pine boards, and supports are cut out in appropriate places.
Stage 2. A frame is constructed from slats with a cross-section of 2x2 cm; an oak slat with a cross-section of 3x3 cm is additionally installed in each corner. A horizontal slat is tied on top of the frame.
It is advisable to use lining of different thicknesses:
- for side walls – 6 mm;
- for front and rear – 19 mm.
Stage 3. The floor is covered with plywood sheets. Poplar beams are used for the roof - they are screwed along the frame in increments of 30 cm. Plywood is fixed on the beams, on top of which a moisture-resistant material and a metal profile of a small cross-section are laid.
Stage 4. There will be only one window in the building (if you do not count the door) - at the top of the back wall. It is advisable to make the window in the form of a bay window.
The door lock in such designs is located at the bottom, but you can put another one - an additional one - at the top. In addition, the door is equipped with a small casement window.
Stage 5. It is recommended to equip a table that extends from under the bed (as was once the case on Great Britain trains). For this purpose, special lockers are formed under the bed. By the way, the lower space can also be used as a sleeping place.
In addition, shelves and a removable ladder are built from wood.
About the name
The term “motorhome” (another name is “camper”) often refers to a car caravan.
Note! Campers are called B- and C-class trailers, while motorhomes are exclusively A-class models.
It is also worth noting that in some countries, all motorhomes without exception are called vinebago.
Turning a car into a motorhome will require a lot of effort and time, as well as the appropriate equipment.
Note! First, you should study this issue from a legal point of view. Different registration organizations view home-built motorhomes differently, and it would be a shame if the vehicle ends up being illegal.
Stage 1. First, the number of residents is determined and, based on this, the vehicle and internal “stuffing” are selected. A detailed design plan is drawn up - this can be done on paper, but it is better to use a computer.
Stage 2. Next, the car body is cleared. If dents are identified, they are removed and the peeling paint is cleaned off. Several windows (if there were none) are installed in the building for lighting and fresh air.
Stage 3. Ventilation holes and valves for gas supply are cut out. All areas of bare metal are coated with a primer to protect against corrosion and aggressive environmental influences.
Stage 4. The house is finished with thermal insulation material.
Note! To do this, you need to use only high-quality materials; saving is highly undesirable. In addition, the material from which the hardware (metal fasteners) are made must be similar to the metal of the car body - this is for additional protection against rust.
Stage 5. The inner surface of the motorhome is finished.
- carpet covering;
- moisture-resistant plywood.
Thick panels with padded strips for mounting furniture are inserted into the side walls. It is typical that first it is better to level the ceiling, and only after that move on to the walls.
Stage 6. After installing the furniture, you should take care of the water supply. To do this, you can place several cans of water under the sink and install small pumps. In addition, you can install large tanks - for example, for taking a shower.
Note! Don’t forget about wastewater - another tank is installed for this. An ordinary garden structure can be used as a toilet.
Step 7: For cooking and heating, as noted earlier, it is better to use propane gas. The cylinder is located in the lower part of the body, as well as an additional hole for ventilation. This can be explained quite simply: propane weighs more than air, so in the event of a leak, such safety measures will prevent dire consequences.
Stage 8. All that remains is to take care of the energy supply. The best option is a powerful battery equipped with an external charging outlet.
Making your own trailer
If difficulties do not frighten you, and the desire for action is unstoppable, you can try your hand at building a house. And whether to remake a GAZelle or build a trailer from scratch - the choice is strictly individual!
DIY mobile home from GAZelle
To work you will need a grinder, a welding machine, a hand saw for wood and a lot of patience. The gradual modernization of the car looks like this:
- The seats are taken out of the cabin, the old trim is removed. All metal parts are treated with a special solution that prevents rust. The walls and ceiling are insulated with foamed polyethylene, and sheets of plywood are laid on the floor. All wiring runs under the floor and wall cladding; this should be thought out in advance.
The frame for the furniture is welded right in the body. If the car cannot be leveled, you can use a pipe as a level, its ends resting against the lower edge of the window openings. After rough welding, the frame is removed and everything is welded, cleaned and brought inside again.
Window openings are covered with carpet. Ceiling panels covered with carpet are also installed. After completing the interior trim, you can attach the slats under the mezzanine and mount the furniture frames.
A swivel mechanism can be made for the front seats. To do this, you will need a front hub, for example, from a VAZ, and part of a rotary strut. The scheme is quite simple.
The final stage is installing furniture on the frame, connecting lighting, installing a pump for the kitchen washstand, covering the mezzanines and minor interior improvements. For cooking, you can put a small gas stove on one burner.
Instead of welding the furniture frame, you can use ready-made sets, reinforcing them from the inside with corners and additional screws. The kitchen also needs to be attached to everything - the floor, the sofa, the wall. This is done to protect the furniture from becoming loose while driving on bumpy roads.
We should not forget that such a modification of the car requires registration with the REO. To do this, you need to write an application and receive a resolution from the technical department of the traffic police and a protocol from the authorized organization.
Stylish plywood trailer house
If your car has a towbar, it would be a sin not to take advantage of the situation and not make a nice “drop” trailer for overnight stays outside the city. For this:
The side walls of the future van are cut and attached to the base. All holes for doors and windows, as well as to lighten the frame, must be cut in advance, so it is better to think through the drawing carefully.
Shelves are assembled from furniture panels and installed on the base. These same shelves will serve as the front and rear walls of the van.
According to the shape of the van, a plywood sheet is bent above the shelves on both sides, and a power frame made of timber is fixed on top. One side is made liftable, providing access to the kitchen.
The top hatch and skylight are cut out. The entire frame is insulated and the wiring is installed.
Everything is covered with veneer sheets on top. Once the door and window openings are cut out, you can begin exterior painting and varnishing.
Doors, an overhead hatch and supply and exhaust ventilation are installed. After securing all the fittings, side lights and wheel fenders, you can safely set off on your journey!
And the video shows a detailed assembly of the motorhome with the installation of solar panels:
A mobile home is a type of transport that is both housing and a means of transportation. This type of housing gained its popularity at the beginning of the last century.
By standard, a mobile home must accommodate eight people. Each resident has his own sleeping place, and there is also a small kitchen. Other amenities and equipment may vary depending on the specific model, but in most cases there are also:
More expensive models have a bathroom consisting of (often replacing a chair, which gives several additional meters of free space), a washbasin and a shower. Sometimes mobile homes are equipped with showers.
Step-by-step instructions: how to build a motorhome with your own hands from scratch
Choosing a van or trailer
The very first thing to do is to find a vehicle that suits you. What's your budget? Are you only going to use it on weekends or are you going on a long trip? Do you love off-road adventures? How many people will be traveling and what amenities do you need? You can find any inexpensive used van and start building a motorhome based on it.
It's worth noting that a van is not the only type of motor home. Perhaps a trailer-trailer or a camper module for a pickup truck is more suitable for someone for recreation. Before you start building the perfect motorhome with your own hands, you can familiarize yourself with all the advantages and disadvantages of each type of motorhome in our article.
HOME ON WHEELS: HOW TO CHOOSE AND WHAT YOU NEED TO KNOW
Let's figure out what kind of motorhomes there are and how to classify them by size. After all, what can be installed inside directly depends on this.
| Passenger van These are vehicles built on the basis of a passenger car. These vans are the most budget-friendly and are great for short trips. These include Volkswagen Caddy, Renault Dokker, Renault Kangoo, Lada Largus, etc. |
| Medium-sized van These vans are already more spacious, some models, like the Mercedes Marco Polo, have a lifting roof, and traveling in them is much more comfortable. This also includes the famous Volkswagen California, Renault Trafic or Opel Vivaro. There are many mid-size vans on the market, and their main advantage is their compactness, so you can easily drive them around the city and drive into almost any parking lot. |
| All Metal Cargo Van Minivans are the largest but also the most expensive vans on the market. They are designed to carry heavy loads, so they have a lot of space, you can stand at full height and easily travel in comfort for a long time. In such vans you can install several sleeping places, a shower and toilet, and all the amenities necessary for life. These include Ford Transit, Mercedes Sprinter, Fiat Ducato, Citroën Jumper and others. |
| Mini Trailer A small teardrop trailer or other option (including an off-road trailer) is a good option if you already have a touring vehicle and are planning small outings. Inside, space is limited, but you can equip such a trailer with almost everything you need. |
| Large caravan trailer Ideal for large groups, families with children and those who have a powerful car to pull such a trailer. There is a lot of space inside, and this is a real full-fledged home - with a shower, toilet and everything you need for long trips. |
| Module for a pickup truck A favorite option for lovers of off-road adventures! Complete freedom, you can go where most people cannot go, having with you comfortable living and recreational conditions. |
So, someone chooses a van for themselves, and someone chooses a trailer (for example, a used one, for further conversion). For our very first motorhome, we decided to try the second option. However, this step-by-step instruction is suitable for absolutely any van or pickup module.
We found a fairly cheap version of the trailer, which was already about 18 years old and which had been sitting at the campsite all this time. Of course, it wasn’t very good inside, but we were going to rebuild it!
This is what we took on the day of purchase
Remove everything unnecessary and clean
Before starting construction, if this is not a new vehicle, then it is better to disassemble everything to scratch - remove the seats, cabinets, shelves, wiring and check for rotten parts. This applies to both the metal body and wood (if we are talking about a used trailer).
What happened in the beginning
If this is not a new van, then you need to pay special attention to the condition of the body. The most common problem is rust. Body corrosion is a serious matter, which can lead to the car rotting and driving it will be simply dangerous. It is important to get rid of all traces of rust before warming and soundproofing the van!
There are several ways to remove rust from a car. The most common is mechanical. To do this you need:
- wash the body thoroughly
- clean off rust and remove all paintwork
- sand the surface with sandpaper or a grinder
- clean and degrease the affected area
- apply anti-corrosion paint
- after drying, paint over it with car paint
It should be noted that if the damage was serious, then you may need a primer and fiberglass putty. If there are cracks and dents on the body, they also need to be addressed. The most important thing is to completely remove all traces of damage and rust, otherwise it may appear again, especially in cold climates and if the car is constantly parked outside.
If we are talking about a trailer-trailer, then you will have to work with wood. Particular attention should be paid to the shower and toilet area (if there was one), since over many years of use, moisture has most likely accumulated here and mold may have formed. In our case, this happened, which we only found out when we dismantled the wall!
It's better to disassemble and take out all the old furniture and disassemble the shower
Plan your new RV
This is one of the main points! It’s great if you are a designer and can immediately plan out the entire space and sketch out a plan on paper or even create a 3D project in programs such as AutoCAD. Unfortunately, we are not designers, so at the planning stage we heavily used the Internet. And be sure to decide for yourself what you need in a new motorhome:
- Bed
- Kitchen
- Table
- Fridge
- Cabinets and shelves
- Work zone
- Shower and toilet
- Place for a pet
- Relaxation zone
- Solar panels and panels, switches, etc.
Take all the dimensions and figure out how everything can fit using cardboard models of a bed, shelves, table, etc. - this is the easiest way if you do not know how or do not want to use modeling programs on a computer.
A great resource for finding cool ideas, in our opinion, is Pinterest. You can hang here for several hours, but you will definitely find something you like. Save it to your desktop, phone, or print it - whatever is convenient. The main thing is to have inspiration and ideas on how to build a mobile home with your own hands!
Ideas for inspiration
Windows, hatches and pipe openings
After the body is processed, it's time to start planning where the openings for windows and hatches will be. If a hood is installed, you will need an opening as close to the kitchen as possible. Skylights are a great way to add light to a motorhome, making them great to have above the kitchen and in the shower room. In addition, to avoid excessive condensation after taking a shower, it is simply necessary in the bathroom area.
Some people like to sleep and look at the stars, so you might want to make a hole just above the bed. In addition, windows and hatches can be of different shapes—people often install porthole-shaped ones on the rear doors of cargo vans.
We had a gas heater in the trailer, so we needed a hole in the floor for ventilation. Moreover, if you already know how the water supply will be installed, you can immediately drill the necessary holes for the inlet/outlet of water and pipes.
Be sure to cover any openings on the outside (with plastic or thin plywood) while you are working on other things to keep dust and moisture out of your van or trailer!
To install windows and hatches you will need:
- Marker and measuring tape
- Electric jigsaw
- Silicone
- Hatches and windows
Thermal insulation and interior trim
Sheathing and insulating the interior (whether you have a van or a trailer) is a critical step in building a DIY RV. This may not be the most fun part of the project, but it does require some patience because there will be a lot of different shaped pieces to cut out.
Proper heat and sound insulation of the interior will allow you to use the motorhome all year round, which is very important. It is necessary to insulate the walls, ceiling and floor, and special attention should be paid to areas in the area of windows and hatches. What does good insulation prevent?
- Cold
- Heat
- Condensation
- Noise
Insulating a van or trailer should be done with high-quality materials, taking your time and avoiding the formation of “voids” and “bubbles” between the metal and the insulating material. Moreover, to avoid condensation, it is necessary to add a waterproof material to the insulation, which will prevent the formation of steam when there is a large difference between the external and internal temperatures.
Currently, there is a huge selection of materials to suit every taste and budget. When working in a van, you will have to combine straight, rigid insulation sheets and a more flexible material for working with parts.
We will tell you how to insulate a van yourself, as well as what materials are best to use in a separate article.
As for the final cladding, it can be done either immediately after heat and sound insulation, or it can be postponed until the installation of the entire energy system. In this case, you can hide the wiring.
Once the van or trailer is insulated, all that remains is to move on to the final surface layer. This is what will be the finished walls of the motorhome and its aesthetic part. Here you can use plywood, wood or lightweight PVC materials, depending on what you like best. For walls and shelves, you can use thinner material, from 5 mm, and for the floor, choose something stronger, at least 10-15 mm. On top of the selected material you can add paint (it’s best to choose matte) or someone even glues wallpaper (yes, this is also very popular!)
It is worth noting that when using a motorhome, scratches may appear on the walls over time, so it is better to choose matte paint and then, if necessary, simply touch up the damaged area rather than changing the wallpaper.
Water supply for a mobile home
In addition to what you'd like to see inside your new RV, you'll want to carefully plan for important things like the water system.
You can buy two tanks of the required volume for clean and gray water, make the necessary holes in them, supply water and drain. Installing plumbing and plumbing in a motorhome yourself is much easier than making an energy supply system. The main thing to remember is that everything must be done hermetically and efficiently in order to avoid further leaks.
To install a complete water supply system you will need:
- Clean water tank (preferably installed inside the car/trailer)
- Gray water tank
- Hoses, fittings, check valve, filler neck
- Pump
- Hydraulic accumulator
- Boiler
- Shower tray, kitchen and shower sink
You can read about how to install a complete RV water system with hot shower here.
We bought a 90 liter clean water tank
Furniture installation
After the thermal insulation and final paneling of the van is completed, you should measure everything again and begin building or assembling the finished furniture. This process can be combined with the installation of a water supply system, since sometimes it is necessary to make adjustments to the original dimensions in order to “fit” the space for the boiler, canisters or hoses.
Plywood drawers and seats
It is better to opt for lightweight materials such as plywood and PVC, especially in invisible parts, so as not to spoil the aesthetics and not load the van or trailer with excess weight - under the ottomans of the sofa or bed, inside the cabinets, etc.
The visible parts can be made of wood (such as a countertop) or other materials that you like. A good option is ready-made modules with a built-in kitchen, sink and countertop, made to fit the size of a specific van model.
Motorhome gas supply
Gas is a must-have item for every RV. The kitchen, most boilers, and many heaters run on gas. In some cases, it is better to contact a professional to install gas in your motorhome. However, if you only need it for the kitchen, then you can do it yourself. It is worth noting that to install gas you need to buy special gas equipment and hoses.
The gas cylinder must always be in an upright position and installed in a sealed cabinet to prevent leakage in the cabin. It is necessary to drill a hole in the floor, at least 10 cm in diameter, and install a ventilation grill so that the gas can escape outside in the event of a leak.
For your own peace of mind, you can install a gas sensor in your motorhome, which is very inexpensive, but can greatly help out in the event of a leak.
How is gas installed in our motorhome?
Electrical supply in a motorhome
Electrical power is the hardest part of building a DIY RV. If you are not an experienced electrician, then it is better to entrust this stage to professionals. Incorrect wiring can easily cause a fire and burn out a car, and unfortunately there are many such cases. However, if you have a good understanding of electricity, you can install the entire system yourself.
Here you need to carefully consider where to install the switches (including 220 V sockets, 12 V switches, external power supply to the van), how the devices will be connected, where to put the inverter and how many batteries to install.
For maximum independence and autonomy, you should consider installing solar panels that will allow you to use everything you need wherever you park. Modern panels charge even in daylight, so residents of northern latitudes should not worry that the sun does not appear often in your climate.
We will tell you what you need and how to install an electrical system in a motorhome or trailer in a separate article.
A convenient thing: if you don’t want to bother with electricity and wires, then just buy a car inverter. Then while driving you can easily charge mobile phones, cameras and even a computer.
Super convenient to carry this in a camper
A simple solution: if you don’t yet have electricity in your motorhome, but you really want to go out into nature, then you can buy a set of garland lights and hang them around the perimeter of the camper. And carry spare batteries with you.
Here is the idea for light bulbs from the same Pinterest
Toilet in a mobile home
The toilet is a really important thing in a motorhome or caravan, perhaps even more important than hot water. With it you really feel the difference between just a car and a “home”. Many people don't think about installing a toilet in their minivan, especially if they only travel on weekends, but let's face it, it's an integral part of life! And when you’re stuck in a traffic jam or caught in heavy rain for several hours, you really feel the difference.
Well, if we are talking about long journeys, then there should be no doubt. In addition, special dry closets for mobile homes are sold already in a set with everything necessary. All you have to do is screw it to the floor!
Toilet and shower in our motorhome
A simple solution: the first thing that comes to mind is a shovel!))) But seriously, small dry closets that can even be installed under the bed are now becoming very popular.
Example of a toilet that stows under a bed or in a cabinet
Complete the decor
Don't skip this last step! This is exactly what will make your camper a cozy home. Firstly, if you're going to be spending a lot of time in your motorhome, you'll need a comfortable bed or sofa bed with pillows and ottomans. They are easy to sew, even if you don’t have a sewing machine.
Secondly, don't forget about the curtains. For a motor home, it is always better to sew them with elastic bands and ties so that while driving they do not constantly fall and bunch up. It's also a good idea to install mosquito nets so you can sleep with the windows open.
Curtains and mosquito nets underneath
If you are traveling with your four-legged pet, then make sure that he has a cozy and comfortable place. After all, he will also have to spend quite a lot of time there.
You can expand your motorhome endlessly! And the more you travel, the more useful things will come to your mind. For example it could be:
- plastic boxes for storing food and things
- hooks for clothes and shoes
- compact broom and dustpan
- food containers and bags
- camping utensils
- first aid kit
- ropes
Storing dishes Storing clothes and other things
The list goes on and on! The main thing to remember is that space is limited, so don't take extra things that you won't use.
Useful extras
Once you start traveling in a self-built motorhome, you will soon realize whether you need to add anything. You may need an additional roof rack or awning so you can sit outside when it's sunny or rainy.
Over time, you may want to add sleeping space to the roof of the van or attach a rack for bicycles or snowboards/skis. There are an infinite number of such extras, everything depends solely on material abilities. In our opinion, if you go on long trips, you should think about such things as:
- Roof rack and car box
- Ladder
- Additional luggage rack on the towbar or hanging metal box
- Marquise
- Air conditioner
If you are a fan of off-road adventures, then the van or trailer should be additionally equipped (suspension, wheels, snorkel, winch, underbody protection, etc.). In addition, you will have to carry sand trucks, spare tires, a can of gasoline, and you will need more space to store all these things.
Making a van and finishing the finished house
You can make a motorhome from a metal container and a trailer. To stay somewhere with such accommodation, you need to find out in advance where the camping base is located, where there are no signs prohibiting stopping. RVs can look modern with the right finishes.
| Illustration | Description of action |
| We assemble a regular trailer for a car or buy a ready-made one. We put a metal container on it. For such a structure to become habitable, it needs to be insulated and furnished, but first we take measurements | |
| We cover the interior walls with wooden panels | |
| On the floor, we first roll out a protective and insulating layer of car carpet, and then another layer of linoleum or another, brighter and lighter carpet. | |
| Using a construction laser, we cut small metal parts to secure a retractable ladder that can be used to climb into the van | |
| We make a ramp. We connect metal profiles using special parts and weld them | |
| We lay out skirting boards inside the trailer in order to secure the carpet | |
| We attach wooden beams to make a small hanging children's bed. We furnish the mini-room with the necessary things: a table and chairs, a small refrigerator, a box for things and a hanger |
Interior decoration is carried out in accordance with personal needs. If there are children in the family, then it is necessary to equip a sleeping place for them.
Towbar for Mitsubishi Outlander: which one to choose, user reviews
When planning a long road trip, you should definitely equip your motorhome with a kitchen area and install a portable refrigerator. You need to put a stove in the kitchen where you can cook a delicious lunch.
The interior decoration is done in such a way that even in the event of strong shaking during movement, the furniture does not fall and its contents do not fly out onto the floor.
Having an additional battery and a 500-watt inverter will be very useful. The wiring is laid in such a way that it fits into each socket that produces 220 V (if an inverter is available). Thus, the traveler will be able to use the same devices as at home and charge his laptop/mobile phones.
In order to save energy, LED lighting is selected.
In cases where the roof is not radius, experts advise making it a slight slope on one side. Thanks to this, the roof will dry out faster after rain and there will be no risk of water flowing into the living module liner in the trailer. Using aluminum corners (40x40 mm), you can close the side joints and fix them with self-tapping screws.
Each internal seam is sealed with transparent white silicone sealant. Secure locks are installed on the doors, and blinds are installed on the windows.
When starting to build a motor home, you must first create a project
Mobile home from a Gazelle or an old bus
Re-equipment of a minibus begins with cleaning the body from upholstery and seats, after which various holes are made - for windows, ventilation, for gas supply.
Mobile house from a bus
Then the work on arranging the residential area is carried out in the following sequence:
- level out any dents on the inner surface, then prime all exposed metal parts of the body to prevent corrosion;
- the internal surface of the future house, including walls, floor and ceiling, is covered with thermal insulation;
- Moisture-resistant plywood or carpeting is laid on top of the heat-insulating material, starting from the ceiling.
Upon completion of these works, electrification and gasification of the premises, equipment of the kitchen and bathroom, and installation of furniture are carried out. For reliable installation of furniture, plywood of a larger thickness is attached to the walls than on the floor or ceiling, or separate reinforced strips are installed to fix it. And, of course, if necessary, you need to put in order the chassis and engine of a Gazelle or an old bus, then such a house will become truly mobile.
Design
The most logical place to start searching for parts is the axles and engine. The frame, suspension, etc. will depend on the capabilities of the engine and the dimensions of the transmission. In the simplest version, all the parts are simply laid on a flat surface, and the frame is welded based on the distance between the axles. It is recommended to use standard frames from the GAZ-53, which can easily be shortened or equipped with additional cross members, fork bars, shock absorber struts, suspension travel limiters, side members, etc.
It is better, of course, to use preliminary diagrams and drawings. Homemade trucks are assembled from factory parts, so all dimensions must be known, and it is not impossible to write out all the calculations on paper in advance. The standard engine may require modification due to the need to connect to a non-original gearbox; the gearbox does not always allow you to work freely with the wheels and motor at hand, but optimism and preliminary planning help Russian craftsmen cope with any difficulties.
Source
Mobile home: photos inside and outside
You can equip a trailer house on wheels by studying various photos.
When creating a trailer-trailer with your own hands, you need to use proven materials and reliable fastenings that allow you to withstand a trip over potholes PHOTO: autoreview.ru/images
You can install modern multifunctional furniture in your mobile home PHOTO: autoreview.ru/images
The best way to increase space is to cut off the roof and install a hydraulic system PHOTO: autoreview.ru/images
When drawing up a project, you should study the legal nuances and properly design a homemade mobile home so that you can safely go on a trip with it.
First steps
Building a mobile home with your own hands consists of the following steps:
- Exterior works
- Interior work
- Water supply works
- Gas and electricity
- Furniture
- Other
If the van will only be used by two people, there will be really plenty of space. If you are planning a trip for 3 or more people, you need to consider the number of seats. Remember that seats must be equipped with appropriate seat belts.
How many sleeping places will you need? One option is to arrange a bunk bed for children. If you have extra space under the roof, you can make a “drop-down” bed.
At this stage, you should have a clear plan for further action. Of course, you can improvise, but it's much easier to have a well-thought-out plan on paper.
Organizing a mobile home business
You can organize your own business in the construction of motorhomes. There are four options for developing such a business.
Option #1. Production of houses for sale for summer holidays or living in the country. This will not require serious material costs, since the houses will be of a simplified design - for example, without insulation.
Option #2. Rent out mobile homes. This is a relatively new business, and everything new can be very expensive. The number of motorhomes in this case increases as the customer base grows.
Option #3. Make mobile eateries or shops.
Option number 4 is also the most interesting. It consists of creating a car park and its further use as a hotel. The main thing here is to divide the trailers into budget, premium and middle class.
For a more detailed introduction to construction technology, watch the thematic video.
Video - DIY mobile home
Traveling without parting with the comfort and warmth of home is a real dream. Fortunately, it is quite feasible. A mobile home will help with its implementation (photo). Many Europeans and almost one in four Americans own such all-inclusive RVs.
The mobile home has everything: beds, sofas, a compact kitchen, built-in cabinets and other amenities (photo). Some even manage to carry a TV and other equipment with them. A motor home not only allows you to feel comfortable while traveling, but also allows you to save a lot. There is no need to rent hotel rooms and pay exorbitant prices.
Podium for speakers: make it yourself or buy it
In the process of manufacturing a motor home, the vehicle owner tries to install various durable materials, which is a serious mistake. It is important to use lightweight materials during the construction process so that the car can easily pull the finished structure.
The second, no less common mistake that is made when building a motor home is ignoring the recommendations regarding ensuring maximum protection for the external surfaces of the trailer. It is advisable to apply at least 2-3 layers of primer and paint, which will increase the life of the homemade camper.
You should also avoid exceeding the dimensions of the main platform of the trailer selected as the base. Otherwise, difficulties will arise during the registration process with the traffic police.
It’s not always possible to register a homemade camper
Technological process
Making a tent van for a GAZelle with your own hands is not such a difficult task. First, the frame is welded, the posts of which are attached to the bottom through embedded plates. The covering material is calculated according to the length of the sides and cut according to the required dimensions.
It should be noted here that covering material from a single piece of which you can get a finished awning does not exist in nature. Therefore, the fabric will have to be sewn on a machine, leaving 4-5 centimeters of margin along the bottom edge for installing eyelets.
In conclusion, we would like to add that our company produces awnings and frames for GAZelle and cars of domestic and Western production. Our specialists work only on individual projects, guaranteed to carry out work of any degree of complexity.
Interior work
The van will most likely have a partition behind the front seats. Some partitions are attached with screws, others are welded to the body. A grinder will help solve the problem.
Remember to use protective equipment. Sparks can leave nasty stains on glass that are impossible to get rid of.
The fun begins. The insulation layer is very important as it will protect your camper from outside noise and temperature. There are many materials that can be used. The choice is up to you.
In this case, Armaflex material
. It should be cut into pieces and glued. The main point is protection from moisture. If the insulating material does not protect against moisture ingress, it should not be used.
It is necessary to prepare insulating material, lightweight and moisture-proof plywood, as well as soft and flexible carpeting.
For the side covers, thicker plywood should be used, since furniture will be installed on them in the future.
Use a wide temperature range adhesive or sealant to secure insulation and carpeting to the sidewalls. Because the RV will be exposed to both freezing temperatures and the hot summer sun. The heating operation will also be affected. If you use low-quality glue, the work will have to be redone after some time.
Where to begin? Start sheathing your motorhome, from the roof to the flooring. First, we install the insulating and cladding layers on the ceiling, then we move on to the side panels.
Use wood strips on the floor to create enough space for insulation. The slats are secured to the floor using appropriate sealant. Then a layer of insulation is laid, after which it must be covered with plywood. The plywood is secured using sealant or screws.
Remember about the water supply, as well as the need to lay electrical cables and gas pipes.
Wires and hoses can be routed through the insulation or under plywood covers if you already know where all the fixtures will be installed.