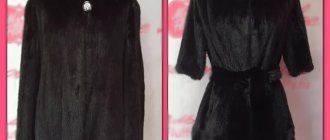
Sometimes, for a variety of reasons, we may need to enlarge clothing, such as a jacket. It would seem that the matter is complicated and you will either have to take it to a professional seamstress, or spend a long time and painstakingly making the side inserts with your own hands. However, there is an easier way to make a jacket larger, which even a fairly inexperienced person can handle.
You will need:
- belt from the jacket you are increasing;
- fabric suitable for the jacket, if there is no belt;
- or the belt of another jacket;
- lightning;
- sewing tools
If your jacket does not have a belt, you can take a fabric that matches the color and texture. If it’s difficult to choose a fabric, don’t be discouraged, because in this case you can turn the place of insertion into a kind of accent. Take, for example, a contrasting color fabric or even sew some knitted pattern on top. Give free rein to your imagination.
Whatever material you choose, the algorithm for further work is the same. We take our jacket and try on the fabric and zipper on the insert. We cut off the amount we need both in length and width.
Youtube | amateur sewing
Now, in order not to rip off the zipper, we simply carefully cut it off, leaving the fabric part on the jacket.
Youtube | amateur sewing
We baste the belt or fabric and sew it on a sewing machine. We do the same with lightning. Almost done.
Youtube | amateur sewing
If there were buttons on your jacket, now we need to hide them. You shouldn’t rip off the buttons, because it won’t look very neat. We simply take the second part of our belt or fabric and hide the “stumps” of the buttons, covering them from above. We sew a strip.
Youtube | amateur sewing
This is what we had and what happened. The work took no more than 20 minutes. The insertion will only be noticeable to you, since you know about it. Others will take it as a feature of the jacket style.
Youtube | amateur sewing
You can watch a video on how to enlarge a jacket with an insert at the front at the link below.
Before the start of the autumn season, I took out warm children's clothes. I organized an audit to check how much my daughter had grown. Many things, of course, are irrevocably small - after all, children grow so quickly! Masha has gained a lot of growth over the summer. I had to buy new clothes and shoes.
Along with other things, I also took out a light autumn raincoat that I sewed myself. Showed it. The wide-style raincoat became as tall as a light jacket for Masha. The sleeves became short, 3/4 in length. It’s a shame, it’s a nice cloak, but you can’t wear it like that...
What are we, not needlewomen, or what?
The bottom of the sleeves was ripped open and ready-made circular knitted cuffs were sewn on. To do this, I turned the sleeve inside out and put a cuff inside, folded in half. I first sewed a zigzag stitch on a machine, then duplicated it with an overlocker.
A zigzag seam is needed to ensure that the stitching remains elastic and stretches without tearing. I set the stitch length to 2.5 and the zigzag width to 1.
View from the inside. You can also go through the stitching at the junction once.
And it's ready, you can wear it. It turned out great, we are delighted - both me and Masha.
My husband is most pleased with me - he is always happy with me when I “save”

