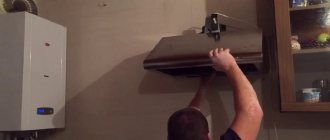
The article will tell you how to make a barrier with your own hands from scrap materials. Of course, the materials are not entirely available - you will find some in your garage or shed, and others you will have to buy in the store. Why is a barrier needed? Its main function is protection from foreign cars. Quite often, cars roll around the courtyards of high-rise buildings, disturbing the peace of residents.
To avoid this, you can install a house barrier. This will protect the residents and make children’s stay in the yards safer. As for opening, this can only be done with a special key or a wireless key fob - it all depends on which unlocking method you choose.
Where can it be used?
Now let's talk about in what cases it is reasonable to install a barrier. Most often it is placed in the territories of the following objects:
- Apartment buildings.
- Car parking.
- Dacha settlements.
- In areas prohibited for entry of vehicles.
- At the entrance to protected areas.
- At the entrance to private households.
Sometimes, to reduce the speed of passing cars, it is enough to install a speed bump. But this is not always effective, since in some cases it is necessary to limit the movement of vehicles around the yard or site as much as possible.
As for barriers, there is no need to buy them - the industry produces models that ordinary owners will not afford. It’s cheaper to make a barrier yourself. You choose the materials yourself, and therefore guarantee high reliability of the product.
Coordination of the installation of a barrier with the fire department in the courtyard of an apartment building
Obtaining permission to install a barrier from the fire department is a difficult but important matter. It is better to deal with this issue before the start of installation work, so as not to redo anything in the future and not come into conflict with this organization. The only requirement of representatives of the fire department for any enclosing structures is to ensure unhindered entry of fire trucks into the yard
If the fence does not meet this condition, it is considered illegal. PPB rules as arguments for refusal
The only requirement of representatives of the fire department for any enclosing structures is to ensure unhindered entry of fire trucks into the yard. If the fence does not meet this condition, it is considered illegal. The PPB rules are used as arguments for refusal.
That is why it is necessary to prove the constant readiness of the barrier to open for the passage of emergency vehicles.
How to do it?
There are two proven options available:
- Hire several security guards, whose duties will include the passage of transport related to urgent services. The method is reliable, although it is not the most budget-friendly. Not all residents can afford the maintenance of such workers.
- Install a video surveillance system with signal output to a 24-hour control room. Everything will be much simpler here - the passage will open at any hour. To do this, the dispatcher only needs to press a button.
Attention! If the installation of a barrier is not agreed upon with the fire department, but the fence is still erected, the fire truck that arrives on call has the right to demolish it. In this case, no one will compensate for the damage, but the court will receive a claim for compensation for damage caused to the company car
Types of barriers
There are several types of devices that are produced by domestic and foreign manufacturers. The designs are not very complicated and can be repeated in a homemade environment. So, let's highlight the following devices:
- Automatic barriers.
- Electromechanical.
- Retractable barriers.
- Swing structures.
- With manual drive.
- Hydraulic systems.
They all differ not only in price, but also in the principle of operation. The design of any barrier consists of the following components:
- Central control unit.
- Mechanical gearbox.
- Electric motor.
- Balance.
- Rack.
- Boom for barrier.
Also, some designs have protective mechanisms, for example:
- Photosensors and other control and safety devices.
- Catchers.
- Automatic systems.
- Protective "skirts".
Preparation of necessary documentation
Legally installing a barrier in the yard is a rather troublesome process. But it is incomparable to the benefits and amenities that are expected after its completion.
Sample letter to the city administration for approval of the installation of a barrier
And the sequence of actions begins with documenting the consent of apartment owners to install this structure. It can be obtained by collecting signatures or at a general meeting, at which a responsible person is also elected to represent the interests of the owners in the relevant authorities. All results are recorded in the protocol. The number of consonants should be approximately 2/3 of the total number of people voting.
Then you need to obtain confirmation of registration of shared ownership of the local area and registration of the site in the cadastral register. Why submit an application written according to the established template to local authorities.
Drawing of the design and installation of an automatic barrier in the yard
A barrier is not a temporary structure. Its installation is impossible without excavating the soil for the foundation for the cabinet. In this regard, it is necessary to have a diagram of the site, communication nodes in this territory and issue a permit for excavation work.
Stages for approving the installation of a barrier in the courtyard of an apartment building
It is quite difficult to obtain permission to install a barrier boom from the fire department. Her main argument: nothing should prevent special equipment from entering the yard in case of fire. Therefore, the legality of installing any barrier device is questionable. This problem can be solved by hiring a watchman who will be in the booth and will be able to raise the road barrier at any time. You can get by by installing video surveillance with a remote control in the watchman’s booth, which operates around the clock.
Drawing with dimensions for installing a barrier
automatic barrier model
Brief description of designs
Electromechanical barriers are more popular and have the following characteristics:
- They work in any conditions, even the harshest.
- The design is not complicated.
- Uninterrupted operation.
Such devices are practical when compared with others. They provide passage clearing and fencing and can be a good alternative for gates.
As for hydraulic structures, they are usually used to limit the movement of vehicles. The designs have the following parameters:
- Can work continuously.
- Wear resistance at the highest level.
- The utilization rate is also high.
- Absolutely silent operation.
Sliding barriers are anti-vandal devices, as they are able to protect any object from mechanical impact. The active element is an arrow that extends in a horizontal plane and performs an enclosing function. When choosing and manufacturing such barriers, the space available at the entrance is of decisive importance. It is convenient to use such barriers; anyone can open and close it without any problems. As for manual designs, they do not have an auxiliary drive. A counterweight is placed on the boom, which lifts it.
Cost calculation
Barrier prices, depending on the characteristics, start from 15,000 rubles. for the simplest mechanical device. A device of this type requires the additional services of a security guard, who will need to be paid a salary. His main responsibility will be to activate the mechanism when residents or ambulances, firefighters, etc. arrive. Therefore, choosing such a means of fencing is unlikely to save money. For a more reliable and easy-to-use electromechanical barrier you will have to pay from 35,000 rubles.
With design
Installing a mechanism requires taking into account many factors: resistance to external influences, safety and convenience for people passing by, physical feasibility of installation, etc. Often people are not able to make a proper assessment and resort to the services of professional engineers, which are provided by many companies in every city. The cost of installation is calculated depending on individual conditions and the barrier model, and therefore varies widely. It costs 12,000-15,000 rubles to navigate.
Subscription fee
In order for the barrier to work properly and never fail, timely maintenance is required. To carry out the service, a specialist is required, because an ignorant person can not only damage, but even completely disable complex equipment. Therefore, it is worth including quarterly professional maintenance in the cost estimate, which, depending on operating conditions, will cost approximately 500 rubles. every season.
Dispatching is more expensive and starts at 2,500 rubles. per month for remote service. The services include control of the passage of special transport (fire department vehicles, ambulances, etc.). As the responsibilities of the dispatch service expand, dispatcher costs increase accordingly.
However, if the tenant does not have a car and does not want to pay extra money, he can appeal the payment decision in court. The Supreme Court will allow not to pay for a barrier if its installation was carried out illegally.
Preparatory work
The first step is to make a drawing of the barrier or a sketch. This will help subsequently make calculations of all components and their selection. Then choose the location of the barrier - it is also recommended to indicate it in the diagram. Next, supports are placed, one will secure the block, the second will protect the boom from lowering too quickly. The arrow should be the same length as the distance between the posts.
If you are unable to make a drawing yourself, then contact a specialist. The drawing must contain the following elements:
- Arrow.
- Axial mechanism.
- Catcher stand.
- Support block.
- Fastening block.
To make the drawing more detailed, it is recommended to use a top view. In this case, it is extremely important to demonstrate sections of the elements. Especially for those cases where pipes of different diameters are used in production. You can make it easier to find the best option for manufacturing structural components. A separate drawing must be drawn up for the axial mechanism. To avoid mistakes, please indicate all dimensions in millimeters.
Determining the installation location
Layout diagrams of the foundation pads under the barrier post and the boom support post at different positions of the barrier post relative to the boom raising/lowering plane - a barrier with left opening (top) and a barrier with right opening (bottom).
When carrying out installation work, it is necessary to take into account that the installed model should not block the free movement of pedestrians and cyclists, especially for structures installed at the entrances to the territory of summer cottages, garage cooperatives, courtyards and similar areas.
The nearest building from the structure being mounted should be located at a distance of at least half a meter. If the structure is located in close proximity to a multi-story building, it should not block the drainage area for rain or melt water.
Any model should be installed on a concrete base. It is not recommended to install the device directly on an asphalt base, since asphalt is too soft a base for this purpose.
When preparing the installation site, it is necessary to calculate the height of the formwork. Its height is directly dependent on the load exerted on the concrete base by the entire mass of the structure.
With a boom length of 4 meters, the formwork can be approximately 50 cm. With a longer boom, the height of the formwork can reach 80 and even 100 cm. To strengthen the structure, reinforcing pins are used, which help give the foundation a higher degree of rigidity.
How to make and install a lifting mechanism yourself
To make a barrier in the yard with your own hands, you need to mount a lifting mechanism.
This is done in the following sequence:
- Drill a hole in the center of the main support using a carbide cutter.
- Place a limiter on the second support. You can make it from any available material. Its main function is to limit the movement of the boom.
- Next, you need to place an arrow in the axis.
- You need to install a counterweight on the back of the boom.
- After this, place the entire structure and fix it on a concrete base.
- Paint the entire surface of the barrier. It is recommended to paint in red and white colors, preferably with compounds with reflective properties.
- To reduce the negative impact of the atmosphere on the paint, you need to apply a couple of layers of varnish on top.
- To make automatic control, you will need a remote control.
- To make fully automatic control, you will need sensors that respond to movement.
Once the structure is installed, you can begin setting up. Of course, if you installed a simple barrier with manual control, you don’t need to make any settings. But if the control is automatic, you will have to adjust the operation of the drives.
Materials for production
The cheapest option is a wooden barrier with hinged canopies.
You can make your own barrier from iron or wood. Advantages of the iron model:
- It is very difficult to damage or break the device, since the strength of the metal is high;
- The barrier lasts for several decades. Especially if it is periodically treated with anti-corrosion agents;
- tearing down a metal barrier is much more difficult.
Disadvantages of the device:
- heavy weight - if the structure is not equipped with a lifting mechanism, only a strong man can manually move the barrier;
- the structure costs more than wood.
The wooden boom and cabinet are definitely cheaper. There are other advantages:
- the weight of the structure is much less, it is easier to install;
- wood lasts long enough if it is treated with antiseptics and painted;
- the design is simpler.
There are also disadvantages:
- the barrier is too light, it is not difficult to break it;
- In regions with strong winds, the arrow will have to be made heavier.
The issue is resolved taking into account the general safety requirements in the fenced area.
If a number of cottages constitute an elite village, much more attention is paid to its protection. It is better to install a strong barrier here. You can also prevent traffic on the street between dachas with the help of a wooden one.
Installation and connection of automatic barriers
To make a barrier with your own hands, you need to prepare a concrete base. It is this that will be able to fix the entire structure. There are no innovations, everything is done according to the old and proven scheme. You dig a pit, pour a cushion of sand, install reinforcement and fill it all with concrete. Be sure to waterproof it.
When making an automatic barrier in the yard, you need to do several manipulations. In general, the installation is the same as in the previous case. You just have to connect the electrical part, namely:
- Reliably ground all metal elements.
- Lay the cable through special channels.
- Place the control panel at a height of about 0.3 m above the surface.
If you are not confident in your own abilities, contact experienced installers. In general, the installation of all systems should not cause any difficulties; the main thing is to adhere to the pre-drawn plan. Always rely on the drawing prepared at the first stage. This will allow you to save time and effort, and most importantly, avoid waste of materials.
Installation process
The process steps remain the same for almost any type of mechanical barrier and differ only in the design details.
- Preparing the site and foundation.
For wooden structures, a fairly deep hole is made. For massive metal ones, a concreted square area with a side of 50 cm and the required depth is prepared. You can use a metal backing slab with bent studs, which is concreted. - Installation of supports.
The wooden base is dug into the prepared recess. The metal is attached to the base slab on concrete with anchor bolts. For lighter structures, it is possible to fasten the base plate using reinforcing pins. A catcher is installed on the other side of the driveway. It requires a less massive mount. - Installation and fastening of the boom.
Fastening occurs simultaneously with the installation and adjustment of the axial mechanism. From the side of the rack, the boom protrudes beyond the base by 50–80 cm; a counterweight should be attached there. On the side of the catcher, the protrusion is much smaller - from 2 to 10 cm. In order for the rotating mechanism to work properly and for a long time, it must be periodically lubricated. - The last step is to check (if necessary, adjust) the operation of all fragments and the mechanism as a whole.
Still haven't decided which brand of barrier to choose? Read about Dorkhan - all doubts will immediately disappear!
We will tell you in detail how the width of a garage door for 1 car is calculated.
At this address https://tech-gate.ru/drugaya-produkciya/markizy/kak-sdelat-svoimi-rukami-2.html you will find an article about making retractable awnings with your own hands.
Before installation, you need to paint all parts and let them dry completely. Barriers should be visible even at night, so it is advisable to purchase additional stickers made of reflective material.
If the surrounding area is not illuminated at all, you should consider installing a lantern.
Independent production and installation of a barrier is possible in a fairly short period of time. You can even use scrap materials for this.
In addition, it is much cheaper than ordering the same services from companies specializing in this.
However, if you have absolutely no skills in working with metal and wood, you should entrust this to professionals, then the design is guaranteed to be reliable and durable.
And in conclusion, we invite you to watch a video that shows how you can make a wooden barrier yourself:
Choosing a homemade or factory-made deadbolt for the gate
Based on common sense, we state that at the gate of the courtyard of a private house where we live permanently, it is enough to lock it from the inside. This solution also applies to garage doors. If the gate is not under control, for example in a country house, you need to add a lock. It is also better to lock the gate, and it is convenient to have an intercom with a remote-controlled lock in the house.
A deadbolt or latch can be purchased at the store. We can conditionally divide the locking devices into:
- bolts;
- valves;
- retainers.
At the same time, installing a factory product can be difficult, and sometimes impossible. Moreover, in conditions of mass production, metal is necessarily saved, so the factory version often has insufficient strength.
In many cases, it is more practical to make a gate lock yourself. Every owner will always have scraps of rods, angles and pipes that can find a new useful life. In this case, you should choose a simple and reliable device design. If there is a need to ensure that the internal deadbolt can be unlocked from the outside, it is better to purchase a factory deadbolt lock.
We build a hive with our own hands
If you don’t want to spend a lot of money on a store-bought hive, there are many videos on the Internet that show various methods of making beehives with your own hands with all the drawings and required dimensions.
Step-by-step instructions for building a bee house for 16 Dadan frames:
- 1 step. We saw blanks for the inner body.
- Step 2. We make cuts to connect the sidewalls. We adjust the sidewalls to each other. We fasten the sides of the inner body.
- Step 3. We make inserts to increase the height of the sidewalls and increase them to the desired height.
- Step 6 Making legs for our hive. We nail the legs to the inner body.
- Step 7 We prepare blanks for the bottom of the hive, carefully nail the first row of boards. We cut off the layer of roofing felt. We fasten the 1st and 2nd rows of boards. Thus, the bottom of the hive is ready.
- Step 8 Attach the back wall of the case.
- Step 9 We cut out a corridor for the entrance. We cut a tap hole in the outer wall.
- Step 10 We nail down the front and side walls.
- Step 11 We make an emphasis for the roof. We cut blanks for the roof. We adjust and knock them together.
- Step 12 Next, we make the magazines and subframe.
- Step 13 We burn the hive body inside and out.
- Step 14 We paint the hive and cover the roof. The hive body is ready.
- Step 15 Small details remain. We screw on the handles for carrying.
- Step 16 Fill the sides with polyurethane foam and “seal” the top
- Step 18 We screw on the ventilation mesh and fasten the valve.
- Step 19 We cover the roof with galvanized sheet metal.
- Step 20 We drill the upper taphole. We fasten the taphole barrier.
- 21 steps. We fasten the landing board and the entrance valve.
- Step 22 The hive is ready for use.
Using approximately the same method, you can build hives with 14 and 16 frames. They are very reliable, the bees are very comfortable in them. The only drawback of such models is weight.
Tools
To make a manual barrier with your own hands, you need to first prepare the necessary tool and appropriate material for the job:
- wooden boards;
Example of a wooden barrier design
- concrete;
- machine;
- hardware;
- jointer;
- drill;
- counterweight;
- paint;
- sensors;
- Control block.
Return to contents