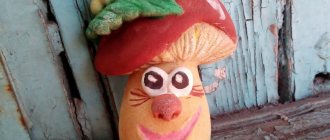
DIY salt dough berries. Step-by-step master class with photos
Modeling from salt dough.
"Gifts of Summer" Master class with step-by-step photos. Author: Shcherbova Yulia Andreevna primary school teacher MBOU "Tolmachevskaya Secondary School No. 61" p.
Tolmachevo, Novosibirsk region Age:
The master class is intended for teachers, parents, children aged 5-11 years.
Purpose:
gift, interior decoration, visual aid for classes, counting material in kindergarten and 1st grade, educational environment for role-playing games “Shop”, “Hike in the Woods”, “Cafe”
Purpose:
to teach children to sculpt strawberries and raspberries from salt dough.
Objectives:
To develop the ability to sculpt from salt dough. To teach children to sculpt a ball using circular movements of the palms and fingers, to show the possibility of transforming (flattening) a ball into a disk. To develop creativity and imagination. Develop fine motor skills Coordinate the movements of both hands. Develop aesthetic perception; cultivate a love for nature, a desire to convey its beauty in one’s creativity
Materials:
flour, salt, water, gouache, foil, basket. During the lesson you can use a selection of poems and riddles, coloring books. Riddles about strawberries and raspberries introduce children to the magical world of healing and tasty berries. Riddles on the theme “Berries,” like any riddles on the theme of native nature, teach the child to be attentive to the environment.
1.N. Rodivilina We picked strawberries Together with my brother Kostya, We helped Mom clean them - We tore off the tails. Painstaking work, But no one is lazy, For the winter, cook delicious jam! A bowl of berries is cool, if only you didn’t bother! But for some reason I don’t want jam anymore!
2. At the dacha, the strawberries have already bloomed. I look at her, imagine how grandma makes jam in the morning, and I help her again! I have a huge spoon in my hands - I stir the jam in a saucepan, I try, I try, and, clinking with the spoon, I now add sugar... In June my strawberries will ripen, In June we will make jam, And, opening the jar at the end of January, We will dream about summer in winter .
3.T. Nezhelskaya Berry strawberry Little sister to the sun. It ripens in the summer and brings joy. The kids are enjoying themselves... Better than candy! A storehouse of vitamins Gathered in a berry. They create their own magical healing nectar. Children, Grandmothers and Grandfathers, Moms and Dads are having fun... Everyone is happy about the strawberries!!! 4. Adults and children love raspberries. Even bears eat them in the forests. Surely there is still someone who eats it, After all, there are countless useful properties in it, It will help cope with a cold, And it can become a tasty addition to a dish, I love raspberries for this, Thank you! I tell her for her help.
5. A thick and prickly raspberry tree has grown in a quiet clearing in the valley; The branches bend under the weight of dew and the weight of ripe raspberries. When I’m there, it seems to me that a princess might suddenly come out of the forest with Malinka and feast on the silence of the Bear Kingdom! 6. The raspberry grows so thickly in Aunt Tanya’s garden and blooms with snow-white, elegant flowers. And in that garden, day after day, bees fly in unison, From morning to night, a swarm hovering with a benevolent buzz. The berry will ripen, then, Like a noisy swarm of bees, the children scurry about in the garden in a cheerful crowd!
7.Among the thorny bushes, children, I show off with a red berry on a branch at the edge. Various little animals love to feast on me in the summer. The brown bear will never bypass that clearing where a lot of juicy sweet berries grow. And people store me in glass jars for a year, like a medicine for colds. Flu and sore throat are not scary, If I’m nearby - ... . (Raspberry) 8. These forest berries are loved by brown bears. Not rowan, not viburnum, But with thorns... (Raspberry)
9. Collect sweet berries, save them for jam, for colds, for sore throats. What will tea help with? - S... (Raspberry)
Little red faces, little ones, showing off on the ridge. From the winds and from the rains, the berries are worried. We don't expect bad weather. We'll reap the harvest in no time. The whole family and our Vika really like it... (Strawberry)
Beautiful red, ripe, not white, juicy and sweet, very aromatic. Guess what we're talking about now? We plant a bush in the garden in the spring, loosen it, water it, soon the berries will turn, for the green ones will come. And then they turn red, they become fuller, they become kinder, the fruit becomes big, and with a huge soul, we will collect them in a basket, we will select the largest ones. I'll tell you a secret, there are no better berries (Strawberries)
What kind of berry is in the red tunic? This is a juicy miracle... (Strawberry)
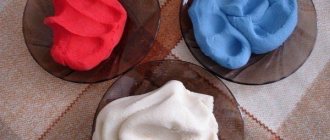
Let's get to work. 1. Knead the dough from flour (2 tbsp.), salt (1 tbsp.) and water.
2. Prepare the necessary materials (basket, gouache, foil, pencil)
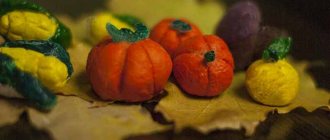
3. Strawberries. Squeeze a piece of foil into a ball. 4. Shape the dough ball into a disk. 5. Place foil in the middle of the disk and roll into a ball. 6.Use your fingers to shape the berry. 7.To make the sepals, we will use a template. 8.Attach to the berry and shape. 9. Sepals can be made in another way. Make a disk from a small ball and make cuts using stacks. Use your fingers to shape it. 10. Raspberries. Make a small ball from the dough. Prepare a pencil. 11. Roll small balls, the size of a bead. Attach them to the workpiece.
12.Leaves: Roll out the dough and prepare a raspberry or strawberry leaf.
13.After the crafts have dried, you need to paint them.
salted strawberries
Let's start... For work we will need the following materials: wire cutters, stack, salt dough, foil, wire (I bought it for beads, very convenient), nail scissors, White napkins, acrylic outline, and of course paint, I use gouache .
Using wire cutters we bite off a certain length, it can be from 10 to 20 cm long, a wire, we make a hook at the tip, a small (about 2x2) piece of foil is hooked onto the hook, “wound” and pressed firmly. Vary the size of the foil, they need berries of different sizes.....
From a white napkin, I will note WHITE, why white, because in the final part, when the berry is painted and the sepal is glued, I painted the trunk in the color scheme that nature gave to the branch of the berry, and it is a little pinkish-red at the base of the strawberry, and off we go shades of green, ocher, burgundy......, in general, we paint according to nature... So, we take a strip of 1.5 to 2 cm wide napkins and apply it obliquely onto a wire. At the base, it is better to blot the napkin a little with a damp finger, so it will lie tightly and will not simply scroll. We need the stem to be elastic and strong. The process is like twisting flagella, but it should be noted that when you do a lot, your fingers get tired....:))
We made blanks and made sure to coat the stems with our fingers with PVA glue for strength. I do it first with exactly this step: wire - foil - wrapping with a napkin, and only then the dough, I explain, this way the beginning of the napkin will be securely hidden in the berry and will not create inconvenience in the work later. On my experimental berry you will further see what it means to not hide the napkin under the dough, but of course it is veiled behind all the sepals, but it’s a little inconvenient, that’s all…..
And now modeling, well, here as in other berries, we take a small piece of dough….
“put it on” a piece of foil and stick it around it, giving it the shape of a berry. As I could tell, it glows constantly..... I drop a little PVA glue into the center of the connection between the trunk and the berry itself so that the dough sticks thoroughly to the napkin, we press it, here the stack helps me, and somewhere I gently smooth it with my finger....
Well, the first one went......
Don’t forget about the unusual shapes, both elongated and like a ball, and the tiny ones are needed, they will add zest to the bouquet.
Well, here they are...... darling seeds. An acrylic white outline comes to the rescue (I use glass and ceramics). Carefully, don’t tremble.. :)), we squeeze out droplets very close and generally “tasty”, so that a decent lump is formed. We start from top to bottom. On my very first berries, if I squeezed out a little at a time, the dough seemed to absorb some of the goodness of the paint and the bump was barely noticeable, it ended up in the same treasured places, again and again. So it's better to be big and neat. Here it is, the treacherous gap between the napkin and the dough...
Second row, staggered
This is how cute it turns out, small, but already fashionable :)) Let it dry thoroughly for 3-4 days, the droplets should be solid.
We prepared an armful for painting :))
And now the painting. In this case, I’m showing a ripe strawberry, I used two shades of red.
Does your child prevent you from doing what you love, insistently demanding attention? So give your child the opportunity to create on his own. Crafts made from salt dough can be a fun hobby for him. Both hand motor skills and imagination will be involved here. Making a craft from salt dough, step by step photo of a plate with strawberries, you can invite your child to try to make a plate with strawberries, which will always remind you of summer.
The simplest recipes for baking puff pastry with cottage cheese
Cottage cheese baking is always my priority; the pie with shortbread crumbs alone is worth it! And from puff pastry I make puff pastries, different snails, cheesecakes, buns, pies, in general, you can create anything. At least I’ll show you these simple recipes.
Snails
Crispy, aromatic and very tasty puff pastries are prepared so quickly that it’s impossible not to make them!
Filling ingredients:
- cottage cheese – 350 g
- granulated sugar – 100 g
- egg – 1 pc.
- vanillin – 30 g.
I don’t even mention the dough, you can knead your own or buy it at the store.
So, mix cottage cheese with sugar and a raw egg, add vanillin, you can add coconut flakes or raisins, dried fruits, nuts for taste - as you wish.
Just stir with a fork and the filling is ready.
The frozen dough needs to be taken out of the refrigerator and allowed to thaw, but if it is freshly kneaded, then on the contrary, let it first stay in the cold for at least an hour.
Roll it out into a rectangle 2-3 mm thick.
Place the curd filling on top and spread it over the entire layer.
Now roll it into a tight roll and pinch the edge.
Turn the workpiece over, seam side down, and cut into pieces 3-4 cm thick.
Place the snails on a baking sheet lined with parchment so that there is a good distance between them, because they will increase in volume during baking.
Brush them with beaten egg and place in the oven for 30-40 minutes (temperature 180 degrees).
As soon as they are browned, while they are hot, coat them with melted butter, and after cooling, sprinkle them with powdered sugar.
Cheesecakes
The same filling can be wrapped in the dough in a slightly different way and you will get cheesecakes or buns. But let's make it more interesting. The baked goods are airy, soft, very tender and tasty.
For 300 g of cottage cheese we need:
- 3 eggs
- 1 lemon
- ½ cup sugar.
How to cook:
Grate the lemon zest.
Separate the yolks from the whites of two eggs. Put the latter aside for now, you can put them in the refrigerator. Beat the yolks and another whole egg together with sugar until thick white foam.
Pour the resulting mixture into the cottage cheese and punch it with a blender.
Add the zest here and mix.
Add a pinch of salt to the whites and beat until stiff peaks form.
Now carefully and carefully combine the protein mixture with the curd mixture.
The finished dough (in this case, you can use yeast-free dough) needs to be lightly rolled out and cut into squares.
Place the filling on each piece and pinch the opposite corners.
To prevent the corners from falling apart during baking, grease them with water or egg white. You can also do this: let the edges fall apart, put any berries in the middle of the finished baked goods, it will be both beautiful and tasty.
Baking time for cheesecakes is approximately 15 minutes.
Nyusha
Pig Nyusha is a lovely pink lady who will take a lot of work to create.
To work you will need pink, red and white plasticine, a little brown. The process is:
- White eyes are attached to the body - a ball, dark pink eyelids are made, and the pupils are dots.
- From very thinly rolled brown material we make fashionista eyelashes - long, beautiful and curved.
- For the patch, red and white plasticine are mixed. The ball is flattened, secured in place and two dents are made - nostrils.
- They roll up plump legs and arms and decorate them with red hooves.
- The most difficult part remains - the pig's hairstyle. It is made from two red disks, the “braids” are made from small balls folded into a pyramid, and all this splendor is completed with a bunch of “hair” - tassels.
Baked goods from puff pastry made from store-bought yeast dough with jam (jam)
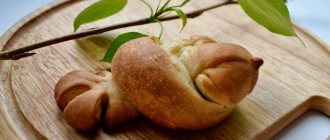
Look what a beautiful braid-shaped pie you can make from puff pastry with just jam!
Of course, it should be thick, or add starch so that it does not leak out during baking. But it’s better to take jam or jam.
They also put berries and even a bar of chocolate in this pie, which will also be delicious!
In this case, in addition to jam, creamy curd cheese was also used.
So, defrost the purchased dough. Roll it into a square (28x28 cm), without pressing too much, immediately on baking paper.
Combine cream cheese (140 g) with a teaspoon of vanillin and table sugar. We work with a mixer to make the mass fluffy.
Visually divide the square of dough into three parts and place the filling on the middle one, spread it evenly with a spoon, leaving the edges free.
On the other two parts of the dough we make oblique cuts to get stripes 2 cm wide. We cut off the extra triangles in the corners; we don’t need them.
Spread your favorite jam on top of the cream.
Now we braid the pigtail: first we fold the horizontal edge, then the stripes alternately from one side to the other, pressing them to the bottom.
The top must be coated with egg and bake for 20-30 minutes in an oven preheated to 200 degrees.
The finished cake can be topped with sugar icing (mix half a glass of powder and a few teaspoons of milk).
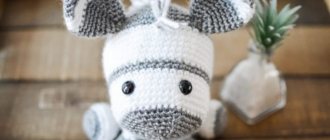
Crochet Smeshariki
A master class on making another model will expand the range of possibilities for practicing smeshariki shapes. For example, Nyusha is done very similarly - a girl with her own unique character and zest.
Basic nuances of implementation
Detailing is already appearing in its manufacture. Pink cheeks are decorated with blush in the form of cute hearts in a darker shade compared to the main color of the toy. And the hairstyle is crowned with a magnificent red braid, decorated with a flower.
For this you will need:
- Cotton threads - pink, red, crimson, white, black;
- Any filler;
- Thin wire for limbs;
- Thick red yarn for braiding.
From 1 to 18 p.m. knit as a body for Krosh;
19: a red thread is introduced to knit the top of the head (imitation of a hairstyle), do without additions, and where the front part is supposed to be, tie 9 columns with a pink thread;
20 : *skipping post. the previous row, 8 columns * - 6 times, where the parting is - in pink 6 tbsp. The result will be 48 stitches;
21: *skip 1 sc, 7 * - from * to * 6 times, take a pink thread and knit the last three stitches with it (the parting is ready);
22: from this row to the end we knit only with red thread; *skip 1 stitch, 6 sc*, from * to * 6 times - 36 p;
23: *skip loop, 5 stitches* - repeat 6 times - 30 stitches;
24: 1 decrease, 4 stitches* - -//- - 24 stitches;
How to quickly bake simple puff pastries with berries from ready-made puff pastry
Let's make very quick pies for tea from puff pastry with cherries. It will require about 400 - 500 grams.
Place the berries (without seeds) in a saucepan, add 300 grams of sugar, mix and leave for 15-20 minutes so that they release juice.
Then add 1 tbsp. spoon of starch and bring to a boil over low heat. Boil for a couple more minutes and you will get a thick jelly.
Divide the dough into squares with a side of about 8 cm. Using a sharp knife, make small cuts in one corner.
Place a spoonful of filling on the opposite side, close the triangle and pinch the edges. To be safe, go around the edge with a fork.
Through the “windows” you can see what’s inside, it turns out beautifully.
Mix the yolk with a spoonful of milk and coat the puff pastries.
We wait another 20 minutes while they sit in the oven, and the puff pastries are ready!
Sovunya
The smeshariki made from plasticine look no worse than the original. To begin with, you can make everyone’s favorite Smesharik. This is Sovunya - a charming and cute owl.
To make it you need very simple instructions:
- The owl consists of a ball-shaped base. This is her head and body at the same time.
- Rich purple plasticine is used to create the bird.
- After creating the head, ears are made in the form of two triangles and attached to the appropriate place.
- The eyes are two balls of white material, flattened into disks and mounted on the “face”.
- The beak is made of red plasticine.
- Lastly, purple eyelids are applied to the eyes, wings, black paws and pupils. The top of the head is decorated with a funny cap in the form of a narrow cone.
All is ready! It took a minimum of time to successfully sculpt a Smeshariki figurine, and the result is amazing!
Sweet pastries made from puff pastry (rolls)
Do you know how to make cream puff pastries yourself? To do this, you only need baking and writing paper, as well as ready-made puff pastry. And you can come up with whatever cream you want.
First, let's prepare the paper blanks: place a sheet of writing paper on baking paper. Fold the baking paper in half so that the white sheet remains inside.
Now we roll it into a tube, turning the edges inward.
Cut the rolled out dough into thin strips and wrap them onto paper tubes, slightly overlapping each other.
Coat with egg and bake for 15 minutes.
Remove the paper from the finished baked goods.
For the cream, combine 200 grams of mascarpone with 100 g of cream, 20 g of powder and vanilla.
Add 100 grams of peeled and chopped strawberries.
Using a pastry bag, fill the puff pastry tubes with cream.
You can dip them in crushed nuts.
Such beauty and deliciousness comes from your own hands!
Losyash
On the Internet you can find smeshariki made from mastic step by step master class.
It will come in handy if you want to make decorations for your baby’s birthday cake. Modeling Losyash from plasticine will help you prepare for this procedure:
- To begin with, a ball is rolled out of yellow plasticine - the body of the animal.
- White round eyes are attached to it in a familiar way.
- A good nose fits between them - we all remember that Losyash stands out for it. For this we use brown plasticine, not too dark.
- We make horns from dark brown or black material and strengthen them on the top of the head. We outline the mouth with a crooked bracket made from a dark stripe.
- All that remains is to add voluminous hooves and yellow arms and insert peppercorn pupils into the eyes - and our hero is ready.
WATCH: Clay Toy Making for Beginners
Baking with apples from puff pastry in the form of roses
You can make apple puffs in a very original way by wrapping them in the shape of roses.
You will need approximately 300 grams of apples, as well as sugar, cinnamon and lemon juice.
The apples need to be cored, divided in half and cut into very thin slices.
Add a tablespoon of lemon juice to them to prevent them from darkening. Now you need to pour boiling water over the fruits and let them soften under the lid for 15 minutes.
Then transfer the slices to a colander to drain all the liquid.
Let's prepare the topping: combine 60 grams of sugar with 2 grams of cinnamon; apples go very well with it. Remember my recipe for apple filled pancakes? It's oh-so delicious!
Roll out the dough to a thickness of 3 mm, cut into strips, their width should be slightly larger than an apple slice.
Place apple slices on the strip so that they protrude slightly above the dough. Grease them with butter and sprinkle with cinnamon sugar.
We wrap the free part of the strip over the apples.
We twist the resulting workpiece into a tube. This will be our rose.
To prevent the roses from falling apart, they need to be placed in small muffin tins on parchment paper.
Grease the top again with butter and sprinkle with sugar.
These apple flowers are baked for 45-50 minutes.
Barash
Having figured out how to make Smeshariki from plasticine, you can easily understand how Barash will turn out. The color chosen for this character is pink. Small cool horns, hooves and a delicate little nose are made black. The eyes are exactly the same as all the other heroes. Curls of wool in the form of balls, legs and arms, ears are made from the material of the body, that is, pink.
Recipe for baking puff pastry with cheese
Unsweetened fillings can also be used in puff pastry baked goods, with cheese – it’s absolutely delicious!
They also make kurnik from this dough - a traditional pie for Maslenitsa, I just prepared the recipes for you.
To prepare the buns you will need:
- sheet of dough
- 100 g cheese
- bunch of greenery
- 2 cloves of garlic.
While the dough layer is defrosting, grate the cheese; its type is not important.
Finely chop the greens: parsley, dill, basil - according to your preferences and availability, you can even take dry ones. Pour a spoonful of olive oil into it, add a little salt and squeeze out the garlic.
Roll out the dough a little, stretch it, it is not necessary to make it thin.
First, grease it with the green mixture, leaving the edges empty.
Sprinkle cheese on top and roll into a large thick roll, pressing the edges.
We cut this roll into portioned buns and place them on a baking sheet. They need to be greased with yolk and baked for 10-15 minutes.
On the topic: methodological developments, presentations and notes
DOUGH PLASTIC The art of modeling from salt dough has become extremely popular these days. Modeling is one of the most useful activities for a child, one of the means of aesthetic education - it helps f.
Ignatieva Olga Aleksandrovna, teacher - psychologist, municipal autonomous preschool educational institution “combined kindergarten No. 8” Explanatory note “The origins of abilities and gifts.
Master class for parents and children of an early age group.
Purpose: To introduce the possibility of using salt dough - plastic dough in the joint creativity of parents and children.
Develop the ability to participate in collective games and activities, establishing positive relationships based on compliance with basic norms and rules of behavior (do not interfere with each other, if necessary.
To foster emotional responsiveness to events occurring in the lives of children at certain times of the year.
Uv. Colleagues and parents, do you like to sculpt, create and imagine? And our little fidgets are interested in sculpting from such a simple material as dough. And we will show you a master class with them.
https://sdelaysam-svoimirukami.ru/1888-smeshariki-iz-testa.html
https://www.maam.ru/detskijsad/konspekt-otkrytogo-zanjatija-412882.html
https://nsportal.ru/detskiy-sad/materialy-dlya-roditeley/2015/02/17/master-klass-smeshariki
Hedgehog
The cute and not at all prickly Hedgehog is one of the most beloved characters of children. Largely because of him, they want to learn how to sculpt Smeshariki from plasticine.
The hedgehog is easy to make:
- The ball-shaped blank becomes the body and head.
- You need to sculpt a lot of three-dimensional triangles from black plasticine. They will become Hedgehog's thorns if you decorate half of his body with them.
- The main detail of this hero that makes him recognizable is his glasses. For them, take white discs and carefully outline them with black “sausages”. Don't forget about the arms. As a result, we get a figure very similar to a cartoon. Legs and arms, ears made of red material and a small button nose with a mouth depicted in perpendicular lines add realism.
This nice little animal will fit perfectly into the existing company.
TOP 5 cool facts about the cartoon
Do you like “Smesharikov”? Then these facts are for you!
Popular articles Bead weaving: flowers
I bet you didn't know these facts before:
- Other name . “Smeshariki” are popular all over the world. Only in some countries they are called “Kikoriki”.
- Audience . When the cartoon was broadcast on television, 50 million viewers watched it simultaneously.
- China. The cartoon is more popular in China than in Russia.
- Awards. “Smeshariki” became nominees for many cartoon competitions, and even won several awards.
- Translation. The cartoon is so popular around the world that it has been translated into 15 languages!
I hope the test “Which Smeshariki are you” helped you get to know yourself even better!
Kopatych
This clumsy bear probably managed to make your little one laugh with his reasoning! So why not mold him into a ready-made group of friends?
Choose orange or light brown mastic for Kotapych, and the master class advises doing a little more for the body than for other animals. After all, Kotapych is already an adult and quite an accomplished economic bear!
Using the stack, form the facial features and attach the eyes to the toy. You can stick thin black strips of mastic above the eyes - the expressive eyebrows of a bear. On the bear's head there must be small bear ears of the same color as the body. And also a straw hat. The bear's tail is shaped like Krosh's tail.
Krosh
All children get the cute bunny Krosh. It requires blue plasticine, but smeshariki made from sugar mastic also work well.
It’s easy to sculpt because it doesn’t have any very small parts:
- As in previous cases, the base is a ball.
- Separately, large ears, legs, and arms are made - all blue. The parts are neatly fastened into place.
- Eyes are created as in other cases.
- The bunny's nose is a small red ball.
- You will have to pay more attention to your mouth. For it, under the nose, at some distance down, you need to make a cut in the shape of a smile and put a piece of red and two large white teeth into it. Our bunny smiles at us!
Volumetric figurines of animals
Three-dimensional figurines of animals are especially popular among children; they can be made in accordance with popular step-by-step instructions, which are intended for plasticine and clay crafts.
Note!
You can sculpt from dough without dyes, then paint the finished figurine and, after drying, coat it with varnish.
You can also cut out various figures: having made a model of them from cardboard, place it on a smooth dough previously rolled out with a rolling pin and carefully cut out along the edges. Then you can paint the figurine, add the necessary texture - roughness, strokes, make eyes, a nose or decorations from beads.
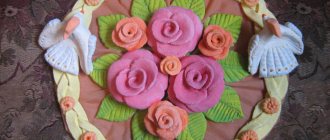
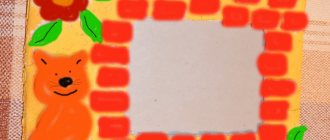
A wonderful homemade gift could be a photo frame or a unique candlestick.
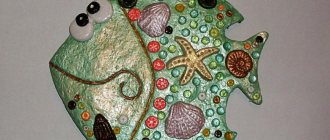
Making panels that combine elements of mosaic, applique and modeling can captivate both children and adults. For the little ones, simple drawings are suitable: you first need to draw a silhouette on parchment, then carefully fill it with dough along the lines.
You can also conceive and implement more complex ideas using beads, mosaics of cereals, dried flowers, etc.